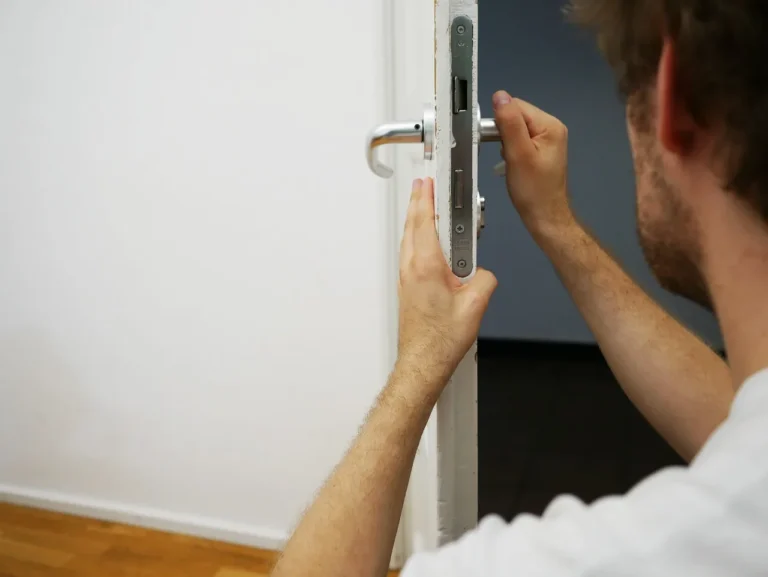
Interior Door Problems and Hardware Fixes
Many interior door problems come back to four common failure points: hinge friction, hinge or frame misalignment, loose hardware, or a latch and strike that no longer meet; identify the symptom first, then adjust or replace only the part causing it. Miss the real cause and a minor squeak or rub can turn into scarred trim, stripped screws, failed latches, or a door that will not close. This guide ties squeaks, sticking, loose handles, lock and latch faults, and threshold rubbing to the exact check and fix that addresses each one.
Start by watching where the problem appears. A squeak at the hinge pin points to friction. A rub at the top latch-side corner usually points to hinge sag or frame movement. A door that hits only at the threshold needs a bottom-clearance check before you reach for a plane. A handle that wobbles but still retracts the latch is a different fault from a latch bolt that will not project far enough to catch.
Start with the quickest safe checks: tighten hinge screws, open and close the door slowly to find the exact contact point, mark latch contact with pencil or graphite, and sort temporary relief from the lasting repair. Lubrication can quiet a dry hinge or dry lock, but repeated noise, recurring rubbing, stripped screws, or a latch that still misses the strike after adjustment means the alignment or hardware fault is still there.
Door symptoms decision table


How to use the matrix
Match the symptom to the exact location before removing parts. Then do the fastest safe test in the third column. If that test changes the symptom, move to the listed fix. If it does not, use the repair-versus-replace threshold so you do not repeat the same short-term patch.
| Symptom | Likely cause | Fastest safe test | Best fix | Replace-vs-repair threshold |
|---|---|---|---|---|
| Squeaks | Dry hinge pin or knuckle; loose hinge screws; worn or bent hinge | Open the door slowly and listen at each hinge; touch each leaf lightly to feel movement at the pin, knuckle, or screw area | Lubricate hinge pin and knuckles with light oil or silicone spray; tighten screws; replace hinge if leaf movement or pin wear remains | Replace if the squeak returns quickly after lubrication or the hinge leaf shifts even with tight screws |
| Sticking at top | Top hinge loose; hinge sag; frame shift; seasonal swelling at top edge | Look for rubbing at the top latch-side corner; tighten top hinge screws and recheck swing | Install longer screws into framing if threads are weak; add a thin shim behind the opposite hinge leaf if alignment needs correction; plane only after hardware and frame checks | Repair if seasonal and minor; replace door or address frame if the top gap stays uneven after hinge correction |
| Sticking at threshold | Bottom hinge sag; raised saddle threshold; swollen bottom edge; dragging sweep or bottom seal | Slide paper along the bottom gap and inspect for shiny rub marks on threshold or sweep | Tighten bottom hinge and top hinge screws, adjust or trim sweep, lower or reset threshold if adjustable, then plane the bottom edge only if needed | Replace sweep or threshold part if drag is caused by the seal; replace door if bottom edge is warped or water-damaged |
| Loose handle | Loose through-screws, loose set screw, worn spindle connection, stripped fastener holes | Hold one side steady and wiggle the other; check exposed screws, concealed trim release, and lever set screw | Tighten fastening screws and set screw; reseat spindle; repair stripped screw holes if possible; replace the set if the hub or spindle is worn | Replace if threads are stripped in the handle body or the lever droops after tightening |
| Latch misalignment | Strike plate too high, low, in, or out; hinge sag; latch not projecting fully | Mark the latch with pencil or graphite, close the door gently, and read the contact mark on the strike plate | Move strike plate up or down, file opening slightly only for fine correction, reposition with new screw holes if severe, and correct hinge sag first | Replace latch if it sticks inside the door or will not spring out fully after alignment is corrected |
| Lock binding | Dry or dirty lock cylinder; latch drag; worn cylinder; whole cylinder turning | Operate the lock with the door open; if key or thumbturn is still stiff, the cylinder or lock body is at fault, not the strike | Use graphite or a silicone-based lock lubricant; correct latch/strike drag; replace worn cylinder or privacy lockset if binding remains | Replace if the key still resists after dry lubrication, if internal parts feel gritty, or if the whole cylinder turns |
Fast checks before removing hardware
- Open and close the door slowly and note the first contact point: top corner, latch edge, bottom edge, threshold, or strike plate.
- Tighten all hinge screws first, especially the top hinge on a sagging door and the bottom hinge on a bottom-rubbing door.
- Test the latch with the door open. If it sticks inside the door, the issue is usually in the latch or handle set rather than the strike plate.
- Test any lock with the door open. If turning resistance remains, the cylinder is dry, dirty, worn, or broken.
- Mark contact points with pencil or graphite before shifting a strike plate or trimming a sweep.
Why is my interior door squeaking and how do I stop it?

Most interior door squeaks start at a dry hinge pin or knuckle. The fix is to find whether the noise comes from the pin, knuckle, leaf, or a loose screw, then lubricate or tighten that exact spot. If the squeak returns soon after lubrication, the usual cause is wear, looseness, or hinge distortion rather than dryness alone.
Where the squeak starts matters
If the sound happens only when the hinge rotates, focus on the pin and knuckles. If the hinge clicks or shifts sideways, the leaf may be loose against the jamb or door. If the screw heads move with the hinge leaf, the real fault is screw grip, not lubricant.
Dry hinges cause most squeaks, but some hinge noise is not a lubrication job. A bent hinge leaf can force metal parts to scrape under load. A worn pin can also let the door drop slightly, adding rub and latch misalignment.
The right lubricant and where it goes
Use light oil or silicone spray on hinge pins and knuckles. Apply a small amount where the pin enters the hinge barrel and work the door through several swings. Wipe off excess so dust does not collect on the painted surface.
Do not use lock lubricant as the default hinge treatment. Graphite belongs in locks, not on hinge leaves, where it can mark trim and still leave metal rubbing metal.
When screws or hinges are the real problem
Tighten every hinge screw with the door nearly closed so the hinge sits in its natural position. If a screw spins without tightening, the hole is stripped. Repair the screw hole with filler approved for screw-holding repairs or move to a longer screw where framing is available behind the jamb.
The top hinge matters most on a door rubbing high at the latch side. A longer screw driven through the top hinge leaf into framing often pulls the jamb side back into line. On the door side, stripped wood around the screw hole needs repair before the hinge can hold adjustment.
When should I lubricate hinges versus replace them?
Lubricate when the hinge is dry but still tight, square, and quiet for a reasonable period afterward. Replace when the pin is worn, the knuckles are loose, the leaf is bent, or the hinge still shifts with tight screws. Replacement also makes sense when the same hinge keeps squeaking after correct lubrication and tightening.
Fix a Door That Squeaks on the Open
If your door squeaks only while opening, the problem is usually hinge friction, not the latch or frame. The supporting guide walks through the fastest checks first: lubricating the hinge pin and knuckles, tightening loose screws, and cleaning out grime before moving on to worn hardware. It also explains why a squeak that seems minor can turn into stripped screw holes or a door that starts sticking if you leave it alone.
Use this door squeak guide when you want a clear fix order without removing the door. It helps you tell the difference between a simple maintenance issue and a hinge that needs replacement, so you can solve the noise quickly and avoid repeat repairs.
How to add extra privacy to an interior door without drilling
If you need a temporary or renter-friendly way to secure a bedroom, office, or bathroom door, a no-drill lock can be the simplest fix. The right choice depends on the door’s swing, handle style, and how much resistance you want. Some solutions act like a privacy latch, while others use a slide bolt or wedge-style stop to keep the door from opening.
The supporting guide explains how to choose between these options and avoid the common mistakes that leave gaps, binding, or surface marks. It also covers the practical tradeoffs for renters, students, and homeowners, so you can match the method to the door instead of guessing. See the full no-drill door lock guide for the step-by-step approach.
Removing a Pocket Door Without Unnecessary Wall Damage
If you need the door out for repair or replacement, the pocket door removal guide shows the least destructive order of operations: remove the slab first if it’s accessible, then deal with the rollers and track hardware, and only open the wall when the full frame has to come out. That matters because jumping straight to demolition can damage drywall, bend the track, and turn a small project into a larger patch-and-paint job.
The article also helps you decide which method fits your situation, whether you can avoid removing molding, and what mistakes to avoid so you can choose the safest, simplest path for your door.
Choosing the Right Interior Door Paint
If the goal is a durable finish that looks good on every door, the supporting guide breaks down the paint options that fail least often first. It explains why a 100% acrylic alkyd enamel is a strong all-around choice, when satin can hide brush marks better, and why semi-gloss is often the safer pick for high-touch doors that need easier cleaning. The article also compares paint by room use and door material so you can avoid common problems like chipping, yellowing, and sticky edges. For a practical starting point, see this interior door paint guide.
Choosing the right interior door hinge size
Hinge size affects how well an interior door carries its weight, stays aligned, and resists sagging over time. The supporting guide explains when the common 3.5-inch butt hinge is enough and when a 4-inch hinge is a better fit for a heavier, thicker, or taller slab. It also covers how the existing mortise and hinge count influence the decision.
If you’re replacing worn hardware or upgrading a door that has started to rub or drop, this interior door hinge size guide helps you match the hinge to the door instead of guessing based on appearance alone.
Picking the Right Door Knob Type
If a door does not need the same function as every other interior door, the knob style matters just as much as the finish. The supporting guide explains the practical difference between passage, privacy, and dummy hardware so you can match the knob to the door’s job: free movement for hallways and closets, one-sided locking for bedrooms and bathrooms, and fixed pulls for doors that do not latch. That prevents common mistakes like buying a knob that will not lock, choosing hardware that will not let the door close correctly, or needing extra drilling later. Use this passage privacy dummy knobs guide when you need a fast, door-by-door decision.
When to Paint Door Hardware
Painting door knobs and hinges makes sense only when the hardware is solid metal, moves freely, and can be fully cleaned and primed; otherwise, replacement is usually the better fix. The supporting guide explains how to judge whether to remove the pieces, paint them in place, or swap them out, so you avoid sticky movement, chipped finish, and paint buildup around the latch or hinge knuckle.
It also walks through the prep and finishing steps needed for a durable result, including sanding, primer choice, paint application, and curing. If you want a practical decision process before you start, this door hardware painting guide helps you choose the right approach and avoid a repair that causes more problems later.
When a credit card can open an interior door
If the door has a spring latch with a beveled edge and no deadbolt, the credit card trick can be a quick way to slip the latch and get the door open. The supporting guide explains how to check for the right lock setup before you try anything, which matters because the method will not work on every interior door and can waste time on the wrong one.
It also covers the main limits, common mistakes, and the faster fallback options when a card is a bad fit. For a clear, step-by-step breakdown of when this method is worth trying, see credit card door opening.
Why does my door stick when the weather changes?
Seasonal sticking usually points to humidity swelling, because a door that fits in dry weather may bind in humid weather. Still, the rub pattern comes first: top-corner rubbing often means hinge sag, latch-edge rubbing can mean frame movement, and bottom rubbing can mean threshold or sweep contact.
Read the contact pattern first
Rubbing at the top latch-side corner usually means the door has dropped on its hinges. Rubbing along the latch edge from top to bottom points more toward swelling or a frame that is no longer square. Rubbing only at the bottom edge or threshold points to hinge sag, a raised saddle threshold, or an over-tight bottom seal.
If your bedroom door closes fine in January but drags at the top latch-side corner every humid week in July, tighten the top hinge screws and check the gap again. If the rub disappears, that points to hinge movement, not a door edge that suddenly needs planing.
Fixes that come before planing
Start with hinge screws. Tighten them all, then focus on the top hinge if the top corner rubs or the bottom hinge if the bottom edge rubs. If the hinge side gap is uneven, add a thin shim behind one hinge leaf to change the door angle slightly.
Use shims for small alignment corrections. A shim behind the bottom hinge can lift the latch side slightly; a shim behind the top hinge can change top clearance. Make one change at a time and recheck the reveal around the door.
When planing the edge is justified
Planing is usually a last step, not the first. If the screws hold, the hinges are not worn, the frame is reasonably square, and the door still swells enough to bind in humid weather, edge trimming may make sense. Mark only the actual contact area. Do not remove material until you confirm recurring contact across weather changes.
Repeated seasonal sticking along a broad section of the latch edge can justify edge work. A local top-corner rub usually does not. If the door is visibly warped, planing one edge may quiet one spot while making latch alignment worse elsewhere.
Replace a Worn Door Sweep to Stop Bottom-Edge Drafts
If the gap is even and the door closes squarely, a worn sweep is often the fastest fix for drafts, dust, and light leaking under an interior door. The supporting guide on interior door sweep replacement explains how to match the mount style, confirm the right size, and avoid buying a strip that drags or peels off.
It also matters because a bad sweep can hide a bigger problem: sagging hinges or a misaligned door. Knowing when to replace the strip and when to correct the door itself helps you solve the leak once instead of stacking temporary fixes.
How do I fix a door that won’t latch properly?
A door that will not latch usually fails at one of three points: the latch misses the strike, the latch does not project fully, or hinge sag shifts the door out of position. A stuck latch is often due to misalignment with the strike plate, but testing with the door open separates latch failure from alignment fast. (Wikihow)
Mark the strike contact point
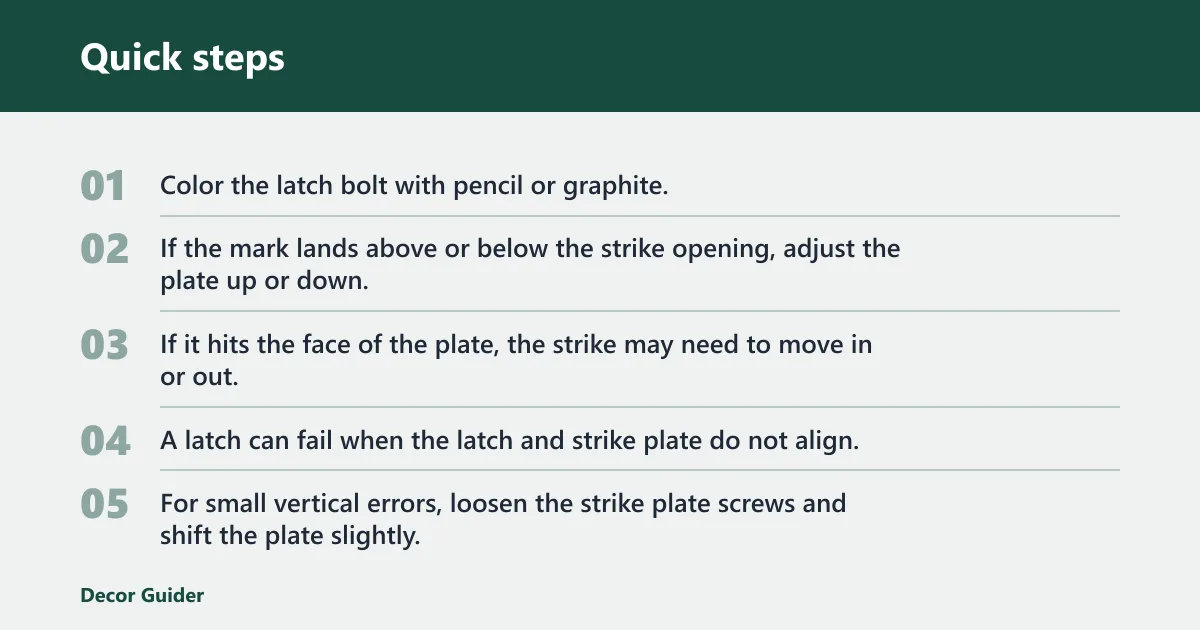
Color the latch bolt with pencil or graphite, then close the door gently until the latch contacts the strike. Open it and read the mark. If the mark lands above or below the strike opening, adjust the plate up or down. If it hits the face of the plate, the strike may need to move in or out.
This check avoids guessing. A latch can fail when the latch and strike plate do not align, and the visible mark shows which way the correction needs to go.
Adjust the strike plate the right way
For small vertical errors, loosen the strike plate screws and shift the plate slightly. If the old screw holes force the plate back to the wrong spot, drill new pilot holes and reset the plate. If the strike is bent, replace it instead of trying to flatten metal that has already deformed.
How do you realign a strike plate on a bedroom or bathroom door? First correct hinge sag, then mark the latch contact point, shift the plate only in the direction shown by the mark, and use new screw holes when the old ones no longer hold the needed position.
When the latch is the problem
Test the latch with the door open. Press it in and release it. If it sticks inside the door, retracts sluggishly, or does not spring out fully, the latch itself is failing. That can keep the door from catching even with a perfectly placed strike.
On privacy or locking sets, check deadlatch engagement as well. If the latch bolt or deadlatch feature never seats properly in the strike, the lock may not secure or release cleanly. A worn latch spring usually calls for replacement, not lubrication alone.
If the door closes against the frame, the handle turns normally, but the latch barely peeks out of the edge and never catches, moving the strike plate will not solve it. The latch body inside the door is not projecting correctly and should be replaced.
When a Door Starts Drooping at the Latch Side
If your interior door drags, gaps unevenly, or misses the strike plate, the key is to match the repair to the cause. The supporting guide on sagging interior doors explains how to start with the least invasive fix: tighten hinge screws, then add a shim, plane a rubbing edge, or adjust the strike only if the door still will not latch.
That approach matters because the wrong repair can strip screw holes, make the door bind harder, or create a latch problem that was not there before. Use it when you want a practical sequence that helps you stop the sag without overcorrecting.
Fixing a Door That Rubs at the Top
If your door catches the frame at the top, the right fix depends on what is actually out of alignment. This guide explains how to diagnose whether the hinges have sagged, the jamb is out of plumb, or the door slab is simply too tall, then match each problem to the correct repair. That matters because planing the edge too soon can damage the finish and throw the latch off.
The article on top-frame rubbing walks through the checks in a practical order, so you can correct the cause instead of masking the symptom and avoid making the rub worse.
How to Stop a Door from Swinging Open or Closed by Itself
If an interior door drifts on its own, the fix usually comes down to hinge alignment, frame plumb, or a latch-side adjustment. The supporting guide on door drift fixes explains how to tell whether the door is moving open or closed for a reason, then match the repair to that direction instead of guessing.
That matters because the wrong correction can leave the door scraping, failing to latch, or drifting right back out of position. The article walks through the main causes, shows what to check first, and helps you choose between shimming, hinge adjustments, or frame checks so the door stays where you want it.
Why a Door Won’t Stay Open
If your door swings shut on its own, the problem is usually not the latch—it’s the door alignment, hinge wear, or a frame that is slightly out of plumb. The supporting guide explains how to tell the difference with simple checks, including the quick 45-degree test, so you can avoid guessing and fix the real cause first.
That matters because a self-closing door can wear out the latch, scrape the floor, and become annoying in everyday use. The article walks through the most likely causes, what to inspect before adjusting hardware, and the common fixes that help a door stay put instead of drifting closed. See door swing issues for the full diagnosis and repair steps.
When a worn hinge is the real problem
If an interior door still sags, rubs, or won’t close after quick adjustments, the next step is often hinge replacement. The supporting guide explains how to tell whether the hinge itself has failed, when a same-size swap will solve the issue, and when damaged screw holes or a worn mortise mean you need a different repair. It also walks through choosing a replacement that matches the existing hinge pattern so the door sits flush again and closes cleanly.
Use this door hinge replacement guide when tightening screws alone isn’t enough, because the wrong hinge or a bad install can leave the door scraping, drifting out of alignment, or pulling loose again.
How to rehang a door after it falls off its hinges
If a door has come off its hinges, the right fix depends on whether the hinges, screw holes, and frame are still in good shape. The supporting guide explains how to tell if you can simply rehang the door, or if you need to repair stripped holes, replace bent hardware, or square up the frame first. That matters because forcing damaged hinges back into place can make the problem worse and cause the door to drop again.
It also walks through safe lifting and reattachment steps, then shows how to align the door so it opens, closes, and latches cleanly. For a practical walkthrough, see door rehanging guide.
What to do when the latch misses the strike plate
If the door closes but won’t catch, the problem is usually a misaligned latch, not the knob itself. Start by checking whether the latch sits too high or too low against the strike plate, then decide whether the fix belongs at the hinges or at the frame. That order matters: correcting sagging hinges first can solve a gap issue without enlarging the strike opening or making the door bind.
The supporting guide on door latch alignment breaks down the symptom check, the quickest adjustments, and when filing or moving the strike plate is the right move. It helps you fix the real cause instead of chasing a latch problem that starts with the door’s position.
How to fix a loose door threshold
A loose threshold is usually fixed by tightening or replacing the fasteners first, then checking whether the base beneath it needs repair. If the threshold still shifts, the problem may be a worn insert, damaged substrate, or a door that is no longer aligned correctly. The article on loose door thresholds explains how to diagnose which failure is actually causing the movement so you can choose the right repair the first time.
This matters because an unstable threshold can create drafts, let in water, and become a trip hazard. It also helps protect the floor and framing below, especially on exterior doors where small gaps can lead to bigger moisture problems over time.
What to do when a bifold door won’t stay closed
If a bifold door keeps drifting open, the fix usually starts with alignment and the pivot hardware, not the latch. The supporting guide walks through the most effective order of checks: confirm the door sits square, reseat the bottom pivot pin, adjust the floor bracket, and then inspect the top pivot bracket and related parts. Working in that sequence helps you solve the cause instead of forcing the door shut over and over.
This matters because a door that won’t stay closed can wear out pivot sockets, loosen brackets, and create more rubbing or misalignment. For a clear step-by-step breakdown, see bifold door fix.
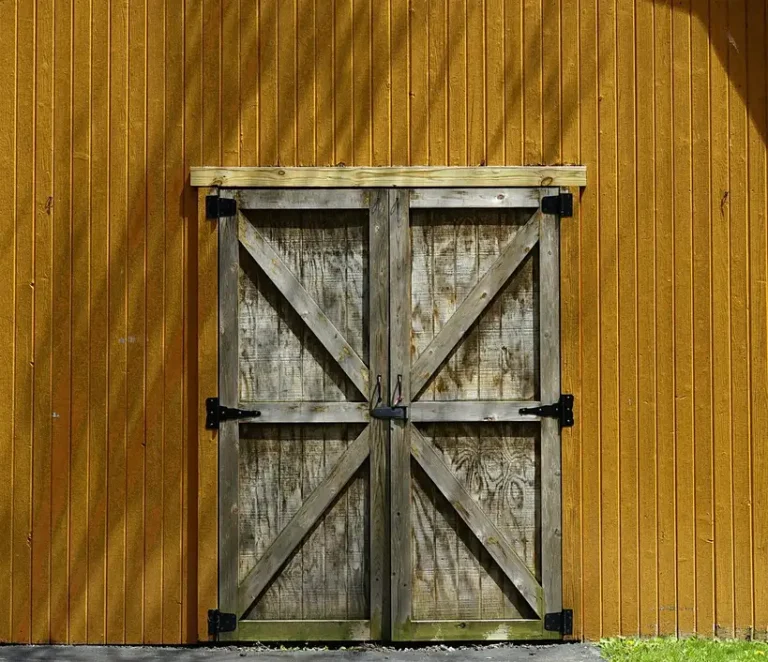
How to keep a barn door from swinging out
If a barn door swings outward instead of staying flat and controlled, the fix usually comes down to three things: the floor guide, the track stops, and the alignment of the hangers and wall clearance. The supporting guide walks through that troubleshooting order so you can identify whether the door is drifting, side-loading, or overtraveling at the ends. barn door swing fix
That matters because unchecked movement can make the door hit trim, rattle loose, or even jump the track over time. The article shows which adjustment matches each symptom, so you can correct the problem without guessing or replacing hardware that is still usable.
How to fix French doors that won’t latch
French doors that refuse to latch usually have an alignment problem, not a broken latch. The supporting guide walks through the most common causes in order: checking the inactive leaf, inspecting astragal placement, looking for sagging hinges, and testing the strike plate and threshold. It matters because a door that looks “fine” can still leak air, rub against hardware, or fail to lock if one part is slightly out of position.
If you want a step-by-step way to narrow down the fault and fix the right component first, see French door latch troubleshooting.
What to do when the strike plate cracks the jamb
If the wood around the strike plate is split, the goal is to stop the crack from spreading and move the latch load onto solid material. This guide explains how to inspect the damage, decide whether the frame just needs reinforcement or a fuller repair, and reset the strike plate so the door latches without forcing the jamb apart. It also covers longer screws, filler or patch options for crushed screw holes, and the final check that confirms the door closes cleanly again.
That matters because a weak strike area usually keeps worsening: the latch begins to misalign, the crack opens farther, and the door may stop catching altogether. For a step-by-step fix, see door frame crack repair.
How to choose and install a sliding closet lock
If your sliding closet door needs child-resistant security or a simple way to keep it shut, the right lock depends on the door style and how much drilling you can allow. The supporting guide breaks down the main options—surface-mounted latches, sliding bolts, and light-duty adhesive stops—so you can match the lock to mirrored, double, or standard closet doors without overbuilding the fix.
It also shows how to install each type step by step, what tools you need, and which mistakes can cause poor alignment or weak holding power. For a practical walkthrough of lock selection and installation, see sliding closet door locks.
How to choose and install a barn door lock
A barn door lock comes down to three basics: the gap between the door and wall, the level of privacy or security you need, and the door’s thickness. The supporting guide explains how to match the latch style to those measurements, then place the latch and strike so they meet cleanly when the door closes. That matters because a poorly aligned lock can bind, sit crooked, or miss the catch entirely.
If you’re comparing options or planning a quick install, the barn door lock guide breaks down the choices and the installation steps in a way that helps prevent alignment mistakes before you drill.
When a sliding closet door starts dragging or jumping the track
If the door is hard to move, rattles, or keeps slipping off the track, the rollers are often the part to check first. The key is to confirm whether the problem is a damaged wheel, a worn hanger, or an adjustment screw that no longer gives enough lift. If the wrong part is replaced, the door can still bind, scrape, or throw the frame out of alignment.
The sliding closet door rollers guide explains how to diagnose the fault, match the replacement hardware, remove the door safely, and install the new assembly so the door glides and stays on track.
How do I tighten a loose door handle or lever?
Most loose handles trace to one of four issues: loose through-screws, a loose set screw, spindle play, or stripped fastener threads. Tighten the visible hardware first, then remove trim only if needed to reach concealed screws. If the handle still wobbles or droops, the internal hub or spindle connection may be worn out.
Find the fastener type first
Some knob and lever sets have exposed screws on the rose or escutcheon. Others hide them behind a snap-on trim ring that releases through a small slot. Lever sets often include a set screw on the underside of the lever, usually securing the lever to the spindle or hub.
Hold one side steady while checking the other. If both sides move together, look for loose through-screws. If only the lever moves on its stem, the set screw or lever hub is more likely at fault.
Repair stripped screw grip or replace worn parts
Tighten screws only until snug. If a screw keeps turning, either the hole in the door face has enlarged or the hardware threads are stripped. Door-side holes can sometimes be repaired. Stripped threads in the handle body usually mean replacement.
Interior lock and handle hardware can loosen over time, and loose door locks can affect interior doors with lever-style keyed doorknobs. If the spindle connection is rounded or the lever no longer stays level after tightening, replacing the complete set is usually faster than trying to rebuild a worn hub.
When loose hinges are the problem
If the door sags, rubs, or no longer closes cleanly, loose hinges are often the cause. The supporting guide explains how to tell whether the issue is a loose screw, a stripped hole, or a screw that keeps spinning, then shows the right fix for each case—from tightening hardware to using a longer screw or repairing the jamb.
That matters because the wrong repair can leave the hinge loose again and let the door keep scraping or shifting. For a step-by-step breakdown of the failure modes and fixes, see tighten loose door hinges.
What to check when a lever handle feels loose
A loose lever usually means one of a few parts has worked free: the set screw, through-bolts, faceplate screws, spindle, or latch assembly. The tighten loose lever guide shows how to identify which fastener is failing so you fix the wobble without stripping screws, damaging trim, or leaving the latch unreliable.
That matters because the right repair depends on whether the handle itself moves, the plate shifts, or the lever drops after use. The article walks through the checks in order, so you can tighten the correct part first and know when a simple adjustment is enough versus when the spindle or latch needs attention.
Swapping a Knob for a Lever Handle
If you want a better grip or a more modern look, this guide explains when an interior knob can be replaced with a lever and what to check before you buy. It walks through the key compatibility points—bore size, backset, latch type, and room-use needs—so you avoid a handle that binds, rubs the trim, or fails to line up. The article also covers removal, installation, and small adjustments that help the new hardware operate smoothly. For a step-by-step breakdown, see door lever replacement.
When a Rusty Door Knob Needs Cleaning or Replacement
A rusty knob is usually fixable if the damage is only on the surface: clean off the oxidation, dry the hardware, and add lubrication so the latch moves freely again. If the metal is pitted, the knob feels rough, or the latch still drags after cleaning, replacement is often the more reliable choice because the rust can keep spreading and make the hardware fail at the worst time.
The rusty door knob guide explains how to tell surface rust from deeper damage, how to clean the metal without scratching the finish, and when a simple fix is enough versus when a new knob is the smarter repair.
When a replacement knob will not fit
If you are replacing a knob, the first step is checking whether the new set matches your door’s measurements. The companion guide to replacement door knob sizing explains the three numbers that matter most: backset, cross-bore, and door thickness. Those measurements determine whether a standard cylindrical knob will sit correctly, line up with the latch, and tighten securely.
This matters because a knob can look compatible online but still fail at install time if even one dimension is off. A quick measurement check helps you avoid returns, choose the right trim style, and buy a lockset that fits the door you already have.
Why does my interior door lock stick or not turn?
A sticking interior lock may be dry, dirty, misaligned, or worn. First test it with the door open so you can separate cylinder drag from latch drag. Use graphite or a silicone-based lock lubricant inside the lock; avoid oil inside locks because it can collect dirt.
Separate lock drag from latch drag
Turn the key, thumbturn, or privacy button with the door open. If the lock still resists, the trouble is inside the cylinder or lock body. If it turns freely when open but binds only when closed, the strike or latch alignment is adding side pressure.
Door lock problems often get discussed for exterior or garage doors, but the same failure modes show up on interior privacy and keyed doors. Misalignment, dirt, and worn parts do not care which side of the house the lock is on.
Choose the correct lubricant
Graphite, not oil, is recommended for a stuck lock. A silicone-based dry lock product can also work where the mechanism is dry but not badly worn. Oil inside a lock cylinder is a poor default because it can trap dust and create gummy buildup.
If the lock uses a privacy button rather than a key cylinder, the internal return parts can still bind. Dry lubrication may help, but a sticky push-button or thumbturn that keeps failing often means the internal mechanism is worn.
Know when replacement is smarter
If the whole lock cylinder turns, that is a professional-level problem. If the key still drags after dry lubrication and alignment checks, the cylinder or lock body is likely worn or broken. Cold weather can freeze a lock mechanism, but that applies mainly to doors exposed to outdoor conditions, not typical conditioned interior rooms.
How to remove a spinning interior door knob
If a knob spins without turning the latch, the fix usually starts with finding the mounting screws and checking whether the spindle or set screw has failed. The supporting guide explains how to tell those causes apart, remove the knob safely through the detent hole or faceplate, and avoid damaging the door edge while you work. It also shows when a simple tightening is enough and when the hardware is stripped or worn out.
Use this loose door knob guide when the handle feels loose but the rest of the door still looks sound, because the right removal step can save you from forcing the latch, chewing up the trim, or replacing parts you do not need.
When an Inside Door Handle Stops Working
If an interior door handle suddenly feels loose, spins, or won’t retract the latch, the fastest fix starts with identifying which part failed. The supporting guide on broken door handles walks through the usual trouble spots: a loose spindle or set screw, a worn latch, or a strike plate that is no longer aligned. That matters because each symptom points to a different repair, and replacing the wrong part can leave the door stuck or the problem unresolved.
Use this guide to narrow the issue before removing hardware, so you can tighten, adjust, or replace the correct component the first time.
Using a Bobby Pin on Simple Interior Locks
If the lock is a basic interior privacy type, a bobby pin may help in a narrow set of cases, but it will not work on every door and it should not be treated as a universal fix. The supporting guide explains which locks are realistic candidates, how the method fits simple privacy hardware, and when it is the wrong tool for the job. It also covers safe, non-destructive handling so you do not bend the pin, damage the mechanism, or make the door harder to open.
That matters because the fastest path is usually the one that matches the lock type. If you are unsure whether your door has an emergency release, a keyway, or a deadbolt, start with bobby pin door opening and use the lock-specific guidance before forcing anything.
How to Diagnose and Free a Stuck Bathroom Door Lock
A stuck bathroom lock usually comes down to a simple mechanical problem: the thumbturn is misaligned, the latch is binding, or the privacy release is jammed. The supporting guide walks through each likely failure point so you can match the symptom to the fix instead of guessing, which helps avoid unnecessary part swaps and reduces the chance of trapping someone inside.
If your lock will not turn, retract, or release from the outside, this bathroom lock repair guide explains how to diagnose the issue, open it safely when possible, and make the smallest repair that holds.
How to reverse an interior door swing
If a door opens the wrong way, the fix is usually to check the handing first and then decide whether a simple hinge-side swap is enough or if you need a full frame-and-hardware reversal. The supporting guide on interior door swing reversal explains how to confirm the swing direction, measure clearance, and avoid ending up with a door that hits trim, blocks a hallway, or leaves the latch in the wrong place.
This matters because the wrong reversal method can create new fit problems instead of solving the original one. The article walks through the decision points, removal steps, hardware changes, and common mistakes so you can choose the least disruptive option for your door and opening.
What causes rubbing at the threshold or bottom edge?
Bottom-edge rubbing usually comes from sagging hinges, a raised threshold, a dragging door sweep, or swelling at the bottom rail. Check the bottom gap across the full width before trimming anything. If the door rubs only near the latch side, hinge sag is more likely than a threshold that suddenly changed height.
Inspect bottom gap and contact points
Look at the gap under the closed door from the push side and pull side. An uneven gap that narrows toward the latch side often points to sag. A sweep that bows too far downward can scrape even when the wood door clears the floor.
A door sweep seals the gap between the door and the threshold. That seal helps with drafts, light, and noise, but it can also cause drag if it is installed too low or if a replacement sweep is thicker than the original.
Thresholds, sweeps, and bottom seals
Interior doors sometimes cross a small saddle threshold between rooms or at a bath entry. If the threshold is high or has shifted, check whether the wood door bottom hits the threshold itself or only the sweep or bottom seal.
Fix hinge sag first. Then trim or reset the sweep so it just touches. Bottom seals should control drafts without folding hard under the door. If the threshold is the problem and it is adjustable, lower it slightly. If it is fixed and proud of the floor, that becomes a carpentry correction, not a hardware tweak.
Picture a bathroom door that clears the tile all week, then starts scraping only after a new sweep is installed. The bottom edge is not the issue. The seal is simply hanging too low, and trimming or repositioning the sweep restores clearance without cutting the door.
Can a crooked door be fixed without planing the edge?
Sometimes yes. A crooked-looking interior door often responds to hinge tightening, longer screws, or a small hinge shim rather than edge trimming. Planing helps only when the door itself is the contact problem. If the frame has shifted or the door is warped, shaving one edge may hide the symptom without fixing the cause.
Tell warped door from out-of-square frame
Check the reveal around the closed door. If the gap changes shape from top to bottom but the door face looks flat, the frame or hinge alignment is likely off. If the reveal looks inconsistent and the door edge itself bows away from the frame, the slab may be warped.
A frame-shift problem often shows up as latch misalignment plus rubbing at one corner. A warped door may clear at the hinges and still spring toward the jamb at the latch side. Those are different repairs.
Use longer screws and shims before cutting the door
Longer screws can pull a loose hinge jamb back toward framing. Thin shims behind one hinge leaf can move the latch side enough to restore even clearance. Make changes in small steps, then test latch alignment again because moving the door changes strike position too.
When repair has reached its limit
Repeated misalignment after screw repair, hinge replacement, and strike adjustment points to frame movement or a door that no longer holds shape. Bent strike plates, worn latch springs, broken lock cylinders, and hardware with stripped threads are all poor candidates for endless tuning. Replace the failed part once it stops holding adjustment.
How to tell when a door is out of square
A door that is out of square usually shows uneven gaps, poor latching, or rubbing that won’t go away with simple hinge tightening. The key is to diagnose the real problem first, because fixing the wrong part can leave the door sticking and can wear out hardware faster. The supporting guide walks through the main clues that separate hinge sag, strike plate misalignment, and true frame distortion.
It also explains which correction comes first, whether that means adjusting hinges, moving the strike, or addressing the frame itself. If you want a clear way to decide between small hardware tweaks and larger repairs, door square repair guide shows how to match the symptom to the right fix.
Tools and materials by fix
Compact checklist
| Task | Use this | Why this item fits the job |
|---|---|---|
| Tighten hinges, handles, strike plates | Screwdriver; drill/driver on low torque | Prevents cam-out and lets screws seat without stripping painted hardware |
| Pull loose top hinge back into line | Longer screws | Reaches framing when jamb-side screw holes have weakened |
| Fine hinge angle correction | Shims | Changes door swing geometry without cutting the slab |
| Quiet dry hinges | Light oil or silicone spray | Targets pin and knuckle friction |
| Free a sticky lock cylinder | Graphite or silicone-based lock lubricant | Dry lubrication suits lock internals better than oil when dirt buildup is a risk |
| Repair stripped wood screw holes | Filler suited for screw-holding repair | Restores bite where screws no longer clamp hardware firmly |
| Fix latch/strike mismatch | Replacement strike plate; pencil or graphite for marking | Shows contact point clearly and replaces bent or poorly shaped strike hardware |
| Fix stuck or weak latch | Replacement latch | Needed when the bolt does not spring out or retract smoothly |
| Fix wobbling knob or drooping lever | Replacement handle set | Best when hubs, set-screw seats, or spindle connections are worn or stripped |
| Stop recurring hinge noise or sag from worn parts | Replacement hinges | Needed when lubrication and screw correction do not stop movement |
Frequently asked questions
How do I realign a strike plate on a bedroom or bathroom door?
Mark the latch bolt with pencil or graphite, close the door gently, and read where it hits the strike. Move the plate only in that direction. Correct hinge sag before moving the strike, because a dropped door can make any strike adjustment temporary. Use new screw holes if the old ones no longer hold position.
Products related to this article
Sponsored / affiliate links. As an Amazon Associate I earn from qualifying purchases. I may earn additional commission from eligible campaigns.