How to Replace a Door Hinge on an Interior Door
Replace an interior door hinge only when the mortise is sound, the jamb and stile still hold screws, and the door can sit flush with a same-size hinge and the same screw pattern. Skip that check, and the door can keep sagging, scrape the floor, or tear out the wood around the screws. This guide shows how to diagnose the failure, choose the right replacement hinge, and install it so the door closes cleanly.
Interior door hinge repair decision table


| Symptom | Likely cause | Fix method | Stop/replace threshold |
|---|---|---|---|
| Loose screws | Screws have lost bite in the jamb or stile | Retighten with matching screws; move to longer screws if the wood still grips | Stop if the screw heads spin without grabbing any wood |
| Stripped jamb holes | Fastener holes in the frame are enlarged or crushed | Repair the jamb with wood filler or epoxy if the damage is shallow; use longer screws into solid framing when possible | Replace the hinge only after the jamb can hold a flush, plumb installation |
| Bent leaves | Hinge leaf is twisted or bowed | Replace the hinge; a bent leaf will not sit flat in the mortise | Stop using the hinge if it will not sit flush in the cutout |
| Seized pins | Paint, corrosion, or debris locks the pin in place | Tap out the pin with a hammer and screwdriver or punch; replace the hinge if the knuckle or leaf is damaged | Replace the whole hinge if the pin will not move without forcing the leaf |
| Mortise too shallow | Leaf thickness sits proud of the cutout | Deepen the mortise so the leaf sits flush | Stop if the frame or door slab is too damaged to cut a proper mortise |
| Repeat sag after repair | Top hinge load is still too high or the frame is out of plumb | Recheck the top hinge, screw bite, and jamb alignment; upgrade to stronger fasteners if the substrate allows | Replace the hinge only if the frame can still hold a square, aligned door |
What you’ll need
- A replacement butt hinge should match the existing leaf dimensions, finish, screw pattern, and thickness.
- Screwdriver or drill/driver with the correct bit for the hinge screws
- Hammer
- Hinge pin punch, nail punch, or nail set
- Wedge to support the door or hold the gap open
- Level
- Plumb tool or level for the jamb check
- Wood filler or epoxy for shallow stripped wood damage
- Longer wood screws for partial jamb repair when sound framing is behind the hole
- Toothpicks or anchors only if the substrate matches that repair method
- Utility knife or chisel for cleaning a damaged mortise edge
How do you tell whether the hinge is the problem?
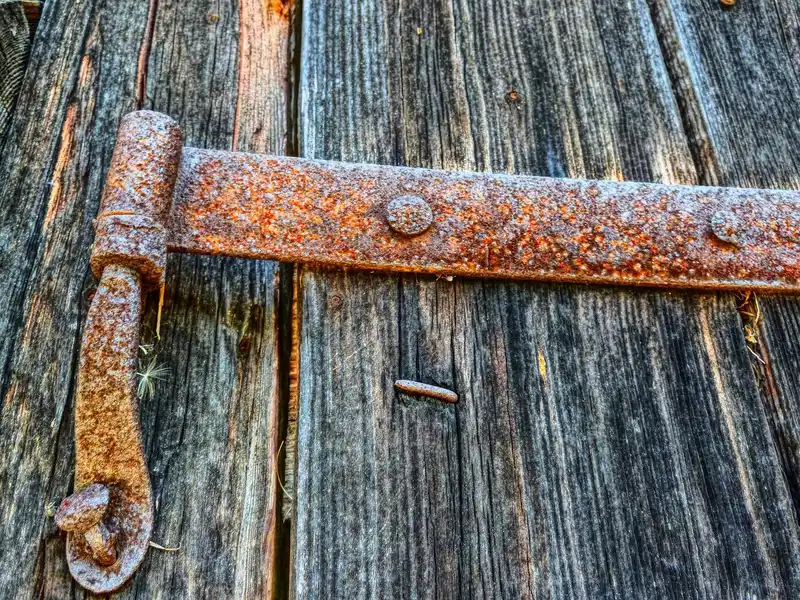
Start with the top hinge first, because it often carries the greatest torque on a sagging door. If the door rubs near the latch side, drops when opened, or needs lifting to latch, check the screw bite, mortise depth, and leaf shape before replacing hardware. Loose screws can look like a bad hinge, and a proud mortise can mimic sag.
Check the top hinge first
- Close the door and note where it rubs or gaps.
- Open it halfway and look for sag at the latch edge.
- Inspect the top hinge screws for movement, splitting, or stripped wood.
- Check whether the leaf sits flush in the mortise.
Say your door is a standard interior slab with 3 hinges, and the top edge drops enough that the latch sticks before the strike lines up. That pattern usually points to the top hinge or its screw bite, not the whole frame.
Compare the door reveal, rub marks, and swing resistance
- Use a level to check the door edge and jamb for plumb.
- Look for even reveal gaps around the top and latch side.
- Mark rub spots with painter’s tape if needed.
- Move the door slowly and feel for tight spots that change with height.
Inspect the mortise, screw bite, and hinge leaf shape
- Back out one screw at a time so the hinge stays aligned.
- Look for cracked finish, bent leaves, and displaced pins.
- Confirm the mortise depth matches the existing cutout.
- Replace the hinge if the leaf will not sit flat even with sound screws.
Can you replace one hinge without taking the whole door off?
Yes, in many interior door repairs you can change one hinge without removing the full frame. Support the slab with a wedge or helper, remove the pin if needed, and keep the door from shifting while you swap the hardware. If the door is heavy or the pin is seized, lifting the slab out can be safer.
Remove the pin or support the door before loosening screws
- Insert a wedge under the door to take the weight off the hinge.
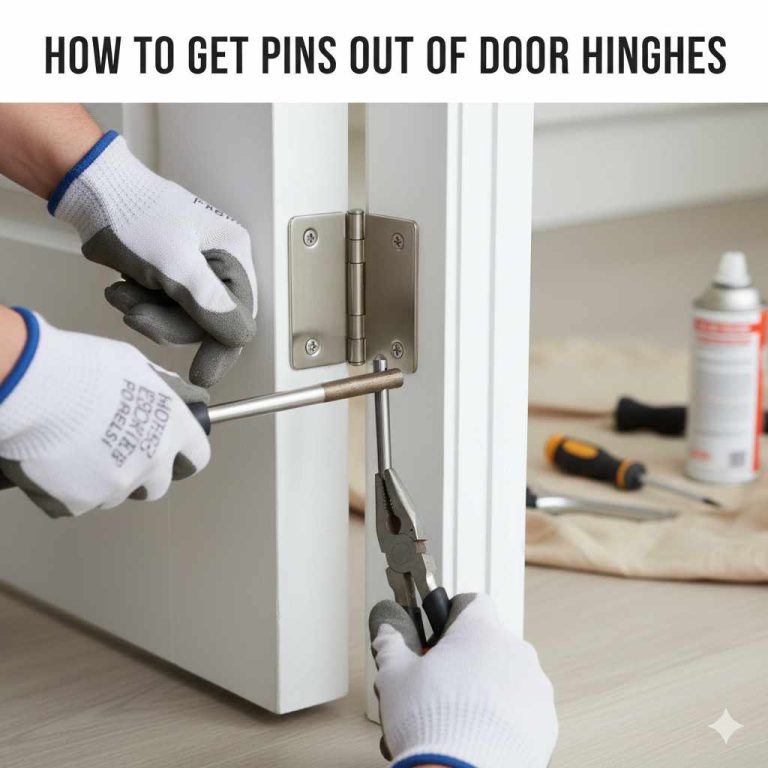
- Tap the pin out with a hammer and screwdriver or punch.
- Use a wedge, nail punch, or nail set for the pin; avoid a regular nail because it may bend. (Wikihow)
- Remove the hinge screws only after the door is fully supported.
When to leave the slab in place
- Keep the door in place if the hinge screws still hold the slab and jamb.
- Work on one hinge at a time so the alignment does not wander.
- Check the door with a level after each fastener change.
- Stop if the door starts to bind or drop before the new hinge is seated.
When lifting the door out makes the job safer
- Lift the door only if the pin is free and the slab is stable.
- Remove the bottom hinge first, then the top hinge for stability.
- Set the door on a protected surface before replacing hardware.
- Use a reciprocating saw only if a stubborn nail must be cut during removal.
Use a replacement butt hinge that matches the existing leaf dimensions, finish, and screw pattern. A standard residential door carries 2 or 3 hinges, so the new hinge should fit the same mortise without forcing the door out of plumb. The leaf thickness must sit flush, or the door can twist and bind.
Remove the pin and old hinge
- Pop the hinge pin with a hammer and screwdriver or punch.
- Set the pin aside if it will be reused.
- Back out the hinge screws.
- Lift away the old hinge and inspect the mortise edges.
Fit the replacement hinge to the mortise
- Place the new hinge in the cutout without forcing it.
- Check that the leaf sits flush with the door and jamb surfaces.
- Deepen the mortise only enough to match the existing cutout.
- Confirm the hinge hole spacing matches before fastening.
Repair screw holes before installing new fasteners
- Test each hole by turning the screw by hand.
- Use longer screws if the original holes are stripped but solid framing is behind the jamb.
- Fill shallow damaged wood with filler or epoxy, then let it cure before fastening.
- Use toothpicks or anchors only when the substrate calls for that repair.
Rehang, test, and retighten
- Set the door back on the hinges and insert the pin.
- Open and close the door several times.
- Check plumb, level, and reveal gaps after the hinge is seated.
- Add about a 1/16-inch adjustment at a time if the reveal is still uneven, then recheck.
What if the screw holes are stripped or the jamb is damaged?
Do not treat jamb damage and door-slab damage as the same repair. If the stripped hole is in the jamb, longer screws may reach sound framing behind the casing. If the stripped hole is in the door slab, filler or epoxy may help only when the damage is shallow enough to hold a fastener again.
Door slab repairs versus jamb repairs
- Identify whether the loose screw is in the jamb side or the slab side.
- Check whether the wood around the hole is crushed, split, or missing.
- Repair only the damaged side instead of treating both surfaces the same.
- Replace the hinge if the repair area cannot stay flush.
When longer screws help
- Use longer wood screws when the jamb hole has lost bite but solid framing is behind it.
- Drive the screw slowly so it does not split the jamb.
- Retighten the top hinge first if the door is sagging.
- Stop if the screw never tightens before the head seats.
When filler, epoxy, or a larger repair is the right call
- Use filler or epoxy only for shallow, localized damage.
- Allow the repair to cure fully before refastening.
- Move to a larger repair if the hole is blown out or the mortise edge is crumbling.
- Replace the hinge only after the wood can support the load again.
Suppose the top hinge screw in the jamb spins freely, but the lower screw still bites and the frame checks plumb. In that case, a longer screw at the top hole may solve the problem without changing the whole hinge.
Common mistakes
Most failed hinge swaps come from fixing the wrong surface, using the wrong hinge pattern, or skipping the alignment check after installation. A door can look repaired and still rub if the mortise sits proud or the jamb is out of square. Commercial or ADA-covered interiors can have stricter opening-force expectations, so a door that still drags should not be left as-is.
- Mixing up jamb damage and door damage: repair the stripped side that actually lost screw bite.
- Using a mismatched hinge: match leaf dimensions, thickness, finish, and hole spacing.
- Ignoring the top hinge: that hinge often carries the most load on a sagging door.
- Leaving a proud mortise: a hinge that sits above the cutout can bind or twist the door.
- Skipping plumb and reveal checks: verify alignment before and after tightening.
- Assuming a seized pin is harmless: corrosion or paint can hide damage that needs hinge replacement.
Frequently asked questions
How do you replace a hinge on an interior door without removing the whole frame?
Support the slab with a wedge, remove the pin if needed, and swap one hinge at a time. Keep the door in place while you check plumb and reveal gaps. If the jamb is sound and the mortise fits flush, a full frame removal is usually unnecessary.
Can you change a door hinge without taking the door off?
Yes, if the door is supported and the pin comes out cleanly. Remove the hinge screws with the slab held steady, then install the replacement hinge in the same mortise. If the door starts to drop or bind during the swap, take the slab off and reset it.
What tools do I need to install a new hinge on an interior door?
Use a screwdriver or drill/driver, hammer, punch or nail set, wedge, level, and the replacement hinge. Keep repair materials nearby for stripped holes. A standard residential door usually has 2 or 3 hinges, so match the new part to the existing size and screw pattern.
How do I know if the hinge screws are stripped or the hinge itself is bent?
If the screw turns without tightening, the hole is stripped. If the leaf will not sit flat in the mortise, or the knuckle looks twisted, the hinge is bent. Check for cracked finish, displaced pins, and uneven gaps before deciding whether to repair the wood or replace the hardware.
Are interior door hinges universal, or do I need an exact match?
Interior door hinges are not universal in practice. Match the leaf dimensions, thickness, screw pattern, and finish, and use a replacement that fits the existing mortise. If the new hinge sits proud or the holes do not line up, the door can rub or sag again.
How do I keep the door aligned after replacing one hinge?
Check plumb, level, and reveal gaps after every tightening step. Start with the top hinge if the door sags, then recheck the latch side gap. If the door still drops, the frame or mortise may need a larger repair before the hinge swap will hold.
Products related to this article
Sponsored / affiliate links. As an Amazon Associate I earn from qualifying purchases. I may earn additional commission from eligible campaigns.