How to Fix a Door That Sticks at the Top Corner
To fix a door that sticks at the top corner, identify the rub pattern first, then try the least invasive fix: tighten hinges, adjust strike alignment, or shim the hinge before you plane or sand the door. Skip that order, and the door can bind harder, scrape the frame, or still miss the latch. This guide shows how to diagnose top-corner rubs and choose the right repair in the safest sequence.
Top-corner rub checklist


Start by finding where the door touches and when it happens. A top-corner rub can point to hinge sag, a swollen edge, or an opening that is out of square, and the fix depends on that pattern. Interior finish doors commonly aim for a small, even reveal around the perimeter; a gap that is noticeably tighter at one corner is a clue that the door or frame has shifted rather than a random trim defect. [1][2]
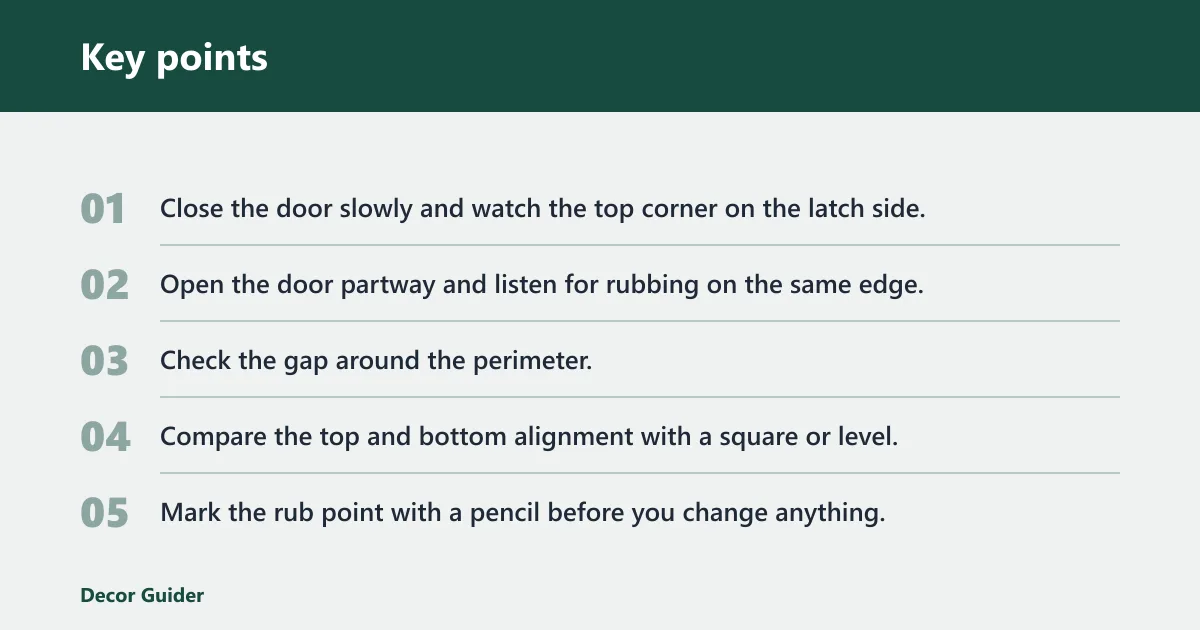
- Close the door slowly and watch the top corner on the latch side.
- Open the door partway and listen for rubbing on the same edge.
- Check the gap around the perimeter. A consistent gap is usually between 1/8 inch and 1/16 inch around the door and frame.
- Compare the top and bottom alignment with a square or level.
- Mark the rub point with a pencil before you change anything.
If the gap is smaller at the top corner than the rest of the perimeter, the door is telling you where the problem lives. Do not cut first. A small hinge issue can look like a trim job until you inspect the frame and hardware.
Picture a bedroom door that closes halfway, then catches only at the top latch-side corner. If the bottom gap looks even but the top closes tight against the jamb, the cause is often sag at the hinges rather than a large trim issue. In that pattern, the top hinge usually needs attention first, not a general reshaping of the door edge.
Why is the top corner sticking?
Top-corner sticking usually comes from one of three places: loose or worn hinges, seasonal swelling, or a frame that is no longer square. Wood movement is normal; the USDA Forest Service Wood Handbook notes that wood gains and loses moisture with changes in relative humidity, which changes its dimensions. That is why a door can fit in one season and drag in another. [1]
Loose hinges and hinge sag
Loose hinges are a common cause of sticking doors, and the top hinge carries most of the door’s weight. When that hinge loosens, the door can drop slightly and push the top corner into the frame. Tightening hinge hardware is the first fix suggested after checking alignment.
Open the door and check every hinge screw. If any screw head turns without drawing the hinge tighter, the hole may be stripped. That needs repair before the hinge can do its job. For stripped holes in softwood jambs, a common field repair is to pack the hole with wood slivers and glue, then redrill a pilot hole so the screw can bite again. [3]
Seasonal swelling at the top edge
Wood doors can stick as humidity and temperature change across seasons. A door that was fine in dry weather may rub at the top corner once the top rail or edge absorbs moisture. In that case, the frame may still be square, but the door’s edge is now slightly larger.
Seasonal movement usually produces a rub that is worse after weather shifts and better in drier conditions. If the gap looks even everywhere else and the rub is limited to a narrow strip, the door may only need a small trim after the simpler fixes fail.
Frame settlement and out-of-square openings
If the door is not square to the frame, that is likely the problem. Older structures can shift, and even a small twist in the opening can force the top corner to bind. In that case, the door may be fine, but the opening no longer matches it.
Check the frame with a square or level at both the top and bottom. If the alignment changes from one side to the other, the opening may be out of square. A hinge shim can sometimes correct a mild shift, but a major twist usually needs a carpenter or other qualified pro. If the reveal is inconsistent top-to-bottom and the jamb itself is racked or settling, stop before removing more wood. [4]
Fix loose or stripped hinge screws
Start with the screws before you change the door itself. Tightening hinge hardware is the first fix after alignment checks, and stripped screw holes are a common reason that tightening does nothing. If screws spin, the hinge cannot hold the door’s weight.
Tighten the screws first
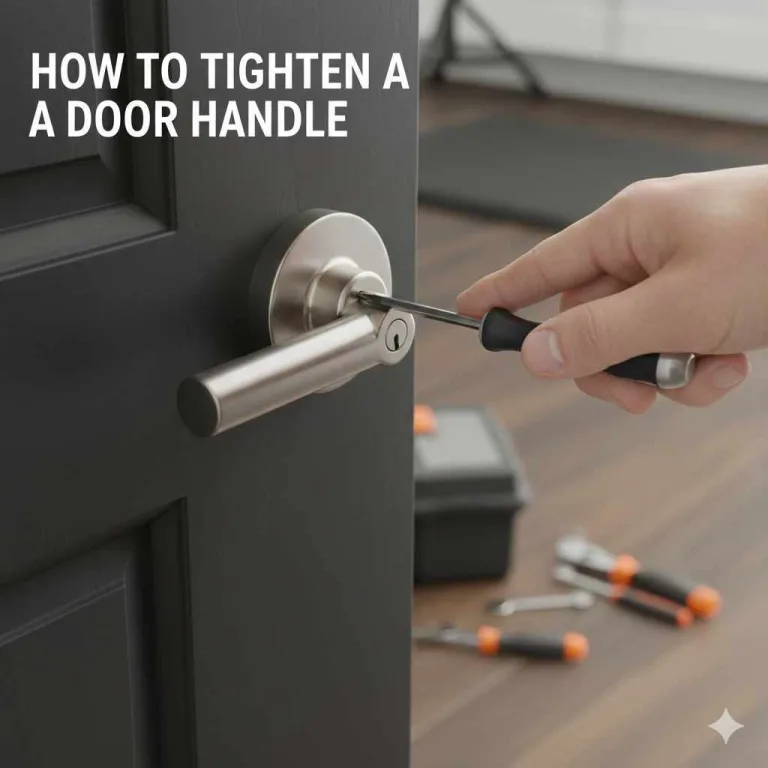
Use a well-fitting screwdriver, ideally a #2 Phillips for common residential hinge screws, and tighten each hinge screw on the jamb and the door side. The most common replacement screws are 1 inch to 2 1/2 inches long, depending on whether you are biting into the jamb only or reaching deeper framing. Focus first on the top hinge, because it carries most of the door’s weight. If the hinge closes up against the wood and the gap improves, stop there and recheck the rub.
A common mistake is to sand the top corner immediately, before confirming that a loose upper hinge is not the real cause. That can remove wood you still need and leave the door lower than the latch plate.
Repair stripped screw holes
If a screw spins without tightening, the hole is stripped. One repair method uses splintered wood and glue to rebuild the hole, then allows a re-drilled pilot hole before reinstalling the screw. The goal is a hole that grips again instead of letting the hinge drift. This is the same basic approach used by many carpentry repair guides for hinge-screw blowout because it restores wood fibers where the screw threads need purchase. [3]
- Remove the loose screw and hinge if needed.
- Pack the hole with splintered wood and glue.
- Let the filler harden fully.
- Drill a new pilot hole in the repaired spot.
- Reinstall the hinge screw and tighten it snugly.
If the hole is badly enlarged, longer screws may hold better because they can bite into solid framing behind the jamb. Use that only after the simple tightening step fails and only if the jamb wood still has enough strength to accept the new screw. In a typical repair, a 2 1/2-inch screw in the top hinge can reach framing and stabilize sag better than a short decorative fastener.
Should you shim the hinge?
A hinge shim belongs behind the lower hinge when the door sag is mild and the frame is close but not quite right. It can straighten the door in the frame and lift the latch-side corner enough to clear the jamb. Use it when the door is hanging low, not when the opening is badly twisted.
Use a shim behind the lower hinge
Place the shim behind the lower hinge to change the angle of the door in the opening. That small adjustment can raise the latch side and reduce top-corner rubbing. It is a useful fix when the door has dropped a little and the rest of the frame still reads square.
Suppose a hallway door rubs only after the weather turns damp, and the latch side sits a touch low. A thin shim behind the lower hinge may restore the gap without cutting any wood. If the door still drags after that, the cause is probably more than simple sag. In practice, shimming the top hinge can help only when you need to fine-tune the reveal at the top hinge side; for a latch-side top-corner rub, the lower hinge is usually the better place to start.
When the top hinge has bent
Over time, the top hinge can bend because it carries most of the door’s weight. If the hinge leaf is warped or twisted, shimming alone may not hold the correction. Rather than treating hinge swapping as a general fix, first decide whether the hinge is actually bent or the screws are simply loose. If the metal is distorted, replacement is usually more reliable than trying to flip hardware around.
That said, if both hinges are the same size and the lower hinge is sound, a temporary hardware swap can be used only as a diagnostic step, not the standard repair. If the top hinge is visibly bent or the screw holes are damaged, replacement is the better move than a temporary swap.
When settling has thrown the door off line
If the opening settled slightly and the door is no longer aligned with the jamb, a shim behind the lower hinge can help pull the top corner back into line. This is a small correction for a small shift. It is not the right answer if the frame is plainly out of square.
When do you plane or trim the door?
Trim the door only after the hardware checks fail and you have confirmed that the rub is on the door edge itself. Mark the sticky area first, then remove the least amount of material needed. For a hollow-core interior door, the edge treatment can be thin and the structure is less forgiving than a solid wood door. As a practical rule, remove only a small amount per pass—about 1/32 inch to 1/16 inch—then test the swing again before taking more.
Mark the rub point before cutting
Use a pencil to mark the exact sticky area where the door touches. That mark shows you where material removal belongs and keeps you from shaving the wrong edge. Recheck the swing after each small adjustment so you do not overshoot the fit.
Marking matters because the rub can be limited to a small patch near the top corner. If you remove material from the wrong place, the door may clear one spot and start binding somewhere else.
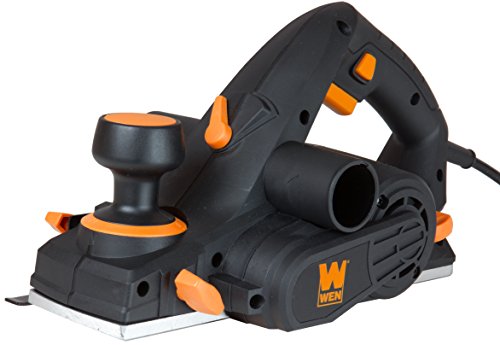
Use a hand planer after removing the door
A hand planer can be used to shave down the part that needs fitting. It is usually the cleaner choice when you can remove the door, support it flat, and work from the marked spot inward. Take off small amounts and test the fit often. The usual tool set is simple: a screwdriver, a #2 bit, a 4-foot level or framing square, a sharp pencil, a hand plane, wood glue, a drill with a pilot bit, and a utility knife for cleaning fibers.
On a solid wood door, a planer usually gives enough control for a small correction. On a hollow-core door, stop sooner and inspect the edge before you take off more than needed. The internal structure leaves less room for error.
Use a door trimmer if you cannot take it off
A door trimmer is a practical alternative to removing the door. It can be used in place, which helps when you do not have a workbench or the hinges are difficult to remove. It is useful for controlled trimming of a narrow rub zone near the top corner.
If you cannot remove the door cleanly, a trimmer may save time and reduce the chance of damaging the finish. Even then, keep the cut small and test the swing after each pass.
Protect the cut edge
After trimming, paint or seal the exposed wood. That step helps control moisture absorption and reduces future swelling and shrinking. If the cut edge stays raw, the same top-corner rub can return when humidity rises.
Apply the finish to every exposed area you cut, including the top edge if that is where the change was made. Let it dry fully before rechecking the gap and latch action. A finished edge is less likely to swell unevenly later.
The final check should show a steady perimeter gap and smooth closing with no scrape at the top corner. If the door still binds after sealing and the hardware is sound, the opening may need deeper correction than a standard DIY adjustment can provide.
Door sticking decision table
Use this checklist to match the symptom pattern to the most likely cause and the best first fix. Start at the top and move down only if the earlier step does not solve the rub.
| Symptom pattern | Likely cause | Best first fix |
|---|---|---|
| Door rubs at the top corner when closing, and the top hinge feels loose | Loose hinge hardware | Tighten the hinge screws first |
| Screws spin without tightening, and the hinge keeps drifting down | Stripped screw holes | Repair the holes with splintered wood and glue, then drill a new pilot hole |
| Door binds more after humid weather, with a tight top edge but normal frame alignment | Seasonal swelling | Confirm the frame is square, then trim only the marked rub area if needed |
| Latch-side top corner drags, lower gap is larger than the top gap, and the door hangs low | Hinge sag | Place a shim behind the lower hinge |
| Door fits poorly at both the top and bottom, and a square or level shows uneven alignment | Frame out of square | Stop and call a pro |
| Top hinge looks bent, and tightening does not restore the gap | Top hinge wear | Replace the bent hinge after confirming screw holes and alignment |
| The rub stays after tightening, shimming, and light trimming | Deeper frame or door problem | Stop and call a pro |
Frequently asked questions
How to fix a door that sticks at the top
Check the rub pattern first, then tighten the hinges before you cut or sand anything. If screws spin, repair the holes first. If the door still rubs at the top corner after that, a shim behind the lower hinge or a small trim at the marked spot may be the next step.
How do you fix a door that is sticking at the top?
Begin with the hinge hardware and the frame alignment, not the edge of the door. A top-corner stick often comes from sag or a shifted opening. If the gap is uneven and the door is not square to the frame, correct that before you plane the sticky area.
How to adjust a door that sticks at the top
Adjust the door by tightening the top hinge, checking for stripped screws, and then adding a shim behind the lower hinge if the door hangs low. If the rub still remains at one marked spot, remove only enough material to clear it and seal the exposed wood afterward.
How do I know if the door frame is out of square?
Use a square or level to compare the top and bottom of the opening, then check the gap around the perimeter. If the spacing changes from side to side and the door is not square to the frame, the opening is likely the problem rather than the door edge alone.
What if the hinge screws keep spinning?
Spinning screws usually mean stripped holes, so tightening alone will not hold. Repair the holes with splintered wood and glue, let them harden, and drill a fresh pilot hole before reinstalling the screw. If the wood around the hinge is badly damaged, a longer screw or hinge replacement may be needed.
Do I need to remove the door to fix the top corner rub?
Not always. You can tighten screws, repair stripped holes, and add a shim with the door in place. Removing the door helps if you need to plane the edge with a hand planer. If removal is awkward, a door trimmer can be the better option.
Products related to this article
Sponsored / affiliate links. As an Amazon Associate I earn from qualifying purchases. I may earn additional commission from eligible campaigns.