Dresser and Drawer Repair: Fixing Sticking Drawers, Slides, Smells and Finishes
A common repair order for dresser drawers is friction, fit, moisture, odor, then hardware; replace slides only if both cabinet and drawer are square and the drawer still binds after wax, alignment, and drying. A wrong diagnosis can strip screw holes, split runners, swell drawer sides, and waste money on new slides that will not correct an out-of-square case. This guide lays out the checks and repairs in order for sticking, sagging, dragging, musty, or off-track drawers, with clear repair-versus-replace calls.
Start with the right diagnosis order


What to check before you touch the hardware
Empty the drawer first. Added weight can mask the real fault by making a weak bottom sag or by keeping worn slides engaged until the drawer is loaded.
Open and close the empty drawer slowly, and watch where the motion changes: first inch, mid-travel, or near fully closed. A drawer that binds at the cabinet face usually points to fit, finish buildup, or swelling. A drawer that moves freely at first and then drops, twists, or clicks deeper in often points to slides, runners, or a failing bottom.
The problem is almost always fixable in under 30 minutes, and lists four fixes: clean, lubricate, address humidity, and realign or repair hardware. That order helps, but only after you identify the part that is actually causing the trouble.
How to identify the actual contact point
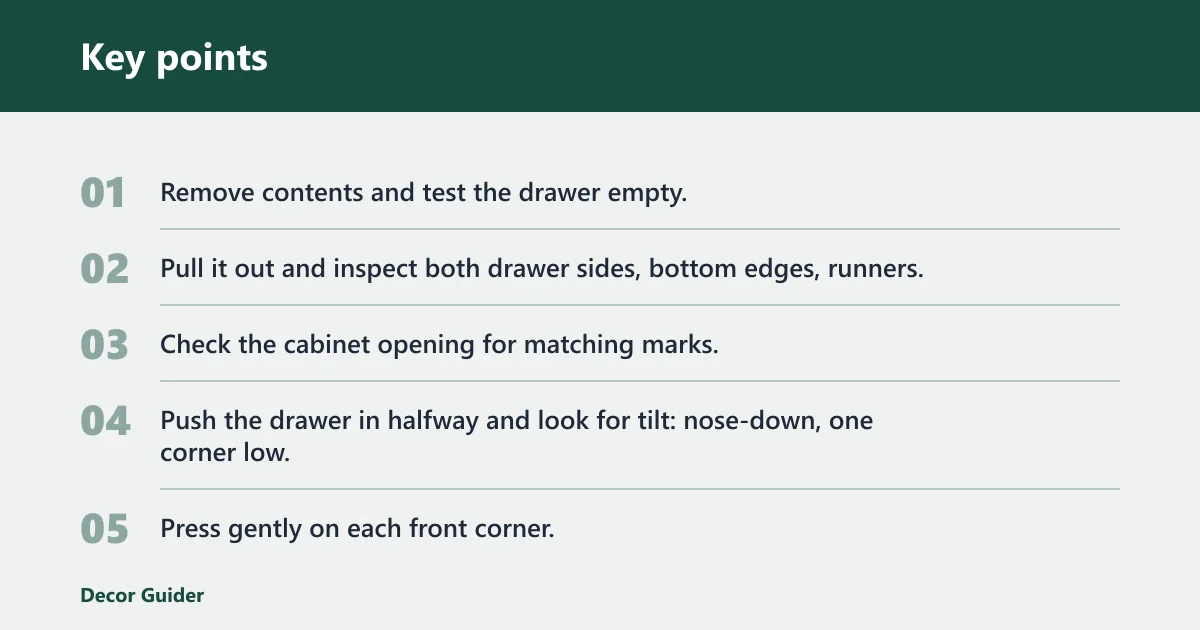
- Remove contents and test the drawer empty.
- Pull it out and inspect both drawer sides, bottom edges, runners, and slide members for shiny rub marks, fresh scratches, sawdust, or worn finish.
- Check the cabinet opening for matching marks.
- Push the drawer in halfway and look for tilt: nose-down, one corner low, or one side rubbing.
- Press gently on each front corner. If one corner shifts, look for loose screws, split joints, or cabinet rack.
- Sort the failure into one of five buckets: wood friction, fit, moisture, odor, or finish damage.
The five failure buckets
Friction shows up as burnished wood, drag marks, dry runners, or metal slides packed with grit. Fit shows up as one-sided rubbing, a twisted drawer box, or a racked cabinet opening. Moisture shows up as seasonal swelling, musty smell, or sticky movement that eases in drier weather.
Odor needs its own diagnosis. Dust, mildew, old liner adhesive, and contaminated finish do not call for the same fix. Finish damage includes softened coatings, wax in the wrong place, and thick old finish on contact areas that now drags during movement.
A common beginner mistake is sanding both drawer sides before checking for one burnished spot near the back right runner. That removes wood from the whole drawer, even though the real cause may be one loose screw on a cabinet-side guide.
Why does my dresser drawer stick only on one side?
One-sided sticking often means the drawer is no longer traveling parallel to the opening. The common causes are a loose slide screw, runner wear on one side, localized wood swelling, a twisted drawer box, or cabinet rack. Read the rub pattern as the clue, not the sticking itself.
One-sided rub marks and what they usually mean
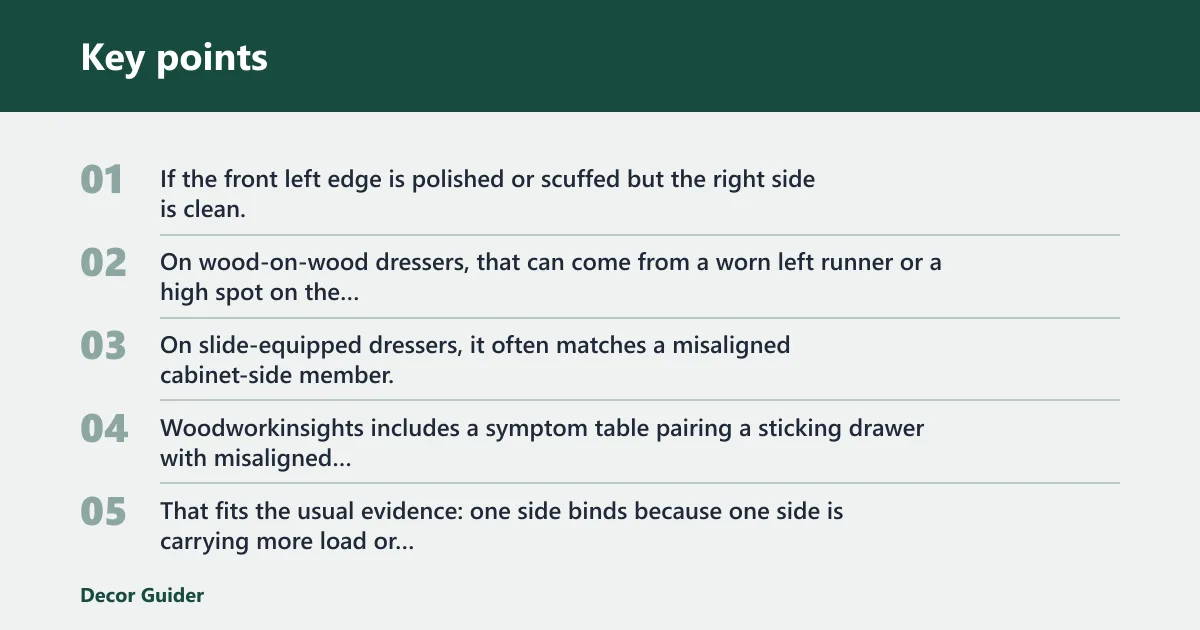
If the front left edge is polished or scuffed but the right side is clean, the drawer is yawing left as it enters. On wood-on-wood dressers, that can come from a worn left runner or a high spot on the left drawer side. On slide-equipped dressers, it often matches a misaligned cabinet-side member.
Woodworkinsights includes a symptom table pairing a sticking drawer with misaligned slides. That fits the usual evidence: one side binds because one side is carrying more load or running out of line.
How to tell cabinet rack from drawer twist
Measure by sight first. Pull the drawer out and set it on a flat floor or bench. If it rocks corner to corner, the drawer box is twisted. If it sits flat but binds only in the cabinet, the case opening or runner layout is the better suspect.
Then compare the drawer front gaps. Uneven reveal at the cabinet opening, especially when neighboring drawers also look skewed, points toward cabinet rack. If only one drawer is affected and its joints show movement, focus on the drawer box.
When a loose slide screw causes side-specific binding
Drawer slides include a drawer side and a cabinet side. If one screw backs out, that member can pivot under load. The drawer still moves, but one side drags, clicks, or drops.
Tighten screws only after you reposition the member square to its original line. Woodworkinsights advises tightening screws after repositioning the slides, and that order matters. Tightening first can lock in the misalignment.
Why a soft-close drawer stops short
If a soft-close drawer won’t shut all the way, the usual causes are a hidden obstruction, a drawer that has drifted out of alignment, or a worn damper. The supporting article explains how to check those in the right order so you can fix the real problem instead of replacing hardware too soon. It also shows how to tell whether a simple adjustment is enough or whether the slide mechanism has failed.
Use this soft-close drawer issue guide when the drawer stops short, closes unevenly, or bounces back open. That matters because continued forcing can damage the slides, drawer front, and cabinet edges.
How to replace an antique dresser drawer lock the right way
If the lock is broken, missing, or no longer turns, the fix is usually to match the replacement to the original lock rather than forcing in a modern one. The drawer lock replacement guide explains how to identify the lock type, measure the body and keyhole, and choose a period-appropriate part that fits the existing mortise or surface mount. That matters because the wrong size can split the drawer front, loosen the escutcheon area, or leave you with a lock that still won’t function.
It also covers safe removal and repair steps so you can preserve the dresser’s original wood and hardware while restoring a secure, usable drawer.
How to secure a dresser drawer with a lock
If a drawer needs child safety or simple privacy, the next step is choosing a lock that matches the dresser’s material and build. The guide on dresser drawer lock explains how to pick hardware that fits solid wood, plywood, laminate, or particleboard without splitting the drawer or leaving the lock ineffective.
It also walks through the basic install decision, what tools and parts are needed, and how to avoid common mistakes that can keep the drawer from closing smoothly. That matters because the wrong lock can weaken the drawer box, fail to hold, or still allow access when you need it most.
How to judge dresser drawer load limits
Drawer slides are only part of the equation: the safest load is set by the weakest point in the whole drawer system. The supporting guide explains how to estimate real capacity by looking at the slide rating, the drawer box, the fasteners, and how the cabinet is mounted, so you can avoid overloading a drawer that “should” hold more on paper.
It also shows why published specs can be misleading unless you know the test conditions, and how to compare standard side-mount, under-mount, and heavy-duty options before you store tools, clothes, or heavier household items. See drawer slide weight ratings for a practical breakdown.
Level an Undermount Drawer Without Guesswork
If a dresser drawer tilts, scrapes, or won’t sit flush, the fix usually starts by finding which part is out of position rather than tightening everything at once. The guide on undermount drawer slides explains how to tell whether the problem is the rear brackets, the slide alignment, or a bent drawer box, then shows how to make small, controlled adjustments. That matters because undermount hardware is sensitive: a tiny shift can stop rubbing, improve glide, and bring the drawer level without creating new binding.
How to Child-Proof a Dresser Drawer
To child-proof a dresser drawer, the safest approach is to fix any loose or sticking drawers first, then secure the dresser to the wall and add the right stop or latch for the drawer type. This matters because a lock alone may not prevent a drawer from being pulled out too far, and an unstable dresser can tip if a child climbs on open drawers.
The full dresser drawer child-proof guide explains how to choose the right method for wood runners, side-mount slides, or undermount hardware, plus what to repair before installing safety devices. It also covers common mistakes, so you can reduce tipping risk without making the drawer harder to use for adults.
Check for recalled MALM dressers before using them
If your IKEA dresser is a MALM chest or dresser made before June 2016, the safe next step is to check whether it falls under the recall. The supporting guide explains what the recall covered, how to identify the model and production date, and what to do if your unit is affected. It also covers why anchoring matters: unanchored dressers from that period can tip over and have been linked to serious injuries and child deaths. Start with the details in Malm dresser recall so you know whether to stop using it, anchor it, or pursue the proper repair or refund.
How deep should a dresser be?
A standard dresser is usually about 18 to 20 inches deep overall, but the right size depends on your room layout, bed placement, and how much clearance you need to open drawers comfortably. The standard dresser depth guide explains the typical depth range, how drawer depth differs from overall cabinet depth, and how much space to leave in front of the piece.
That matters because a dresser that is too deep can crowd a walkway or stop drawers from opening fully, while one that is too shallow may not store enough for your needs. Use the article to compare common dimensions and choose a dresser that fits both the room and the way you use it.
How to move a heavy dresser safely by yourself
If you need to move a heavy dresser alone, the supporting guide explains when solo moving is realistic and when it is safer to stop and ask for help. It walks through the decision points that matter most: emptying drawers, removing loose parts, choosing sliders, a dolly, or a moving strap, and checking whether the route includes thresholds or stairs. That matters because the wrong move can crack the frame, damage flooring, or trap a hand or foot while you pivot through a doorway.
Use this dresser moving guide to match the method to your dresser, your floor, and the obstacles in the path before you start lifting.
How to identify a highboy dresser
A highboy dresser is a tall, narrow, drawer-only case, often built in two stacked sections with drawers above a base. The supporting guide explains how to tell a true highboy from lookalikes such as a tallboy, chest of drawers, armoire, or lingerie chest, which matters when you’re shopping, cataloging furniture, or decoding resale listings. It also covers the dimensions, proportions, and style cues that help separate authentic terminology from loose marketplace labeling.
If you need a quick reference for identification, dimensions, and common mislabels, the highboy dresser guide gives a practical breakdown you can use before buying, listing, or comparing pieces.
How to decide if a dresser is worth refinishing
Before you strip a dresser, check whether it has the structure and value to justify the work. The key question is simple: is the frame solid, are the veneer issues shallow, do the drawers still run square, and will the repair cost stay below the price of a comparable replacement? If the answer is no, refinishing can turn into a long project that still leaves you with warped wood, soft spots, or a finish that can’t hide the damage.
The dresser refinishing guide walks through those checks in a clear order, covering inspection, hardware, surface damage, and cost so you can decide quickly whether to restore the piece or walk away.
How do you tell wood swelling from slide failure?
Wood swelling usually changes with weather and room moisture, while slide failure stays bad in every season. Look for broad rub marks on bare wood, tighter fit during humid spells, and improvement after drying the room. Slides fail differently: looseness, grinding, dropout, or side-to-side wobble that does not track humidity.
Seasonal clues that point to humidity
If the drawer sticks only in summer or after a damp stretch, swelling moves up the list. Keeping indoor humidity near 45% to 50% for stable wood dimensions. That is a practical control point, not a cure by itself.
Most old dressers do not have a track system at all. They ride on wood runners and guides, which means even a small moisture shift can tighten the fit at several contact areas at once.
Quick tests for swollen wood versus worn hardware
Look for fresh rub marks on unfinished or lightly finished wood edges. Swelling tends to leave wider contact patches, often at the upper side edges or the runner contact strips. Worn slides leave different clues: rattling, rough metal movement, ball-bearing spill, bent members, or a drawer that can be lifted off line too easily.
Suppose a bedroom dresser works smoothly in January but binds at the last three inches of closing during a humid July week. If the metal hardware is tight and the drawer sides show fresh burnished streaks, drying the room is safer than replacing slides.
Using a dehumidifier and the indoor target
Use a dehumidifier if the room regularly runs above the recommended range. Keep the space near 45% to 50%, then retest after the dresser and drawer have had time to stabilize. If sticking improves without any hardware changes, moisture was part of the problem.
If nothing changes after humidity control and the drag remains side-specific or noisy, move back to fit and hardware checks.
Drawer failure map
Dresser drawer failure map
| Symptom | Likely cause | Quick test | Safest fix | When to replace |
|---|---|---|---|---|
| Sticks only on one side | Loose slide screw, runner wear, cabinet rack, twisted drawer | Check for one-sided rub marks and corner-to-corner rock | Realign, retighten, repair drawer joints | Replace if case is distorted beyond adjustment or drawer is badly warped |
| Sticks in humid weather | Seasonal swelling | Compare dry-season behavior and inspect broad wood burnish | Lower room humidity, use fine sanding on high spots only, then wax wood runners | Replace parts only if wood stays distorted after drying |
| Loose, wobbly side-mount slides | Backed-out screws or worn slide members | Wiggle drawer side to side with drawer half open | Reposition slides and tighten screws | Replace if ball-bearing members are worn or housings are cracked |
| Drawer drops under load | Bottom sag or popped panel | Load lightly and watch center of drawer floor | Repair bottom support and grooves | Replace bottom if split, rotten, or permanently bowed |
| Musty smell inside | Trapped moisture or mildew | Smell strongest after drawer stays closed; inspect corners and underside | Dry thoroughly, clean, control humidity | Replace liner or wood parts if mold damage is deep |
| Tacky or dragging interior | Softened finish, wax residue, contamination | Touch hidden area for tack; inspect for smeared coating | Clean, isolate finish drag, refinish only affected surfaces | Replace panel if finish failure is severe and wood is damaged |
| Drawer falls off track when pulled out | Missing stop, disengaged slide member, bent hardware | Check extension limit and release clips | Reconnect or replace damaged members | Replace if stops are broken or members will not stay engaged |
| Grinding metal movement | Grit in ball-bearing or roller slide | Move slide without drawer if possible | Clean and use dry PTFE or silicone lubricant | Replace if roughness remains or bearings are missing |
| Front sits crooked when closed | Misaligned runners or under-mount clips | Compare drawer front gaps and clip seating | Reset alignment and tighten hardware | Replace clips or slides if they no longer hold adjustment |
| Wood runner squeak and drag | Dry wood-on-wood contact | Inspect runner tops for polished streaks | Clean, use fine 220-grit on burnished spots only, then paraffin or beeswax | Replace runner if split or worn out of shape |
| Screws no longer tighten | Stripped holes | Remove screw and inspect hole wall | Fill, let dry, sand, and redrill as needed | Replace mounting area insert or part if the surrounding wood is crumbling |
| Drawer side crack or open joint | Structural drawer-box failure | Press joint lightly and look for movement | Apply wood glue and clamp until dry | Replace drawer side if split runs through key load areas |
| Slide works but drawer still binds near face frame | Finish buildup or swollen front corner | Inspect front contact points for heavy finish | Light sanding of the exact rub area and retest | Replace front or rebuild opening if distortion is severe |
| Under-mount drawer releases unevenly | Clip issue or cabinet-side misalignment | Check both front clips for full engagement | Reseat clips and realign slides | Replace clips or slide set if locking hardware is damaged |
When a drawer uses a wafer lock instead of a standard cam lock
If the drawer key turns only a little, binds, or will not move at all, the lock may be a wafer style rather than a standard keyed cylinder. The supporting guide explains how to identify that hardware, what makes it feel stuck, and why forcing it can bend the key or damage the cam and drawer front. It also lays out the safest next step when a wafer lock is the problem, so you can decide whether the issue is simple binding or something that needs replacement. For a clear breakdown of the lock type and the least destructive approach, see wafer lock picking.
How to replace a lost dresser lock key
If a dresser lock is the part keeping a drawer shut, the safest fix is usually to match the key to the lock code instead of guessing. The supporting guide explains how to identify that code, when a locksmith can cut a key from it, and what to do if the code is missing or unreadable. It also helps you decide whether replacement is simpler than repair when the mechanism is worn or damaged. See the dresser lock key guide for the step-by-step options.
This matters because forcing the wrong key can damage the lock, scar the dresser, or leave the drawer jammed shut. Knowing the right replacement path saves time and reduces the risk of making a small problem worse.
How to anchor a dresser to a plaster or drywall wall
Anchoring a dresser matters because tipping risk is highest when drawers are open, loaded, or unevenly filled. The supporting guide explains the safest way to secure a dresser to plaster or drywall by fastening into at least two studs whenever possible, then using anti-tip straps or brackets that match the furniture and wall type. If studs do not line up, it also covers when heavy-duty metal toggle anchors are an acceptable backup and why plastic anchors are not strong enough for this job.
For a step-by-step overview of choosing the right hardware, placing fasteners, and avoiding cracked plaster or torn drywall, see the dresser anchoring guide. It matters because the wrong anchor can fail suddenly and damage both the wall and the dresser.
How do I fix drawer slides that are worn or misaligned?
Fix drawer slides by checking type first, then alignment, then wear. Side-mount and under-mount slides fail in different ways, and ball-bearing slides show different symptoms than roller slides. Repair makes sense when screws are loose or alignment is off; replacement is safer when members are bent, cracked, or badly worn.
Side-mount versus under-mount slide checks
Side-mount slides are visible along the drawer sides. Some drawers with side track systems may have a plastic lever to release them, so do not force removal. Under-mount slides hide beneath the drawer and often rely on front locking clips and rear hooks.
Check whether both sides extend equally. If one side sits farther back, the drawer enters the opening at an angle. On under-mount systems, a partially engaged clip can mimic a warped drawer.
Ball-bearing and roller wear symptoms
Aosite’s guide frames drawer slides as components that include a drawer side and a cabinet side. It also says drawer slides often work with ball bearings or roller wheels. Ball-bearing wear often feels gritty or noisy. Roller wear often feels jumpy, loose, or flat-spotted.
Use a dry lubricant on metal slides, preferably PTFE or silicone. Avoid heavy grease because it traps grit and can speed wear instead of reducing it.
Realignment, screw-hole repair, and when replacement is smarter
Clean the slide path first. Then loosen screws slightly, square the slide to its mate, and retighten after repositioning. If the screws no longer bite, repair the holes before blaming the slide.
Wood filler is useful for small voids, edge defects, or some screw-hole repairs if the product is rated for that use. Let it dry fully, sand after drying, and touch up the surface before final assembly. For heavily stressed mounting points, replacement hardware or a more structural repair may be the safer call.
Replace the slides when housings are cracked, ball-bearing members are badly worn, rollers are chipped, or alignment will not hold because the casework itself is distorted.
How to replace old wooden drawer runners
If the drawer keeps scraping, sagging, or stopping short, the fix may be the runner itself, not the drawer box. The supporting guide shows how to inspect the wear pattern, decide whether a simple shim or rebuild is enough, and measure the clearances before you cut new wood.
It also explains when a full replacement makes more sense, how to match the new runner to the old dresser, and how to avoid common fit mistakes that cause sticking, side rubbing, or drawers that fall out. For a step-by-step walkthrough, see drawer runner replacement.
Why soft-close drawers slam and how to fix it
If a soft-close drawer still slams, the problem is usually either the damper inside the slide or the drawer’s alignment and load balance. The supporting guide on soft-close drawer slides shows how to separate those causes so you do not replace parts blindly. That matters because a drawer that closes normally when empty but slams when loaded needs adjustment, while a drawer that slams even unloaded points to hardware failure.
It also walks through the checks to make before buying replacements, including slide inspection, alignment, and installation details. Use it when the drawer closes too fast, catches, or bangs shut despite being labeled soft-close.
Fixing a Drawer Slide That Pulled Out of the Wood
When a drawer screw rips completely out of the cabinet frame, simply driving it back in will fail because the surrounding wood fibers are stripped. You can permanently reattach pulled drawer slides by matching the repair method to the severity of the damage, using wood glue and toothpicks for minor holes, wood filler for moderate wear, or a solid wood patch for a blowout.
Addressing the compromised wood structure before remounting prevents the slide from immediately ripping out again under normal daily weight.
How to Fix a Malm Drawer That Keeps Coming Off Track
If a Malm drawer keeps dropping or sliding out of alignment, the usual causes are a loose rail, worn glide points, stripped mounting holes, or a drawer that is overloaded on one side. The fastest fix is to diagnose the failure in that order, then reset the drawer and repair the part that is actually failing instead of just pushing the track back into place. The supporting guide on Malm drawer track issues walks through each check so you can stop repeat pop-offs and avoid damaging the side panels or hardware.
How to choose between side-mount and undermount slides
If your replacement drawer slides need to match the cabinet and drawer you already have, the key difference is fit: side-mount slides attach to the drawer and cabinet sides, while undermount slides depend on a specific drawer-box shape and compatible hardware. That means the wrong choice can cause crooked movement, sticking, or a drawer that will not close fully.
The side-mount vs undermount guide breaks down compatibility, clearance, and retrofit limits so you can choose the slide style that fits your dresser without trial and error.
What should I use on wood runners and tracks?
Use wax on wood-on-wood runners, not on metal slides. Clean tracks first, then sand only burnished friction points with fine 220-grit, remove dust, and retest fit. Paraffin or beeswax works on wood runners; PTFE or silicone dry lubricant works on metal slide mechanisms.
Cleaning drawer tracks before any lubricant
Tracks collect dust, crumbs, fibers, and old wax. Clean them before adding anything. If you lubricate over debris, you make an abrasive paste on wood runners or a grit trap inside metal slide mechanisms.
Older dressers often have simple wood runners, center guides, or kickers rather than modern full-extension hardware. Treat each contact strip as a separate surface and clean it all the way to the back.
Fine sanding on burnished friction points only
Fine 220-grit sandpaper for burnished wood contact points. Keep that sanding local. Remove as little material as possible, then clean away every trace of dust before retesting.
Do not sand broad areas “until it fits.” That can create slop in dry months and does nothing for a loose cabinet-side guide.
Paraffin or beeswax for wood runners; dry lubricant for metal slides
Apply paraffin or beeswax lightly on the runner tops, matching drawer contact strips, and other wood-on-wood bearing surfaces. Do not coat the entire drawer side.
Use dry PTFE or silicone on metal ball-bearing or roller slides. These products leave less residue than grease and are better for mechanisms that collect lint and dust inside a bedroom dresser.
How do you repair drawer boxes, bottoms, and screw holes?
Repair the drawer box before chasing slide adjustments if the drawer twists, sags, or opens at a joint. Cracks, loose corners, bottom failure, and stripped mounting holes all change how the drawer rides. If the structure is weak, lubrication and alignment will only mask the problem briefly.
Wood glue for cracks, splits, and loose joints
If a drawer side is cracked or a dovetail or butt joint has opened, use wood glue and clamp the joint until dry. Wipe squeeze-out before it hardens on visible surfaces. Retest fit only after the box is rigid again.
Say your top dresser drawer sticks on the right and drops slightly when half open. You tighten the right slide screws, but the problem returns. A split at the back right corner lets the box spread under load, so the structural repair has to come first.
How to spot a failing drawer bottom instead of a bad slide
A failing bottom usually shows up under load. The drawer may glide when empty but dip in the middle, scrape the case below, or pop free from its grooves when filled with folded jeans or books.
If the floor panel bows and the sides remain parallel, the slides may be fine. Inspect the bottom grooves, center support, and rear capture area. Bottom failure and slide failure are separate problems, even when they show up together.
Using wood filler for stripped holes and surface defects before refinishing
Woodworkinsights lists wood filler, sandpaper, and a level as core repair tools. Use wood filler for small surface defects, edge voids, and suitable screw-hole repairs. Let it cure, sand after drying, then touch up or refinish as needed.
For friction repairs, keep filler off bearing surfaces unless you plan to level and finish that exact area. A rough patch on a runner creates a new drag point.
Fix a Drawer That Grips After Painting
If a drawer was smooth before finishing and now feels tight, the safest fix is to identify the exact bind points before you remove any more material. The supporting guide explains how to check whether the problem comes from paint buildup, slight swelling, or hardware misalignment, then shows the least aggressive way to correct it so the drawer closes cleanly again. That matters because sanding the wrong area can thin the finish, make the fit uneven, or turn a small friction issue into a bigger one.
Use the practical steps in drawer tightness fix to mark the rub spots, relieve them carefully, and decide when to adjust slides or runners instead of taking off more paint.
Reinforce a Drawer Bottom That Keeps Breaking
If a drawer bottom keeps cracking or bowing, the real fix is usually more than a quick patch. The supporting guide explains how to spot the failure pattern, replace a sagging or split panel, and decide when to add a center brace, cleats, or thicker plywood so the drawer can handle everyday weight without splitting again.
That matters because a weak bottom can keep dropping clothes, loosening runners, and turning a small repair into a bigger cabinet problem. See the full dresser drawer bottom reinforcement guide for the right repair based on the drawer type and damage.
How to repair a damaged dresser knob hole
If a dresser knob spins, pulls out, or sits off-center, the fix is usually to fill the damaged hole, let it cure, and then redrill the new opening in the right spot. The article on dresser knob hole repair explains how to match the repair to the problem, whether the hole is stripped, oversized, or drilled in the wrong place.
That matters because the wrong repair can split veneer, leave the knob crooked, or make the same fastener fail again. This section helps you decide when a simple filler repair is enough and when you need a cleaner patch before drilling a fresh screw hole.
How do I fix a dresser drawer that smells musty inside?
Fix musty drawer odor by separating moisture, mildew, dust, old liner residue, and finish contamination. Start with a dry inspection, then clean only after you know what is causing the smell. Fragrance products can hide the source and keep trapped moisture in place, which makes the drawer worse.
Dust, mildew, old liners, and finish contamination as different odor sources
Dust smells stale. Mildew smells damp and returns after the drawer stays closed. Old shelf liner residue often smells sweet, sour, or chemical and may feel gummy. Contaminated finish can smell sharp or waxy, especially in drawers that were over-polished or cleaned with incompatible products.
One guide separates drawer issues into slides, runners, tracks, bottoms, and liners. That separation helps here too, because a smell from old liner adhesive does not call for the same repair as mildew in the drawer bottom grooves.
Drying, cleaning, and moisture-control steps that fit each cause
For dust and old debris, vacuum corners, wipe hard surfaces, and let the drawer air out fully. For trapped moisture, dry the room and the furniture first, then keep indoor humidity near 45% to 50% with a dehumidifier if needed.
For liner residue, remove the liner completely and clean off adhesive before sealing or refinishing. For mildew, inspect hidden surfaces including the drawer underside and case interior. If wood stays damp, odor treatment will not last.
When odor means the wood or finish needs deeper repair
If the smell returns quickly after drying and cleaning, the source may be in the finish film, porous wood fibers, or mold-damaged material. That is the point to consider finish removal, sealing, bottom replacement, or part replacement instead of perfumes or sachets.
How to remove cedar odor from a dresser
If a dresser smells strongly of cedar, the goal is to lower the odor without damaging the wood or finish. The supporting guide explains how to start with airflow, then use gentle methods like a diluted vinegar wipe on sealed surfaces or odor absorbers such as baking soda and activated charcoal when the smell lingers. That matters because cedar scent can transfer to clothes and can be hard to judge until you treat the dresser itself. The article also shows when to stop, when sanding or sealing is worth considering, and how to handle cases where mildew or smoke may be contributing to the smell. See cedar smell removal for the step-by-step approach.
How to get mothball odor out of a dresser
If a dresser smells like mothballs, the fix is usually to ventilate it first, then clean the surfaces, and only after that use an odor absorber such as baking soda or activated charcoal. This works because the smell may be sitting on the surface, trapped in the drawer liner, or soaked into raw wood, and each source needs a different treatment.
The supporting guide on mothball smell removal explains how to tell where the odor is coming from, when to remove liners, and why the smell can keep returning if the source is not handled in the right order.
How to deal with a strong new dresser odor
If a new dresser smells sharply chemical, don’t treat it like a normal “new wood” odor. The practical fix is to air it out first, then seal the drawer interiors with a low-odor product if the smell lingers. The supporting guide on new dresser sealing explains how to judge whether the finish needs to off-gas longer, which sealers are least risky for drawer interiors, and when the odor is strong enough that returning the dresser makes more sense than trying to cover it up.
This matters because trapped fumes can transfer to clothes and stay in the drawers for weeks if you skip the right step.
What to do when silverfish are in dresser drawers
If you find silverfish in a dresser, the fix is to clean the drawers, reduce moisture, and treat the surrounding room so the pests do not return. The supporting guide explains which items to remove first, how to vacuum cracks and wipe the wood dry, and when sticky traps or humidity control are useful. It also covers why the infestation may extend beyond one drawer, which matters because silverfish can damage labels, paper items, and fabric blends while thriving in damp conditions. For a step-by-step plan, see silverfish drawer removal.
When a veneer dresser needs paint instead of a touch-up
If the veneer is intact but dated, dull, or only lightly worn, painting can be a practical way to refresh the dresser without replacing the piece. The supporting guide explains how to check whether the veneer is paintable, which repairs must happen first, and how to avoid finishing over loose, bubbled, or water-damaged spots that can fail later. It also walks through the prep, priming, painting, and sealing choices that matter most for a long-lasting result. If you’re weighing a cosmetic update against a repair-heavy refinishing project, paint veneer dresser gives you a clear decision path.
What to do when the dresser top veneer lifts
Peeling veneer on a dresser top is usually fixable if the base is still flat and the loose area is small. The supporting guide breaks down how to decide whether you can re-glue lifted edges, patch a missing spot, or need to replace the whole sheet because the core is swollen, split, or too damaged to hold a repair. That matters because waiting usually makes the damage spread, rough edges catch, and the top finish look uneven.
It also walks through the repair sequence in plain terms: stabilize the loose veneer, patch minor losses, and know when replacement is the safer choice. For the full process, see peeling veneer repair.
When a dresser needs a full paint strip
If the dresser’s finish is failing badly, a full strip can be the cleanest way to get back to bare wood and decide what to do next. The supporting guide explains how to choose between chemical stripper, sanding, and heat based on whether the piece is solid wood, veneered, or detailed, and it flags the situations where heat or aggressive sanding can do real damage.
That matters because the wrong method can burn veneer, round over carvings, swell joints, or make drawers stick. If you’re deciding how to handle a refinishing project from the start, this paint stripping guide helps you match the method to the dresser’s construction before you remove a single coat.
How do you know when painting an IKEA dresser is the right fix?
Painting is the better choice when an IKEA dresser has widespread surface wear, yellowing, or mismatched repairs that a touch-up won’t hide. The key question is the finish type: solid wood can usually be sanded and primed, but laminate, melamine, and foil-faced parts need more careful prep or the paint can peel and scratch quickly. For a durable result, the surface, primer, and topcoat all have to match the dresser’s material.
The supporting guide on painting an IKEA dresser explains how to identify common IKEA finishes, what prep each one needs, and which mistakes cause the most failure. That matters because the wrong approach can turn a cosmetic update into a finish that chips fast or never bonds well.
When a dresser top needs spill protection
If perfumes, lotions, or drinks regularly sit on a dresser, the top needs a barrier that matches both the finish and the spill risk. Lightweight protection like a felt or cork liner may be enough for occasional use, but repeated liquid exposure usually calls for a tray or a sealed top protector to keep oils and alcohol from dulling lacquer, staining wood, or lifting veneer. The supporting guide on dresser top spill protection explains which option fits painted, lacquered, wood, and veneer surfaces, so you can prevent damage without changing the look of the furniture.
Rent-safe ways to keep a dresser from tipping
If you rent, the safest approach is usually a stud-mounted anti-tip strap or bracket that gives real tip-over restraint without causing unnecessary damage. The supporting guide on anchoring a dresser explains what hardware to use, how wall type affects your choice, and why temporary removable fasteners are not a verified substitute for proper restraint on a dresser.
It also covers the practical renter issues that matter most: what to do if your landlord limits permanent mounting, how to handle tricky installations like an IKEA STORKLINTA, and how to patch small holes when you move out. That makes it useful for anyone who wants a stable dresser without risking avoidable wall damage.
When a dresser leg needs replacement
If a dresser wobbles, tilts, or has a cracked leg, the fix depends on how that leg is attached. The supporting guide explains how to check whether the leg screws in, bolts to a mounting plate, or is part of a damaged frame, so you can choose the right repair instead of forcing the wrong one.
That matters because using the wrong hardware can split the wood, leave the dresser unstable, or make the damage come back once the piece is loaded. The article on dresser leg replacement walks through the inspection step, the matching replacement method, and the safe installation approach so the dresser stands level and supports weight properly.
How to Move a Dresser on Carpet Without Damage
If you need to reposition a dresser, the safest approach depends on the carpet pile and the dresser’s weight. The supporting guide breaks down the practical options: furniture sliders for low-pile carpet, cardboard or a moving blanket for short moves, and a dolly plus a second person when the dresser is heavy. It also explains why moving it bare can snag carpet, stress the legs, and make tipping more likely.
For a step-by-step method that matches your floor type and helps protect both the carpet and the dresser, see dresser on carpet.
When a removable liner is the right fix
If the drawer interior is sound but you want a cleaner surface, the dresser drawer liner guide shows how to use contact paper as a simple, removable upgrade. It explains how to measure the drawer bottom, cut the liner slightly smaller for a better fit, and smooth it down so it lays flat instead of bubbling or shifting.
The article also covers trimming the edges, lining the sides neatly, and avoiding common mistakes that can leave sticky residue or torn corners later. That matters if you want a drawer that looks tidier now and still comes apart cleanly when you change finishes or replace the liner later.
When should you sand, refinish, or replace parts?
Sand only when you have identified an exact wood contact point or finish ridge that is causing drag. Refinish when the coating itself is tacky, contaminated, or too thick on bearing surfaces. Replace parts when distortion, wear, or damage is structural and keeps defeating adjustment.
Finish drag and tacky surfaces versus structural damage
Finish drag happens when an old coating softens, builds up along an edge, or picks up wax and dirt until it becomes sticky. Structural damage is different: warped drawer sides, split runners, rotten bottoms, or slide members that will not stay aligned.
If the drawer moves better after surface cleaning but still drags at one glossy ridge, controlled sanding and touch-up make sense. If the drawer rocks, sags, or drops off track, solve the structure first.
Safe limits for sanding older dresser parts
Use fine 220-grit only on the specific high spots that show fresh burnish or finish ridges. Do not remove broad areas of original material without a clear reason. Older dressers can have thin edge profiles, veneer nearby, or carefully fitted runners that do not tolerate aggressive sanding.
Replacement thresholds for slides, warped drawers, and damaged casework
Replacement is the safer answer when slide housings are cracked, ball-bearing slides are badly worn, cabinet-side members are bent, under-mount clips are broken, or repeated adjustments fail because the case opening is out of square.
Replace drawer parts when sides are severely warped, bottom panels are rotten or mold-damaged, or the wood has lost enough integrity that glue and filler will not hold. Repair has limits, and forcing an unsound drawer back into service usually creates a second repair.
Frequently asked questions
What should I use to lubricate wooden drawer runners?
Use paraffin or beeswax on clean wood-on-wood runners and matching contact strips. If the runner has shiny burnished high spots, sand those lightly with fine 220-grit first and remove all dust. Do not use wax on metal slide mechanisms, and do not use heavy grease that traps grit.
How do I know if humidity is causing my dresser drawer to stick?
Humidity is likely when the drawer gets tight during damp weather, shows broad wood rub marks, and improves after the room dries. Keep indoor humidity near 45% to 50% with a dehumidifier and retest. If the problem stays identical year-round, look harder at slides, runners, and case alignment.
What causes a drawer to fall off the track when I pull it out?
Common causes include missing stops, bent slide members, disengaged side-mount components, under-mount clip problems, and cabinet-side misalignment. Some side-track drawers use a plastic release lever, so forced removal can create this problem. Check engagement and stops before assuming the entire slide set needs replacement.
How do I tell if the drawer bottom is failing instead of the slides?
A failing bottom usually shows itself under load. The drawer may work empty but sag in the center, scrape below, or pop from its grooves when filled. If the floor panel bows while the side hardware still tracks straight, repair the bottom support before changing slides.
Products related to this article
Sponsored / affiliate links. As an Amazon Associate I earn from qualifying purchases. I may earn additional commission from eligible campaigns.