How to Fix an IKEA Dresser Drawer Back Panel That Fell Out
Fix an IKEA dresser drawer back panel by matching the failure type: if the panel only slipped out, reglue or re-seat it; if the groove is crushed or the back is split, replace the drawer back or box. A bad patch leaves the drawer racked, rubbing, and weak enough to sag or dump contents. This guide shows how to inspect the joints, tell loose from broken, and choose the least invasive repair that restores square.
Diagnosing the drawer joint failure

- Tempered hardboard panel
- Flat, smooth surface
- Custom sizes available on request
The rear joint usually fails at the point where the back panel meets the side panels. On many IKEA drawer boxes, that joint may use glue, staples, screws, cam locks, or dowels, so the repair depends on what actually failed. Start by identifying whether the panel is loose, stripped, crushed, or cracked.
Check the slides before you reach for glue. A drawer that binds in the cabinet can look crooked even when the box is sound, and a repair will not stay square if the slides force it out of line.
Identify the failure at the rear joint
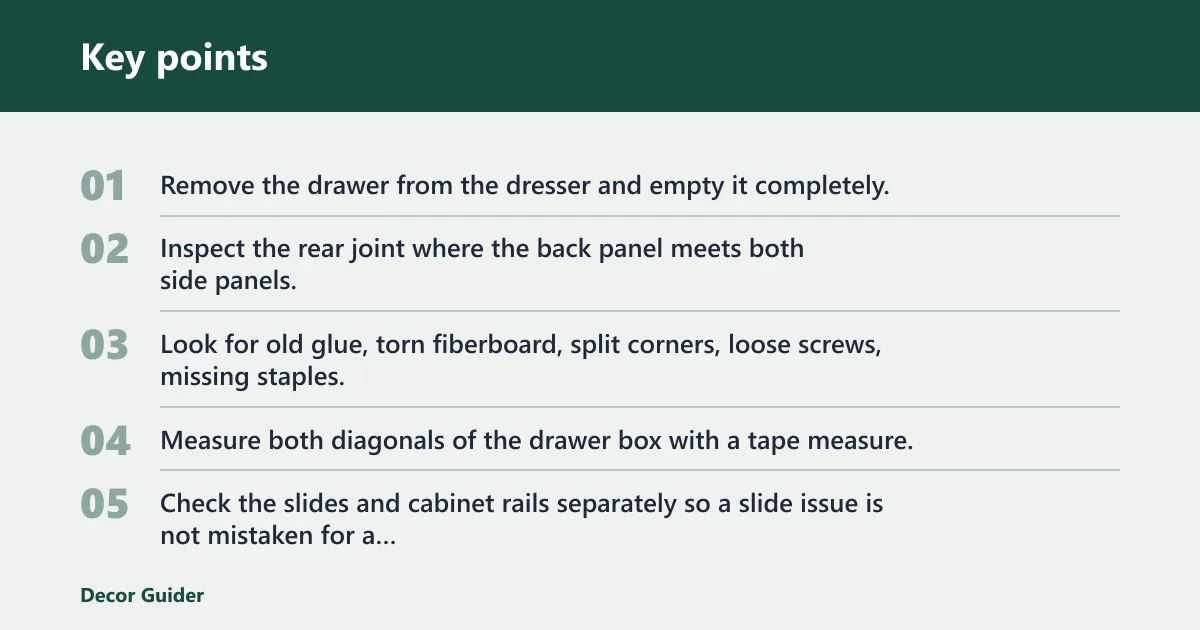
- Remove the drawer from the dresser and empty it completely.
- Inspect the rear joint where the back panel meets both side panels.
- Look for old glue, torn fiberboard, split corners, loose screws, missing staples, or a panel that no longer sits in its groove.
- Measure both diagonals of the drawer box with a tape measure. If the numbers differ, the box is out of square.
- Check the slides and cabinet rails separately so a slide issue is not mistaken for a drawer-box failure.
What the damage usually means
Clean wood-to-wood contact points point to a glue failure. A hole that spins a screw points to stripped material. A corner that crumbles or mushrooms points to crushed particleboard. A cracked back panel usually means the panel itself has lost strength and needs more than glue.
What you’ll need
- Wood glue for clean, tight joints
- Two or more clamps
- Scrap wood pads or folded cardboard to protect finished faces
- Wood filler or two-part epoxy for damaged particleboard
- Replacement screws or small reinforcement brackets
- Pilot hole drill bit
- Right-angle square, or a tape measure for diagonal checks
- Utility knife or scraper for removing old glue
- Fine sandpaper for lightly cleaning a repaired area
Drawer back panel repair table
| Failure type | Best fix | Recommended materials | Is clamping enough? | Replace the drawer when |
|---|---|---|---|---|
| Loose glue joint | Clean the joint, apply glue, square the box, and clamp until cured | Wood glue, clamps, scrap wood pads, right-angle square | Yes, if the wood fibers and grooves are still intact | The panel will not stay seated or the drawer remains out of square after a correct reglue |
| Stripped screw hole | Rebuild the hole, then re-fastening with a pilot hole and matching screw | Wood filler or epoxy, replacement screws, pilot hole drill bit | No, clamping alone will not restore screw holding power | The surrounding particleboard no longer holds a new screw after repair |
| Crushed particleboard corner | Rebuild the corner with epoxy, then add a screw or bracket only after curing | Epoxy, filler, replacement screws or brackets, clamps | No, the damaged corner needs material rebuilt first | The corner keeps crumbling or the fastener pulls through again |
| Cracked back panel | Replace the back panel if the crack reaches a load-bearing edge | Replacement panel or drawer box, screws or brackets if the model allows | Sometimes, only for a temporary dry-fit check | The crack opens under clamp pressure or the panel flexes when loaded |
| Repeated failure after repair | Stop patching and replace the drawer or back panel | Replacement drawer, hardware matched to the model | No | The same joint fails again after one proper repair cycle |
How do you fix a loose back panel?
If the panel only slipped out of a clean joint, glue and clamping are usually enough. Remove old glue first, then re-seat the panel so the drawer stays square while the adhesive cures. Use a square or diagonal measurements before you tighten the clamps fully.
Re-glue a clean joint
- Dry-fit the back panel in its groove or rear joint.
- Scrape off loose glue and debris from both mating surfaces.
- Apply a thin bead of wood glue to clean wood-to-wood or particleboard-to-wood contact surfaces.
- Press the joint together and check the box with a right-angle square or diagonal measurements.
- Clamp across the drawer so pressure pulls the box square, not sideways.
- Leave the drawer clamped for the adhesive label’s full cure time before loading it.
Clamp the drawer square
Two clamps are often better than one because they spread pressure evenly across a thin drawer box. Put scrap wood or pads under the clamp jaws so the finish does not dent. If the drawer is slightly racked, clamp the longer diagonal first until both diagonal measurements match.
How do you repair stripped holes or crushed corners?
If a screw hole no longer grips or a corner has crumbled, glue alone is not enough. Rebuild the damaged material first, then add the fastener back with a pilot hole. For crushed particleboard, epoxy is often the better choice because it tends to hold shape better than soft filler.
Rebuild damaged particleboard
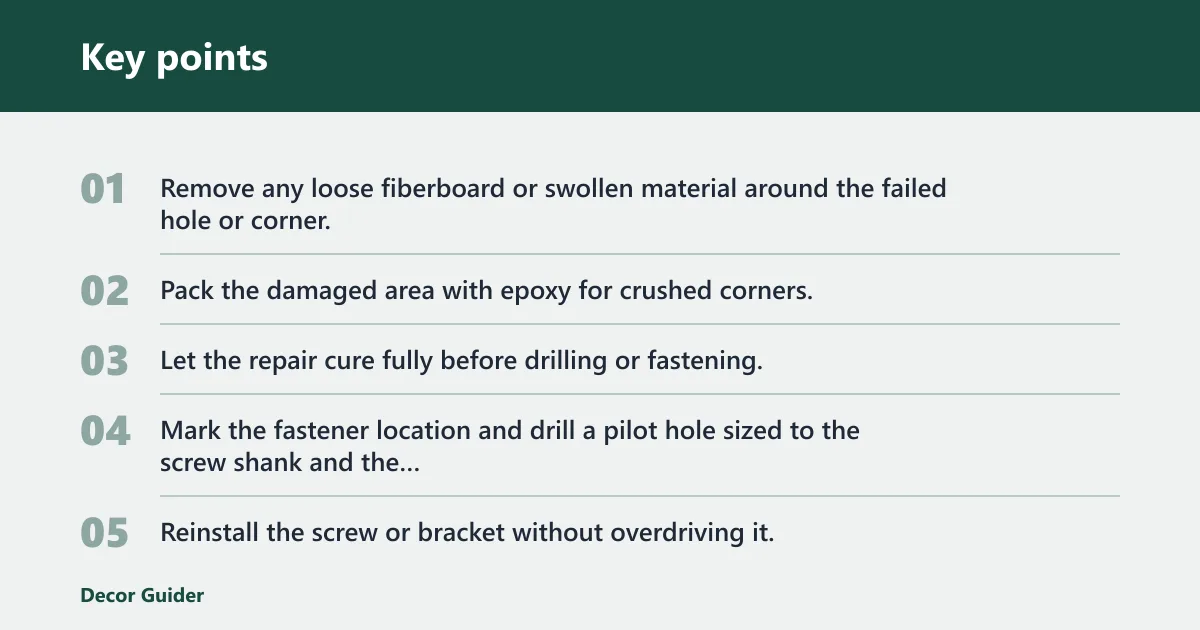
- Remove any loose fiberboard or swollen material around the failed hole or corner.
- Pack the damaged area with epoxy for crushed corners, or use wood filler for smaller voids.
- Let the repair cure fully before drilling or fastening.
- Mark the fastener location and drill a pilot hole sized to the screw shank and the material density.
- Reinstall the screw or bracket without overdriving it.
- Recheck square, then test the drawer in the cabinet.
Add reinforcement when the original fastener no longer holds
Replacement screws or small brackets can stabilize a loose back panel, but they must match the drawer material thickness. A screw that is too long can punch through thin IKEA panels. A screw that is too thick can split the edge. If the drawer has already failed twice in the same spot, replacement is usually the cleaner fix.
Picture a shallow 14-inch drawer with a rear corner that has turned soft after a screw pulled out twice. Fill the corner, wait for cure, then drill a pilot hole so the new fastener has solid material to bite into. If the repaired corner crumbles again during reassembly, the drawer box has moved past a practical repair.
Common mistakes
Using the wrong repair is what usually causes a second failure. Keep the fix matched to the damage, and do not skip the square check.
- Using glue alone on stripped holes or a crushed corner
- Skipping the square check before tightening clamps or screws
- Driving screws without a pilot hole in thin particleboard
- Ignoring drawer slide alignment after the repair
- Reusing a cracked back panel when the split reaches a load-bearing edge
A common first-timer mistake is to clamp a loose drawer back tightly, then discover the drawer still rubs because the slides were already out of line. Test the drawer in the cabinet after the repair, then check whether the slides need adjustment before blaming the box again.
Frequently asked questions
How do I fix an IKEA dresser drawer back panel that fell out?
Remove the drawer, clean the joint, and decide whether the failure is a loose glue line or damaged material. If the surfaces are intact, wood glue and clamps are enough. If the hole is stripped or the corner is crushed, rebuild the area first, then re-fastening with a pilot hole.
Can I glue the back panel back into an IKEA drawer?
Yes, but only when the mating surfaces are clean and still fit tightly. Glue works best on intact particleboard or fiberboard joints with enough surface contact to hold while it cures. If the groove is crushed or the screw hole is blown out, add reinforcement or replace the panel.
Do I need screws or brackets to reattach the drawer back?
Use screws or brackets when the original fastener holes no longer hold or when the drawer design depends on mechanical fastening as well as glue. Match the fastener length to the drawer thickness, and drill pilot holes so the edge does not split. Clamping alone will not fix stripped material.
What glue works best for IKEA particleboard drawers?
Wood glue is the right choice for clean particleboard-to-wood or wood-to-wood joints. It needs clamp pressure and full cure time. For crushed or crumbling particleboard, use epoxy or filler first, because ordinary wood glue will not rebuild missing material or restore screw-holding strength.
Why did the IKEA drawer back panel come loose in the first place?
Common causes include loose glue, stripped fastener holes, crushed particleboard, and slide misalignment that keeps racking the box. Heavy loads and repeated binding can open the rear joint again. Check the drawer slides and cabinet rails so you do not repair a symptom instead of the cause.
How long should I clamp the drawer back panel before using it?
Clamp it for the adhesive label’s full cure time, not just until it feels tight. Many wood glues need several hours before handling and longer before loading. If the drawer is square and the joint is dry to the touch, wait until the stated cure period ends before reinstalling weight.
Should I replace the whole drawer if the back panel is broken?
Replace the drawer when the back panel is cracked through a load-bearing edge, the corners keep breaking out, or a proper repair has already failed more than once. A replacement drawer or panel is safer than stacking patches on brittle particleboard. Use the model’s hardware pattern so the slides still align.
Products related to this article
Sponsored / affiliate links. As an Amazon Associate I earn from qualifying purchases. I may earn additional commission from eligible campaigns.