How to Fix a Drawer That Is Too Tight After Painting
If a painted drawer is tight, mark the high spots with chalk or pencil, then remove paint only at the bind points with about 220-grit sandpaper or a scraper; if it still sticks, adjust the slides or runners before sanding more. Ignore the cause, and you can strip the finish, worsen the fit, or make the drawer bind harder after the paint cures. This guide shows how to tell whether paint, swelling, or hardware is the problem, then fix it with the least material removed.
Why the drawer tightened after paint


Fresh paint changes the fit in small but important ways. Build-up usually shows on edges, corners, and the front lip, where film thickness stacks up from multiple coats and slower drying in sheltered spots. Finish manufacturers commonly note that paint can feel dry long before it has fully cured; full cure can take days to weeks depending on product, temperature, humidity, and film thickness. If the drawer was already close to the opening size, even a thin layer can create drag.
Humidity can complicate the diagnosis. Wood can swell after finishing, especially along end grain, at the drawer bottom groove, and at the front where movement is already tight. Extension services such as Penn State Extension and the University of Minnesota Extension both note that wood moves with seasonal moisture changes, which is why a drawer that seemed fine in a dry shop can tighten in a damp room after paint. That means the bind may come from both the paint film and the wood itself, which is why sanding at random is the wrong first move.
Paint film thickness versus wood movement
Paint buildup usually shows up as shiny rub marks on the exact contact point. Swelling tends to affect a broader area and may feel tighter even when the finish looks smooth. Because cured finish adds measurable thickness, even film build in the low thousandths can matter when a drawer already has only a small running clearance. If the drawer binds only after painting, but the same opening was fine before, treat the paint film as the first suspect and the wood movement as the second.
Front, side, or bottom bind
If the drawer sticks at the face frame, the front is probably rubbing before the sides do. If it drags only halfway in or out, the side edges or runners are more likely. If it feels fine until the last inch, check the bottom panel in its groove or corners first.
Drawer tightness troubleshooting table
| Symptom | Likely cause | Test | Fix | Risk level | How much to sand first |
|---|---|---|---|---|---|
| Both sides drag after painting | Paint buildup on drawer side edges | Rub chalk or pencil on the side edge, then slide the drawer and look for transfer | Spot sand the marked edge with 220-grit, then ease the corner slightly | Low | Start with 2 to 3 light passes, then retest |
| Drawer front scrapes the face frame | Paint buildup on the front edge or slight front-out alignment | Close the drawer slowly and watch for the first point of contact | Remove only the rubbed paint on the front edge, then check square and reveal | Medium | Start with a narrow 1/2-inch band, not the whole face |
| Drawer feels tighter in humid weather | Swollen wood after finishing | Remove the drawer and check whether the bind is still present off the opening | Let the parts dry, then remove only the high spots that still rub | Medium | Try the lightest spot sanding first; do not chase the full edge |
| Drawer binds on one side only | Misaligned slides or one runner sitting proud | Measure the gap on both sides and check screw tightness | Realign the hardware before sanding any wood | High | Sand only after the hardware is square and level |
| Drawer catches near the bottom | Loose, swollen, or sagging drawer bottom | Press the bottom panel and check whether it moves in the groove | Reset, secure, or replace the bottom panel if it bows or rubs | Medium | Do not sand the sides first; inspect the bottom edge first |
| Drawer gets harder after each close | Too much finish buildup plus friction at the runners | Check for shiny wear marks on wood-to-wood contact points | Remove a minimal amount of finish, then use dry lubricant on the runner | Low to medium | Start with a few test strokes only |
How do you remove the drawer safely?
Remove the drawer only after you know the likely rub point. Open it fully, support the box, and look for a latch or release lever if it uses newer track hardware. If the drawer is caught on debris or a loose screw, clear that first; forcing the pull can chip the finish or bend a slide.
For wood runners, lift the front slightly and pull straight out if the design allows it. For ball-bearing or side-mount slides, look for the release lever and follow the hardware’s intended removal motion. Manufacturers such as Accuride and Blum emphasize removing drawers according to the slide design rather than prying the box out, because forced removal can mis-seat the members. Keep the parts oriented so you can reinstall them in the same position.
Freeing a stuck dresser drawer without damage
- Empty the drawer so weight does not twist the box.
- Pull it partway open and look for debris, swollen paint, or a proud screw head.
- Check both sides for release levers if the drawer rides on metal slides.
- Lift, tilt, or disengage the drawer as the hardware allows.
- Set the drawer on a flat surface and mark the rub zones before sanding.
Where is it rubbing?
Use the drawer’s wear marks to locate the bind before you remove material. Paint often fails at the side edges, front lip, or bottom corners, while alignment problems usually show up as one-sided drag. If the rub point is not obvious, chalk or pencil gives you a visible transfer line after one careful slide.
Drawer side edges and high spots after coating
Side edges are the most common rub point after painting. The film piles up there, especially where the brush or roller turns the corner. Look for glossy streaks, tiny chips, or a dull stripe that matches the opening height. A common mistake is trimming the entire drawer front when only a small ridge of paint along the top lip is causing it to stick. In repair work, the pattern is usually obvious: one narrow shiny line on a painted edge, not broad wear across the whole side.
Drawer front against the face frame
If the drawer face scrapes the dresser opening, the contact point is usually the perimeter of the front rather than the whole panel. Check the top corners first, then the lower corners, because those edges often carry extra paint and hit before the center does. Keep the reveal even when you correct it. If you need to find the exact rub line, the faster route is to diagnose the front edge before sanding the side edges; that prevents the common overcorrection of thinning an entire painted face.
Drawer bottom in the groove or at the corners
A sagging or swollen bottom can bind in the groove, especially if the panel was finished and then reinstalled before it fully stabilized. If the bottom is loose, it may rattle and then catch under load. If it is swollen, it may rub at the corners or bow upward into the drawer box.
Say your drawer opens smoothly for 4 inches, then stops with a soft scrape at the front left corner. That pattern usually points to a front corner rub or a slide that sits slightly out of square, not to a broad side problem. Check that corner before you sand the full edge.
How should you correct the fit?
Correct the tight spot with the smallest possible change. Start with a clear step sequence: diagnose the rub point, mark it, remove the drawer, sand or scrape a little, retest, then lubricate or realign hardware only after the wood fit is right. Start with spot sanding using about 220-grit or a similar fine grit, then retest. If the rub is narrow and raised, a scraper can remove only the paint film. If the edge is proud, shave it lightly and ease the corner so the drawer does not chew through the finish later.
Spot sanding with fine grit
Use short, controlled strokes on the marked area only. Keep the sanding block flat on broad surfaces and switch to finger support only on narrow edges where control matters more than speed. Stop as soon as the shiny rub mark disappears; you are trying to restore clearance, not reshape the drawer. In practice, that usually means only a few passes at a time, then a full retest rather than sanding by feel.
When to scrape instead of sand
Scraping works best when the paint film is the problem and the wood beneath is still fair. Use it on a narrow high spot, a thick brush ridge, or a corner drip. Scrape lightly and keep the blade moving. Aggressive scraping can chip the finish and expose raw wood, which creates a patch that may need a touch-up later.
Shaving an edge without breaking the finish
If the drawer side itself is too proud, shave only the outer edge and then soften the corner. The goal is a subtle taper, not a visible bevel. After that, seal or touch up the exposed line if needed so moisture does not get into bare wood.
Suppose a dresser drawer is 21 5/8 inches wide inside, but the painted sides now rub the opening because the finish is thicker at the edges. In that case, removing a tiny amount from the high edge usually fixes the fit better than attacking the center panel. The same logic applies to the front lip and the bottom corners.
What should you do with runners and slides?
Do not treat wood runners and metal slides the same way. Wood runners can often be smoothed and lightly lubricated because the contact is wood-to-wood. Metal hardware needs alignment checks first, especially with side-mount, undermount, and ball-bearing systems. If the slide is loose or out of level, sanding the drawer will not solve the bind.
Wood runners versus metal slides
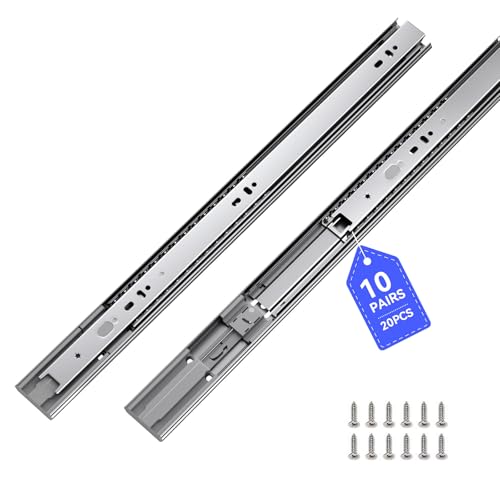
Wood runners wear at the front and center where the drawer carries the most load. Check for polished tracks, grooves, or a raised splinter that catches the drawer side. Metal slides should move evenly and sit parallel. If one slide is higher, lower, or twisted, the drawer can bind even when the box itself is square.
Side-mount, undermount, and ball-bearing checks
Side-mount slides usually show side-to-side alignment problems first. Undermount slides can stick if the drawer bottom or cleats are out of position. Ball-bearing slides often use a release lever and need the drawer box seated evenly on both sides. Tighten loose screws before you file or sand anything else. Manufacturer installation instructions typically call for parallel mounting and consistent side clearances, because a small height mismatch can create binding at the front or middle of the travel.
Drawer alignment checks
Check that the opening is square, the slides are level, and the gap is even from front to back. A dresser can look fine from the front and still rack enough to pinch a newly painted drawer. If one side has a smaller reveal, correct the hardware before you remove more wood. For typical clearances, wood-runner drawers often work with a tighter fit than metal slide systems: side runners may run with roughly 1/16 inch per side when the casework is true, while side-mount slides commonly need around 1/2 inch per side, and many undermount systems require roughly 1/2 inch per side and a precise drawer bottom/height match. Always verify the exact spec for the hardware on hand, because a finished film can reduce those clearances by enough to matter when the opening was already close.
| Slide type | Common bind point | Best check | Preferred fix |
|---|---|---|---|
| Wood runner | Front edge and worn track | Look for polished or grooved wear | Clean, smooth, then apply dry lubricant |
| Side-mount slide | Uneven mounting height | Compare screw positions and side gaps | Retighten and realign the pair |
| Undermount slide | Drawer bottom or bracket interference | Check underside clearance and track seating | Reset hardware and inspect the bottom panel |
| Ball-bearing slide | Release lever or mis-seated member | Confirm both sides lock in the same position | Disengage, reseat, and reinstall evenly |
How do you reduce friction without overcorrecting?
Use lubrication after you have confirmed that the fit is close and the hardware is square. Wax or paraffin works well on wood-to-wood contact, especially on runners and drawer sides. Choose a dry lubricant when you want less drag without wet residue. Silicone-free products are often the safer choice if you may need future finish repairs. On painted or refinished drawers, dry lubricants are the better default because they are less likely to interfere with touch-up, but they still should not be used as a substitute for alignment.
Where lubrication helps
Lubrication helps on wood runners, grooved contact points, and other dry rubbing zones where the drawer is already correctly sized. It can also reduce seasonal drag after you have corrected the paint buildup. Apply a light coat only, then move the drawer several times to spread it evenly.
Where lubrication does not help
Lubricant will not fix a front edge that is physically too thick or a slide that sits out of square. If the drawer binds hard enough to require force, the answer is not more wax. Correct the rub point first, then use lubrication as a finishing step.
Frequently asked questions
How do I fix a drawer that is too tight after painting?
Mark the rub points, then remove only the paint or high wood at those spots with 220-grit sandpaper or a scraper. Retest after each small change. If the drawer still binds, check the slides, runners, and bottom panel before taking off more material.
Why does my drawer stick after I painted it?
Paint often builds up on edges and corners, which reduces clearance. The drawer can also stick because the wood swelled after finishing or because the hardware shifted out of square. Check the front, side edges, and bottom separately so you do not sand the wrong place. Finish manufacturers also warn that a coating can remain soft enough to drag for a while after it feels dry to the touch, so a newly painted drawer may tighten before it fully cures.
How do I make a painted drawer slide easier?
First, correct the exact rub point. Then smooth the contact area with fine-grit sandpaper and apply a dry lubricant such as wax or paraffin on wood-to-wood contact. If the drawer uses metal slides, tighten and align the hardware before you lubricate anything.
Should I sand or scrape paint off a tight drawer?
Use sanding for broad, gentle correction and scraping for a narrow ridge or drip. Fine-grit sanding is safer on a painted edge because it removes material gradually. Scraping works faster, but it can chip the finish if you press too hard or catch the blade angle wrong.
What lubricant is safe to use on painted drawer sides?
A dry lubricant such as wax or paraffin is usually the better fit for painted wood-to-wood contact. It lowers friction without leaving a wet film that can attract dust. Avoid heavy application, and be cautious with silicone-heavy products if future touch-up or repainting is likely.
How much clearance should a drawer have after painting?
There is no single universal gap, but the drawer should move freely without side rubbing, front scraping, or bottom drag. If paint has reduced the original fit, restore only enough clearance to stop the bind. The goal is an even reveal and smooth travel, not a loose drawer. As a practical rule, wood-runner drawers can work with a much tighter side clearance than side-mount or undermount systems, but any finish build that cuts into the original gap by a few thousandths can be enough to create drag if the fit was already close.
How do I tell if the drawer is too tight because of paint or swelling?
Paint trouble usually shows a narrow shiny rub line on the edge or front lip. Swelling affects a broader section and may worsen with humidity. Remove the drawer and check whether the bind still exists off the opening; if it does, the problem may be the drawer itself rather than the case. Hardware and wood movement can also combine, so one symptom does not always mean one cause.
How do I fix a dresser drawer that sticks on one side after painting?
Check the tighter side first for paint buildup, a proud runner, or a slide mounted slightly high. If the drawer face is even but the side still drags, the hardware may be out of line. Adjust the slide before sanding the drawer side, then retest the reveal. This is the place to use a left-to-right diagnosis: mark the binding edge, remove the drawer, correct the high point, reinstall, and only then decide whether any lubrication is needed.
How do I fix bottom of a drawer?
If the bottom is loose, sagging, or swollen, inspect the groove and corners before you touch the sides. A damaged bottom can be reset, secured, or replaced with a panel such as 1/8-inch plywood if the existing one no longer fits. Make sure the replacement sits flat and does not rub the groove.
How do I fix a stuck drawer?
Start with diagnosis, not force. Remove debris, check screws, and identify the rub point with chalk or pencil. Then correct the smallest binding area with fine sanding, shaving, or hardware adjustment. If the drawer is still stuck, inspect the bottom panel and slide system next.
How do I fix a drawer?
For a painted drawer, “fixing” usually means restoring a small amount of clearance at the exact bind point. That may mean sanding a side edge, trimming a front rub, tightening hardware, or smoothing the runner. Test after each adjustment so you do not turn a tight fit into a sloppy one.
How to fix a dresser drawer
Take the drawer out, inspect the opening, and decide whether the problem is the drawer box, the bottom, or the hardware. On a painted dresser, the finish itself is often part of the problem, but not always the only one. Correct paint buildup first, then align the slides and check for sagging.
Products related to this article
Sponsored / affiliate links. As an Amazon Associate I earn from qualifying purchases. I may earn additional commission from eligible campaigns.