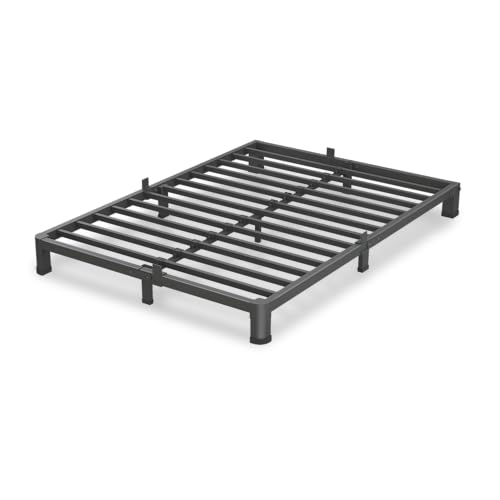
Bed and Bathroom Fixes: Bed Frames, Mattresses, Toilets, Tubs and Vanities
Measure first: check bed support spacing, mattress size, toilet rough-in, tub opening, and vanity width. Replace the whole fixture if the frame, bowl, shell, or cabinet is cracked, or if the opening is out of spec. A bad guess can leave you with parts that do not fit, leaks or sagging, and duplicate costs for delivery, labor, and disposal. This guide covers common failure signs, the measurements that matter, and the line between quick repair, part replacement, and full replacement.
The repair sequence is the same in both rooms. Start with the symptom, verify the support or fit behind it, then pick the least disruptive fix that matches the actual failure. A squeaky bed frame, a running toilet, a vanity with swollen edges, and a tub that flexes underfoot each point to a specific part or measurement you should check before replacing anything.
This article was revised as a measurement-first repair guide rather than a catalog summary. The method is simple: confirm the finished opening, check support and anchoring, inspect wear parts, then compare what you found with manufacturer instructions, accessibility guidance, and install standards. For related planning details, see our guides to metal bed frames, mattress support and sizing, toilet selection, vanity installation, and bathtub buying.
What matters in practice is compatibility, not marketing names. Example: a queen mattress that measures correctly can still fail on a base with excessive slat gaps, a bowed center rail, or one unloaded center leg. A new toilet can match the bowl style you want and still miss the wall because the rough-in was measured from the baseboard instead of the finished wall. A floating vanity can look structurally fine until wet drywall or missing blocking lets the fasteners creep under load. These are measurement and support failures, not shopping mistakes.
Use this compatibility checklist before you order: verify finished width, depth, and height; measure both diagonals on rectangular frames or openings to catch racking; locate studs, blocking, supply lines, shutoffs, drains, and vent obstructions; check whether support members are actually bearing weight; and confirm the new part does not rely on improvised shims, random boards, or drywall anchors where the installation instructions call for structural support.
Start with diagnosis, not replacement


Sort problems by risk first
Prioritize repairs in this order: water escape, structural support failure, safety hazards, then nuisance symptoms. A toilet that runs can waste water, but a toilet that leaks at the base can damage flooring. A bed that creaks is annoying. A bed with a failed center rail can bend slats, let the mattress fold into the opening, and damage the frame itself.
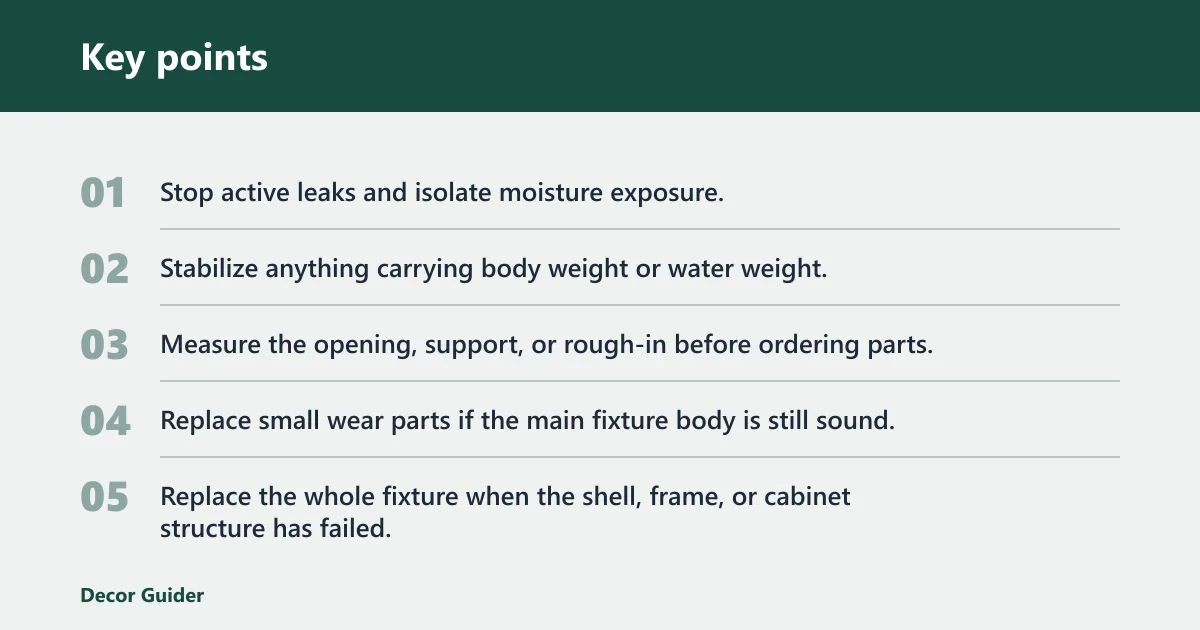
Use this quick triage order:
- Stop active leaks and isolate moisture exposure.
- Stabilize anything carrying body weight or water weight.
- Measure the opening, support, or rough-in before ordering parts.
- Replace small wear parts if the main fixture body is still sound.
- Replace the whole fixture when the shell, frame, or cabinet structure has failed.
The five checks to make before ordering any bed or bathroom part
First, measure the opening or footprint. For beds, that means mattress length and width against the inside frame dimension. For toilets, measure rough-in from the finished wall to the center of the closet bolts; a 12-inch rough-in is the standard layout in most replacement situations. For vanities and tubs, measure width, depth, and door or trim clearance.
Second, inspect support. Check slat spacing, slat condition, center rails, center legs, vanity wall backing, floor flatness, and tub base support. Foam-mattress support rules are not universal, so compare your gaps with the mattress maker’s instruction; for example, Purple says slats should be no more than 3 inches apart, while Saatva says slats should be no more than 4 inches apart. A new part installed on failed support usually fails again.
Third, check attachment points. Headboard and footboard hardware, rail brackets, toilet supply location, drain location, vanity plumbing stub-outs, and tub drain position all need to match the new part. Use a tape measure, a straightedge, a torpedo level, and a flashlight; those four tools catch most fit failures before delivery day.
Fourth, confirm moisture exposure. Swollen particleboard, stained flooring edges, soft drywall, failed caulk, and mold odor change the repair plan. Fix ventilation and splash control before reinstalling finish materials. If the substrate is soft enough that screws no longer bite or the cabinet core has expanded at the seams, replacement is usually more durable than patching.
Fifth, decide whether the wear part or the main body has failed. Replacing a flapper makes sense on a sound toilet. Replacing slats makes sense on a square frame with sound rails. It does not make sense on cracked porcelain, a split side rail, or a vanity box with blown seams.
When a repair is likely to hold and when replacement is the cheaper path
Repair is the smart first move when the problem is limited to hardware, seals, slats, a flapper, a fill valve, a loose bracket, or a missing support leg. Replacement is usually cheaper when the main structure is cracked, permanently warped, water-damaged through the core, or dimensionally wrong for the room or mattress.
Suppose a queen bed dips only at the middle, the side rails are straight, and one center leg is missing. Replacing the center support hardware is a focused fix. If the side rails are bowed outward and the bolt holes are wallowed out, the frame is already past a durable repair. The same logic applies in bathrooms: a leaking fill valve is repairable, but a bowl crack or a vanity side panel that has swollen apart at the fasteners usually is not.
Match the reinforcement to the symptom
Reinforcing a bed frame works best when you fix the specific problem, not the whole frame at random. A centered support beam helps a sagging middle, joint tightening and corner bracing reduce wobble, and stops or grippers keep a mattress from sliding out of place. The right choice also depends on whether the frame is wood or metal, plus how much weight it needs to carry. This bed frame reinforcement guide explains which parts to add, what to buy, and what mistakes can turn a small issue into cracked slats or loose joints.
Fixture triage table
| Symptom | Most likely cause | Exact measurement or spec to check | Fastest fix | When replacement is smarter |
|---|---|---|---|---|
| Bed sags in the middle | Failed center rail, missing center leg, bowed slats, or unsupported span | Count center legs, inspect rail straightness, measure every slat gap, and compare with the mattress maker’s maximum allowed gap | Tighten rail hardware; replace failed center support parts or bowed slats | Replace the frame if side rails are bent, joints are enlarged, or the frame remains out of square after hardware work |
| Bed wobbles or clicks | Loose fasteners, worn brackets, twisted rails, or mismatched headboard hardware | Check bolt pattern, bracket fit, rail-to-post movement, and whether both diagonals of the frame match | Retighten, re-square, and replace worn brackets or fasteners | Replace if the rails are cracked, the posts split, or the joint metal is deformed |
| Mattress slides off frame | Undersized frame, slick cover, smooth slats, weak side retention, or missing retainer bar | Measure mattress and inside frame size; inspect side-rail height and presence of a retainer | Add non-slip matting and the correct retainer; correct the size mismatch | Replace the frame if the inside opening is wrong or rails cannot retain the mattress safely |
| Foam mattress feels uneven | Slat gaps too wide, slats bowed, or platform panel unsupported | Measure each gap and inspect slat thickness, width, and holder condition | Replace damaged slats or add the correct support deck approved by the mattress maker | Replace if the base cannot meet the mattress support requirement without improvised layers |
| Toilet keeps running | Flapper leak, chain misadjustment, fill valve fault, or water level set too high | Check chain slack, flapper seat condition, and tank water line setting | Adjust chain, replace flapper, or replace fill valve | Replace the toilet if parts are obsolete, the bowl is cracked, or poor flush performance continues after valve repairs |
| New toilet will not fit | Wrong rough-in or tank-to-wall clearance issue | Measure rough-in from finished wall to closet bolt center; standard recommendation is 12-inch rough-in | Order the correct rough-in model before install day | Replace the order, not the flange, unless a larger remodel is already opening the floor |
| Vanity edges swell or drawers stick | Moisture intrusion, unsealed edges, splash exposure, or cabinet material failure | Inspect sink-top seam, exposed particleboard, toe-kick swelling, and wall moisture | Dry the area, recaulk splash points, and correct the leak source | Replace when cabinet core is swollen, delaminated, or fasteners no longer hold |
| Floating vanity pulls from wall | Weak anchoring, poor wall backing, or overload | Confirm blocking, stud location, bracket type, and actual drawer load | Unload drawers and re-anchor into proper backing | Replace with a freestanding unit if the wall cannot support a floating install |
| Tub flexes or leaks at edges | Base support failure, movement at drain shoe, or failed caulk from shell movement | Check level, floor support, drain alignment, and whether movement reopens the caulk joint | Re-support the base if the shell is sound; reset drain and recaulk | Replace if the shell is cracked, finish is failing widely, or movement cannot be corrected |
How do you fix a bed frame that sags or shifts?

Fix the support path before blaming the mattress. Check whether the center rail is straight, whether all center legs touch the floor, whether slats are intact and seated, and whether the frame is square. Repair usually holds when the rails and posts are sound. Replacement is better when the frame is bent, split, or undersized.
Middle sag: center rail failure, missing legs, and span length problems
Most middle sag starts where the load crosses the widest unsupported span. On larger beds, the center rail and its legs carry much of that load. If a center leg is missing, adjusted too short, or sitting on a crushed cap or slick pad, the rail can bow and the slats can drop with it.
Inspect from floor level, not from above. A rail that looks straight from standing height can show a clear dip when you sight along its length. Also check whether each center leg is actually loaded. If one hovers even slightly above the floor, the other supports do the work and the rail twists under use. A straightedge, a feeler gap at each foot, and matched diagonal measurements give you a better answer than tightening bolts at random.
Wobble and noise: loose fasteners, worn brackets, and twisted side rails
A bed that shifts side to side usually has movement at a joint. Tighten the rail-to-post bolts first, then re-square the frame by matching the two diagonal measurements. If the diagonals differ, the frame is racked and will keep loosening under motion.
Headboard and footboard attachment problems are often missed. Check bolt pattern, bracket fit, and whether the rail connection points match the headboard hardware. A frame can seem weak when the real issue is incomplete engagement between the hook plate, post slot, or bolt shoulder. If tightening stops the noise only for a few nights, inspect for elongated holes, deformed brackets, or wood crushing around the fastener.
Sliding on hard floors: floor-grip fixes that actually hold
Sliding usually starts at the feet, not the mattress. Hard plastic glides on smooth floors cut friction enough that normal movement walks the frame sideways. Replace worn leg caps, add high-friction pads sized for each foot, and make sure every leg bears weight equally.
A common failure case is a metal frame on smooth tile with one rear foot slightly off the floor. The occupied corners shuffle under load, and the frame “moves” even though the rails are tight. Leveling that foot, replacing crushed caps, and using pads that fit the foot diameter is more reliable than wedging cardboard or stacking generic felt protectors.
When the frame itself is undersized or overloaded
Weight capacity is a functional spec, not a label to ignore. Capacity depends on span length, number of legs, center support layout, slat count, joint design, and mattress type. A dense foam mattress can load a frame differently than a lighter innerspring because the support is more continuous across the base.
Use a first-principles check: if the side rails bow outward, the center rail already shows permanent deflection, or the frame will not stay square after hardware is tightened, stop buying accessory parts and treat the frame as the failed component. If you are comparing replacements, our guide to metal bed frames explains how rail depth, center support, and deck type affect real-world stability.
How to fix a mattress-to-headboard gap
A gap behind the mattress usually comes down to one of three things: the mattress has drifted, the support height is mismatched, or the frame leaves extra space by design. The supporting guide breaks down how to tell which cause you’re dealing with and which fix fits best, from recentring the mattress and adding a stop to using a proper gap filler when the frame geometry is the real problem. That matters because a persistent gap can let pillows slip through, reduce stable edge support, and make the bed look unfinished. For a practical walkthrough, see mattress headboard gap fix.
What to do when a freestanding tub starts to shift
If a freestanding tub rocks, the fix depends on whether the movement comes from the floor, the tub feet, or the plumbing. The supporting guide on freestanding tub rocking explains how to test the tub empty, spot floor-level issues, and tell the difference between shell flex and a drain or supply line pulling the tub out of position.
That matters because a little movement can lead to cracked caulk, stressed drain fittings, and loose connections over time. The article also helps you decide whether you can level or stabilize the tub in place, or whether the problem is big enough to call a plumber or contractor.
What to do when tightening bolts doesn’t stop the wobble
If the toilet still rocks after you check and evenly tighten the closet bolts, the fix is usually not a shim. The supporting guide explains how to tell whether the problem is a loose bolt, a bad wax seal, a flange issue, or a soft floor under the base. That matters because a toilet that keeps moving can damage the porcelain and break the seal, which can lead to leaks at the floor.
For a step-by-step look at the no-shim options, see toilet rocking fixes. The article shows which repair matches the cause so you can solve the wobble without masking a deeper problem.
Fix a Loose Towel Bar Before It Damages the Wall
A loose towel bar usually starts with a simple hardware issue, but the fix depends on what has failed: the set screw, the mounting bracket, the wall anchor, or the drywall itself. The towel bar repair guide walks through that diagnosis in order so you can stop the wobble with the smallest repair that will actually last.
That matters because guessing often makes the hole bigger, strips the screws, and turns a quick tightening job into wall repair. The article shows what to check first, how to remove the bar cleanly, and when it makes more sense to rebuild the anchor point or replace the rack entirely.
Repair Loose Bathroom Tiles Before Water Gets In
A loose bathroom tile is usually a signal to match the repair to the failure, not just glue it down. The supporting guide explains how to tell whether cracked grout, a tile that lifts intact, or a damaged substrate is the real problem, then shows the right fix for each case. That matters because the wrong repair can leave water reaching the backer board or subfloor and make the same tile fail again.
For a practical walkthrough of inspection, removal, reset, regrout, and replacement steps, see loose bathroom tile repair.
Tighten Hidden Seat Hardware
A loose toilet seat with concealed hardware usually needs access through the hinge caps, then a careful check of whether the fastener is a concealed nut, a top-fix anchor, or a quick-release latch. The right fix is to tighten in small steps so you stop the wobble without stripping threads or stressing the porcelain. If the hardware still spins, cracks, or won’t hold tension, replacement is the safer next move.
The hidden bolt fix matters because the wrong turn can chip the bowl, damage the hinge, and make the looseness come back fast. This article shows how to identify the hardware, tighten it from above when needed, and decide when the seat parts are beyond repair.
Identify the hidden fastener before you force it
If a toilet seat won’t lift off after you loosen the visible hardware, the next step is to identify whether the hinge uses top-fix caps, underside nuts, or a rear lock mechanism. That distinction matters because pulling on the wrong piece can crack porcelain, strip the screw head, or break the hinge.
The hidden screw removal guide breaks down how to spot each style, open the cover, and remove the seat safely. It also helps you avoid common mistakes and check what to look for after the seat is off.
Replace Worn Vanity Hinge Hardware Cleanly
If a vanity door sags, rubs the frame, or won’t stay aligned, the fix is usually replacing the hinge with a matching part rather than forcing the door back into place. The key is compatibility: the hinge type, overlay, hole pattern, and door weight all need to line up so the new hardware fits and the cabinet closes smoothly. The supporting guide on vanity cabinet hinges explains how to identify the old hinge, measure the important dimensions, decide whether to reuse the existing holes, and install the replacement without stripping the wood.
Set the Mirror Height Around the Sink
The best mirror height comes down to clearances, not guesswork. This article explains the practical target for most bathrooms: keep the bottom edge of the mirror roughly 5 to 10 inches above the faucet and about 4 to 6 inches above the backsplash, then check the top edge against any vanity light or sconces. It also shows how vanity height, mirror size, and double-sink layouts change the placement, so the mirror looks balanced and still works for daily use.
If you want the exact measurement process, the bathroom mirror height guide breaks down where to mark, what to measure first, and how to hang it level and secure.
Remove a Seized Toilet Seat Safely
If the seat won’t budge, the right fix depends on the hardware, not brute force. The supporting guide on stuck toilet seat removal shows how to identify plastic caps, metal nuts, spinning bolts, stripped heads, and hidden quick-release mounts so you can choose the least risky method first.
That matters because the wrong approach can crack porcelain, chip the bowl, or turn a simple seat swap into a toilet replacement. Use this section when tightening has stopped working and you need a safe path to remove the seat without damaging the fixture.
Add a canopy safely to an existing bed frame
If you want the look of a canopy without replacing your bed, the key is matching the attachment method to the frame. The supporting canopy attachment guide explains when to use built-in posts, clamp-on brackets, or a ceiling mount, and how to tell whether your frame can handle the load. That matters because the wrong hardware can make the canopy wobble, bend slats, or leave unnecessary holes in the room.
Use it to choose a renter-safe option, gather the right hardware, and install the canopy with fewer guesswork mistakes.
Take Apart a Canopy Bed Without Damaging the Frame
If you need to move, store, or repair a canopy bed, the safest approach is to disassemble it in the reverse order of assembly: bedding and mattress first, then the canopy top, then the posts, rails, and support parts. That sequence helps prevent the frame from twisting, keeps fasteners organized, and reduces the chance of stripping threads or cracking wood.
The supporting guide on canopy bed disassembly covers the removal order, how to check for hidden connectors, and what to do when bolts, posts, or the top frame are stuck. It matters because a careful teardown makes reassembly easier and helps avoid costly damage to the bed.
Pick a no-drill canopy method that matches your ceiling
If you want the soft look of a bed canopy without putting holes in the ceiling, the key is matching the hardware to your room. The supporting guide explains when adhesive hooks are suitable, when a tension rod is the safer choice, and when a freestanding frame is the better answer for heavier fabric or rental restrictions. It also covers the risks that matter most: peeling paint, dropped fabric, and deposit damage. Use this no-drill canopy guide to choose the method that fits your ceiling type, fabric weight, and lease rules before you install anything.
How to Size a Canopy Bed for Your Ceiling
A canopy bed should leave enough space above the frame to avoid a cramped look and to keep any fixture or drapery from crowding the ceiling. The supporting guide explains a simple height formula: measure ceiling height, subtract light drop, then allow about 4–6 inches of clearance plus any extra room needed for finials or curtains. That makes it easier to tell whether a tall four-poster will feel balanced or overwhelming in your room. If you’re comparing options, this canopy bed height guide shows how to check fit before you buy.
Keep bed skirts from shifting
If a bed skirt keeps creeping out of place, the fix usually comes down to matching the attachment method to the bed setup, not buying a new skirt. The supporting guide explains when clip-on grippers work best, when Velcro is a better choice for platform beds, and why the right number of anchor points matters on larger beds. It also helps you identify whether the real problem is a poor fit, the wrong fabric, or a frame that lets the skirt slide.
That matters because a slipping skirt exposes under-bed storage, looks untidy, and often points to a mismatch you can correct quickly. See the full bed skirt guide for the specific fixes and troubleshooting steps.
When the frame needs reassembly
If a metal bed frame is loose, uneven, or missing hardware, the fix may be to rebuild it from the ground up instead of forcing mismatched parts together. The metal bed frame assembly guide explains how to identify the frame type, sort the rails, legs, and support pieces, and line up every tab, hole, and bracket before tightening anything. That matters because a rushed setup can bend the frame, strip fasteners, or leave the bed unstable. Use it when the frame is new, recently moved, or coming apart at the joints.
When the bed frame needs to come apart
If you need to move, store, or replace parts of a bed, the safest approach is to disassemble it in the order the joints were put together. The supporting guide explains how to spot the connection type first, whether your frame uses hooks, bolts, cam locks, or slats, so you can choose the right method instead of forcing hardware loose. See bed frame teardown for a clear breakdown of the steps and the mistakes that can damage threads, brackets, or wood.
Choose a Frame Built for the Load
If your mattress is heavier than average, the frame needs more than basic support: it should be rated for the combined weight of the mattress and sleepers, with a rigid center beam, middle legs, and slats close enough together to prevent flex. The supporting guide explains how to choose the right heavy mattress bed frame so you avoid sagging, noise, broken slats, and warranty problems.
It also compares platform and slatted bases, helps you decide whether a box spring makes sense, and flags common mistakes that lead to early failure.
Anchor Selection for Non-Stud Mounting
When mounting a towel bar away from studs, selecting the correct fastener is critical to prevent pull-out and wall damage. towel bar mounting methods detail how to match hollow-wall anchors or masonry screws to specific wall materials like drywall, tile, or brick. For areas holding wet towels, durable metal anchors are superior to plastic plugs because they maintain structural integrity under repeated weight.
Getting the anchor type right ensures the hardware stays level and secure, avoiding common issues like sagging or crooked installation. This guide explains how wall thickness and condition affect holding power, helping you choose a solution that supports the load without compromising your finished walls.
How far apart should bed slats be?
There is no single slat-spacing number that fits every mattress. Measure the open gap between each slat, then compare that number with the mattress maker’s support requirement, especially for memory foam. If the gaps exceed the allowed maximum, replace slats or the whole base before assuming the mattress is defective.
Why slat spacing changes with mattress type
Foam and hybrid mattresses often need closer support because softer comfort layers can settle into wide gaps and create pressure points or early wear. Manufacturer rules vary, which is why the instruction sheet matters more than forum advice: Purple specifies slats no more than 3 inches apart, while Saatva allows up to 4 inches on many models.
Platform and standard bed frames differ here. A platform bed may use slats or a panel deck and is meant to support the mattress directly. A standard metal frame often supports a box spring or foundation, with the mattress resting above that support layer. If you are matching mattress type to base type, our mattress support and sizing guide covers the common compatibility traps.
What to check besides spacing
Spacing is only one part of support performance. Check slat width, thickness, wood quality, straightness, and whether plastic holders are cracked or loose. A slat can meet the spacing rule and still fail if it has permanent bowing, end damage, or too much flex for the frame span.
Memory foam compatibility depends on the whole base. If the mattress requires closer support or a nearly continuous deck, adding random boards can create uneven height and new stress points. Use slats or panels that fit the holder system and maintain a flat plane. The decision point is simple: if you cannot meet the mattress maker’s support rule without improvised layers, replace the base.
How to replace missing or bowed slats without creating new support gaps
Replace slats with the correct length and thickness so they sit fully in the holders and share load evenly. If one replacement sits proud or low, the mattress bridges unevenly and wear shows up fast. Check every holder while the slats are out. Loose caps can be the real reason the slats shift.
Measure each gap after installation, not just before. On many failing frames, the spacing increases near the center because the holders have crept outward or the rail has spread. That post-repair check matters as much as the replacement piece itself.
Do you need a box spring with a platform bed?
A platform bed is usually designed to support the mattress directly, while a standard frame often needs a foundation or box spring to create that support surface. The right answer depends on the frame design, the mattress support requirement, and the finished bed height you want.
Platform beds, standard frames, foundations, and true box springs compared
A true box spring has spring action inside and was built to pair with certain innerspring mattresses. A foundation is a rigid support layer. Many people use “box spring” to mean either one, but the support function matters more than the label.
If the platform already provides approved support, adding a box spring can raise the mattress too high and change the feel. If a standard frame has only perimeter rails, a rigid foundation or true box spring may be required to avoid unsupported spans. Verify the support rule against the mattress documentation before stacking layers just to change height.
Height, feel, airflow, and support implications
Adding a box spring or foundation changes sleeping height and edge feel. It also changes how the mattress flexes. Airflow matters too, but direct-to-floor setups have a separate risk: trapped moisture under the mattress, especially in humid rooms or on cooler slab floors.
Putting a mattress directly on the floor can limit airflow, trap condensation, and create support concerns if the mattress maker requires a slatted or rigid base. It may also affect warranty coverage where support rules are specified. If your goal is height, use a support system the mattress maker approves rather than mixing a platform, a panel, and an old box spring.
Signs the box spring or foundation is the real source of sagging
Look for a bowed frame inside the box spring, broken grid wires, soft spots, squeaks, and edge collapse. If the mattress feels firmer on the floor than on the base, the support layer may be the failed part. Replace that layer before replacing a good mattress.
A quick decision point: if the mattress lies flat on a known-good temporary surface but dips on the usual base, the base is the suspect. If the dip remains in the same body zone on both surfaces, the mattress may be the failed component.
Why does a mattress keep sliding off the frame?

The usual causes are a size mismatch, a slick mattress cover, low-friction slats, weak side retention, or a missing retainer bar. Measure the mattress and the inside frame opening first. If the fit is correct, add grip only after confirming the support deck is flat and the rails still hold the mattress in position.
Frame-to-mattress size mismatch and low side-rail retention
“Queen” is not enough as a diagnosis. Measure both parts. A mattress that is even slightly short or narrow for the opening can drift with repeated movement, especially if the frame has shallow side rails or no foot-end stop.
A common first-timer mistake is fixing this with thick pads before checking the opening itself. If the frame is oversized, the mattress will still creep, and the added pad can bunch and raise one side. Check inside width, inside length, rail height above the deck, and whether the frame includes any positive stop at the head or foot.
Slick covers, smooth slats, and missing retainer bars
Modern mattress covers can be slippery against varnished wood, laminated panels, or powder-coated metal. Non-slip matting can help, but it should not bridge unsupported gaps or bunch under the mattress. If the frame was designed for a retainer bar, install the proper bar rather than improvising blocks.
Failure case: the mattress stays centered when empty but shifts overnight toward the foot. That usually points to a low-friction deck plus body movement, not a mystery size issue. Confirm the deck is flat, the slats are fully seated, and the rails have enough lip to resist sideways creep before adding grip material.
Direct-to-floor setups: moisture risks and support downsides
Direct-to-floor placement can stop sliding because there is no frame movement, but it creates another set of problems: lower airflow, greater moisture risk under the mattress, and no side restraint if the room has uneven flooring. It is a temporary troubleshooting step, not a universal long-term fix.
If direct-to-floor placement immediately fixes the feel, use that result as a diagnostic clue. It suggests the issue is frame movement, deck flatness, or support geometry, not necessarily the mattress itself.
How to stop a platform-bed mattress from shifting
If your mattress keeps creeping on a platform bed, the right fix depends on how much it moves and why. A small slide usually points to surface friction, while larger shifting can mean the mattress is a poor fit for the frame or that the bed needs added retention. The platform bed mattress guide breaks down those causes and matches them to practical fixes, from non-slip pads to grip strips and retainer bars.
That matters because repeated sliding can wear the cover, make the bed feel unstable, and leave you adjusting it every night. This section helps you spot the problem quickly, then choose the simplest fix that actually holds.
Why the bed setup matters when a mattress won’t stay put
A sliding mattress is usually a setup problem, not a mattress problem. The most common causes are low-friction frame rails, an uneven support surface, weak slat placement, or a bed that shifts on the floor. Fixing the wrong part first can waste money on straps or pads that only mask the real issue.
The supporting guide on mattress sliding causes breaks down how to identify which failure mode you have and what to do about it. That matters because the best fix depends on the cause: add grip where the frame is slick, correct support where the base is uneven, or stabilize the whole bed if the frame itself is creeping.
What should you check before replacing a toilet?
Measure the rough-in first, then decide whether the issue is a wear part, a fit problem, or a failed bowl. A running toilet often needs only a flapper or fill valve. Replacement makes more sense for cracked porcelain, recurring base leaks, chronic clogs, obsolete parts, or a toilet that cannot fit the existing rough-in.
How to measure rough-in size correctly
Measure from the finished wall, not the baseboard, to the center of the closet bolts. The standard replacement rough-in is 12 inches, with 10-inch and 14-inch rough-ins also used in some homes. Get that number before shopping, because a toilet with the wrong rough-in can force awkward spacing or stop the tank short of the wall.
Running toilet triage: flapper, fill valve, chain, float, and water line setting
Start in the tank. A chain that is too tight can hold the flapper open. Too loose can tangle and keep it from sealing cleanly. If the flapper seat is worn or the rubber is stiff, replace the flapper. If the fill valve does not shut off properly, replace that assembly next.
Check the water line setting as well. Water above the marked line can spill into the overflow and mimic a bad flapper. Those are small-part repairs and usually worth doing before any toilet replacement discussion. Use food coloring in the tank if needed: color appearing in the bowl without flushing points to a flapper or seat leak rather than a supply problem.
Replacement triggers and practical feature choices
Replace when porcelain is cracked, leaks repeat after seal work, flush performance stays poor, or clogging is chronic and not explained by drain issues. For accessibility, the ADA Standards require a toilet seat height of 17 to 19 inches above the finished floor; many “comfort height” models reach that range once the seat is installed.
For water use, EPA WaterSense labels toilets that use 1.28 gallons per flush or less. Skirted bowls can make side cleaning easier but may complicate access during installation. Rimless bowl designs can reduce hidden rim areas where buildup tends to collect, but fit, rough-in, shutoff access, and flange condition still come first. If you are comparing styles, our toilet selection guide can help narrow the right bowl height and footprint.
Stop a Toilet From Rocking Before It Leaks
If a toilet shifts when you sit down, the fix usually starts with the simplest causes: loose closet bolts, an uneven floor, a worn wax ring, or a damaged flange. The key is to diagnose the wobble before adding shims, because shimming the wrong problem can hide a failing seal and let leaks spread under the toilet.
The rocking toilet repair guide breaks down each cause and shows when to tighten, shim, or replace parts. That matters because a toilet that rocks can crack at the base, damage the floor, and create a leak that turns a small fix into a bigger repair.
Stop a Toilet Seat From Sliding Out of Place
A shifting bathroom fixture is more than an annoyance; chronic movement can crack plastic components, stress the hinges, and scratch the porcelain bowl. Often, simply tightening the hinge bolts is not enough if worn washers or oversized bowl holes are causing the instability. A toilet seat keeps sliding issue requires checking the hardware alignment and identifying the exact source of the shift.
This troubleshooting guide helps you evaluate whether you need new hardware or a complete seat replacement, walking you through targeted fixes to secure the fixture permanently.
Pinpoint the Leak by When It Shows Up
The fastest way to narrow down water at the toilet base is to note when it appears. If the puddle shows up only after flushing, the likely culprits are the wax ring, closet bolts, or a loose toilet seal. If it appears even when the toilet hasn’t been used, look higher up first: the tank, supply line, condensation, or even a hairline crack in the bowl.
This toilet leak guide explains how to tell those causes apart and why that matters before you start pulling the fixture apart. Sorting the source early helps you avoid unnecessary repairs, reduces the chance of subfloor damage, and points you to the right fix the first time.
Find the Source of a Shower Door Leak at the Bottom
Bottom leaks usually mean the door isn’t directing water back into the shower, so the fix starts with the leak path—not just the seal. The supporting guide shows how to check the sweep, curb slope, spray direction, track drainage, hinge alignment, and caulk so you can tell whether the problem is a worn part, a setup issue, or both. It also explains which repairs fit sliding, framed, and frameless doors, helping you avoid replacing hardware that isn’t actually the cause.
If water is pooling outside the shower or seeping under the curb, shower door leak fixes can help you narrow it down quickly and choose the least invasive repair before moisture damages flooring or invites mold.
Fix Bathroom Odors at the Source
If a bathroom smells off, the fastest fix is to identify whether the problem is moisture, mildew, a dry trap, or toilet-area residue. The supporting guide shows how to tell those odors apart, then walks through practical steps to remove the cause instead of covering it up.
That matters because bathroom smells usually return when the underlying issue stays in place. For a clear troubleshooting path, see bathroom odor guide for ways to pinpoint the source, dry the room properly, and keep the space smelling fresh longer.
Should you choose a freestanding or floating vanity?
Choose by wall support, floor condition, plumbing location, and storage needs before style. Freestanding vanities are a simpler, more budget-friendly installation. Floating vanities are wall-mounted and hover above the floor, which changes anchoring needs, cleaning access, and how much drawer space remains once the plumbing is routed.
Wall support, floor condition, and plumbing location checks
A floating vanity needs dependable structure in the wall. Stud location alone may not be enough if the mounting system expects blocking, and drywall anchors alone are not a substitute for structural fastening. If the wall is uneven, moisture-damaged, or crowded with badly placed plumbing, a freestanding unit is often the cleaner repair path.
Freestanding units also help when the floor is not perfectly finished under the existing cabinet footprint. They can cover more of the old area and reduce wall anchoring demands. Before ordering, map stud centers, drain height, trap location, and shutoff positions so the drawer box and mounting rail do not collide with plumbing. For more detail, see our vanity installation guide.
Storage trade-offs, drawer usability, and cleaning access
Floating units leave visible floor underneath, which improves access for mopping and can help a small room feel less crowded. The trade-off is storage geometry. Plumbing in the center of the cabinet cuts into usable drawer depth, and shallow drawers need good hardware to carry daily load without racking.
Full-extension slides are worth checking because they determine how much of the drawer remains reachable behind the plumbing cutout. A freestanding vanity may give more total enclosed volume, especially when plumbing enters from the wall at a convenient height. If the wall cavity is shallow or crowded, the lost drawer space can outweigh the visual benefit of floating storage.
Moisture-resistant finishes and cabinet details that matter
Look for sealed edges around door bottoms, side panels, and sink cutouts. Exposed particleboard edges are weak points in splash zones. Plywood generally tolerates occasional humidity better than particleboard once edges are breached, but any cabinet can fail if standing water sits at the seams.
Check the sink-top joint and backsplash area closely. Swelling at the top rail or toe-kick often means splash control and ventilation need attention before a new vanity goes in. If screws spin in softened substrate or the box has opened at glued seams, replacement is usually more durable than trying to harden the material in place.
Is an alcove tub better than a freestanding tub?
For many homes, yes, if the job needs efficient use of space, easier plumbing alignment, and practical tub-shower use. Alcove tubs are recommended for budget-friendly, space-efficient setups. A freestanding tub makes sense only if the floor area, drain location, and bathing habits support it without compromising shower function or service access.
Space planning, clearances, and drain-position compatibility
Start with the opening, not the look. Measure the alcove width, apron access, door swing, and path into the room. Then check the drain location against the tub’s drain end. Moving a drain can be simple in an open-floor remodel and expensive in a finished slab or tight joist bay.
Also check whether the subfloor and framing meet the tub manufacturer’s support method. Many acrylic and fiberglass tubs require a level base and may call for a setting bed or other full bottom support in the installation instructions; if the shell flexes because that support was skipped, recaulk alone will not hold. If you are comparing formats, our bathtub buying guide covers opening size and drain-end planning.
Tub-shower combo practicality versus stand-alone soaking use
If the tub also serves as the family shower, alcove usually wins because it accepts a surround or tiled wet wall more naturally and uses the room envelope efficiently. A freestanding tub often demands more floor area around it and does not solve showering unless a separate shower already exists.
That distinction is a decision point, not a style preference. If the room needs one fixture to handle bathing, showering, splash containment, and easy cleaning, alcove usually delivers fewer compromises. If the bathroom already has a dedicated shower, a freestanding tub may be easier to justify.
When repair, refinishing, or replacement makes the most sense
Refinish cosmetic wear if the shell is stable, the drain connection is sound, and there is no movement underfoot. Replace when the finish is failing across large areas, the base flexes, the shell is cracked, or the tub no longer fits how the room is actually used.
A practical threshold is repeated joint failure. If fresh caulk splits because the tub still moves when loaded, the fix is structural support or replacement, not another tube of sealant. If the shell is rigid and the defects are limited to staining or worn finish, refinishing can buy useful life without opening walls.
When a Japanese Soaking Tub Fits Your Bathroom
A Japanese soaking tub can work well if you want a deep soak in a smaller footprint, but the room has to support both the tub size and the access around it. The supporting article explains the typical dimensions, the clearance needed for installation and movement, and why height matters just as much as floor space. It also helps you judge whether your bathroom is large enough, whether a compact layout is realistic, and what to check before you plan plumbing or delivery. If you are comparing bathtub styles, this Japanese soaking tub guide gives the space requirements that make the decision practical.
Check Weight Before You Buy a Soaking Tub
Weight is one of the first things to verify before choosing a Japanese soaking tub, especially if it will sit on an upper floor or older framing. The supporting guide on Japanese soaking tub weight explains the typical empty and filled ranges, then shows why those numbers matter for floor loading, delivery, and installation planning.
That matters because a tub that seems compact can still become extremely heavy once filled, putting stress on joists, finishes, and the room below. The article also helps you compare materials and sizes so you can narrow choices early and avoid buying a tub that requires unexpected structural work.
Check the Tub’s Filled Weight Before You Install It
Before you commit to a freestanding tub, calculate the full load it will place on the bathroom floor. The supporting article explains how to estimate that number using the tub’s dry weight, water capacity, and the bather’s weight, then compares the result to what a wood-framed or older floor can safely handle. That matters because a heavy tub can lead to sagging, cracked finishes, or expensive structural fixes if the floor is undersized.
You’ll also get a practical breakdown of which tub materials are heaviest, when reinforcement becomes necessary, and when an engineer should be involved. See freestanding tub weight for the full load-check process.
Which bathroom fixes are worth doing during a remodel?
Do the fixes that prevent repeat damage first: leaks, ventilation, wet-area backing, and any rough-in problem that would block the new fixtures. Fixture-only work makes sense when layout and plumbing locations already suit the room. A broader remodel is worth it when wrong clearances, hidden moisture, or bad rough-ins would force compromises on every new fixture.
Fixture-only update versus full renovation
A fixture-only update works when the toilet rough-in is correct, the vanity width fits without crowding the door swing, the tub opening is standard and sound, and there is no widespread moisture damage behind finishes. Full renovation earns its cost when multiple openings or rough-ins are wrong at once.
If more than one major item needs structural correction, such as a wrong toilet rough-in plus wet wall damage behind a vanity plus a flexing tub base, separate piecemeal replacements often cost more than opening the room once and correcting the underlying conditions.
Measure-first ordering before demolition or delivery
Order only after measuring toilet rough-in, vanity width and depth, wall-to-door clearance, tub footprint, drain end, and supply location. ADA-style seat heights run 17 to 19 inches to the top of the seat, so a taller toilet can change how nearby cabinets, paper holders, or knee clearance feel in a tight room.
For tubs and vanities, make a simple paper sketch with finished dimensions, trim thickness, and door swing arc before ordering. That one step catches many delivery-day surprises, especially when the replacement is deeper or taller than the original fixture.
Installation sequence that avoids rework
Stop leaks and correct ventilation first. Then handle wall or floor repairs, rough plumbing changes, and blocking for a floating vanity if needed. Set the tub before finished wall surfaces, finish the wet walls, install the vanity, then set the toilet after flooring and trim are complete.
Say your bathroom can take either a freestanding vanity or a floating one, but the old wallboard behind the current cabinet is soft from splash exposure. Replacing the vanity first would hide the failure for a while. Opening the wall, drying the cavity, and adding proper backing comes first if a floating unit is even being considered.
Budget priorities: leaks, moisture durability, and high-failure fixtures first
Spend first on anything that can ruin adjacent materials: leaking toilet seals, poor exhaust performance, unsealed vanity splash zones, and moving tubs. After that, address fixtures with repeat failures or bad fit. Decorative swaps can wait if the support and moisture details are not settled.
That order usually gives the best return because it reduces the odds that new finishes will have to be removed later. If the room still has unresolved moisture or structural movement, visible upgrades are the least durable dollars you can spend.
Use the right filler at every bathroom seam
If a bathroom joint is between two fixed tile surfaces, grout is usually the right choice; if it sits where different surfaces meet or move, caulk is the safer choice. That distinction matters because the wrong material can crack at the seam, let water behind the tile, and lead to damage that is harder to fix later.
The caulk vs grout guide breaks down which seams get which material, including corners, tub edges, and tile-to-tile joints. Use it when you need a quick rule for choosing the right product before you repair, re-seal, or remodel a bathroom.
Use the right buffer when the headboard taps the wall
If your bed is making contact with the wall, the fix usually starts with the gap itself: tighten the frame, then add felt, rubber, or foam where the headboard or bed frame is striking. For larger gaps or more movement, the better answer may be anchoring the bed, adding wall protection, or combining both so the noise does not return. This matters because repeated tapping can loosen hardware, mark paint, and eventually chip drywall.
The supporting guide on headboard wall noise breaks down the common causes, shows how to judge the gap size, and helps you choose the right fix for metal, upholstered, or shifting bed frames.
Set the headboard gap before the bed starts shifting
If your bed feels noisy, sits unevenly, or keeps rubbing the wall, the fix may be as simple as measuring the gap behind the headboard. The supporting guide explains the right clearance for frame-mounted and wall-mounted setups, plus how skirting boards can change the fit. It also shows why too little space can strain fixings and keep the bed from sitting square.
Use the measurements in headboard wall spacing to choose a gap that protects the frame and helps the bed stay aligned.
Choose the Right Headboard Height
Headboard height affects both comfort and how finished the bed looks. A headboard that is too short can disappear behind pillows, while one that is too tall may overwhelm a small room or sit awkwardly under low ceilings. The right number depends on mattress thickness, bed frame height, bed size, and whether the headboard mounts to the wall or the frame. The headboard height guide breaks down the usual height ranges for queen, king, and California king beds and shows how to measure before you buy.
That makes it easier to avoid returns, match the scale of the room, and pick a headboard that looks intentional instead of improvised.
When bed risers make sense
Bed risers can work well when a bed frame has four stable leg points and you need more clearance for storage or easier access. The supporting guide explains how to judge whether your frame can handle risers, how to estimate the load, and how to choose a height that keeps every leg lifted evenly. It also covers the small details that prevent wobble, slipping, and stress on the frame.
If you’re considering this upgrade, bed riser installation matters because the wrong size or setup can make a frame less stable instead of more useful. The article shows the compatibility checks and placement rules that help you avoid clearance problems and keep the bed secure.
Frequently asked questions
How much weight can a bed frame hold?
There is no single figure that covers all frames. Capacity depends on rail span, center support count, slat design, joint hardware, and mattress weight. Check the maker’s rating, then inspect whether every center leg bears evenly. If the frame racks, bows, or drops slats, treat that as a support failure even before any published limit is reached.
How do I fix a toilet that keeps running?
Open the tank and check chain slack, flapper sealing, fill-valve shutoff, and water level against the marked line. Replace the flapper if the rubber is worn, then replace the fill valve if it still overfills or fails to stop. Replace the whole toilet only if parts are obsolete, porcelain is cracked, or flushing remains poor after repair.
What size rough-in does a toilet need?
The standard replacement rough-in is 12 inches, but 10-inch and 14-inch versions exist. Measure from the finished wall to the center of the closet bolts, not to the front of the toilet or to the baseboard. Confirm that number before ordering, because the wrong rough-in can create tank-to-wall interference or awkward placement in the room.
What bathroom fixes are worth doing during a remodel?
Fix leaks, ventilation, damaged backing, and wrong rough-ins before buying visible fixtures. After that, replace the highest-failure items: a running or cracked toilet, a swelling vanity, or a tub that moves and reopens caulk joints. Cosmetic changes are worth less if moisture, anchoring, or fit problems will force the work to be redone.
Products related to this article
Sponsored / affiliate links. As an Amazon Associate I earn from qualifying purchases. I may earn additional commission from eligible campaigns.