How to Paint a Bathroom Vanity Without Peeling
To help a bathroom vanity last longer, clean it, scuff-sand the surface, use a bonding primer suited to the material, apply two thin topcoats, and let it cure about 7 days before heavy use. Poor prep or the wrong primer usually leads to blistering, chips, and a repaint you have to do again. This article shows how to match prep, primer, paint, and cure time to wood, MDF, laminate, or old enamel so the finish holds up in a humid bathroom.
The real causes of peeling paint



Peeling usually starts where water, steam, and hand oils hit first: sink cutouts, caulk lines, door edges, and hardware holes. Bathroom humidity matters, but the failure often begins with weak adhesion on a glossy, dirty, or mismatched surface. The surface problem is the real clue.
Humidity and steam at edges
Steam and humidity are a major cause of bathroom vanity peeling, but they usually exploit a weak edge rather than create the failure alone. Paint films fail first on thin, exposed areas where moisture sneaks under the coating. If the sink opening or caulk bead lifts, expect edge lift next.
Gloss, grime, and poor adhesion
Soap, lotion, and skin oils leave a film that paint cannot grip well. If the vanity still has a slick factory finish, the coating can peel even when it looks dry. Degreasing before sanding or priming matters because dust alone does not remove that residue.
When peeling points to a substrate problem
If the finish peels in sheets, the substrate may be wrong for the coating system. Laminate edge-bond failure, stained wood with bleed-through, and a previously painted vanity with loose old paint all need different prep. A light scuff is enough only when the old film is still sound.
What you’ll need
- Degreaser, TSP substitute, or liquid deglosser
- Sandpaper: 120-grit, 150-grit, and 220-grit
- Wood filler for holes, dents, and scratches
- Bonding primer for glossy, laminate, stained, or painted surfaces
- Cabinet enamel paint for bath/kitchen use
- Topcoat or sealer, such as polyurethane or acrylic
- Painter’s tape, drop cloths, and labeling tape
- Screwdriver or drill for hinges, knobs, and pulls
- Brushes, foam roller, spray paint, or a paint sprayer
- Containers or bags for labeled hardware
Bathroom vanity surface checklist
The correct workflow depends on what the vanity is made of and what finish is already there. Wood, laminate, glossy factory finish, and old painted surfaces each fail in different ways. Use the table below to match the fix to the surface instead of guessing.
| Substrate | Failure symptom | Prep level | Primer type | Paint type | Cure-time caution |
|---|---|---|---|---|---|
| Solid wood | Edge chips, stain bleed, worn corners | Clean, sand with 150-grit, fill defects, smooth with 220-grit | Bonding primer or stain-blocking primer where needed | Cabinet enamel | Wait 7 days before heavy use; longer in humid rooms |
| Stained wood | Peeling at edges or discoloration through paint | Degrease, scuff-sand, repair chips, sand filler smooth | Moisture-resistant bonding primer | Cabinet enamel | Do not rehang hardware until the coating stops marking under light pressure |
| Laminate | Lift at seams, corners, or edge-bond failure | Clean, degloss, sand lightly, reattach loose edges if needed | Bonding primer made for slick surfaces | Cabinet enamel | Full cure matters more than dry-to-touch time |
| Glossy factory finish | New paint scratches or peels in sheets | Degrease, scuff with 120- to 150-grit, remove dust | High-adhesion bonding primer | Cabinet enamel | Recoat only within the label window |
| Previously painted surface | Flaking around knobs, hinges, and sink cutouts | Scrape loose paint, sand edges, feather repairs | Bonding primer over sound paint only | Cabinet enamel | Weeks may be needed for full cure before reassembly |
How do you prep a bathroom vanity?
Remove the doors, drawers, pulls, knobs, and hinges first, then label every part before you sand. Clean with a degreaser, TSP substitute, or liquid deglosser, because paint will fail over lotion, soap, and hand-oil residue. Prep ends with sanding, filling, and smoothing the repair areas.
Remove and label doors, drawers, and hardware
- Take off doors, drawers, knobs, pulls, and hinges.
- Put each set in a labeled bag or container.
- Mark hinge locations and door positions so reassembly matches the original fit.
Clean, degrease, and degloss
- Wipe all painted or stained surfaces with degreaser, TSP substitute, or liquid deglosser.
- Rinse or wipe away residue if the product label requires it.
- Let the vanity dry fully before sanding so dust does not stick to cleaner film.
Sand, fill, and smooth edges
- Lightly sand loose vanity paint before repainting.
- Use 120-grit for rough spots, 150-grit for smoothing repairs, and 220-grit for smoothing.
- Fill old hardware holes and scratches with wood filler, then sand it flush.
Say your 30-inch vanity has two old knob holes on each drawer front and a glossy white finish. Fill the unused holes, sand the edges smooth, and keep the repair flat before priming. Raised filler telegraphs through enamel and can create a break point where peeling starts later.
What kind of primer should I use on a bathroom vanity?
Use a bonding primer when the surface is glossy, laminate, stained, or already painted and slick. That primer type is meant to grip difficult surfaces and handle bathroom moisture better than a general wall primer. For bathroom vanities, the primer choice matters as much as the paint choice.
Bonding primer for glossy or laminate surfaces
A moisture-resistant bonding primer is the safest default for most bathroom vanities. It helps on laminate, factory finishes, and old enamel, where normal primer can release later. If the vanity has stained wood, use a primer that also blocks bleed-through.
Brush-on versus spray primer
Brush-on primer gives more control on edges, corners, and sink cutouts. Spray primer can level faster on flat doors and drawer fronts, but it needs ventilation and even passes. If you spray, hold the can or gun 8 to 12 inches away.
Spot-priming repairs versus full priming
Spot-prime only if the rest of the surface is sound and uniform. If there is widespread gloss, edge lift, or old paint failure, prime the full vanity. A patchy primer layer can leave weak spots that show through the finish.
How do you paint it without runs?
Cabinet enamel paint is a commonly used finish for a bathroom vanity because it is designed for more wear than ordinary wall paint and is often used in kitchens or baths. Apply two thin coats instead of one heavy coat. Thin coats reduce runs, brush marks, and soft spots that stay vulnerable to moisture.
Brush and roller method
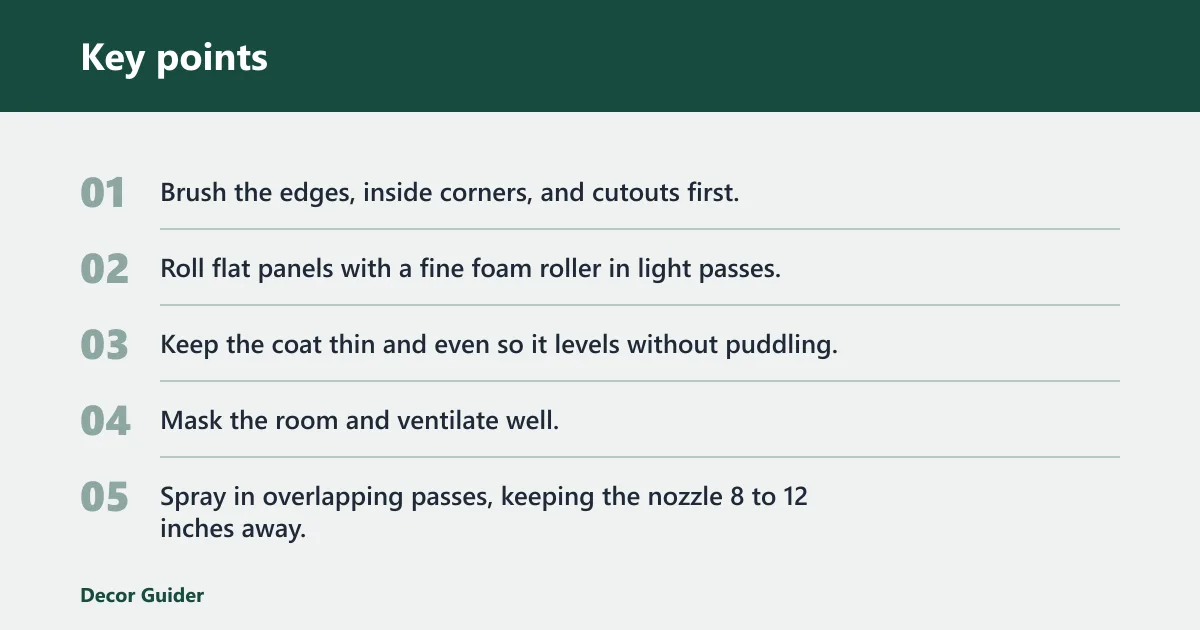
- Brush the edges, inside corners, and cutouts first.
- Roll flat panels with a fine foam roller in light passes.
- Keep the coat thin and even so it levels without puddling.
Spray paint or paint sprayer method
- Mask the room and ventilate well.
- Spray in overlapping passes, keeping the nozzle 8 to 12 inches away.
- Build coverage with multiple thin coats rather than one wet coat.
Thin coats and recoat timing
Dry time and cure time are different, and a surface may be dry to the touch before it is ready for moisture, hardware pressure, or daily use. The surface may feel dry long before it can take moisture, hardware pressure, or daily use. Follow the paint label for recoat timing, then give the vanity about 24 to 48 hours before light handling and longer before full bathroom use when the label allows it.
Suppose a sink base has a brushed enamel coat that looks dry after one afternoon. If the next coat goes on too soon, the lower film can stay soft under the upper layer and wrinkle around the sink cutout. Waiting for the recoat window matters more than speed.
How long should you wait before using a painted bathroom vanity?
A common rule of thumb is to wait about 24 to 48 hours before light use, then about 7 days before heavy use in a bathroom. Some finishes need longer than the label’s cure window before reassembly or hard wear, so follow the exact primer and paint label system first. Moisture, soap splash, and repeated touching can mark a finish that is dry but not cured.
Reinstall hardware after cure, not after touch-dry
Reattach knobs, pulls, doors, and drawers only after the finish can resist imprinting. If hardware goes back too soon, it can imprint or crack the coating around screw holes. Keep labeled hardware containers nearby so reassembly is orderly once the cure period ends.
What if paint is already peeling?
If the repaint peeled recently, start with a salvage check. Larger peeling zones usually need sanding back to sound paint, then primer and a fresh topcoat. If the failure is widespread, restart rather than patch over loose film.
- Scrape away all loose paint to a firm edge.
- Feather the border with 150-grit, then smooth with 220-grit.
- Patch dents or exposed wood with filler, then sand flush.
- Prime the bare or glossy areas with a bonding primer.
- Recoat with cabinet enamel in thin layers.
If a laminate edge has lifted, cyanoacrylate adhesive can reattach it, then tape or clamp it while it sets. Do this before primer so the repair stays flat under paint.
Common mistakes
Skipping degreasing is one of the fastest ways to get new peeling. Sanding over soap film or lotion residue only roughens the contamination. Another common mistake is using a general primer on laminate or glossy enamel, which leaves the coating with little to grab.
Do not reassemble the vanity before cure. A finish that feels dry can still dent around screws, hinges, and drawer pulls. Also watch the sink edge and caulk line; those borders often fail first, especially if old caulk stays cracked or loose.
Keep bathroom humidity down during cure, and avoid splashing the vanity top while the finish is still hardening.
Frequently asked questions
How do you paint a bathroom vanity without it peeling?
Remove the hardware, clean with a degreaser, scuff-sand with 120 to 220 grit, then use a bonding primer and cabinet enamel in two thin coats. Let it cure before heavy bathroom use. The finish fails most often when cleaning or primer selection is skipped.
Do I need to sand a bathroom vanity before painting it?
Yes. Light sanding helps the primer grip, and loose vanity paint should be lightly sanded before repainting. Use 150-grit on finished surfaces and 220-grit for smoothing repairs. If the surface is heavily damaged or peeling widely, sanding alone is not enough.
Can you paint a laminate bathroom vanity so it lasts?
Yes, if you clean it well, reattach any loose edges, sand lightly, and use a bonding primer made for slick surfaces. After that, apply cabinet enamel in thin coats. Laminate failures usually start at seams and edges, so those areas need extra care.
What paint finish works best for a bathroom vanity?
A durable cabinet enamel is the best base finish for a bathroom vanity, especially in bath or kitchen grade formulas. It should be applied in multiple thin coats, then left to cure fully. A topcoat can add moisture and scratch resistance if the label allows it.
Products related to this article
Sponsored / affiliate links. As an Amazon Associate I earn from qualifying purchases. I may earn additional commission from eligible campaigns.