How to Caulk a Bathroom Vanity Backsplash
Caulk a bathroom vanity backsplash by cleaning the joint, choosing the right sealant for the gap, and filling small openings with a bead that matches the surface movement. Use backer rod or substrate repair first when the gap is too deep, too wide, or the wall is damaged. This guide shows how to inspect the joint, pick the right product, and apply a neat, durable seal.
Do I need a backsplash behind a bathroom sink?


Usually, yes. A backsplash helps protect the wall from splash, makes the area easier to wipe clean, and gives the vanity a finished look. A common 4-inch backsplash is enough for many sink setups, while full-height backsplash treatment makes more sense where splash is frequent, the wall finish is fragile, or the design calls for a more continuous surface.
If you are weighing backsplash options for a remodel or repair, start with the wall condition and the amount of water the sink area sees. A small splash guard can be enough for a low-exposure vanity, while a full-height surface is often better where water hits the wall often or where you want a more seamless design. See the broader bathroom vanity backsplash context for common layout choices.
What the backsplash joint needs
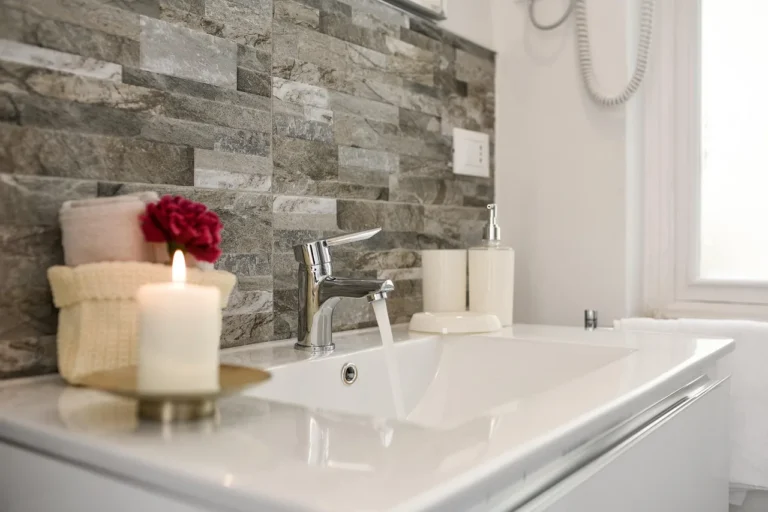
A backsplash is a vertical surface that shields the wall behind the countertop. It may be a 4-inch splash or a full wall behind the sink, but the seal still matters at the countertop, the backsplash edge, and the side seams where water can enter. Those joints need a water-tight finish, not a cosmetic line alone.
The main job of caulk is to stop splash and seepage at the sink. Industry guidance from sealant manufacturers such as GE Sealants and Sika stresses that bathroom joints need a product suited to wet areas, plus clean, dry, sound surfaces for adhesion. That protection depends on a clean joint and a stable substrate.
Picture a 4-inch backsplash with a thin line between the tile and the painted wall. If the line is only cosmetic, it can still trap water behind the edge after handwashing. If the drywall is soft or the gap keeps reopening, the problem is in the wall, not the bead.
Which surfaces need a seal?
Focus on three areas: countertop-to-wall, backsplash-to-wall, and the side seams where the backsplash meets a return wall or cabinet edge. Each joint moves a little differently, so the bead should match the gap rather than stretch across a void.
Water-resistant backsplash materials include tile, glass, stone, mirror, and washable wallpaper. Whatever the surface, the edge needs a clean seal where water can creep in.
When the gap is cosmetic and when it is a moisture issue
A hairline line with no staining, no softness, and no recurring opening is usually a cosmetic joint. A darkened edge, a hollow feel, peeling paint, or swollen drywall means moisture has already reached the wall or substrate. At that point, caulk alone is not the fix.
What caulk should you use?
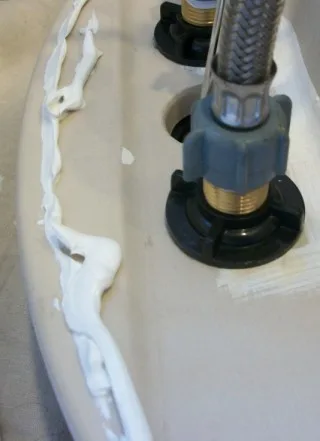
Use a bathroom-rated 100% silicone caulk for wet vanity joints, especially at the countertop-to-wall line and around the sink backsplash. Siliconized acrylic is easier to paint, but it is less water-resistant and generally better suited to drier trim joints than splash zones. For a sink edge, silicone is the safer default.
Check the label rather than relying on a generic rule. Different products list different joint-size limits, cure times, and approved substrates, so the manufacturer’s directions matter more than a single threshold. For example, many bathroom sealants specify allowable joint dimensions and require primer-free, clean surfaces for best adhesion.
Clear versus color-matched caulk
Clear caulk can disappear against glass, mirror, some stone edges, and mixed-color tile. Color-matched caulk is better when the joint sits against a painted wall or a countertop edge that needs a cleaner visual line. Choose the color after the gap has been cleaned, because old residue can change how the edge reads.
When a wide joint calls for backer rod first
Use backer rod when the joint is too deep or wide for a single surface seal. It fills the lower part of the gap so the caulk bead can bond to two sides instead of sinking into an empty cavity. That helps control bead depth and reduces shrinkage.
Manufacturer guidance from products such as Sika Backer Rod and OSI sealant instructions generally points to backer rod or other backing when the joint is too deep for proper caulk geometry. If the wall edge is damaged, soft, or crumbling, repair the substrate before sealing so the bead can bond to a sound surface.
Bathroom vanity backsplash checklist

Have the right tools before you start: a caulk gun, utility knife, painter’s tape, a rag, and the caulk you plan to use. A caulk gun applies a continuous bead, and it works best when you keep steady trigger pressure and cut the tip to match the joint width.
The utility knife is for removing old caulk, not for scraping aggressively. Use it carefully near tile, stone, laminate, glass, mirror, and drywall. The goal is to score the edges and lift the old material cleanly, with as little scratching as possible.
- Clear the sink area and dry the joint.
- Score both edges of the old bead with a utility knife.
- Lift and peel the old caulk slowly.
- Clean residue from the countertop, backsplash, and wall.
- Let the joint dry fully before new caulk goes in.
- Cut the caulk tip to match the joint width.
How to remove old caulk without gouging the finish
Work along the old bead in short sections. Score along each side, then pull the bead away instead of digging under it. If the joint is on laminate or stone, keep the blade flat and shallow. If the old caulk resists, cut a little more rather than forcing the knife deeper.
Do not seal over loose residue. New caulk sticks best to a clean, dry edge. Soap film, mildew, dust, and old silicone all reduce adhesion, especially along countertop-to-wall joints where water can sit after sink use.
How to dry and clean the joint before new caulk
Dry the joint completely. Bathroom drywall should be dry before recaulking, and any hidden leak should be corrected first. Wipe the edge with a dry rag, then confirm the backing surface is not soft or crumbling. If the wall feels swollen, stop and repair it before caulking.
How do you caulk a bathroom vanity backsplash?
Caulk the joint by masking the edges, laying a controlled bead, tooling it smooth, and removing tape before the skin sets too far. The bead should bridge the gap without flooding the surface. On a vanity backsplash, that means treating each joint separately, not running one pass across every edge.
Tape placement on both sides of the joint
Apply painter’s tape on both sides of the line so only the joint stays exposed. Keep the tape edges straight and parallel to the seam. This helps create crisp lines at the backsplash-to-wall and countertop-to-wall joints, especially where the wall finish is painted drywall or wallpaper.
Leave enough room for the bead to seat in the center. If the tape crowds the gap, the caulk may smear onto the visible face and leave a ridge after smoothing.
Bead size, angle, and trigger control
Cut the caulk tip to match the joint width, then hold the gun at a consistent angle as you move along the seam. Use steady trigger pressure so the bead stays even. Aim for enough material to fill the joint, not so much that it bulges out across the face.
For a normal backsplash seam, a small continuous bead is usually enough when the product label supports that joint size. For wider joints, insert backer rod first, then apply caulk over it. That keeps the bead from sagging into a deep cavity.
Smoothing, tape removal, and cleanup
Smooth the bead right after application with a tool or a gloved finger, using light pressure. Then remove the tape before the surface skins over fully. If you wait too long, the edge can tear and leave a ragged line.
Wipe away excess caulk before it sets. Keep cleanup confined to the fresh bead and the nearby masking area. Once the joint starts to cure, stop tooling; overworking it can pull material out of the seam and leave thin spots.
When should you stop and repair the wall first?
Stop and repair the substrate first if the drywall is soft, swollen, mold-stained, or crumbling. Caulk cannot stabilize damaged bathroom drywall. If the gap keeps opening after previous repairs, the wall or vanity movement is larger than a surface seal can handle.
Recurring leaks are another stop sign. If water has already reached the wall, a new bead may cover the symptom while the damage stays active underneath. In that case, dry the area, fix the leak path, and repair the substrate before recaulk.
Suppose the seam behind a sink is 3/8 inch wide and the drywall edge feels spongy. Filling that gap with caulk alone only hides the problem for a while. The better sequence is remove the failed material, replace the damaged backing, then recaulk over a sound surface.
Bathroom backsplash joint decision table
Use this table to match the joint condition to the right prep and stopping point. It is meant for the seal line itself, not for a full wall repair estimate.
| Joint condition | Recommended prep | Use backer rod? | Bead size guidance | Cure-time caution | Stop DIY and repair first when |
|---|---|---|---|---|---|
| Hairline gap | Clean, dry, and remove loose residue; tape both sides if the edge is visible | No | Small continuous bead only, just enough to bridge the line | Avoid water exposure until the caulk has set per label directions | The wall is soft, stained, or reopening after prior caulk |
| Normal backsplash seam | Remove old caulk, wipe dry, and check both faces of the joint | Usually no | Even bead sized to the seam width, then smooth lightly | Do not wash the area or splash the sink until cured | There is mold, swelling, or movement behind the backsplash |
| Wide gap | Clean thoroughly, measure depth, and confirm the substrate is sound | Yes, if the joint is too deep for a surface seal | Bead should cover the rod without overfilling the face | Thicker beads usually need more cure time before water use | The gap is too large for a stable seal or the wall edge crumbles |
| Damaged or soft drywall | Remove failed caulk and damaged material, then dry the area fully | No, not until the substrate is repaired | Do not caulk over soft material | Do not rush to recaulk wet or swollen drywall | Drywall is soft, swollen, moldy, or crumbling |
How do you finish the line cleanly?
A clean line depends on three things: controlled bead size, proper tape placement, and stopping before the caulk skins over. Check the seam for ridges, skipped spots, smears, and gaps after smoothing. If any section looks thin, add a fresh pass right away rather than waiting for it to cure.
After the tape comes off, inspect both edges of the joint. The bead should be continuous, with no pinholes where water can enter. If the line is uneven but the seal is intact, leave it alone rather than reworking cured caulk and making the edge worse.
Do not use the sink heavily until the caulk has cured according to the product label. Cure time depends on bead size, temperature, humidity, and the specific sealant, so the label matters. A thick bead over backer rod needs more caution than a thin hairline seal.
Frequently asked questions
How do you caulk around a bathroom vanity?
Work one joint at a time: countertop-to-wall, backsplash-to-wall, and side seams. Each line needs a clean, dry surface and a bead sized to the gap. Use controlled pressure from the caulk gun, then tool the bead lightly so it bridges the seam without leaving ridges or thin spots.
How do you caulk a bathroom sink backsplash?
Remove old caulk, clean the edge, and use bathroom-rated silicone at the sink backsplash joint. Tape both sides if you want a straighter line, then lay a small bead and smooth it before removing the tape. If the wall is soft or the gap keeps reopening, repair the backing first.
What caulk should I use for a bathroom vanity backsplash?
Use a bathroom-rated 100% silicone caulk for the wet joints around a vanity backsplash. It is suited to countertop-to-wall edges and comes in clear or color-matched versions. Skip paintable siliconized acrylic in splash zones, and use backer rod first when the gap is too wide for one surface bead.
Should I caulk the gap between the countertop and wall?
Yes, if the gap is at a vanity or sink area that can take splash. That joint can let water reach drywall or the vanity top if it stays open. Clean it well, confirm the backing is dry and sound, then seal it with bathroom-rated silicone sized to the gap.
When should you replace cracked caulk around a bathroom vanity?
Replace cracked caulk as soon as it splits, pulls away, or shows gaps. Cracking means the seal is no longer continuous, and water can reach the wall. If the crack returns after recaulk, check for movement, soft drywall, or a joint that is too wide for a simple bead.
Products related to this article
Sponsored / affiliate links. As an Amazon Associate I earn from qualifying purchases. I may earn additional commission from eligible campaigns.