How to Add a Shower to a Freestanding Tub
Yes, a freestanding tub can have a shower only if you add a shower valve, a suitable drain, and water containment; without those three, it is still a tub, not a safe shower. If this is done wrong, you risk leaks, slip hazards, mold, and code problems that cost more to fix later. This guide covers the parts you need, the main installation paths, and when a separate shower makes more sense.
Choosing between a hand shower and a full system
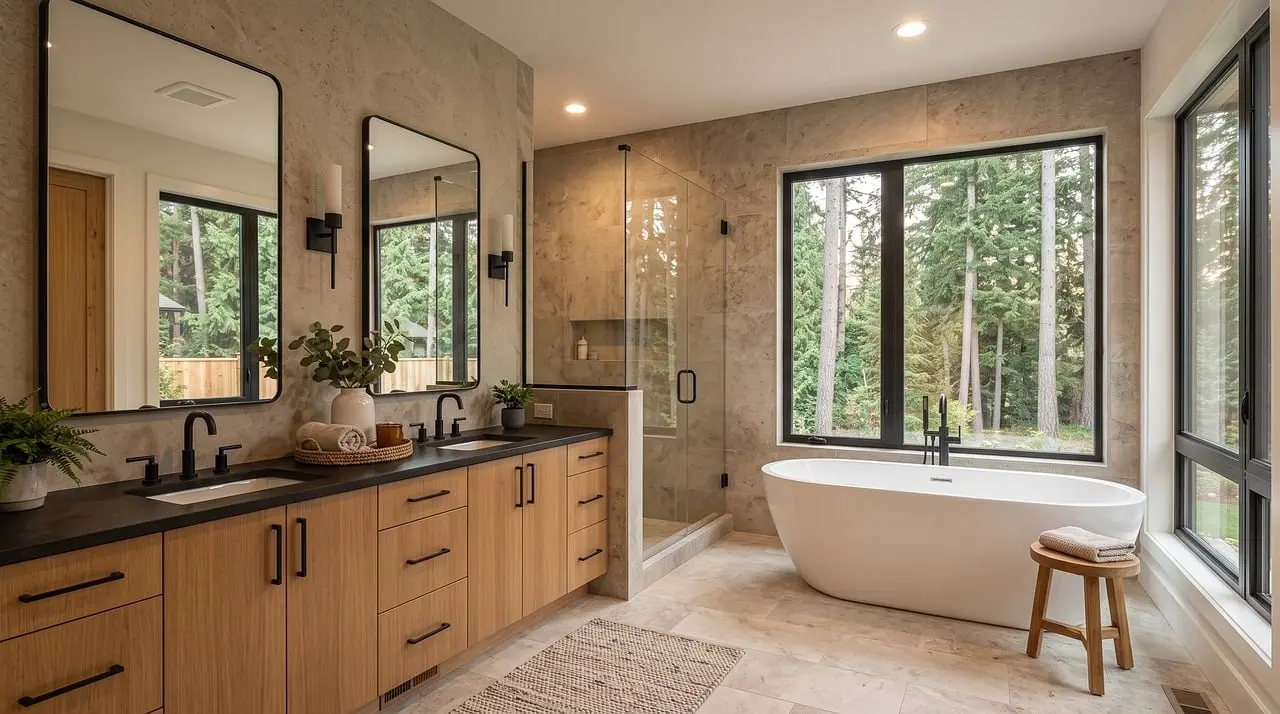
Yes, but the practical answer is usually a hand shower, not a true overhead shower. A freestanding tub is usually a soaking fixture with open floor space around all sides, so the room has to handle splash, drainage, and access from below or through a panel. A full shower system generally needs more enclosure and plumbing work.
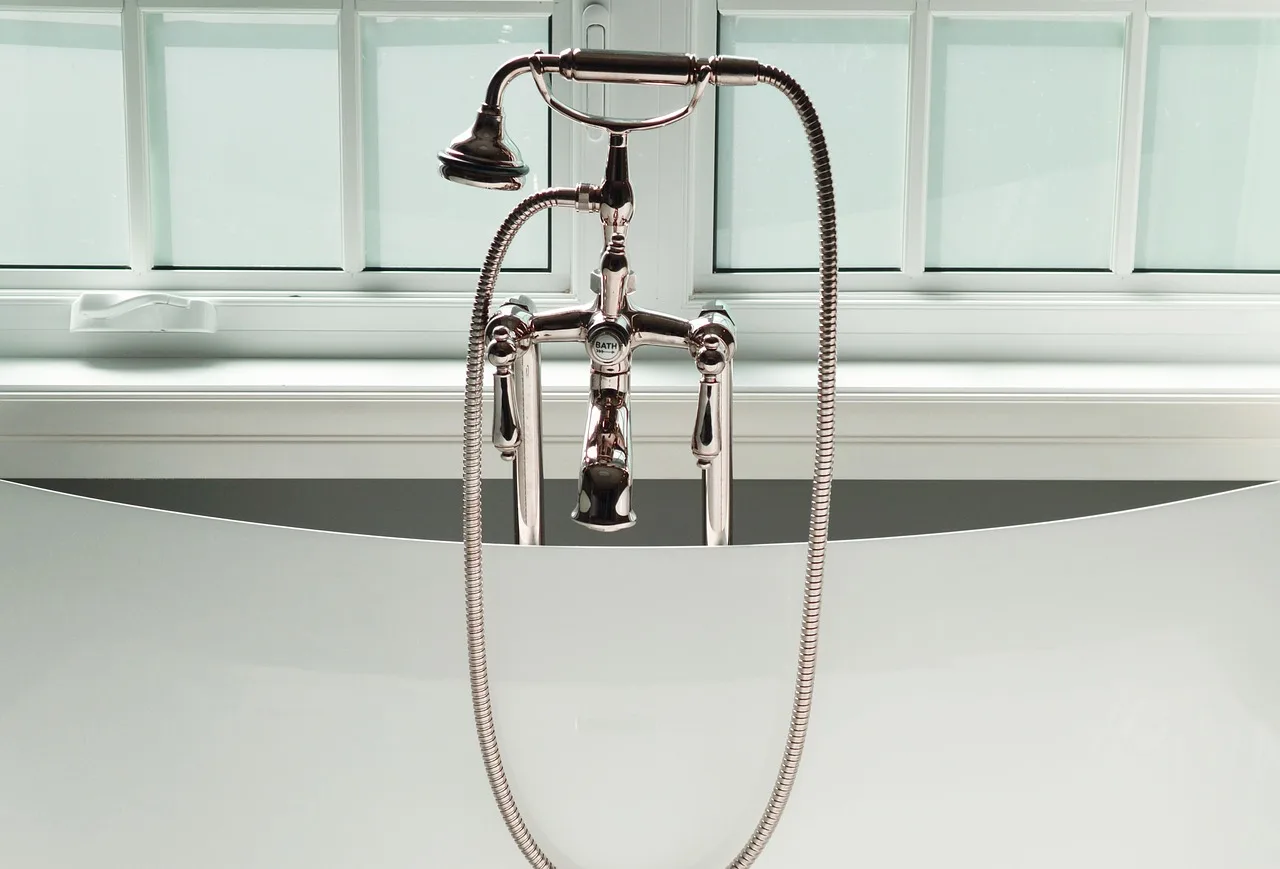
A freestanding tub faucet includes knobs and diverters to control temperature and water flow, and it is plumbed through the floor, not the wall. That makes the fixture stack different from a standard tub-shower combo. The usual path is a freestanding tub filler with a diverter and a hand shower, plus a holder or slide bar if you want the hose positioned for seated bathing.
When a hand shower is the realistic option
A hand shower is the most practical add-on when the tub stays open on most sides. A freestanding tub filler can include a slim, rectangular hand shower, and that setup is enough for rinsing hair, washing a child, or cleaning the tub. It is not the same as turning the space into a full shower stall.
That setup works best when the bathroom already has a nearby splash-control strategy, such as a curtain, a fixed glass panel, or a partial enclosure. Without containment, water from a hand shower still reaches the floor fast.
When a full shower system makes sense
A true shower system makes sense when the tub sits inside a planned wet zone, usually during a remodel that includes waterproofing walls and floors around it. In that case, you can add a shower valve, a shower head, and better containment, but the room would function more like a shower area than a tub with a spray attachment.
If the space is open on two or more sides, the problem is not the spray itself. It is the splash pattern and the lack of a barrier. That is where many freestanding tub shower ideas fail.
When you should choose a separate shower instead
Choose a separate shower when the tub is meant mainly for soaking, the floor structure needs reinforcement, or the room is too open to control spray. A separate shower is usually the better daily-use answer for families, shared baths, and small rooms where every wet floor becomes a hazard.
Suppose a 66-inch solid surface freestanding tub is planned for a second-floor bath, and the room has no easy place for a curtain track or glass return. In that case, keep the tub as a soaking fixture and build a separate shower elsewhere in the room.
What parts a freestanding tub shower needs

The basic stack is simple on paper and unforgiving in practice: a freestanding tub filler, a diverter, a hand shower hose, a holder or slide bar, and an anti-scald mixing valve where code requires it. Leave out one of those pieces and the setup becomes awkward, unsafe, or both.
Freestanding tub filler and diverter
The filler is the central fixture. A freestanding black floor mount faucet is described as durable and easy to install next to the tub, and some freestanding bathtub faucets are easy to install on concrete and wood floors. The diverter switches flow from the tub spout to the hand shower, and many modern fillers build that into the body.
Because freestanding tub faucets are plumbed through the floor, the rough-in has to be correct before the finished floor goes in. Once tile or slab work is done, moving the supply location is difficult.
Hand shower, hose, and holder
The hand shower is what makes showering possible without turning the room into a full shower enclosure. The hose needs enough reach for seated bathing and enough slack to rinse the tub without tugging on the fitting. A slide bar or cradle helps you control height and keeps the spray aimed where it belongs.
Do not confuse convenience with containment. A hose can make the tub usable for rinsing, but it does not stop water from leaving the tub area.
Anti-scald mixing valve and shutoff access
An anti-scald mixing valve helps keep temperature swings under control, especially if the shower will be used by children or older adults. Shutoff access matters too. Freestanding tubs still need hot and cold supply lines, and the installer should keep service access available at the valve and any connections below the floor.
Freestanding tubs need a properly sized drain and vent, plus hot and cold supply lines. A freestanding tub often needs an access panel from below or a removable ceiling for drainage connections. That is not optional planning detail; it is the difference between a serviceable installation and a future tear-out.

Which freestanding tub shower setup fits your bathroom?
The right setup depends on the floor below, the room size, and whether the project includes major demolition. A hand shower can work in several homes, but slab cuts, upper-floor reinforcement, and waterproofing all change the answer quickly. The table below sorts the common cases.
| Home type | Plumbing changes needed | Splash risk | Cost tier | Best use case |
|---|---|---|---|---|
| Slab floor | Floor penetration, supply relocation, drain planning, possible slab cut | Medium to high unless enclosed | High | New build or full remodel where rough-in can be set early |
| Second-story wood-framed floor | Reinforced framing, supply lines through joists, drain and vent access below | Medium | Medium to high | Baths with access from a lower floor and enough structure for the load |
| Small bathroom | Minimal if using a hand shower only, but containment still needed | High without a curtain or panel | Low to medium | Occasional rinse use, not daily showering |
| Full gut remodel | Best chance to place valve, filler, drain, vent, and waterproofing correctly | Low to medium with proper enclosure | Medium to high | Best path for a true tub-plus-shower layout |
How to plan the plumbing before tile goes
Plan the plumbing before any finished surface is installed. Hot and cold supply lines, valve height, filler location, drain slope, and vent path all need to be set early. After tile, slab, or finished flooring, changing those locations usually means opening the room back up.
Supply line layout
Freestanding tub fillers need the rough-in at the floor, not the wall. That means the plumber must know the exact tub model, its footprint, and where the filler will land relative to the rim. A misaligned rough-in can leave the faucet too close to the tub, too far away, or awkwardly exposed.
The practical rule is simple: pick the tub first, then place the filler. The other way around creates avoidable compromises.
Drain, trap, and vent requirements
Drainage has to meet local code. Most modern tubs use a 1 1/2-inch drain, and some codes want a 2-inch drain for larger tubs. A 1 1/2-inch trap arm may run roughly 3 to 5 feet maximum, so longer runs or a different layout may force a redesign.
A vent is part of the system, not an extra. Without it, drainage performance and trap protection suffer. That matters even more when the tub is used more often and filled higher for showering and rinsing.
Why rough-in location is hard to change later
Freestanding tub faucets are plumbed through the floor, so the location becomes locked in once the floor is finished. On slab, that can mean cutting concrete. On wood framing, it can mean opening the ceiling below or working from an access panel. Either way, the fix is rarely simple.
Picture a bathroom where the floor tile is already down and the filler ends up about 3 inches off-center. That small error can force a visible patch, a new hole, or a compromised layout that never lines up cleanly with the tub.
What floor structure and tub weight can mean
Floor structure is a real part of the decision, especially on upper floors. A filled freestanding tub can be heavy before anyone steps in. The tub material, water volume, and bather load all add up, and older wood-framed floors may need reinforcement.
Tub material and filled weight
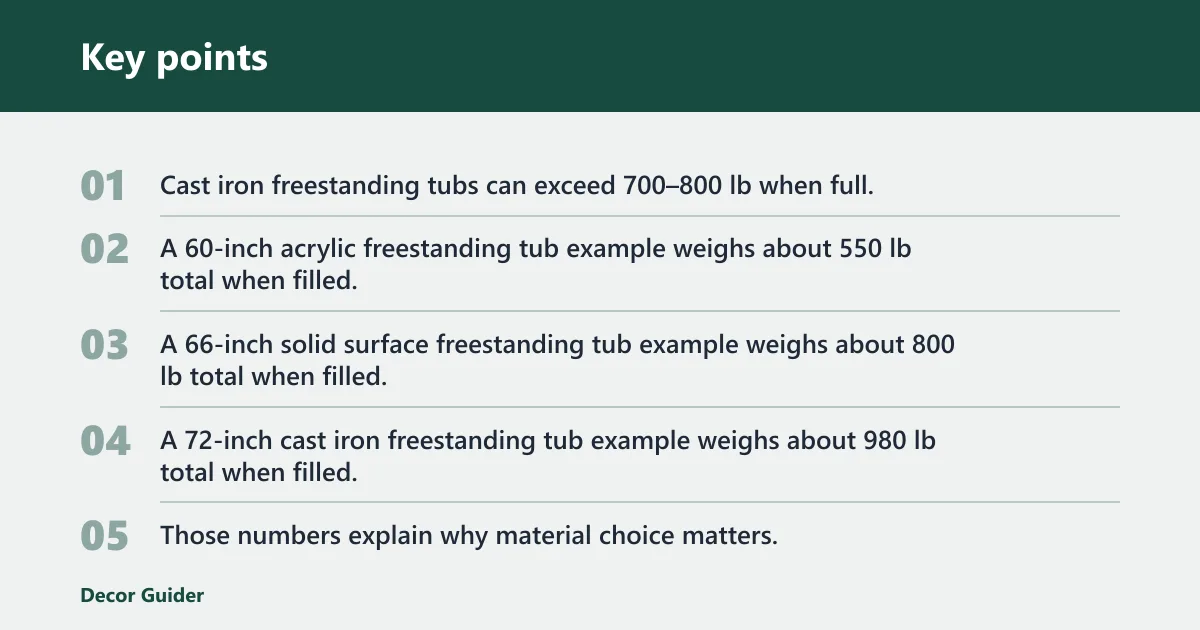
Cast iron freestanding tubs can exceed 700–800 lb when full. A 60-inch acrylic freestanding tub example weighs about 550 lb total when filled, before adding a person. A 66-inch solid surface freestanding tub example weighs about 800 lb total when filled, before adding a person. A 72-inch cast iron freestanding tub example weighs about 980 lb total when filled, before adding a person.
Those numbers explain why material choice matters. Acrylic is lighter, cast iron is heavier, and stone resin or solid surface falls somewhere in between depending on size and construction.
When reinforcement is needed
Reinforcement is worth discussing when the tub will sit on an older wood-framed floor, the joist span is long, or the room will see regular soaking fills. A filled tub plus a person is a different load than a standard bathtub. The framing should be checked before tile, not after deflection appears.
Why upper floors need extra caution
Upper floors add access challenges and make leak prevention more important. If the drain or trap needs service, getting to it may require opening the ceiling below. That is why a freestanding tub often needs an access panel from below or a removable ceiling for drainage connections.
How to control splash around a freestanding tub shower
Splash control is the main comfort problem. Even a good hand shower can send water across the room if the tub is open on all sides. The fix depends on whether you want a partial shower feel or just enough containment for occasional rinsing.
Curtains, panels, and partial enclosures
A curtain is the fastest way to reduce splash, but it only works if it hangs close enough to the tub and reaches the floor. A fixed glass panel blocks spray more effectively and usually works better when the tub is part of a wet zone. Partial enclosures are often the compromise between openness and control.
Seat height and hose reach
Choose a hand shower setup that works while seated in the tub. The hose should reach the bather without pulling the fixture sideways, and the holder should let the spray angle down rather than out into the room. If the hose is too short, the user ends up chasing the wand and splashing more water.
Layout choices that reduce wet floors
Place the tub so the open side does not face the driest part of the room. Keep towels, rugs, and storage outside the spray path. The more open the bathroom, the more the layout has to do the work that a shower enclosure would normally handle.
A common first-timer mistake is placing the tub in the center of a small room and assuming a hand shower will stay tidy. The spray does not care about the room plan. Water still lands where there is no barrier.
How much does it usually cost?
Cost depends on how much plumbing and waterproofing has to move. A low-complexity add-on is usually a hand shower on a floor-mounted filler with minimal rearrangement. Mid-level retrofits involve drain, vent, or supply changes. High-complexity projects include slab cuts, reinforcement, and a true shower enclosure.
Low-complexity add-on
This is the simplest case: a compatible freestanding tub filler with diverter, a hand shower, and limited plumbing changes. It fits best when the rough-in can land close to the tub location and the floor is already accessible. The work is still precise, but it avoids major demolition.
Mid-level retrofit
This level usually involves moving supplies, improving venting, or adding access below the floor. It may also include a glass panel or curtain system to tame splash. Costs climb because labor and finish repairs start to matter as much as the fixture itself.
High-complexity remodel
This is the full redesign path: structural review, valve relocation, drainage changes, waterproofing, and often a separate shower zone. Slab-floor homes and full gut remodels can fall here quickly. It is the right path when the bathroom needs a real shower, not only a rinse option.
Frequently asked questions
Can you add a shower to a freestanding tub?
Yes, but usually as a hand shower attached to a freestanding tub filler with a diverter. A true shower needs containment, a valve, and proper drainage. If the room stays open, a separate shower is often the safer and more usable choice for daily bathing.
What plumbing is needed for a freestanding tub shower?
You need hot and cold supply lines, a floor-plumbed filler, a diverter, a hand shower connection, a properly sized drain, and venting. Many setups also need an anti-scald mixing valve and access below the floor for service. The exact rough-in should be set before the floor is finished.
How do you install a freestanding tub with a shower?
Set the tub model first, then rough in the floor-mounted filler, drain, vent, and supply lines. Add the diverter and hand shower to the filler, then plan splash control with a curtain, panel, or enclosure. If the bathroom cannot contain spray, install a separate shower instead.
Can you add a shower head to a soaking tub?
Yes, but a soaking tub does not automatically become a shower-ready fixture. The room needs a safe valve, a spray source, and water containment. Without those, you get splash and slip risk, not a reliable shower setup. A hand shower is usually the simplest retrofit.
Do you need a separate shower if you have a freestanding tub?
Often, yes, if the tub will be used every day or the room is too open to control water. A freestanding tub is best treated as a soaking fixture unless the layout supports a contained wet zone. Separate showers are usually easier to use and easier to keep dry.
What is the best faucet setup for a freestanding tub and shower?
The best setup is a freestanding tub filler with knobs, a diverter, and a slim hand shower, paired with an anti-scald valve and a hose long enough for seated bathing. Floor-mounted placement must be exact, because the rough-in is hard to move after the floor is finished.
Products related to this article
Sponsored / affiliate links. As an Amazon Associate I earn from qualifying purchases. I may earn additional commission from eligible campaigns.