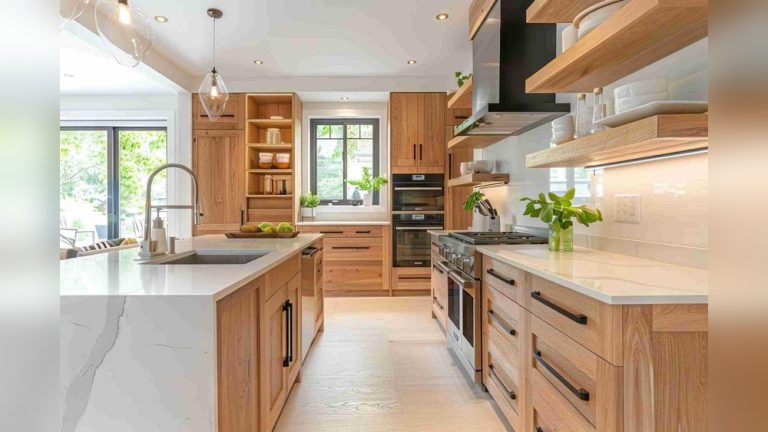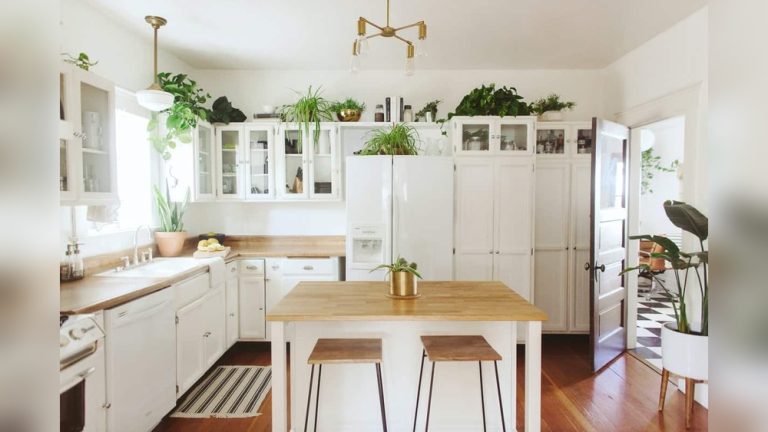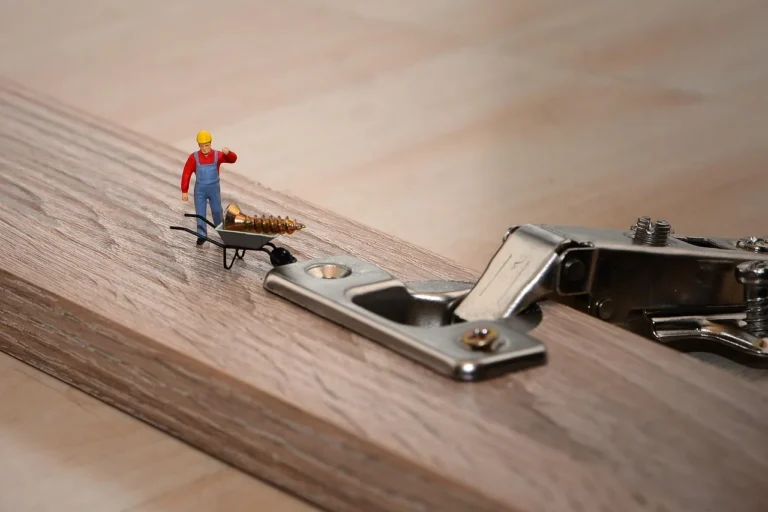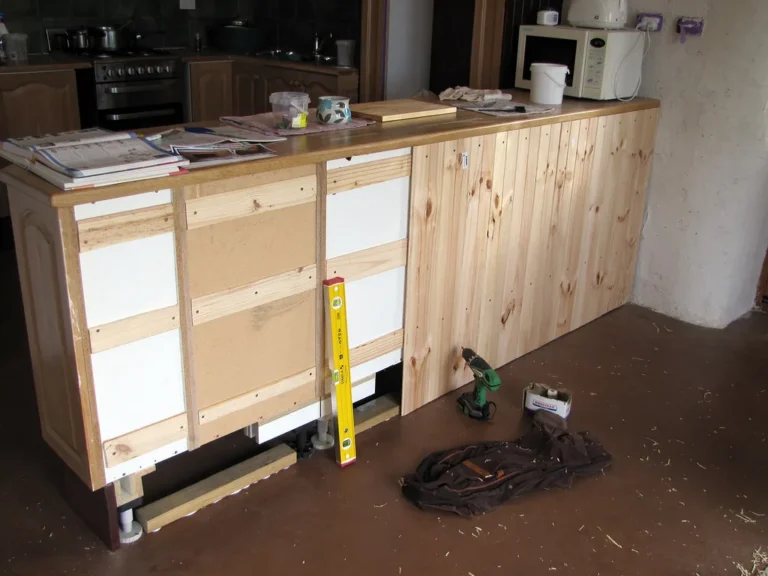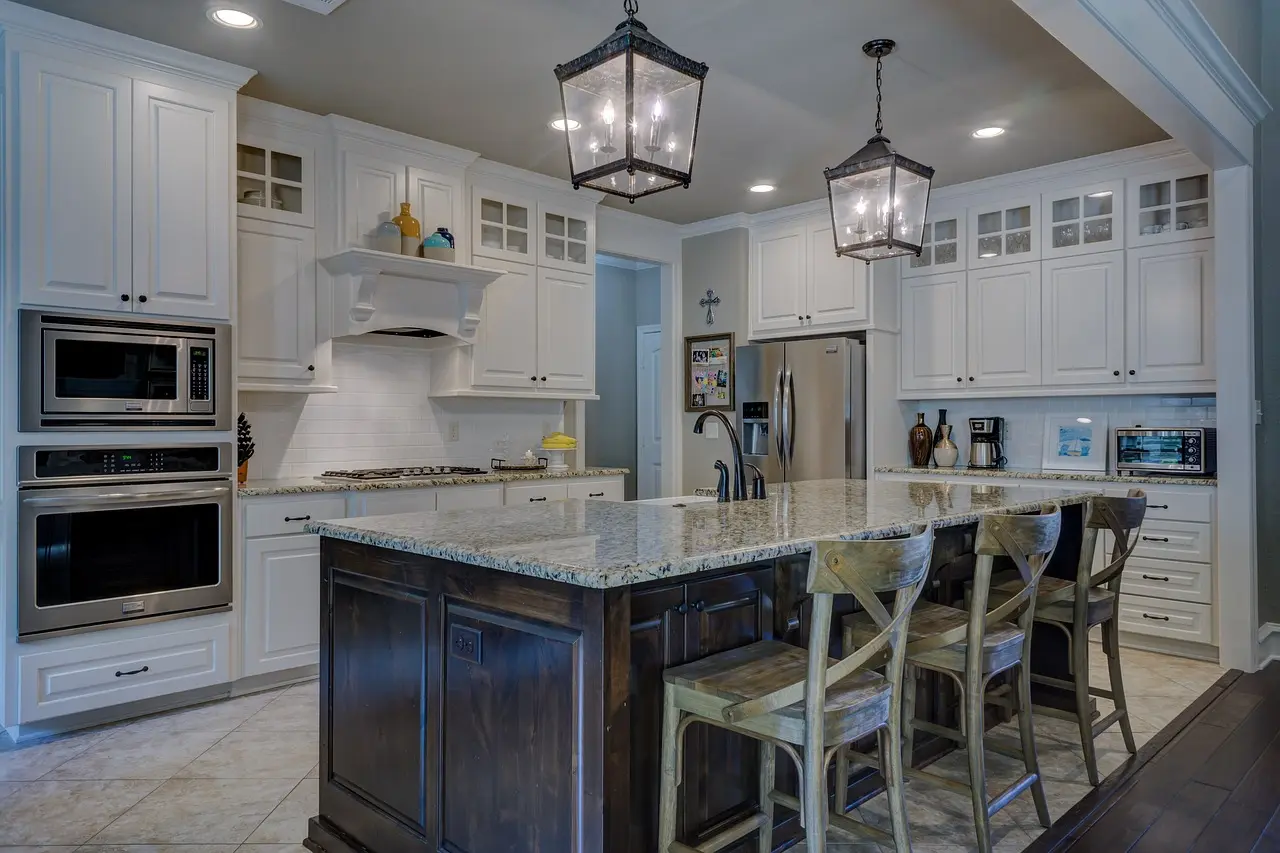
Kitchen Cabinets: Styles, Materials and Installation
For many remodels, all-plywood semi-custom cabinets with solid-wood or MDF painted doors are a practical choice; in general, decent stock lines may last around 15-25 years, and well-built custom cabinets may last longer. Those lifespan ranges are approximate, not guarantees, because moisture exposure, ventilation, hardware quality, and installation quality matter as much as the catalog specs. I have seen the expensive mistakes up close on remodels and punch-list work: fillers ordered after the fact, sink bases swelling, finishes peeling, and installers fighting crooked walls with cabinets that were built dead square. This guide compares styles, box and door materials, hardware, and stock, semi-custom, or custom installation fit so you can match budget, moisture risk, lifespan, and layout accuracy.
How should you choose kitchen cabinets first: style, material, or installation?

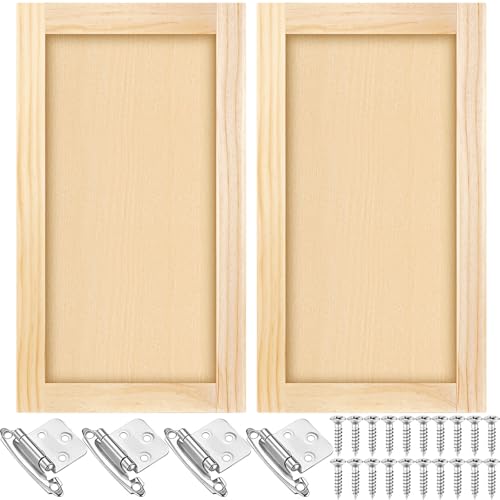
Choose cabinets by failure risk first, then by appearance. The order that keeps mistakes down is construction, door and drawer material, then installation method, and only after that door profile. That order ties the cabinet package to moisture exposure, alignment tolerance, cleanup demands, and how much site correction the room will need.
Start with failure risk, not door profile
A sink run that stays damp punishes weak box materials fast. A crooked floor punishes inset doors. A rental punishes fragile painted edges and fussy reveals. I start there long before anyone argues over white Shaker versus slab.
The common misses are predictable: sink-base swelling, warped doors near dishwashers, hinge screws loosening in weak substrate, drawer rack from poor slides, and reveal drift after installers rush leveling. I have seen cabinet lines look great under showroom lights and still turn into repair work six months later.
Match cabinet choices to the homeowner scenario
A budget refresh usually works best with full-overlay stock or semi-custom cabinets, simple fillers, and fewer layout changes. A family kitchen needs stronger drawer hardware, stiffer boxes, and a finish that stands up to constant wiping.
For rentals, I prefer forgiving door fit and finishes that are easy to touch up over tight reveals. In a high-moisture kitchen, the safer move is plywood boxes plus careful sink, dishwasher, and range-hood planning. For a premium remodel, appearance counts, but so does the crew’s ability to install to tighter tolerances.
The three decisions that lock in cost
The early cost drivers are cabinet construction, front material, and install labor. Frameless or inset work raises alignment pressure. Plywood boxes cost more than lower-grade particle boxes. Painted MDF doors can lower front cost, while stained solid wood often raises it because grain, color, and movement need tighter control.
Independent checkpoints matter more than brochure language. For cabinet claims about emissions, durability, and performance, I look for third-party or standards-based references such as KCMA/ANSI A161.1 performance testing, EPA TSCA Title VI formaldehyde compliance for composite wood products, and material guidance from APA and the Composite Panel Association. Manufacturer claims still need to be verified in writing.
What are the main kitchen cabinet styles and constructions?
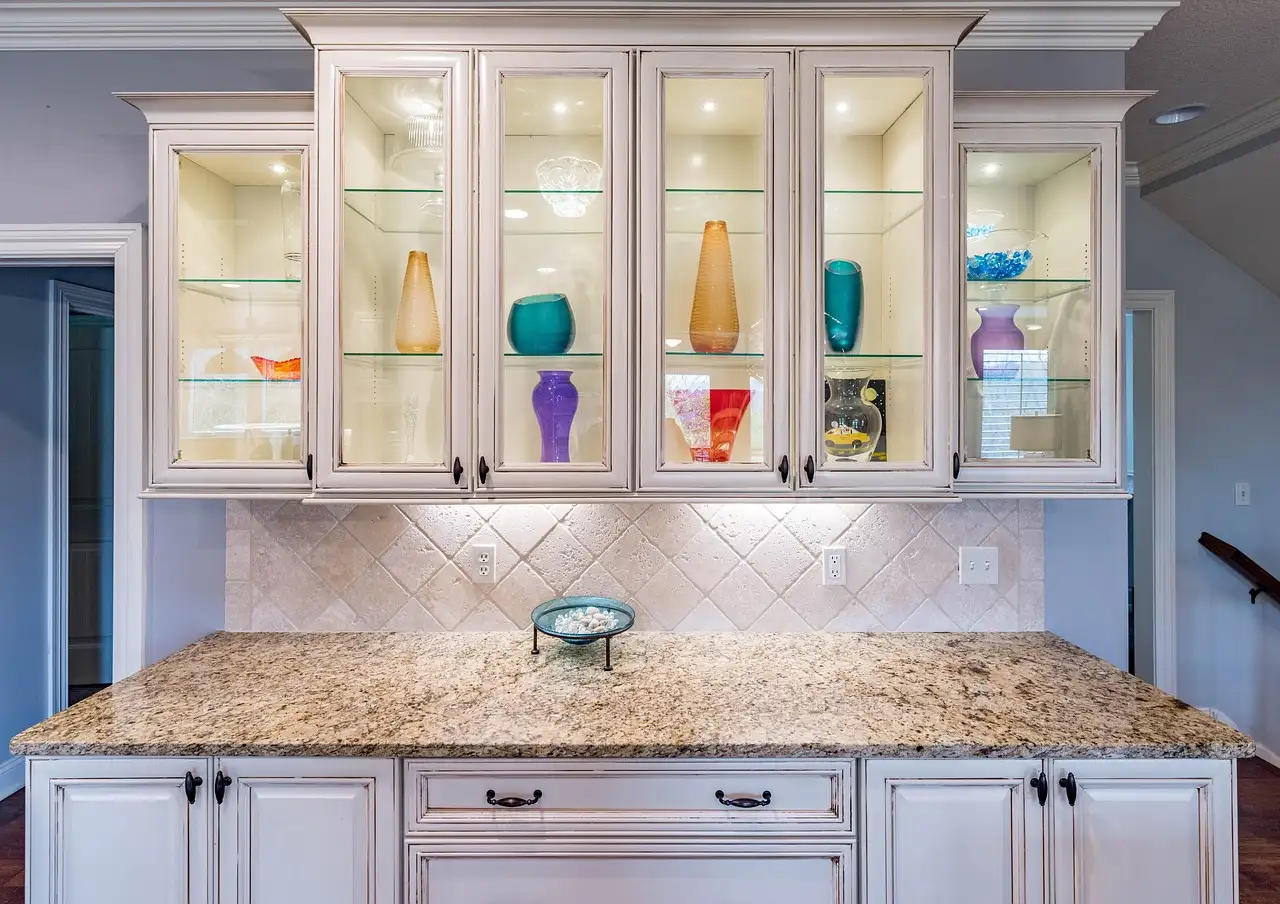
The main categories are Shaker doors, inset or overlay door fit, and frameless or face frame cabinet construction. These terms often get lumped together, but they describe different parts of the cabinet. Keeping them separate makes it much easier to compare reveal size, storage space, rigidity, and installation tolerance.
Shaker cabinets: five-piece doors that cross modern and traditional kitchens
Shaker cabinets use a simple framed door profile with rails, stiles, and a center panel. The profile has straight lines and a familiar frame, so it works in kitchens that lean modern and in rooms with more traditional trim and finishes. Shaker doors also work in painted or stained finishes, which helps explain why they stay widely specified.
Shaker is a door style, not a construction method. A Shaker door can be installed as inset or overlay, and it can be mounted on a face frame or frameless cabinet box. In real projects, that is why the same Shaker sample can land in entry-level, midrange, or premium bids.
Inset vs overlay cabinets: door fit, reveal size, and tolerance for error
Inset cabinets place the door inside the face frame opening. That creates a premium look, but it also demands precise measurements, flatter walls, and tighter final alignment. Small errors show fast because the reveals around each door stay in view.
Overlay cabinets place the door over part of the cabinet face. They come in partial overlay and full overlay versions. Overlay fit is more forgiving than inset, which is why I see it used again and again in budget and midrange projects.
Reveal size changes the final look. Partial overlay leaves more face frame visible. Full overlay covers more of the frame and reads cleaner. In practice, full overlay also hides minor cabinet-to-cabinet variation better than inset.
Frameless vs face frame cabinets: storage gain, rigidity, and hinge setup
Frameless cabinets use a European-style construction without a front face frame. That usually gives more usable interior storage and a more modern appearance, but installation has to be accurate because door and drawer alignment depends heavily on square boxes and careful leveling.
Face frame cabinets use traditional framed construction. They are common in North America and have a stiffer front structure, which can help keep the cabinet opening stable. The frame also affects hinge choice, drawer clearance, and how door alignment gets adjusted over time.
Why Shaker and inset are not opposites
Many homeowners compare Shaker and inset as if they were competing styles. They are not. Shaker describes the door profile. Inset describes how that door sits in relation to the frame.
A kitchen can have inset Shaker doors, full-overlay Shaker doors, or even slab inset doors. This matters because cost, upkeep, and install difficulty are driven more by fit and construction than by whether the center panel is Shaker.
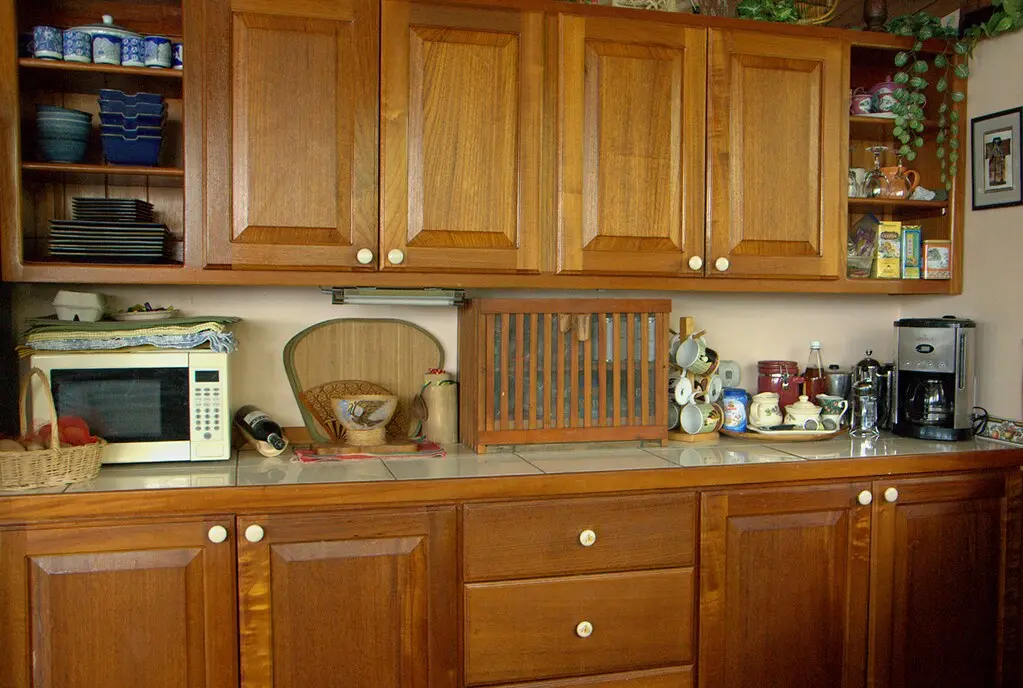
Shaker vs Raised Panel Cabinets by Kitchen Size and Budget
Shaker cabinets suit small, bright kitchens and tighter budgets because their flat centers are easier to clean and cost less to maintain. Raised panel doors offer a formal aesthetic but require more light, space, and upkeep tolerance due to deeper profiles that collect dust and grease.
Selecting the wrong style can darken a room or hurt resale value if it clashes with the home’s architecture. This comparison evaluates room size, lighting conditions, cleaning habits, and budget to help you avoid costly mistakes. Use the cabinet door style guide to match your specific kitchen constraints with the right profile before ordering.
Which cabinet materials hold up best in a real kitchen?
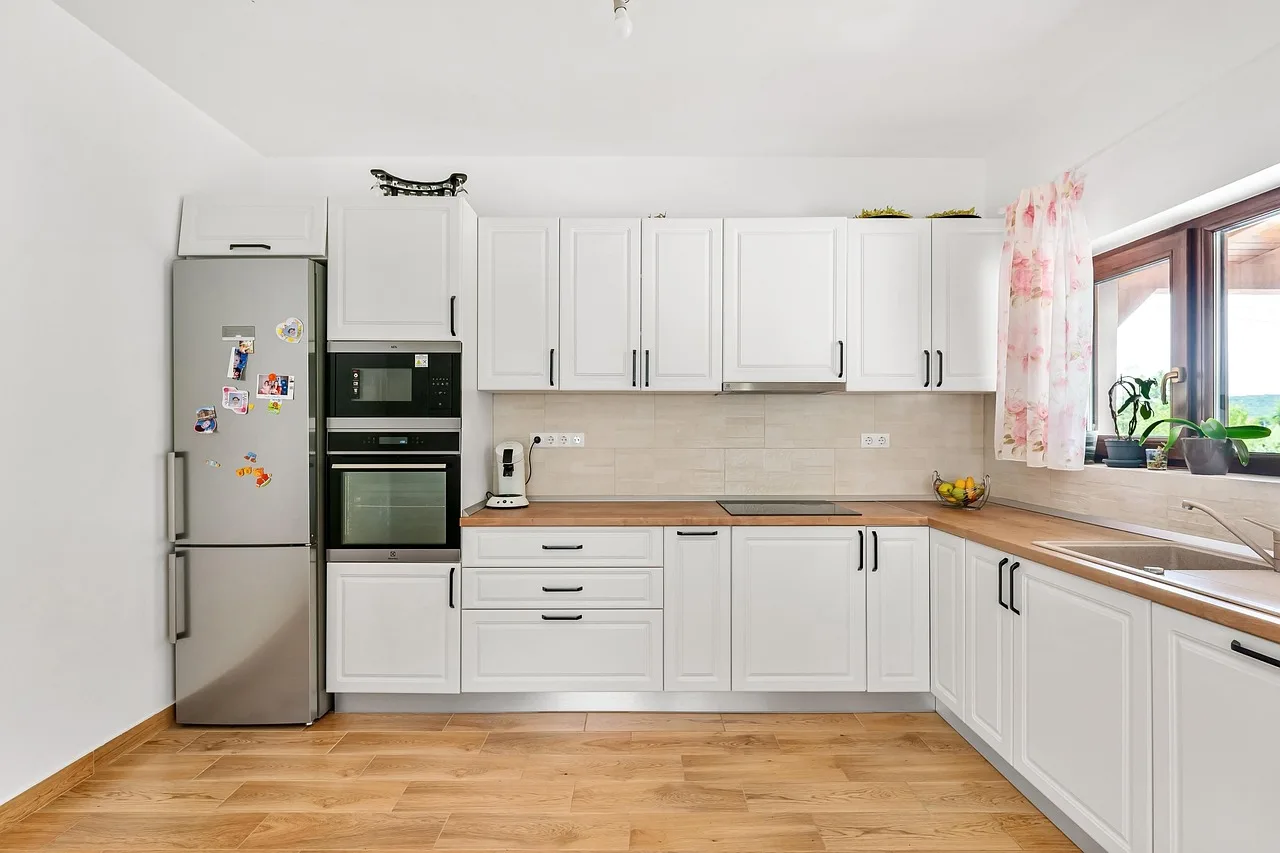
Plywood boxes usually handle kitchen abuse better than weaker engineered boxes, while MDF works well for stable painted door surfaces if moisture is controlled. Solid wood is strongest as a front material, not automatically as the whole cabinet. The right pairing depends on where water, steam, and repeated screw stress actually occur.
Plywood cabinet boxes: where the moisture and screw-holding advantages matter
Plywood cabinet boxes use layered wood construction. In kitchens, that matters most under sinks, beside dishwashers, and on long cabinet runs where screws, slides, and heavy drawers keep stressing the box. Better-quality cabinet boxes often use plywood in common thicknesses such as 1/2 inch to 3/4 inch.
For homeowners trying to compare quotes, the useful question is not whether a display door looks nice but whether the sides, bottom, back, and hanging rails are plywood, what thickness they are, and how the back is attached. APA guidance on structural wood panels is one reason plywood remains the safer upgrade where stiffness and fastener holding matter.
Plywood is not magic. Poor joinery, weak backs, or sloppy installation can still leave a rigid material performing badly. But when moisture exposure is part of the picture, plywood is usually the safer box upgrade than spending the same money on decorative trim.
MDF cabinet components: when the paint finish is worth it and when moisture is a problem
MDF is engineered fiberboard. Its main advantage is a smooth, paintable surface that avoids some grain telegraphing seen under paint on wood. That makes it a practical choice for painted doors, end panels, and some decorative components.
Its weakness is moisture sensitivity. If the finish film breaks at a sink edge, dishwasher side, or toe-kick corner, swelling can follow. MDF performs better in lower-splash areas and on well-sealed painted fronts than it does in vulnerable cabinet boxes.
This is where many guides flatten the issue too much. MDF is acceptable when the job calls for a crisp painted look and water exposure is controlled. It becomes a weak choice when used where leaks, mopping water, or steam are routine. Composite panel standards and emissions rules are useful, but they do not change the basic fact that exposed MDF edges dislike water.
Solid wood cabinet fronts: species, grain variation, stain use, and humidity movement
Solid wood cabinet fronts are common in birch, maple, and oak. They take stain well, and the natural grain variation is part of the appeal. In practical buying terms, that means a stained wood kitchen will usually show more natural variation than a painted MDF kitchen.
Wood fronts move with humidity. That does not make them poor cabinet doors; it means you need realistic expectations. Seasonal movement can show at joints, and wide painted wood components can be harder to keep visually uniform than painted MDF. AWI quality discussions and long-standing millwork practice both reflect this: wood is durable, but it is not dimensionally static.
For stained finishes, solid wood often makes more sense than MDF because the grain is meant to be seen. For painted finishes, the cleaner surface of MDF can be a better visual choice if moisture risks are managed well.
Best material pairings by cabinet part
- Box: Plywood is the safer pick where moisture or heavy drawer use is expected.
- Door: Painted MDF works well for smooth painted finishes; solid wood suits stained fronts and natural grain.
- Panel: MDF is often fine for painted decorative panels away from direct water exposure.
- Drawer front: Solid wood is common where stain or impact resistance matters; painted MDF can work if edges are protected.
Which budget paint systems survive kitchen cabinet wear
The most durable low-cost finish for kitchen cabinets pairs a bonding primer with two coats of waterborne alkyd enamel. Standard wall paint or cheap acrylic trim paint fails quickly on high-touch doors, chipping around handles and gumming up within months. A failed paint job forces a full redo, making the initially cheaper option far more expensive over time.
Choosing the right system depends on your cabinet material and timeline. Cabinet-specific trim enamel offers the lowest risk for wood surfaces, while a dedicated bonding primer is essential for laminate. For a faster short-term refresh, water-based all-in-one refinishing paints work but sacrifice longevity. Comparing these options helps you decide where to spend for lasting results. The guide to budget cabinet paint breaks down which combinations hold up against daily kitchen use.
Thermofoil vs. Wood Cabinets for Kitchens and Baths
Thermofoil cabinets offer a lower upfront price and wipe-clean surfaces, making them practical for light-use areas or budget-conscious refacing projects. However, they are vulnerable to heat and moisture, which can cause peeling doors and swollen panels over time.
Wood cabinets handle the heavy use typical of kitchens and bathrooms far better, resisting steam and allowing spot repairs instead of full replacements. Choosing the wrong material often leads to higher long-term costs when thermofoil fails near stoves or sinks. Comparing thermofoil versus wood cabinets across cost, durability, maintenance, and failure risk ensures you select the right option before your remodel begins.
Comparing Fabuwood Collections and Build Quality
Fabuwood positions itself as a mid-range option that offers more design flexibility than basic stock lines, but the right choice depends heavily on which collection you select. The Allure line suits most kitchens, Quest works for tighter budgets, and Illume provides a frameless aesthetic with a distinct build style.
To help you weigh these options, our detailed review breaks down the materials, hardware quality, and chip resistance of each line. Understanding these differences is critical because it directly impacts durability and whether the cabinet fits your specific space and style goals. Explore the full Fabuwood cabinets review to see how each collection performs against others in the market.
Fabuwood Collections and Build Quality Breakdown
Fabuwood occupies a mid-range position that offers more design flexibility than basic stock lines without jumping to custom pricing. The specific value depends heavily on which collection you select. Our detailed analysis in the Fabuwood cabinets review breaks down the differences between the Allure, Quest, and Illume lines. Allure suits most standard kitchens, Quest targets tighter budgets, and Illume provides a frameless aesthetic with distinct build characteristics.
Understanding these variations is critical because they directly impact durability and maintenance. We examine the chip resistance of the finishes and the quality of the included hardware. This context helps you determine if the construction methods align with your household’s wear patterns and budget constraints before ordering.
Choosing Contact Paper to Refinish Cabinet Surfaces
Thicker peel-and-stick vinyl with a repositionable adhesive prevents the bubbling, edge lifting, and seam issues that thin films cause on cabinet doors and shelves. Selecting the right roll width for each cabinet zone reduces rework and keeps the finish flat across high-use surfaces.
The supporting guide breaks down how to match contact paper thickness, adhesive type, and coverage area to specific cabinet zones, including shelves and removable applications. It also explains how to calculate the exact yardage needed before cutting. If you plan to refresh existing boxes without painting or replacing doors, choosing the best cabinet contact paper ensures the material holds up to daily handling and humidity.
Which wood filler matches your cabinet repair and finish?
The right wood filler depends on the size of the damage and whether your cabinets are painted or stained. Two-part epoxy fillers handle large dents and broken corners without shrinking, while lightweight putties work best for filling tiny nail holes before painting. Stainable formulas are essential for visible wood grain, since standard fillers absorb stain unevenly and leave obvious blotches.
Choosing the wrong product leads to patches that crack, show through paint, or refuse to take color. This breakdown compares top options by repair size, finish type, and drying speed so you can match the material to the job. Find the right cabinet wood filler to keep repairs invisible and avoid redoing the work later.
Painted vs Stained Cabinet Finishes: Durability and Repair
Stained cabinets reveal natural wood grain and generally withstand heavy daily use with fewer visible touch-ups, while painted cabinets deliver a uniform color that makes small spot repairs straightforward. Choosing the wrong finish for your substrate or kitchen traffic leads to chips, grain telegraphing, and mismatched patches that drive up long-term maintenance costs.
This comparison evaluates how each finish performs across different cabinet materials, cleaning routines, sheens, and topcoats. It also breaks down real-world repair expenses and includes a decision matrix to match the right option to your specific kitchen conditions. Review the full breakdown of painted vs stained cabinets before finalizing your order to avoid premature refinishing.
What cabinet construction lasts longest in a kitchen?
The longest-lasting cabinet construction usually combines rigid boxes, well-supported backs, dependable joinery, and accurate installation. Longevity comes from matching the box material to moisture exposure and matching the door fit to the room’s tolerances. Poor leveling, weak substrate, or repeated water contact can ruin expensive cabinets early.
Box thickness, joinery, and back panel support
Box thickness matters, but not by itself. A cabinet with decent side panels can still fail if the back is flimsy, the hanging rail is weak, or fasteners are poorly placed. Wall cabinets especially need a solid back and proper anchoring because sag starts there.
Face frame cabinets often feel more stable at the front opening because the frame stiffens that edge. Frameless cabinets rely more on the accuracy of the box itself and on careful assembly at each joint.
Moisture damage patterns around sinks, dishwashers, and poorly vented kitchens
Most early cabinet damage starts at the wet zones. Sink bases swell from slow drips. Dishwasher end panels catch steam if the gasket or venting setup is poor. Upper cabinets near weak range hoods collect greasy moisture that breaks down finishes and hinge performance over time.
Plywood boxes resist these problems better than weaker engineered boxes, but they still need sealed edges, tight plumbing, and prompt leak repair. A good box cannot make up for a chronic leak.
Door warp, edge wear, and hinge pull-out
Warped doors usually come from uneven moisture, poor material choice for the location, or weak construction in the door itself. Painted edges chip most often at busy corners and below pull areas. Thermofoil can also fail at edges when heat or moisture keeps working the bond.
Hinge pull-out is usually a substrate problem or an overused adjustment point. If screws are repeatedly tightened into weak material, the door eventually sags. Drawer sag often starts when wide, loaded drawers are paired with light-duty glides or loosely squared boxes.
How face frame and frameless cabinets age differently
Face frame cabinets often hide small box irregularities better as the kitchen settles. Frameless cabinets can deliver tighter, cleaner reveals and more storage, but they show leveling errors sooner. When install accuracy is excellent, frameless performs very well. When it is rushed, reveal drift becomes obvious fast.
Inset vs. Overlay Cabinet Doors: Which Fits Your Kitchen?
Choosing between inset and overlay cabinet doors determines your kitchen’s storage capacity, installation budget, and long-term maintenance. Inset doors sit flush inside the face frame for a precise, furniture-like appearance, but they require skilled installation and cost more. Overlay doors cover the frame partially or fully, offering a wider opening, simpler hanging, and a lower price point.
Mismatching either style to your installer’s skill level or budget often results in rubbing doors, uneven gaps, or lost interior space. This comparison of inset versus overlay doors breaks down how face-frame construction affects fit, what tolerance each style demands, and which option delivers better value for specific remodel scenarios.
Do you need soft-close hinges and drawers?
Soft-close hinges and drawer glides are useful in many kitchens, but they are not necessary in every remodel. They reduce noise and can cut wear from repeated slamming. Their value is highest in family kitchens, rentals with frequent use, and any layout where doors and drawers are opened constantly.
Where soft-close hinges and glides make the biggest daily difference
Soft-close hardware matters most on trash pull-outs, cookware drawers, kids’ snack zones, and corner cabinets that take repeated hits. These are the spots where slamming hardware and door rack usually show up first.
That points to current market demand more than some rare luxury add-on. In my experience, homeowners notice the benefit most on the heaviest drawers, not necessarily on every small upper door.
When soft-close helps durability and when it is mostly a comfort upgrade
On lightweight guest-bath style cabinetry in a low-use kitchen zone, soft-close is mostly about comfort. On deep drawers loaded with dishes or pots, it can reduce repeated impact on the cabinet box and hardware mount points.
The key point is simple: soft-close helps daily use, but it does not rescue a weak box or bad install.
Hardware checkpoints that matter more than brand names
- Look for smooth adjustment range on hinges so reveals can be corrected after seasonal movement or minor settling.
- Check slide attachment and drawer box squareness; a good glide on a crooked drawer still performs badly.
- Ask whether doors and drawers are aligned after installation, not only prepped in the shop.
Choosing the Right Cabinet Door Bumpers for Quiet Closing
Adhesive silicone bumpers in 1/8-inch to 1/4-inch thickness stop most face-frame cabinet doors from banging shut, while 3/8-inch pads work better for wider gaps or firmer stops. Using the wrong thickness leaves doors misaligned, noisy, and hard on hinges.
Matching bumper shape, material, and size to your cabinet style and clearance prevents long-term wear. Options range from clear polyurethane dots and felt pads for light-duty finish protection to magnetic catches and soft-close dampers when a door needs stronger closure. The guide to cabinet door bumpers breaks down how to pair each type with specific noise levels and hardware setups.
Choosing the Right Screws for Secure Cabinet Installations
The strength and longevity of a cabinet build hinge on the screws you use. This guide breaks down the most reliable options, starting with the default #8 × 2½‑in washer‑head screw and explaining when to upgrade to longer or specialty fasteners. It includes a quick comparison chart, the criteria used to rank products, and a detailed selection table that highlights top picks such as Etauwe #8 × 3 in wood screws for general fastening, Tapcon concrete anchors for masonry‑adjacent jobs, and FASTENPOWER #8 × 1 in screws for hinges.
Follow the recommendations to avoid stripped holes, over‑driving, or weak joints. For a full rundown, see the best cabinet screws guide.
Matching Cabinet Door Latches to Your Build for Child Safety
The right child-proofing latch depends entirely on your cabinet construction. Adhesive latches work well on flat, clean interiors and suit renters who cannot drill, while screw-mount magnetic latches handle doors that flex or see heavy daily use. Choosing the wrong type means latches peel off, pop open unexpectedly, or leave hazardous under-sink items within a toddler’s reach.
A proper fit check prevents these failures before they happen. This breakdown of cabinet door latches compares options by mounting method, cabinet style, and common failure points so you can secure your kitchen correctly the first time.
When to choose visible hinges versus concealed hinges
If your cabinet doors are traditional, inset, or easy to replace later, visible hinges can be the simpler choice; if you want a cleaner look, more adjustment, and a fit that suits most modern frameless or overlay doors, concealed hinges usually win. The key is matching the hinge to the cabinet construction before you order hardware, because the wrong choice can lead to gaps, binding doors, or an expensive retrofit.
The full cabinet hinges comparison breaks down the trade-offs by door style, face-frame vs. frameless cabinets, installation complexity, and long-term adjustability so you can pick the option that fits your project and avoid preventable fit issues.
Choosing Between Cabinet Pulls and Knobs
The guide breaks down when to use cabinet pulls vs knobs by looking at door size, drawer weight, hand reach, and drill‑hole limits. Pulls are the safer default for drawers and wide doors, while knobs work best on smaller, lighter doors; keeping the existing hole pattern avoids extra patching or redrilling. By matching hardware to the cabinet’s function you prevent awkward grips, sore fingers, and unnecessary remodel work. The article walks you through each use‑case so you can select the right handle before you buy, ensuring both ergonomics and a seamless finish.
Choosing the Right Shelf Pins for Adjustable Cabinet Storage
The guide explains cabinet shelf pins and how to match pin type, size, material, and load to kitchen cabinets, pantries, and utility storage. It starts by stating the rule that the best pins are the largest your holes can accept—typically 1/4‑inch—and then walks through the impact of worn holes and heavier loads, recommending steel pins with a shoulder in those cases. It compares standard steel pins, locking/threaded pins, spoon‑style supports, and plastic sleeves, showing which is best for most kitchens, loose or worn holes, wide heavy shelves, and light‑duty storage.
Understanding these differences prevents wobbling, sagging, or cracked panels, ensuring your adjustable shelves stay level and secure.
Optimizing Small Kitchen Corners with the Right Organizer
Small kitchens lose valuable storage to awkward corner cabinets, but the right organizer can turn that dead space into a functional zone. The guide breaks down three main solutions—blind‑corner pull‑outs for deep, hidden corners, lazy Susan units for standard corners, and swing‑out hardware for heavier pots—explaining how cabinet dimensions, clearance, and load capacity determine the best fit. It also offers a quick‑comparison chart, a compatibility checklist, and tips for measuring before you buy, helping you avoid hardware that hits doors, blocks plumbing, or sags under weight. Discover which system suits your layout in our detailed review of the top corner cabinet organizers.
Pull-Outs vs Lazy Susans: Which Corner Solution Wins?
This guide breaks down the key differences between corner cabinet pull‑outs and Lazy Susans, helping you decide which retrofit maximizes space and usability. It explains how cabinet shape, door swing, and interior depth dictate the proper fit, compares sight lines, load capacity, and installation effort, and outlines cost implications. By following the step‑by‑step measurements and load‑bearing tips, you can avoid hidden corners and frustrating searches, ensuring everyday items stay visible and reachable. See the detailed comparison of corner cabinet pull-outs and Lazy Susans in the article.
How much do kitchen cabinets cost installed?
Installed cabinet cost often changes more with scope and difficulty than with door style alone. Stock, semi-custom, and custom lines can bring different labor demands, and site conditions can add time quickly. Box material, hardware, panels, fillers, crown, and layout corrections all move the final number more than many homeowners expect.
Stock, semi-custom, and custom: what changes the labor and material bill
Stock cabinets usually keep costs down because sizes and options are limited. Semi-custom raises material cost but can cut field improvisation if the kitchen needs smarter sizing. Custom increases both fabrication and install expectations because reveals, fillers, and alignment are often less forgiving.
Expect labor to rise when cabinet fit gets tighter. Inset, tall stacked cabinets, and long frameless runs all ask more from the crew than basic full-overlay stock boxes.
Door style, box material, hardware, panels, fillers, and trim as price drivers
Shaker doors are often easier on the budget than heavily profiled traditional doors, but front style is only one line item. Plywood box upgrades, finished end panels, appliance panels, crown, light rail, pull-out accessories, and hardware packages can change the installed total quickly.
Finish system quality can also affect price and repairability. I care less about the paint supplier name than about how the finish performs at edges, how it touches up after installation, and whether the line has a documented warranty and replacement path.
Site conditions that raise install cost
Uneven floors, out-of-plumb walls, tall ceilings, soffit removal, plumbing conflicts, and electrical relocation all raise labor. So does replacing cabinets while trying to preserve flooring or countertops that were not laid out for the new cabinet footprint.
Professional crews also spend time on layout confirmation. Detailed field measurement, appliance verification, and dry-run checking cost money, but they cut ordering mistakes. From what I have seen, that is cheaper than emergency fillers, remakes, or countertop gaps later.
Where to spend for longevity and where to save without regret
Spend on the box, the sink-base area, drawer hardware, and installer accuracy. Save on decorative add-ons that do not affect wear, such as extra trim in a modest kitchen or fussy inset work in a room with poor geometry.
If the budget is tight, a full-overlay Shaker cabinet with a plywood box and modest hardware package usually makes more sense than an inset cabinet with weaker internals.
What should you know before cabinet installation?
Before cabinet installation, verify room dimensions, appliance specs, floor level, wall straightness, and utility locations. Most install trouble starts before the truck arrives. Accurate field measurement, layout confirmation, shimming plans, and replacement sequencing decide whether the job ends with tight reveals or with emergency fillers and recut panels.
Measure walls, ceilings, floors, and appliance clearances the way installers do
- Measure each wall in more than one place because room width can change from front to back.
- Check floor level across the full cabinet run and at the highest point where base cabinets start.
- Check wall plumb and corner bow; tall pantry units expose these errors fast.
- Confirm appliance specifications, including door swing and required clearances.
- Mark plumbing, outlets, vents, and shutoffs before final cabinet ordering.
Professional cabinet installation: laser measurements, layout confirmation, shimming, and final alignment
Professional cabinet installation should include laser measurements, layout confirmation, wall leveling and shim adjustment, and final alignment of doors, drawers, and reveals. Those steps are where many replacement projects either go smoothly or turn into on-site problem solving.
When I compare installers, I look for licensed crews where required, written scope, field verification, appliance coordination, and a final adjustment visit if needed. Alignment work matters as much as the boxes themselves, especially on frameless runs and inset jobs.
Replacement sequencing for remodels with countertops, flooring, and backsplash work
Cabinets usually set the layout for countertops and backsplash. Flooring can go before or after cabinets depending on the material and the remodel plan, but the sequence should be decided early so appliance heights and toe-kick lines do not get thrown off.
If countertops are staying, replacement gets harder. Small sizing changes can create visible gaps at walls or appliance openings, and old tops rarely forgive cabinet moves.
Red flags that turn a simple cabinet swap into a layout correction job
- Walls are visibly out of straight over a long run.
- The old cabinets were used to hide major plumbing or electrical offsets.
- Flooring height changed after the original kitchen was built.
- The plan includes inset doors in a room that already shows settlement.
- The homeowner wants reuse of old counters with new cabinet dimensions.
Cabinet decision matrix for 5 homeowner scenarios
How to read the matrix
This matrix links a homeowner scenario to the safer cabinet style choice, the material pairing that fits the risk, and the expected installation complexity. It is meant to narrow decisions fast, not replace a room-specific measure.
| Style | Material | Installation complexity |
|---|---|---|
| Budget refresh: Full-overlay Shaker or simple slab; avoid inset unless the room is unusually square. | Plywood box if possible; painted MDF doors are acceptable in dry zones; save on decorative panels first. | Low to medium; stock or semi-custom works if appliance sizes and fillers are checked early. |
| Family kitchen: Full-overlay Shaker on face frame or frameless boxes for easier daily use and less reveal stress. | Plywood boxes, solid wood or painted MDF doors, soft-close hinges and glides on busy drawers and doors. | Medium; layout accuracy matters because heavy-use drawers expose poor leveling quickly. |
| Rental: Partial or full overlay with forgiving reveals; avoid tight inset reveals and delicate painted edges at impact zones. | Plywood box where wear is high; simple stained wood fronts or durable painted fronts that are easy to touch up. | Low to medium; prioritize repeatable parts and easy future door adjustment. |
| High-moisture kitchen: Full-overlay face frame or frameless, depending layout; avoid material choices that leave exposed vulnerable edges near water. | Plywood boxes around sink and dishwasher runs; limit MDF use to safer painted panels and protected doors. | Medium to high; water-risk areas need careful appliance fit, ventilation, and sink-base detailing. |
| Premium remodel: Inset or refined full-overlay, often Shaker or slab; choose only if the room and installer can hold tighter tolerances. | Plywood boxes with selected solid wood fronts or painted MDF where a smoother paint surface is preferred. | High; custom sizing, precise reveals, and wall correction work often increase labor. |
Budget refresh and rental scenarios
These two scenarios reward forgiveness. Overlay doors hide more install variation, and replacement parts are easier to source later. The wrong place to overspend here is on inset fit or heavy trim while accepting weak boxes.
Family kitchen and high-moisture kitchen scenarios
Family kitchens punish drawer systems more than almost any other area. High-moisture kitchens punish box material first. In both cases, soft-close and plywood boxes are easier to defend than decorative upgrades.
Premium remodel scenario
Premium projects often chase tighter reveals and cleaner sightlines. That can work very well, but only when measurements, shimming, and final alignment are treated as core parts of the budget. For higher-end quotes, I still come back to the same checkpoints: independent standards, clear construction details, and an installer who can prove they routinely hit those tolerances.
Frequently asked questions
Are solid wood cabinets better than plywood?
For cabinet boxes, plywood is usually the stronger choice in kitchens because it handles moisture and fastener stress better than many lower-grade alternatives. For visible fronts, solid wood is often preferred for stained finishes and natural grain. They do different jobs, so one does not replace the other.
What is the difference between shaker and inset cabinets?
Shaker is a door style with a five-piece profile. Inset is a door fit where the door sits inside the face frame opening. A kitchen can have inset Shaker doors, overlay Shaker doors, or non-Shaker inset doors, so these terms describe different cabinet characteristics.
How do I choose kitchen cabinets for a budget remodel?
For a budget remodel, focus first on box construction, forgiving door fit, and layout simplicity. A full-overlay Shaker cabinet with plywood boxes where moisture risk is highest is usually a safer spend than paying extra for inset fit, custom trim, or decorative details that do little for daily performance.
Are plywood cabinets worth the extra cost?
Usually yes in wet or high-use areas. If the budget only allows a few upgrades, I would rather put money into plywood sink-base and dishwasher-adjacent cabinets, sturdier drawer hardware, and better installation than into decorative trim.
What is better for painted cabinets, MDF or solid wood?
For a smooth painted look, MDF often wins on appearance. For higher-impact areas or stained finishes, solid wood is often the better fit. The caveat is simple: painted MDF can look excellent, but it should stay away from repeated water exposure and damaged edges.
How long do kitchen cabinets last?
Many decent stock or semi-custom cabinets land around 15-25 years, and some well-built custom kitchens last longer. That is a broad real-world estimate, not a warranty promise, because leaks, steam, heavy use, and poor installation can shorten lifespan dramatically.
Should I choose stock, semi-custom, or custom cabinets?
Choose stock when the layout is simple and budget is tight, semi-custom when sizing flexibility can prevent field compromises, and custom when the room or design really needs it. In many average kitchens, semi-custom is the practical middle ground because it solves more fit problems without pushing every decision into premium pricing.
What should I check before signing a cabinet order?
Confirm box material, box thickness, back construction, door material, hinge and slide type, finish warranty, appliance sizes, filler widths, and who is responsible for field measurement. I also want the sink-base plan, panel count, and installation scope in writing before deposit day.
Cabinet installation checklist you can use before ordering
If you want one practical beyond the matrix, use this checklist. I built it from the recurring misses I have seen on kitchen replacements, and it is meant to catch measurable problems before fabrication starts.
| Checkpoint | Pass standard | Why it matters |
|---|---|---|
| Floor level across base-cabinet run | Variation identified and highest point marked before order | Controls toe-kick height, countertop level, and door reveal consistency |
| Wall plumb and corner bow | Measured in multiple spots, especially at tall pantry locations | Reduces filler surprises and side-panel scribing problems |
| Appliance specification check | Model numbers and required clearances confirmed in writing | Prevents range, fridge, and dishwasher fit failures |
| Sink-base moisture plan | Plywood or protected box specified; plumbing reviewed | Targets the most common early-failure area |
| Door fit choice | Inset only if room geometry and installer skill support it | Avoids paying for a tolerance the room cannot hold |
| Final alignment scope | Installer responsible for adjusting doors and drawers after set | Separates a complete install from a drop-and-go install |
Sources
- Kitchen Cabinet Manufacturers Association (KCMA), ANSI/KCMA A161.1 performance standard for kitchen and vanity cabinets.
- U.S. Environmental Protection Agency (EPA), TSCA Title VI requirements for formaldehyde emissions from composite wood products.
- APA – The Engineered Wood Association, guidance on plywood and structural panel performance.
- Composite Panel Association, technical information on MDF and particleboard properties and use limitations.
- Architectural Woodwork Institute (AWI), quality standards and guidance relevant to wood movement, tolerances, and millwork expectations.
- My own field observations from cabinet replacement, punch-list correction, and installation troubleshooting; these are experience-based notes, not lab testing.
Products related to this article
Sponsored / affiliate links. As an Amazon Associate I earn from qualifying purchases. I may earn additional commission from eligible campaigns.