How To Make Kitchen Cabinets
Building your own kitchen cabinets is one of the most rewarding home improvement projects a DIYer can undertake. Not only does it save you significant costs compared to custom cabinetry, but it gives you full control over the style, materials, and functionality of your kitchen space.
Whether your motivation is to maximize storage, achieve a custom look, or simply enjoy the satisfaction of crafting something lasting, making kitchen cabinets from scratch is a project that pays off for years to come.
In my experience, the process can seem daunting, but with the right planning, tools, and techniques, even intermediate woodworkers can achieve professional results. This comprehensive guide covers every crucial stage, from selecting materials and designing layouts to precise joinery, assembly, and finishing.
Real-world examples, comparison tables, and expert tips will help you avoid common pitfalls, manage your budget, and ensure the cabinets you build are both beautiful and built to last.
Key Takeaways
- Building kitchen cabinets yourself saves money and allows for complete customization.
- Careful planning, accurate measurements, and quality materials are crucial for success.
- Essential steps include design, cutting, assembly, finishing, and installation.
- Using the right tools and joinery methods ensures durability and professional results.
- Real-world examples, data tables, and expert tips help you avoid common mistakes.
- The process requires patience but delivers long-lasting satisfaction and value.

Credit: kitchensearch.com
Planning Your Kitchen Cabinets
Proper planning is the foundation of any successful cabinetry project. This phase includes assessing your needs, designing the layout, choosing materials, and preparing a detailed plan.
Assessing Your Needs And Measuring The Space
Start by evaluating your kitchen’s current storage and workflow. List the items you need to store, from pots and pans to food containers and small appliances. Consider how your cabinets can make daily tasks easier, think about accessibility, counter space, and appliance placement.
Steps for Accurate Measurement:
- Measure the room’s length, width, and height.
- Note the location of windows, doors, outlets, plumbing, and appliances.
- Mark these on a scaled floor plan.
- Double-check all measurements, accuracy is crucial to avoid costly mistakes.
Pro Tip: Use a laser measure for precision and transfer all dimensions to graph paper or a digital design tool.
Designing Your Cabinet Layout
A well-designed layout maximizes storage and enhances workflow. The “kitchen work triangle” (sink, stove, refrigerator) should remain unobstructed. Consider popular cabinet configurations:
- Base cabinets: Standard height is 34.5 inches; depth is 24 inches.
- Wall cabinets: Typically 12 inches deep, mounted 18 inches above the countertop.
- Tall cabinets: Used for pantries or ovens, height may reach 84-96 inches.
Include a mix of drawers, shelves, and specialty organizers for optimal function.
Choosing Materials
Material selection affects durability, appearance, and cost. Common options include:
| Material | Pros | Cons | Estimated Cost (per sheet) |
|---|---|---|---|
| Birch Plywood | Strong, stable, good for painting | Visible plies on edges | $60, $90 |
| MDF | Very smooth, inexpensive | Heavy, less moisture resistant | $30, $50 |
| Melamine | Pre-finished, easy to clean | Chips easily, exposed edges need covering | $40, $65 |
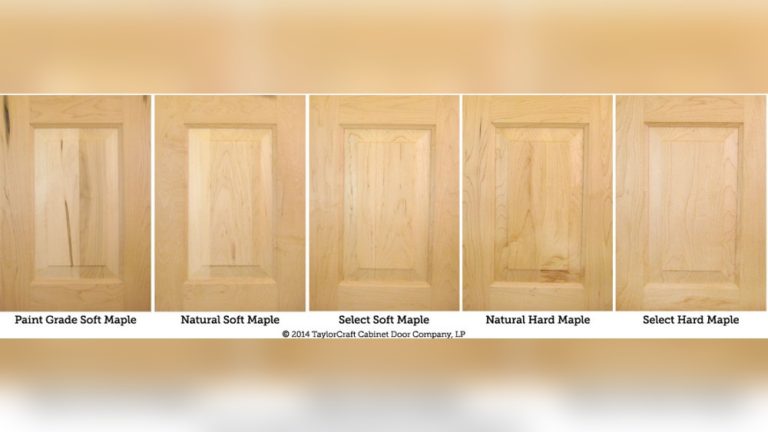
| Hardwood (maple, oak) | Durable, beautiful grain | Expensive, more difficult to work | $80, $120 |
Example: For a cost-effective kitchen, many DIYers use birch plywood for the cabinet boxes and solid hardwood for the face frames and doors.
Budgeting And Timeframe
Building cabinets yourself can save 50, 70% compared to buying custom units. For a standard 10×10 kitchen, expect to spend $1,000, $2,500 on materials. Allow 2, 4 weeks for completion, depending on skill level and project complexity.
Warning: Underestimating time or budget can lead to rushed work and compromises in quality.
Creating A Detailed Plan
Draw elevation views, cross-sections, and exploded diagrams of your cabinets. List every piece you’ll need, including panels, shelves, face frames, doors, drawers, and hardware. This ensures efficient use of materials and prevents errors during assembly.
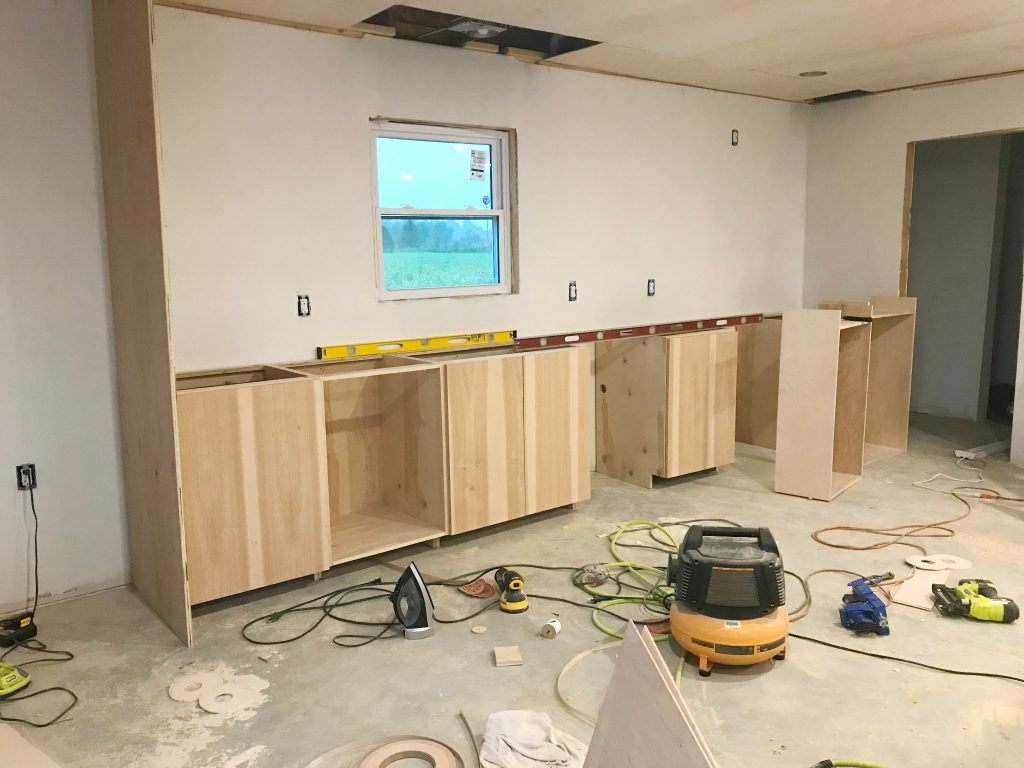
Credit: www.woodshopdiaries.com
Essential Tools And Workspace Setup
Equipping yourself with the right tools and preparing your workspace are crucial steps for efficient, accurate cabinet construction.
Must-have Tools For Cabinet Building
A blend of power and hand tools ensures precision and efficiency. Here’s a breakdown of essential equipment:
- Table saw: For straight, accurate cuts on large panels.
- Circular saw with guide: Useful for breaking down plywood sheets.
- Router: For cutting dadoes, rabbets, and decorative edges.
- Drill/driver: For assembling parts and installing hardware.
- Miter saw: For precise crosscuts and angles.
- Clamps: Multiple bar and pipe clamps are needed for glue-ups.
- Pocket hole jig: For strong, hidden joinery.
- Orbital sander: Ensures a smooth, professional finish.
- Measuring tools: Tape measure, square, marking gauge.
Example: Many successful cabinetmakers use a combination of table saw and circular saw with a high-quality guide track to achieve perfectly straight cuts on plywood.
Setting Up A Safe, Efficient Workspace
Choose a well-ventilated area with adequate lighting, such as a garage or basement. Install sturdy workbenches and ensure you have enough space to maneuver full-size plywood sheets. Organize tools for easy access and safety.
Pro Tip: Lay down foam boards or sacrificial plywood to protect your workpieces and blades during cutting.
Optional Tools And Jigs
While not strictly necessary, these can speed up the process and improve accuracy:
- Track saw: Delivers precise cuts on large panels.
- Dado blade set: For clean, consistent grooves.
- Cabinet hardware jig: Speeds up handle and hinge installation.
Safety Considerations
Always wear safety glasses, hearing protection, and a dust mask when cutting or sanding. Keep your workspace clean to reduce the risk of accidents.
Warning: Never remove safety guards from power tools. Follow manufacturer guidelines at all times.
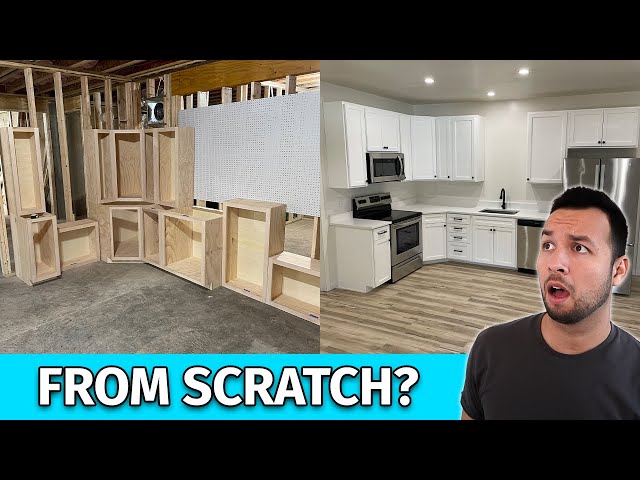
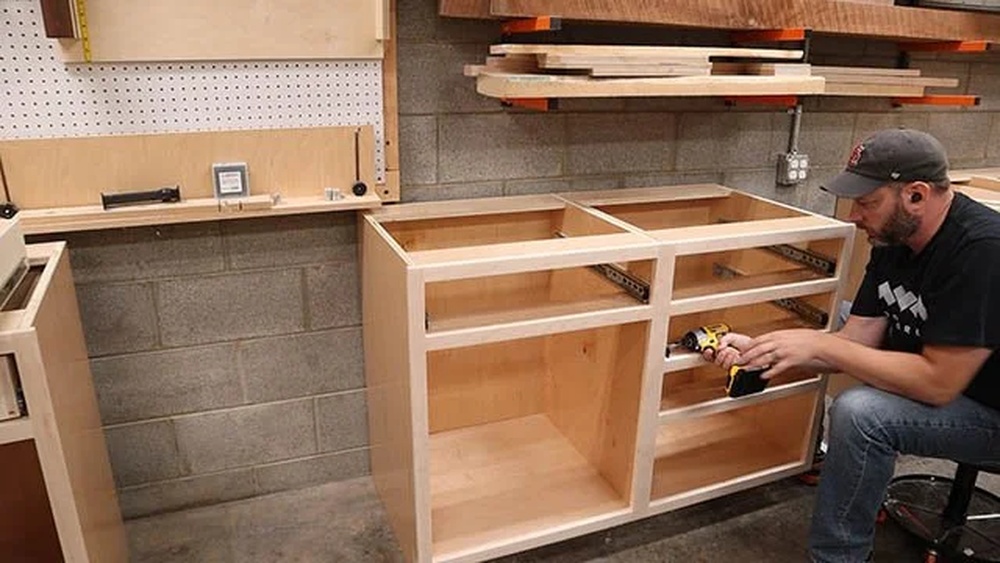
Credit: www.youtube.com
Step-by-step Cabinet Construction
This section breaks down the cabinet-building process into manageable steps, from cutting materials to final assembly.
Cutting The Panels
Begin by ripping plywood sheets into the panels required for your cabinet boxes (sides, tops, bottoms, and shelves). Use your cut list to maximize material efficiency and minimize waste.
Steps:
- Double-check measurements before cutting.
- Use a table saw or circular saw with a guide for straight edges.
- Label each piece as you cut.
Assembling The Cabinet Boxes
Cabinet boxes, or “carcases,” form the structural foundation. Common joinery methods include dadoes, rabbets, and pocket screws.
- Dado joints: Offer excellent strength for shelves and dividers.
- Pocket screws: Fast and simple, especially for beginners.
- Rabbets: Create a strong rear joint for attaching the back panel.
Assembly Process:
- Dry-fit all pieces before applying glue.
- Use wood glue and clamps to secure joints.
- Reinforce with pocket screws or brad nails as needed.
- Attach back panels (typically 1/4″ plywood) for stability.
Building Face Frames
Face frames create a finished look and add strength. Typically made from 1×2 hardwood (maple, oak, or poplar), they are assembled with pocket screws or dowels.
Steps:
- Cut stiles and rails to length.
- Join corners with glue and pocket screws.
- Attach the assembled frame to the cabinet box with glue and brads.
Example: One DIYer used poplar for face frames and achieved a flawless painted finish that rivaled high-end custom cabinets.
Constructing Doors And Drawers
Choose between slab, Shaker-style, or raised panel doors. Shaker-style is popular for its clean lines and ease of construction.
- Slab doors: Simple plywood panels with edge banding.
- Shaker doors: Frame and panel construction using pocket screws or mortise-and-tenon joinery.
For drawers, use 1/2″ or 5/8″ plywood for sides, with a 1/4″ plywood bottom set in a groove.
Drawer Joinery Options:
- Dovetails: Strongest, but require skill or a jig.
- Box joints: Attractive and strong.
- Pocket screws: Simple and effective for most home builds.
Finishing Touches
- Sand all surfaces up to 220 grit.
- Fill any visible screw holes or gaps with wood filler.
- Apply your chosen finish (paint, stain, clear coat) in a dust-free environment.
- Install hardware: Hinges, pulls, and drawer slides.
Pro Tip: Use a high-quality primer and enamel paint for a durable, professional look.
Real-world Example
A homeowner in Portland, Oregon, documented his kitchen cabinet build using birch plywood and poplar. He saved over $7,000 compared to quotes from custom cabinet shops and completed the project over three weekends. His biggest takeaway? “Measuring twice and cutting once saved me from expensive mistakes.
”
Installation And Adjustment
Proper installation is essential to ensure your cabinets are level, secure, and aligned.
Preparing The Installation Area
- Remove old cabinets and repair any wall or floor damage.
- Mark stud locations and snap a level chalk line at the base cabinet height.
- Dry-fit cabinets to check for fit and alignment.
Mounting Base Cabinets
- Set the corner or end cabinet first, ensuring it is level and plumb.
- Shim as needed to compensate for uneven floors or walls.
- Secure cabinets to wall studs using 2.5″ cabinet screws through the back rail.
- Join adjacent cabinets with clamps and screws through face frames.
Installing Wall Cabinets
- Use a ledger board temporarily screwed to the wall to support the cabinets during installation.
- Start with the corner cabinet and work outward.
- Shim and screw cabinets to studs, checking for level after each unit.
Final Adjustments
- Adjust door hinges for even gaps and smooth operation.
- Install toe kicks, crown molding, and any trim pieces.
- Attach countertops and reconnect plumbing/appliances.
Example: In a recent project, uneven floors required shimming almost every base cabinet. Taking the time for these adjustments ensured perfectly level countertops and seamless drawer operation.
Finishing And Customization
Once cabinets are installed, attention to detail in finishing and customizing can elevate the project from good to exceptional.
Painting And Staining
- Fill nail holes and caulk seams for a seamless appearance.
- Sand thoroughly between coats.
- Apply at least two coats of paint or polyurethane for durability.
- Use a sprayer for a glass-smooth finish, or a high-density foam roller for less mess.
Adding Hardware And Accessories
Install pulls and knobs using a cabinet hardware jig for consistent placement. Consider soft-close hinges and full-extension drawer slides for a premium feel.
Popular Accessories:
- Pull-out trash bins
- Spice rack pull-outs
- Lazy Susans
- Under-cabinet lighting
Custom Storage Solutions
Tailor interiors to your needs:
- Adjustable shelves for flexible storage
- Deep drawers for pots and pans
- Vertical dividers for baking sheets
Pro Tip: Pre-plan locations for all accessories before assembly to ensure proper fit.
Maintenance And Care
Clean surfaces with mild soap and water. Avoid harsh chemicals that can damage finishes. Tighten hardware annually and touch up paint as needed to keep cabinets looking new.
Example: A family who installed custom pull-out shelves reported a dramatic improvement in kitchen organization and accessibility, especially for older members.
Cost, Time, And Value Comparison
Understanding the return on investment and time commitment helps set realistic expectations.
Cost Breakdown
| Expense Category | DIY Cabinets | Stock Cabinets | Semi-Custom Cabinets | Custom Cabinets |
|---|---|---|---|---|
| Materials | $1,000, $2,500 | $2,000, $4,000 | $4,000, $8,000 | $8,000, $20,000+ |
| Labor | $0 (DIY) | $1,500, $3,000 | $2,000, $5,000 | $4,000, $10,000 |
| Total Estimate | $1,000, $2,500 | $3,500, $7,000 | $6,000, $13,000 | $12,000, $30,000+ |
Time Commitment
- DIY Build: 40, 80 hours for a typical kitchen
- Stock Cabinets: 5, 10 hours (installation only)
- Custom Cabinets: 2, 6 weeks (including manufacturing and installation)
Value Comparison
Building your own cabinets offers the highest degree of customization and cost savings, but requires significant time and skill. Stock and semi-custom cabinets are faster but may not fit your kitchen or preferences as precisely.
Example Comparison
A homeowner compared three bids for a 10×10 kitchen:
- DIY: $1,800 (materials)
- Stock cabinets: $4,200 (plus $2,000 install)
- Custom quote: $14,000
He chose the DIY route, investing his weekends and achieving a tailored, high-end look.
Common Mistakes And How To Avoid Them
Avoiding these pitfalls can mean the difference between frustration and flawless results.
Inaccurate Measurements
Errors in measuring or marking can lead to poor fit and wasted materials. Always double-check dimensions before cutting.
Rushing Assembly
Skipping dry-fits or not allowing glue to fully cure can result in weak joints. Take your time and follow each step methodically.
Poor Material Choices
Using low-grade plywood or MDF in high-moisture areas can result in swelling and warping. Select materials appropriate for kitchen environments.
Skimping On Hardware
Cheap drawer slides and hinges often fail prematurely. Invest in quality hardware for long-lasting function.
Neglecting Safety
Improper use of power tools or lack of protective equipment can cause injuries. Always prioritize safety.
Example: One DIYer reported that switching to soft-close hardware mid-project significantly improved the overall feel and function of his cabinets, justifying the extra expense.
Real-world Examples And Case Studies
Examining real projects helps illustrate the practical aspects of cabinet building.
Example 1: Maximizing Small Kitchen Storage
A couple in a 1960s bungalow needed to maximize storage in a 9×10 kitchen. By building custom cabinets to the ceiling and adding deep drawers, they increased usable storage by over 30% compared to their previous stock cabinets.
Example 2: Budget-friendly Remodel
A DIY enthusiast used birch plywood and Shaker-style doors for a full kitchen remodel. By investing in a pocket hole jig and taking time to paint with a sprayer, he created cabinets that matched the style of much more expensive brands at a fraction of the price.
Example 3: Eco-friendly Materials
In a green remodel, a homeowner sourced FSC-certified plywood and water-based finishes. The result was a sustainable, non-toxic kitchen that increased the home’s value and appeal to environmentally conscious buyers.
Frequently Asked Questions
What Is The Most Durable Material For Kitchen Cabinets?
While many materials are suitable, solid hardwood and high-quality plywood offer the best combination of strength and longevity for cabinet construction. MDF and particleboard are less durable, especially in high-moisture environments. For eco-friendly options, look for certified sustainable woods.
Can I Build Kitchen Cabinets With Limited Woodworking Experience?
Yes, many DIYers with moderate skills have successfully built cabinets using detailed plans, basic power tools, and careful measurement. Start with a small project, such as a single base cabinet, to build confidence and skills before tackling a full kitchen.
How Do I Ensure My Cabinets Are Level During Installation?
Use a long carpenter’s level and shims to adjust each cabinet as you install. Always start with the highest point on the floor and work outward. Check for level and plumb at every step to ensure doors and drawers operate smoothly.
Is It Cheaper To Build Or Buy Kitchen Cabinets?
Building cabinets yourself can save 50, 70% compared to purchasing custom units. However, factor in the cost of tools, materials, and your time. For more insights on food storage and preservation, see Freeze-drying vs canning: Which is better for long-term food storage?.
What Finish Is Best For Kitchen Cabinet Durability?
A high-quality acrylic enamel or conversion varnish provides excellent resistance to moisture, grease, and daily wear. Water-based polyurethanes are also durable and safer to use indoors. For more information on material choices, check out Family Handyman’s cabinet building guide.
Building your own kitchen cabinets is a challenging but deeply satisfying endeavor. With thoughtful planning, the right tools, and attention to detail, you can create cabinetry that matches your style, fits your space perfectly, and stands the test of time. Not only will you enjoy a kitchen tailored to your needs, but you’ll also gain skills and confidence for future woodworking projects. For related kitchen projects and storage ideas, explore topics like choosing the right canning jar makes preserving food easier or learn about is pickling salt the same as canning salt? to further enhance your kitchen’s functionality and organization.
Products related to this article
Sponsored / affiliate links. As an Amazon Associate I earn from qualifying purchases. I may earn additional commission from eligible campaigns.