Dresser Care and Maintenance Guide for Wood Finishes
Clean a dresser with a barely damp microfiber cloth, dry it promptly afterward, and match cleaners to the finish: mild soap for sealed wood, a wax-free cleaner for laminate, and avoid water on raw wood. Break that rule and you risk white rings, swollen veneer, sticky drawers, stripped screws, and even tip-over problems. This guide covers finish-specific cleaning, scratch and water prevention, drawer fixes, hardware tightening, and anchoring a dresser safely.
Identify the dresser material and finish before cleaning

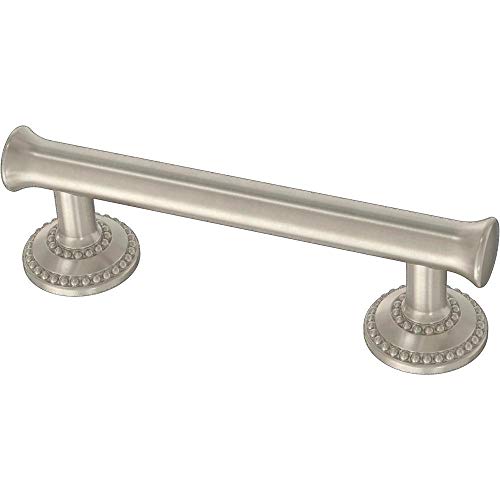
Dresser care starts with correct identification. I have seen a cleaner that worked fine on sealed oak haze paint, lift a laminate seam, or swell MDF along the bottom edge.
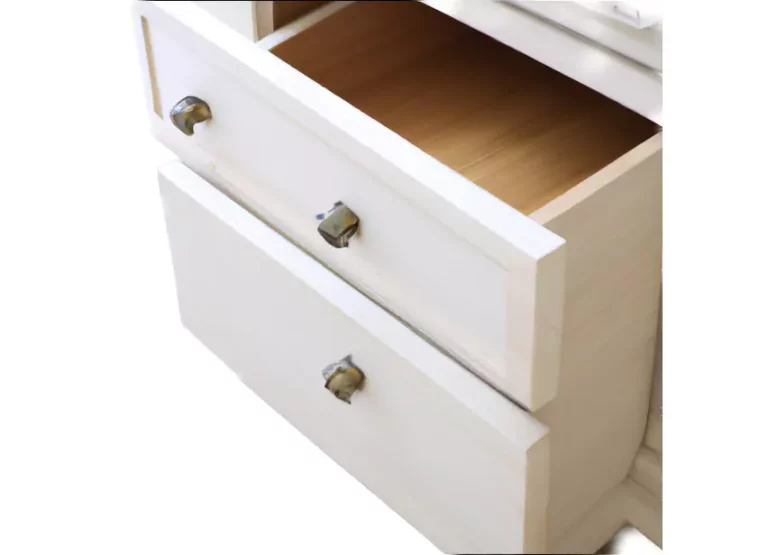
The best clues are usually in the places people skip: drawer sides, the underside of the top, the back panel, and the inside face of a side panel. Solid wood often shows grain variation and end grain at hidden edges. Veneer has a thin real-wood face over another core. Laminate usually shows a printed surface with a repeating grain pattern. MDF looks dense, smooth, and fibrous at raw edges. Painted pieces can hide solid wood, MDF, or veneer under the coating.
Let the dresser’s build guide the care plan. IKEA says its dressers use materials like oak, pine, and birch, and the RAST 6-drawer dresser is made of pine. The GULLABERG 8-drawer dresser is described as solid wood, while the BRIMNES 4-drawer dresser is offered in black, white, and gray/frosted glass, which shows how differently surfaces can behave within one furniture line.
Quick inspection points that change the care plan
- Top surface: Look for coating wear, ring marks, heat dulling, and scratches near lamps, mirrors, and hair tools.
- Front edges: Check for chips, lifted laminate corners, and paint wear where hands touch daily.
- Drawer bottoms: Sagging or bowing points to overloading and poor load balance.
- Back panel: Musty smell, staining, or softness can mean hidden dampness.
- Bottom edges and feet: MDF and laminate often fail here first after mopping, spills, or carpet shampooing.
- Seams: Open seams usually signal moisture entry, impact, or panel movement.
Evaluating Compact Dresser Materials and Safety
The MALM dresser specs provide a practical benchmark for low-profile storage needs. This analysis details how its particleboard and fiberboard construction affects durability, specifically highlighting risks like chipping, overfilling, and tip-over hazards. It evaluates the drawer layout and structural stability for everyday use in bedrooms and guest rooms. Understanding these material limitations helps you determine if the unit’s compact size justifies the necessary safety precautions, such as wall anchoring. This review offers a clear verdict on whether the price-friendly design meets your specific longevity and safety expectations.
How do I clean a dresser without damaging the finish?

Use as little moisture as the finish will tolerate, and stick with the gentlest cleaner that will do the job. I dry dust first, then wipe with a barely damp microfiber cloth only on sealed, laminate, or painted surfaces. Dry it right away. Keep water off raw wood, skip strong solvents, and do not let cleaner run into joints, seams, or hardware holes.
Dry dusting versus damp wiping
Dry dusting clears away grit before your cloth drags it across the finish and leaves fine scratches. I find this matters most on dark paint, glossy laminate, and sealed wood tops, where swirl marks show up fast under a lamp.
Damp wiping is for skin oil, makeup dust, hair spray residue, and sticky film. The cloth should feel barely moist, never wet enough to leave beads behind. Follow with a dry cloth right away, especially along front edges and around drawer pulls.
Cleaner chemistry by finish
- Sealed solid wood: Mild soap diluted in water on a microfiber cloth is usually enough. Too much oil soap, heavy polish, or silicone dressing can leave buildup that grabs dust and makes later touch-up work harder.
- Unfinished wood: Keep water off it. Use dry microfiber first. For a spot, a slightly damp cloth may be used only as a last resort, then dry at once. Raw wood darkens and swells easily.
- Laminate: Use a wax-free cleaner or a cloth lightly dampened with mild soapy water. Too much liquid can creep into seams and edges.
- Painted surfaces: Mild soap is safer than strong degreasers. Repeated use of abrasive pads can wear through paint at corners and raised details.
- MDF with a coating: Treat it like the coating type, but with stricter moisture limits. The surface may look fine while the core is weakening at fasteners or edges.
Spot-cleaning common residue
Fingerprints usually come off with a damp cloth and a quick dry. Makeup powder needs dry dusting first, because a wet cloth turns loose powder into paste and pushes it into texture. Sticky film from hair products or lotion needs a little dwell time from a damp cloth, then a second pass with plain water and a dry wipe.
What to avoid, and why damage shows up later
Abrasive pads and magic-eraser style abrasion leave fine scratches that flatten sheen. Bleach, ammonia-heavy cleaners, and strong solvent blends can soften some painted and clear-coated surfaces. Steam cleaning pushes moisture into joints, veneer edges, and MDF fibers. I often see the damage days later as clouding, swelling, lifting seams, or sticky drawers.
What maintenance is different for wood, laminate, and MDF dressers?
Wood, laminate, and MDF fail in different ways, so the prevention work changes by material. Solid wood reacts to humidity swings and surface scratches. Laminate holds up to casual wiping but fails at seams and under heat. MDF can look stable until moisture reaches an edge or fastener area, then swelling and loosening move fast.
Solid wood dresser care
Sealed solid wood does best with regular dusting and an occasional barely damp wipe, while unfinished wood needs a much drier routine. In a bedroom that gets daily use, I dust weekly. In a quieter room, once every week or two is often enough.
Watch for early wood movement: fine cracks at joints, a top that feels slightly uneven at board seams, or drawers that fit differently from one season to the next. Those are humidity signs, not a cue to add more polish.
For light scratches, a careful buff with a soft cloth after cleaning may reduce visibility. For shallow finish scratches, a finish-matched touch-up marker or wax fill stick can help. Deep gouges, missing finish, or split wood need repair work, not routine maintenance.
Laminate dresser care
Laminate handles ordinary wipe-downs well, but the edge seams are the weak spot. Water from cups, plant pots, or over-wet cloths usually gets in from the front edge and around back corners first.
Heat is another common cause of failure. A mug, candle vessel, or hot hair tool can dull the sheen or leave a ring that will not clean off because the surface itself changed. Abrasive cleaners can do the same by scratching the wear layer.
MDF dresser care
MDF is especially vulnerable to moisture. Swelling often starts at bottom edges, around screw holes, and behind painted skins that looked fine during cleaning. Once the core puffs, sanding and painting rarely bring the panel back to its original strength.
Fasteners also loosen sooner in MDF casework if drawers are overloaded or dragged while racked. Check screw tightness gently on a regular schedule. Overtightening can strip the hole and leave you with less holding power than before.
Veneered and painted surfaces
Veneer can act like wood on the face and engineered board at the core, so both humidity control and seam protection matter. Paint adds color, not extra toughness. Repeated rubbing at corners, knob areas, and top front edges wears through first.
Choosing the Right Paint for Laminate Dressers
Painting a laminate dresser requires a bonded system—first a bonding primer, then a hard cabinet enamel or acrylic‑alkyd topcoat. The article explains when to opt for a satin finish for a forgiving look or a semi‑gloss for easier cleaning, and why skipping prep leads to peeling, chipping, or scratching. It also walks you through essential tools, sanding decisions, primer selection, and step‑by‑step application techniques, while highlighting common mistakes to avoid. Following these guidelines ensures a durable, professional‑looking finish that protects the dresser for years. See the detailed guide on laminate dresser paint for top product picks and FAQs.
What should I use to protect a dresser top from scratches and heat?
Use a fitted top protector or mat with a non-slip backing, enough scratch resistance for daily objects, and enough heat resistance for warm items that may land there by habit. Pair it with trays under perfume, lamps, and grooming tools. Protection should cover the use zone without trapping moisture underneath.
Choosing a top protector or mat
Measure the actual top, not the dresser name alone. IKEA offers dressers in wide, narrow, short, and tall sizes, so accessory fit should follow the piece in front of you. The HEMNES 8-drawer dresser measures 63×37 3/4 inches, and the STORKLINTA 6-drawer dresser measures 55 1/8×18 7/8×29 1/2 inches. Those examples show why guessing often leaves exposed corners or overhang.
Look for these features:
- Scratch resistance: Useful under jewelry trays, framed mirrors, and ceramic decor.
- Heat resistance: Needed if styling tools or hot mugs may touch down.
- Non-slip backing: Keeps the protector from creeping and scuffing underneath.
- Cleanable surface: Spills should wipe off without saturating the dresser top.
Daily habits that prevent top failure
Keep cups, plant saucers, and diffusers on trays. Avoid rubber-backed items that can trap moisture if the room runs damp. Lift decor to clean under it instead of dragging it across the finish.
Sunlight matters too. A dresser top can fade unevenly when one section sits under direct light and the covered area beneath a tray does not. Rotate decor occasionally if the room gets strong exposure.
Choosing the Right Dresser Top Protector Material
Tempered glass and polycarbonate shields offer the strongest defense against hot styling tools or mugs, while 1.5–2 mm clear vinyl preserves full visibility of the wood grain beneath. Felt-backed pads add slip resistance for items that shift during daily use. Selecting the correct thickness and material prevents permanent finish damage before it starts.
Nursery changing stations, makeup vanities, and workshop dressers each demand different coverage strategies, from waterproof mats to custom-cut sheets that span oversized surfaces. Our guide breaks down these specific use cases so you can match the right barrier to your dresser’s exact purpose. Compare options in our roundup of dresser top protectors to find the fit that balances clarity, heat resistance, and durability.
Dresser Top Protector vs Tablecloth: Which Actually Shields the Finish
A fitted dresser top protector blocks makeup, perfume, lamp heat, and daily wear far better than a loose tablecloth. Tablecloths slide easily, trap spilled liquids against the wood or laminate, and can leave water rings or lift edges on the finish over time.
Choosing between a dresser top protector and a decorative cloth depends entirely on how the surface is used. Bedrooms, guest rooms, and kids’ spaces each present different spill and scratch risks. A fitted protector handles heavy use, while a tablecloth works only for light styling where no liquids or hot items are placed directly on the surface.
How often should I tighten dresser hardware and check stability?
Check pull screws, slide screws, and overall stability about monthly in a busy room, and after moves, floor changes, or heavy reloading of drawers. Handles loosen from daily torque, while casework shifts from uneven floors and changing humidity. The check takes minutes and catches wobble before hardware strips or an anchor loosens.
Basic tools to keep nearby
- Phillips screwdriver
- Allen key
- Soft microfiber cloth
- Level
What to tighten, and what to leave alone
Tighten drawer pulls, interior slide screws, and frame fasteners that have clear play. Stop when snug. On MDF-backed units, extra force can strip the hole.
Use the level across the top and at side-to-side points if drawers start self-opening or rolling shut. A dresser that is slightly out of level can act like it has bad slides when the real problem is floor slope or one foot out of contact.
Some models include useful stability details from the factory. The STOREMOLLA 8-drawer dresser includes adjustable feet, and the GULLABERG 8-drawer dresser includes floor-protecting fittings. Those features help, but they do not replace routine checks.
Evaluate HEMNES dresser stability and load limits
The Hemnes dresser review details how solid pine construction influences durability and tip-over safety. It breaks down assembly complexity, specific drawer load limits, and necessary anchoring steps to prevent structural issues. This analysis helps you determine if the traditional profile fits your space or if maintenance challenges outweigh the benefits. Understanding these factors ensures you avoid common mistakes that lead to crooked drawers and instability.
Use these insights to decide if the unit suits your specific safety requirements before purchasing, rather than assuming standard assembly instructions are sufficient for long-term secure use.
How do I stop dresser drawers from sticking or wobbling?
Start by unloading the problem drawer halfway and checking for racking, loose screws, swollen parts, or slide misalignment. Sticking often comes from moisture or case twist, while wobble points to worn slides, loose fasteners, or uneven load. Lubricant helps only when the slide type and alignment problem actually call for it.
Diagnose before lubricating
- Remove enough contents to reduce weight and rebalance the load.
- Open the drawer and inspect slide screws or wood runners for looseness.
- Check whether the drawer front sits square in the opening.
- Look for rub marks on one side, the drawer bottom, or the top rail.
- Feel the side panels and drawer edges for swelling or roughness.
- Use a level on the dresser top to rule out floor-related racking.
Slides, rails, and waxing options
Wood-on-wood runners can sometimes benefit from a light pass of paste wax on the runner contact area after cleaning and drying. Use very little. Excess attracts grime.
Metal slides usually need cleaning and screw checks first. If the slide maker did not intend lubrication, adding oil can collect dust and turn into sticky sludge. Greasy spray products are a common mistake on bedroom furniture because fibers from clothing and lint settle into them fast.
When lubricant makes things worse
If a drawer is rubbing because the case is out of square, the drawer bottom is sagging, or moisture has swollen the side, lubrication only hides the symptom for a short time. Then the drawer sticks again, often worse, because grit clings to the lubricant.
Load balance matters
Heavy items belong low and spread across multiple drawers. One overloaded top drawer can strain slides and increase tip risk at the same time. If the drawer bottom bows, reduce weight before tightening hardware or adjusting slides.
Match repair kits to specific drawer failures
Choosing the correct dresser repair kit requires diagnosing the exact failure point before purchasing parts. Bottom support kits address sagging floors, rail kits fix loose tracks, and corner clamps stabilize split fronts, while guide shims correct worn runners. Installing the wrong component often worsens jams or damages the cabinet frame permanently.
This diagnostic approach ensures you select hardware that actually resolves the underlying mechanical issue rather than applying a temporary patch. The guide matches common symptoms to specific solutions, covering options for vintage wooden runners, heavy-duty side mounts, and universal plastic replacements. Reviewing these targeted recommendations helps avoid costly trial-and-error when sourcing dresser drawer repair kits for your specific furniture type.
Diagnose Drawer Hardware Before Replacing Parts
A sticky dresser drawer rarely needs a full hardware swap. The fix depends on whether the problem is cracked or flat-spotted rollers, bent slide tracks, or a racked drawer box. Replacing the wrong component wastes time and can damage the runners or the drawer itself.
Start by identifying whether your dresser uses slides or rollers, then inspect the specific failure point. This process ensures you buy the correct replacement and restore smooth operation without trial and error. A detailed breakdown of drawer slides vs rollers explains how each mechanism works, how to diagnose faults accurately, and which installation steps apply to your hardware type.
How do I prevent dresser water rings, odor, and moisture damage?
Prevent rings and odor by keeping liquids off the bare surface, controlling room dampness, and drying any wipe-down right away. Use trays on the top, removable liners inside drawers, and extra airflow around the back panel. Musty smells usually point to hidden moisture, dust buildup, or stored textiles trapping damp air.
Room moisture control before damage starts
Dressers last longer when room humidity stays in a middle indoor band instead of swinging from very dry to very damp. Sudden swings stress wood joints, tighten or loosen drawer fit, and encourage mildew inside closed drawers.
If the room runs damp, use a dehumidifier or silica packs in problem drawers. If the dresser sits close to an outside wall, leave a little breathing room behind it so the back panel does not trap stale air.
Drawer liners that help instead of hurt
Choose liners for grip, removability, and trim-to-fit sizing. A good liner lies flat, lifts out cleanly for washing or replacement, and does not leave adhesive behind. For odor control, breathable liners work better than heavy plastic sheets, which can trap moisture below clothing.
Replace liners when they curl, hold odor after cleaning, or stay damp after a spill. In many bedrooms, that means replacing them when wear becomes visible or smell lingers after airing out, not by a fixed date.
Hidden mildew zones
Check the back panel, drawer interiors, and the underside of the top. A sour or musty smell, gray spotting, or rough swollen edges are warning signs. Empty out textiles, air the unit, and fix the room moisture source first. Surface cleaning alone will not solve ongoing dampness.
How can I keep a dresser from tipping over in a bedroom?
Keep the dresser level, load heavier items low, and use an anti-tip kit secured to the wall according to the hardware type and wall material. Recheck the anchor after moving the piece, replacing flooring, or changing feet. Stability is a maintenance task, not a one-time install.
Level, leg contact, and case squareness
Start with the floor. If one foot floats, the case can rack and drawers can self-open. A level helps confirm whether the dresser sits true or needs adjustment. Adjustable feet, when present, can help dial out minor floor irregularities.
Some recent pieces are built with safety standards in mind. Some IKEA dressers are designed to meet the US Federal Stability Standard. That helps, but loaded drawers, uneven floors, and missing anchors can still create risk.
Anti-tip kit inspection
- Check the wall attachment point: It should still be tight and sound.
- Inspect the strap or bracket: Look for wear, twisting, or damage from cleaning behind the dresser.
- Confirm case attachment: The screw at the dresser back should be snug and not tearing out.
- Re-anchor after moving: Even a short move for painting or carpet work can leave the old anchor misaligned.
Choosing the right dresser organizer for a small bedroom
A poorly sized dresser organizer wastes floor space, blocks drawer access, and increases tip-over risk in tight rooms. The right unit matches your layout: low, wide chests fit short wall runs, tall narrow towers maximize corner storage, and anchored or wall-safe pieces protect children and pets.
Comparing organizers by dimensions, wardrobe type, and safety features helps you buy exactly what fits. A detailed breakdown of small bedroom dresser organizers covers top picks ranging from budget fabric bins to bamboo drawer dividers, along with a fit checklist so you can match a unit to your specific room constraints quickly.
Dresser vs. Armoire: Choosing the Right Bedroom Storage
A dresser works best when you need quick daily access to folded clothes and have enough floor clearance for drawers to open fully. An armoire is the better choice when closet space is limited and hanging garments takes priority over drawer storage. Picking the wrong piece creates tight walkways, doors that hit other furniture, and cluttered floors.
The comparison of dresser versus armoire storage breaks down footprint differences, ideal garment types, and exact measuring steps so you can confirm a piece fits your room layout before buying. It includes a practical room-fit checklist that prevents clearance issues and ensures your main walking route stays unobstructed.
Dresser vs Vanity: Choosing the Best Fit for a Small Bedroom
In a small bedroom, a dresser is the better choice when maximizing storage and keeping walkways clear takes priority over having a seated grooming spot. A vanity only works if you have enough width for both the piece itself and room to pull out a chair comfortably.
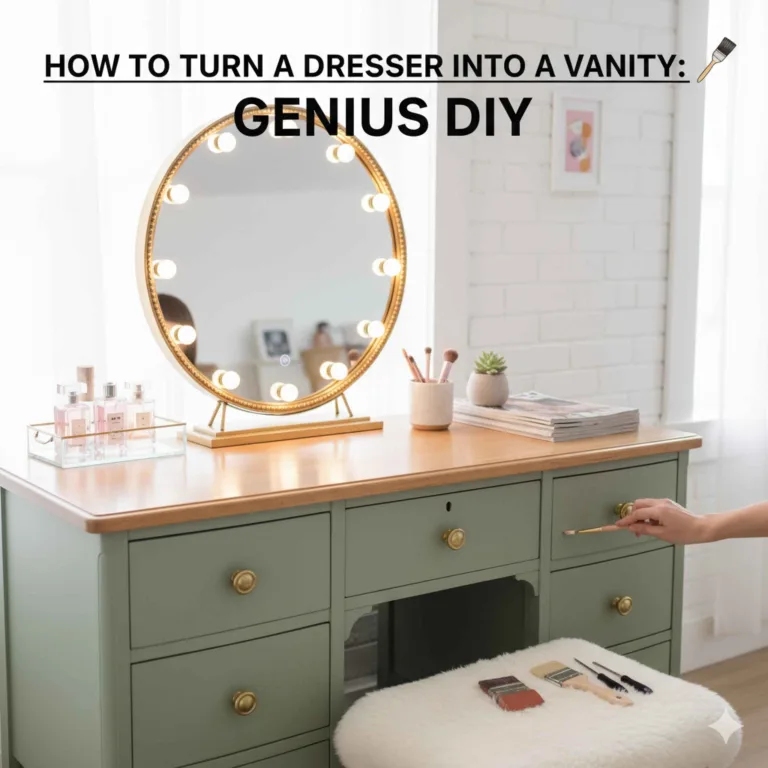
Picking the wrong option blocks movement, forces clutter onto your bed, and makes daily routines feel cramped. Comparing footprint, drawer capacity, and actual use helps you decide quickly without guessing. This breakdown of dresser vs vanity sizing covers exact dimensions, mirror options, and whether converting a dresser into a vanity makes sense in tight spaces.
Dresser Mirror vs. Wall Mirror: Choosing the Right Placement
A dresser mirror adds height and stays attached to the furniture, while a wall mirror gives you precise control over hanging height and keeps the dresser top clear for lighting or decor. The wrong choice can force awkward grooming posture, block drawer access, or create a tip-over hazard in the bedroom.
Clearance requirements, mirror-to-dresser proportions, and anchoring needs all differ between the two setups. A detailed dresser mirror comparison breaks down how each option affects storage access, safety, and whether the room feels larger, so you can match the mirror type to your specific layout before drilling or buying.
Choosing Between Wood and Metal Dresser Knobs
Wood dresser knobs provide a warmer grip and are easier to refinish, while metal knobs withstand heavy daily use, high humidity, and frequent handling without swelling or corroding. Selecting hardware based solely on appearance often leads to scuffed, loose, or damaged knobs that compromise drawer function.
This comparison evaluates feel, moisture response, cleaning effort, and durability across specific room conditions. It includes decision criteria for hardwood versus softwood options and outlines when metal outlasts wood on frequently opened drawers. Matching the knob material to your dresser’s location and usage prevents premature wear and keeps hardware secure. Review the full breakdown of wood vs metal knobs to select the right fit for each piece in your home.
Choosing the right lamp size for a narrow dresser top
A dresser lamp that is too wide or tall crowds drawers, blocks mirrors, and risks tipping on shallow surfaces. For narrow tops, a mini table lamp measuring in the low-to-mid teens in height, with a base under 8 inches wide and a shade under 12 inches, provides balanced light without sacrificing usable space.
Matching lamp proportions to your dresser depth prevents accidental damage and keeps daily essentials like chargers within reach. The guide to narrow dresser lamps breaks down exact clearance requirements, space-saving base styles, and sizing rules so you can protect your furniture while maintaining proper bedroom lighting.
Use the dresser care maintenance matrix
This matrix is the practical core of failure prevention. Match the symptom to the material and likely cause, then use the least invasive safe fix. If the issue involves swelling, delamination, stripped holes, cracked panels, or failed anchors, stop early and move to repair or replacement before damage spreads.
| Material / component | Symptom | Likely cause | Safe fix | Tools needed | When to stop DIY |
|---|---|---|---|---|---|
| Sealed solid wood top | White ring or cloudy patch | Moisture trapped in finish from cup or damp item | Dry surface, improve top protection, monitor if mark fades after the area fully dries | Microfiber cloth, top protector or tray | If finish turns sticky, cracks, or the mark remains after drying and gentle cleaning |
| Unfinished wood | Dark spot | Liquid entered raw fibers | Dry thoroughly, keep surface dry going forward | Dry microfiber cloth | If fibers raise, split, or stain penetrates deeply |
| Laminate top | Dull ring or scuffed sheen | Heat exposure or abrasive cleaner | Clean with wax-free cleaner, add mat or tray, avoid hot items | Microfiber cloth | If laminate layer is worn through or blistered |
| Laminate edge seam | Lifting edge | Water entry at seam | Dry area, reduce moisture exposure immediately | Microfiber cloth | If seam opens, chips, or keeps lifting; repair or panel replacement is usually needed |
| MDF side or base | Swollen bottom edge | Mopping, spill, carpet cleaning, or damp floor | Dry area, raise off damp surface if possible, correct moisture source | Cloth, level if feet need checking | If panel has puffed, softened, or coating split; replacement is often more realistic than patching |
| Painted surface | Shiny worn spots or color loss at edge | Abrasion from scrubbing or repeated hand contact | Clean gently, use protector in wear zones, consider touch-up paint if finish-compatible | Microfiber cloth | If bare substrate shows across a wide area or paint continues lifting |
| Drawer slides or runners | Sticky drawer | Misalignment, dirt, overload, or swelling | Unload partway, clean contact points, tighten screws, check level and square | Phillips screwdriver, level, cloth | If slide is bent, wood is swollen, or drawer box is out of square |
| Drawer box | Wobble or sag | Loose hardware, worn slide, bowed bottom, poor load balance | Redistribute weight, tighten hardware, inspect bottom support | Phillips screwdriver, Allen key | If bottom panel is cracked, slide is worn out, or screw holes are stripped |
| Hardware in MDF casework | Screw will not stay tight | Stripped fiberboard hole | Reduce load and avoid further tightening | Phillips screwdriver | If fastener spins freely or anchor point tears out |
| Drawer interior | Musty odor | Trapped moisture, dusty liner, poor airflow | Empty drawers, air out, replace liner, use silica packs if room stays damp | Cloth, liner, silica packs | If mildew spotting returns after drying and cleaning |
| Case stability | Rocking or self-opening drawers | Uneven floor, loose fasteners, out-of-level case | Check level, adjust feet if present, retighten accessible hardware | Level, screwdriver | If side panels crack, joints open, or the case stays out of square |
| Anti-tip kit | Loose strap or bracket | Movement, wall change, or failed fastener | Unload upper drawers, inspect hardware, re-anchor correctly | Phillips screwdriver, level | If wall substrate is damaged or case attachment point has failed |
Set a weekly, monthly, and seasonal maintenance schedule
Weekly
- Dry dust the top, drawer fronts, and pull areas with a soft microfiber cloth.
- Wipe away fingerprints and product residue with a barely damp cloth, then dry.
- Check for standing water under cups, plants, diffusers, or decor trays.
- Open one or two drawers and sniff for early mustiness.
Monthly
- Tighten drawer pulls and accessible slide screws.
- Check the dresser with a level if drawers have changed behavior.
- Inspect top protectors and mats for trapped grit, curl, or moisture underneath.
- Inspect drawer liners for odor, dampness, or bunching.
- Confirm the anti-tip kit is still tight.
Seasonally
- Look for wood movement, seam changes, and finish stress after weather shifts.
- Reassess room dampness and add a dehumidifier or silica packs if needed.
- Pull the dresser forward carefully, clean behind it, and inspect the back panel.
- Recheck anchoring after floor changes, repainting, or moving the piece.
What are the signs a dresser needs repair instead of routine maintenance?
Routine care stops at the point where the structure, substrate, or safety hardware has failed. Swollen MDF, lifting laminate seams, cracked side panels, stripped fastener holes, loose joints, broken slides, and failed anti-tip attachment points are repair issues. Cleaning and retightening cannot reverse those failures and can sometimes make them worse.
Repair or replace thresholds
Replace or professionally repair when panels soften, seams keep lifting, drawer boxes rack even after unloading and alignment checks, or anchors no longer hold securely. A solid wood piece may be worth joint repair or slide replacement. Budget MDF units with swollen bases often make more sense to replace.
Products related to this article
Sponsored / affiliate links. As an Amazon Associate I earn from qualifying purchases. I may earn additional commission from eligible campaigns.