Sofa Cleaning and Stain Removal Guide for Upholstery
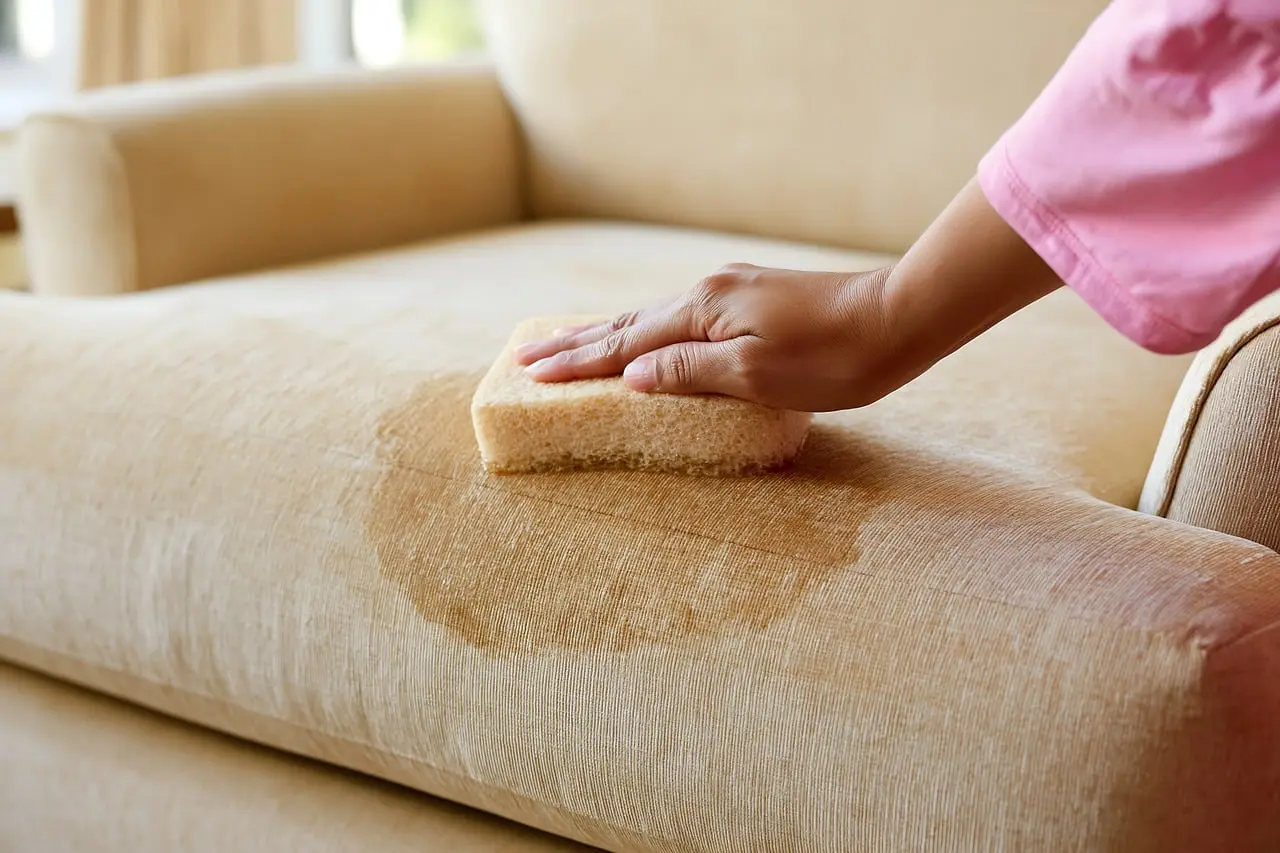
For sofa cleaning and stain removal, match the cleaner to the upholstery code first: W is typically cleaned with water-based cleaners, S with solvent-only cleaners, WS may allow either, and X is usually vacuumed only. Get this wrong and you can set the stain, spread rings, strip dye, shrink fabric, or crack leather. I have seen all five happen on real sofas. This guide gives a stain-to-solution chart by spill type, fabric or leather, safe spot-testing steps, and the signs DIY will likely fail. If you need a quick code refresher first, see our upholstery cleaning codes guide.
What you’ll need


Basic hand-cleaning tools
- Vacuum with upholstery attachment
- Microfiber cloths
- White absorbent towels or paper towels
- Soft brush
- Spray bottle for controlled application
- Small bowls for mixing cleaner off-fabric
- Dry pickup tool such as a spoon or dull scraper for solids
Cleaner types and where each fits
- Mild detergent for many W and some WS fabrics when diluted and spot-tested
- Solvent cleaner for S fabrics and some WS fabrics when the label allows it
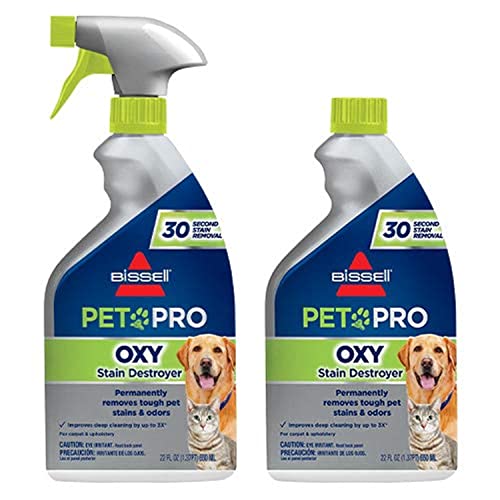
- Enzyme cleaner for active organic residue such as urine, vomit, or milk on code-safe fabric
- Oxygen-based cleaner for some color-safe fabric stains after spot-testing
- Leather cleaner made for finished leather; avoid fabric cleaners on leather unless the maker allows it
When a portable extractor or wet/dry tool is worth using
- Use a portable upholstery cleaner when the code allows water and the stain covers more than a small spot
- Prefer a unit with strong suction, separate clean and dirty tanks, and easy portability around cushions and arms
- Check the upholstery care tag and the machine manual before any extraction step
- Use the least water needed and make extra dry passes to recover as much moisture as possible
- Separate clean and dirty tanks help you monitor rinse water and avoid reapplying soil
- A longer hose and cord reach can matter more than raw wattage on sectionals and deep seats
What to keep away from upholstery
- Steam cleaners as a default choice
- Bleach or strong alkali cleaners
- Heavy brushing on textured weaves, velvet, chenille, or leather
- Direct spraying that soaks seams, welt cords, or foam
- Heat from hair dryers or heated tools
Sofa cleaning and stain removal starts with three checks
Identify the sofa material before choosing a cleaner
Fabric and leather do not share a workflow. Finished leather usually needs a dedicated leather cleaner and very little moisture. Fabric splits again into synthetic and natural fibers. Polyester and olefin often handle careful water-based spot cleaning better than cotton, linen, rayon, or viscose, which can be more prone to rings, shrinkage, or browning. If you are unsure whether you have protected or absorbent leather, our leather furniture cleaning guide covers the basic checks.
Colorfastness matters as much as fiber. Dark cotton blends, denim-look upholstery, and many printed fabrics can bleed when damp. If a white cloth picks up dye during testing, the job can shift from stain removal to damage control in one pass. In my own spot tests, deep navy cotton blends and loose viscose-linen mixes have been the quickest to transfer color, even when the care code looked permissive.
Read the upholstery code: W, S, WS, or X
W allows water-based cleaners. S allows solvent-only cleaners. WS allows either, but the stain type still decides which is safer first. X means vacuum only; no liquid cleaner should go on the fabric unless a professional inspects it first.
Every cleaner still needs a spot test. A code tells you what class of cleaner is allowed, not how a faded arm, a back cushion, or a natural-fiber blend will react on that specific sofa. For edge cases, I always cross-check the tag with the manufacturer care sheet if it exists, because code labels and actual fabric behavior do not always line up cleanly.
Classify the stain before you touch it
Protein stains can include milk, blood, sweat, urine, and vomit. Oil and grease stains can include body oil, butter, lotion, and makeup. Dye stains can include wine, ink, marker, denim transfer, and brightly colored drinks. Mud, sauce, coffee, and tea often start as water-friendly stains, but old residues can hold oil, dye, and odor together.
That is why broad advice fails. A water spill on a W-code polyester is one thing. A body-oil mark on an S-code rayon blend is another. The first can often be flushed and extracted. The second may spread with one wrong spray. For pet accidents, the visible spot is only half the problem, so if odor is involved also see our pet urine odor removal guide.
Choosing the right lint remover for sofa hair
The tool you use to remove pet hair from a sofa must match the fabric weave and shedding level. A rubber pet hair remover works best on tight weaves and microfiber, while a fabric brush handles medium shedding without damaging fibers. For heavy buildup, an upholstery vacuum attachment clears hair that has already packed into seams.
Using sticky rollers on looped or delicate fabrics often causes pilling and pushes hair deeper into the cushion. Matching your sofa lint removers to the specific material prevents weekly cleanup from taking longer than necessary and protects the upholstery surface over time.
How do I test a cleaner on upholstery without damaging the fabric?

Test the mildest allowed cleaner on a hidden area first, using very little liquid and a white cloth. Wait for drying, then check for dye transfer, stiffening, rings, sheen loss, or texture change. If any of those appear, stop and switch methods or call a professional. My standard test spot is a 1-inch square on a rear skirt or zippered underside panel, using one light blot and one light dry pass before I wait for full drying.
Choose a hidden test area with the same fabric exposure
Use the rear skirt, the back edge of a cushion, or a zippered underside panel if it matches the visible fabric. Avoid testing on a sun-faded section or a spot with less wear, because the result may look safer than it really is. On leather, I test near a lower rear panel where finish wear is usually similar but still hidden.
Apply the least aggressive option first
- Vacuum the test area slowly with the upholstery tool, making two overlapping passes to pull out grit that can scratch damp fibers.
- Put a small amount of cleaner on a white cloth first, so you control moisture and do not drive liquid into seams or foam.
- Blot a small area once or twice.
- Press with a dry cloth to lift residue.
- Let the area dry with moving air from a fan or open window, not heat, until the fabric and backing feel fully dry.
Check for color transfer, texture change, rings, and finish loss
Fabric warning signs include a lighter halo, dark ring, roughened pile, fuzzing, or dye on the cloth. Leather warning signs include dull finish loss, tackiness, darkening that stays after drying, or a sticky topcoat. Any of those means the cleaner is wrong, the fabric is too sensitive, or the moisture load is too high.
My actual pressure target is light, about what it takes to hold a folded microfiber in place with two or three fingers, not a scrub. On polyester and olefin I usually see the test square dry in 20 to 45 minutes if I kept it only lightly damp. On cotton-linen blends, I have seen the same amount of moisture leave a faint tide mark after an hour, which is a failure case and a stop sign. On velvet, I have seen the stain improve while the pile direction changed and dried darker; that also counts as failure even when the spot looks cleaner. On finished leather, a successful test dries back to the original sheen. On absorbent or aniline-like leather, even plain water can darken the test area longer than expected, which is why I stop rather than chase the mark.
Choosing the Right Cleaning Brush for Your Upholstery
Effective upholstery care starts with the proper brush. The guide on best cleaning brushes breaks down three essential tools—soft‑nylon/horsehair for woven fabrics, rubber for microfiber and pet hair, and a delicate detail brush for velvet or chenille. It explains how each brush interacts with different piles, warns of common mishaps like fuzzing or shiny marks, and offers a quick comparison chart so you can match the brush to your sofa’s fabric. By following its buying recommendations, you’ll avoid damaging the weave and keep dirt from embedding deeper, ensuring a cleaner, longer‑lasting look for your furniture.
Choosing Between Baking Soda and Upholstery Deodorizer
Understanding whether to reach for baking soda or a commercial upholstery deodorizer can save you time, protect fabrics, and actually eliminate stubborn smells. The supporting guide compares baking soda vs deodorizer options, breaking down odor sources—light, dry scents versus oily, pet, or smoke odors—and matching them to fabric codes, residue risk, and the appropriate treatment. It also provides a decision table that tells you which product will truly neutralize the odor instead of merely masking it, plus common pitfalls like leaving residue or setting stains. Use this information to choose the right product before you start cleaning, ensuring effective deodorization without damaging your sofa.
Using a McCulloch Steam Cleaner on Upholstery
A McCulloch steam cleaner works well on couches only when the upholstery is steam-safe and stains are light to moderate. Short, controlled passes prevent excess moisture from causing fabric rings, shrinkage, or prolonged dampness that can damage delicate materials.
This matters because applying too much steam to sensitive furniture often causes more harm than the original stain. The machine handles single sofas or sectional segments effectively, but it struggles with moisture-sensitive fabrics that require dry cleaning methods instead. Before investing time in this approach, confirm your fabric code allows water-based heat treatment. For a full breakdown of performance, limitations, and which sofa types respond best, review the McCulloch steam cleaner evaluation to determine if it fits your specific upholstery needs.
Matching Protectors to Pet Behavior and Sofa Fabrics
Not all sofa protectors handle different pet habits or upholstery materials equally well. The guide sofa fabric protector options breaks down which covers, slipcovers, and throws suit specific scenarios, such as frequent accidents versus heavy shedding. It maps these choices against your sofa’s existing fabric and how often you are willing to launder the protector.
Selecting the wrong item can trap odors and stains, turning a temporary fix into a permanent upholstery replacement cost. This section helps you align the protection level with your pet’s actual behavior rather than just the damage you have already seen.
Selecting Protector Types Based on Fabric and Behavior
The supporting guide breaks down specific protector options by matching them to pet behavior and upholstery type. It details how to choose between waterproof slipcovers for frequent accidents, tight-weave washable covers for heavy shedding, or simple throws for light scratching. sofa fabric protectors are compared based on maintenance tolerance and pet type to ensure a proper fit.
Getting the protector wrong can trap odors and cause permanent stains, turning a cheap fix into a replacement cost. This section highlights why skipping fit verification or considering cleanability constraints leads to long-term damage, helping you avoid common mistakes before purchasing.
Pet Hair Brush vs Vacuum for Sofa Upholstery
Choosing between a pet hair brush and a vacuum depends on your sofa fabric, shedding level, and whether hair is surface-level or embedded. Brushes excel at quick cleanup on delicate textiles without risking damage, while vacuums are necessary for deep-seated fur, seam buildup, and allergy control.
Selecting the wrong tool can waste time or push hair deeper into fibers. This brush versus vacuum comparison breaks down which method works best by upholstery type and cleaning goal to prevent fabric damage and improve removal efficiency.
Using the Shark Steam Pocket on Upholstery
The Shark Steam Pocket works on sofas only for light refreshes on heat-safe, colorfast fabrics. It is not a stain extractor and will damage silk, velvet, untested microfiber, or glued seams if applied directly. Using steam incorrectly can set stains permanently, warp fibers, or leave water marks that require professional repair.
Before steaming any cushion, confirm the upholstery code allows heat and moisture. For pet messes or deep stains, a dedicated extraction method delivers better results without risking fabric integrity. This Shark Steam Pocket review breaks down exactly which sofa materials tolerate steam, includes a safety decision table, and identifies better Shark alternatives for stubborn upholstery stains.
Budget Cordless Vacuums for Quick Upholstery Pickup
A budget cordless vacuum like the Eureka NEC280TL handles fast surface jobs—pet hair on cushions, crumbs on stairs, and grit in car seats—but it cannot replace a full-size floor vacuum or deliver deep-cleaning agitation. Expecting it to do both leaves embedded dirt in your fabric and wastes money on the wrong tool.
The Eureka NEC280TL upholstery review breaks down exactly what this stick vacuum achieves on sofas and where its runtime and brush roll fall short. It includes a decision table that separates quick touch-ups from jobs requiring a corded upright, so you can match the right machine to your specific cleaning task without guessing.
Sofa stain decision table

How to use the table by stain type, code, and material
Read across, not down. Start with the stain category, then check the upholstery code, then confirm whether the sofa is fabric or leather. The first-line cleaner is the safest opening move, not a promise of full removal. If the stain grows, rings, or turns lighter only in the center, stop. For machine options on code-safe upholstery, our vacuum and extractor buying guide explains what suction and recovery actually matter.
Quick decision flow: Upholstery code -> stain category -> material check (synthetic, natural fiber, velvet/chenille, finished leather, aniline leather) -> first-line cleaner on cloth, not directly on the sofa -> stop if dye transfers, pile distorts, ringing starts, leather darkens, or moisture reaches the cushion fill.
Stain-to-solution decision guide
| Stain type | Upholstery code | Safe first-line cleaner | What to avoid | Drying time | When to stop and call a professional |
|---|---|---|---|---|---|
| Coffee, tea, juice, light food spill on fabric | W or WS | Synthetic woven fabric: mild detergent solution on cloth, then blot and extract lightly if allowed. Natural fibers such as cotton, linen, rayon, or viscose: use a barely damp cloth first, then the weakest detergent mix only if the test spot stays ring-free. Velvet or chenille: blot with pile, minimal moisture, then groom lightly when dry. | Flooding the cushion, heat, hard brushing. Do not use heavy saturation on natural fibers. Do not scrub velvet or chenille across the pile. | Usually a few hours with fan airflow if lightly dampened; longer on dense cushions and natural-fiber blends | If a ring forms, color bleeds, the pile goes darker in one direction, or the fill gets wet |
| Butter, lotion, body oil, makeup on fabric | S or WS | Code-safe solvent cleaner on cloth; blot from edge inward. On natural fibers and dark dyed fabrics, make fewer passes and inspect between each one. | Adding water first, steam, repeated rubbing. Do not use water-first methods on S fabric. Do not scrub chenille or loose weaves. | Often quicker than water-based cleaning if used sparingly | If the spot spreads wider, the fabric face lightens, or dye transfers to the cloth |
| Blood, milk, vomit, sweat, urine on fabric | W or WS | Cool water-compatible enzyme cleaner if spot-tested safe. Use short dwell time and blotting on natural fibers; on synthetics, controlled extraction may help if the code allows it. | Hot water, steam, strong fragrance sprays. Do not use enzymes on leather. Do not oversoak cushions or drive residue into foam. | Several hours; longer if odor treatment reaches padding | If odor returns after drying, the stain reaches foam, or a yellow-brown ring develops on natural fibers |
| Wine, colored drink, ink, marker, denim transfer on fabric | W, S, or WS depending on label | Use the code-safe cleaner with minimal passes; dye work often needs specialist chemistry. On velvet, chenille, viscose, and dark natural fibers, treat this as high-risk from the start. | Heat, bleach, aggressive scrubbing, random stain hacks. Do not use oxygen cleaner on unknown dyes. Do not keep blotting once color starts moving. | Varies; keep airflow on until fully dry | If dye transfers to cloth during testing, color smears, or a pale patch appears |
| Dried mud or gritty soil on fabric | W, WS, or X | Dry vacuum and soft brush first; add cleaner only if residue remains and code allows it. On velvet or chenille, vacuum with the nap and avoid harsh brushing. | Wetting before removing grit, hard scrubbing. Do not mash grit into natural fibers or pile fabrics. | Minimal if handled mostly dry | If abrasion has already frayed the weave or pile distortion remains after dry cleaning |
| Pet urine on fabric | W or WS | Blot heavily, then enzyme cleaner and extraction if code allows. On natural fibers, use less liquid and expect higher ring risk; on dense cushions, contamination may extend beyond the visible edge. | Masking sprays, oversoaking, steam. Do not chase odor with repeated wet passes. Do not use on X-code upholstery. | Longer because hidden moisture must leave the cushion core | If odor rebounds, staining returns, contamination is widespread, or moisture reaches the cushion core |
| General mark or unknown spot on leather | Leather care label or maker guidance | Finished or protected leather: dry cloth first, then dedicated leather cleaner on cloth after testing. Aniline, nubuck, or suede-like leather: dry method only unless maker guidance specifically allows more. | Fabric detergent, solvent unless maker allows it, steam. Do not use enzyme cleaner, oxygen cleaner, or high-moisture methods on aniline leather. | Usually short if only lightly dampened | If finish dulls, color lifts, cracking is visible, or absorbent leather darkens and stays uneven |
| Any stain on X-code upholstery | X | Vacuum only; dry sponge may help loose soil | Water, solvent, steam, foam cleaner | None if kept dry | Immediately for fresh spills or any set-in stain |
Commercial vs Homemade Sofa Cleaners by Stain Type
Commercial upholstery cleaners outperform homemade solutions on oil, dye, urine, and older stains, while a mild DIY mix works for fresh food spills on sturdy fabrics if you blot immediately. Using the wrong formula can set stains permanently, leave sticky residue that attracts more dirt, or damage fabric backing and trim.
The comparison breaks down both options across stain type, fabric risk, residue buildup, odor control, pet safety, and cost per use. A decision table matches specific fabrics and stains to the safest cleaner so you avoid oversaturation and water rings. Choosing between commercial versus homemade cleaners depends entirely on what caused the spot and how delicate your upholstery is.
Choosing the Right Furniture Stain Remover for Your Surface
Furniture stain removers work on upholstery and unfinished wood, but applying them to damaged finishes often drives stains deeper or strips color. Before treating a spot, identify whether you are dealing with bare wood, a compromised finish, or fabric, because each surface requires a different product category.
This breakdown separates true removers from concealers and finish restorers so you can match the solution to the actual damage. Choosing incorrectly wastes money and risks permanent discoloration. For a detailed comparison of what works on wood versus upholstery, review this furniture stain remover guide to determine if a dedicated treatment fits your specific repair needs.
Choosing furniture sliders by floor type and sofa weight
Hard plastic sliders protect carpet during a sofa move, while felt or PTFE pads prevent scratches on hardwood and tile. Cup-style options keep round feet from slipping off the pad mid-move. Using the wrong slider can gouge floors, crush carpet pile, or trap the sofa in a doorway.
The guide to furniture sliders for sofas compares materials by leg shape and surface type, then maps a safe moving path that keeps pads securely in place. It also covers heavy-duty wheeled lifters for sectionals and reusable felt options rated above typical sofa weights.
Sofa Cover vs Slipcover: Choosing the Right Fit
Understanding the difference between a sofa cover and a slipcover helps you avoid constant readjustments, exposed cushions, and fabric slippage. The guide breaks down maintenance effort, fit quality, and everyday performance for families with pets, kids, or frequent spills. It explains when a quick‑remove slipcover is ideal for regular washing and retucking, and when a more protective sofa cover reduces day‑to‑day upkeep. By matching the solution to your sofa type and lifestyle, you can keep upholstery looking fresh without extra hassle. Learn the detailed trade‑offs in the sofa cover vs slipcover comparison.
What is the safest first step for a fresh sofa stain?
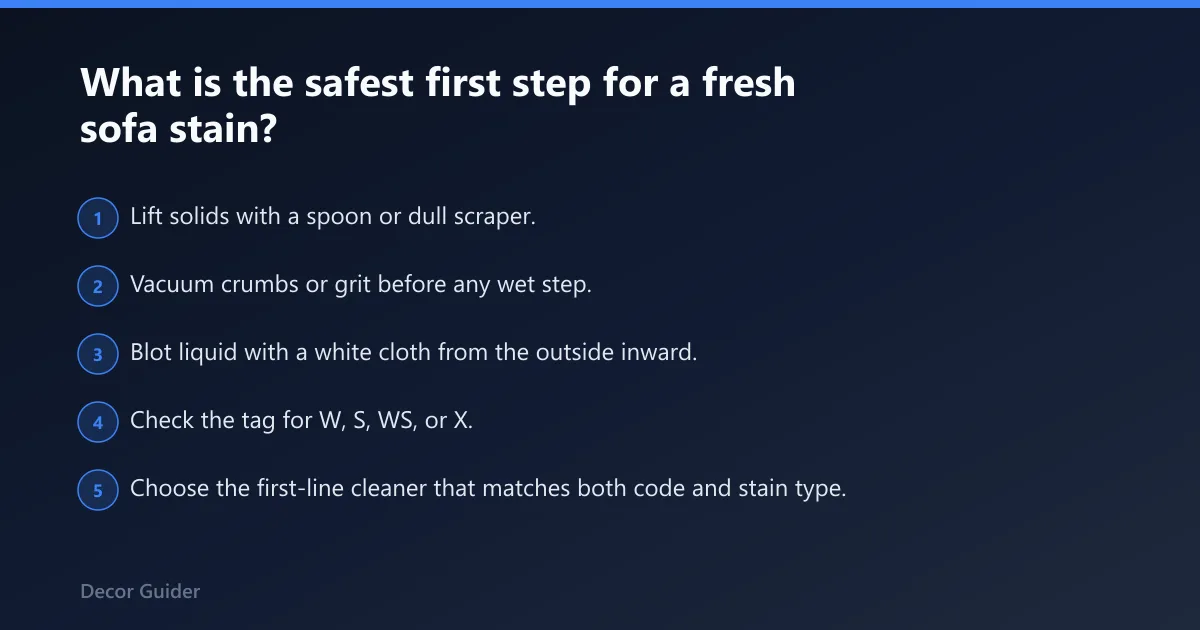
The safest first move is dry control: lift solids, blot liquids, and stop the spill from spreading before adding any cleaner. Water is only safe when the code allows it and the stain type fits. Leather needs even less moisture and faster wiping than fabric. In my own testing, the best results came when I spent more time removing dry soil and less time applying liquid.
Follow this fresh-stain sequence
- Lift solids with a spoon or dull scraper.
- Vacuum crumbs or grit before any wet step.
- Blot liquid with a white cloth from the outside inward.
- Check the tag for W, S, WS, or X.
- Choose the first-line cleaner that matches both code and stain type.
- Apply cleaner to a cloth, then to the stain in short passes.
- Blot or extract residue only if the fabric code allows it.
- Dry the area fast with a fan and separated cushions if possible.
When fresh spills need water-based cleaning
Food, coffee, tea, light mud, and many drink spills on W or WS fabric usually start with a mild detergent mix or plain damp blotting before detergent. Keep the moisture load low. The goal is residue lift, not soaking through to the foam. On cotton, linen, rayon, and viscose, I reduce moisture further and stop sooner because these are the fabrics on which I most often see tide marks.
When fresh spills need solvent-based cleaning
Grease, makeup, body oil, and lotion on S or WS upholstery usually respond better to solvent cleaners because water can spread the oily edge and leave a ring. On solvent-only upholstery, skipping straight to water is a common failure point. My worst failure here was a body-oil mark on a rayon blend arm panel that doubled in diameter after a water-first attempt years ago; since then I do not improvise on S-code pieces.
How the method changes for leather
Leather should be wiped quickly with a dry or barely damp cloth, then cleaned with a leather-safe product after testing. Do not chase the stain into seams. Do not use enzyme cleaner, oxygen cleaner, or steam unless the manufacturer says the finish can handle it. Protected leather and aniline leather should not be treated the same way, so if you are in doubt, start with our leather furniture cleaning guide before you clean.
How to pick the right sofa repair kit for small tears
If a sofa tear is minor, the quickest fix is to select a repair kit that matches both the tear’s location and the upholstery material. The guide walks you through a side‑by‑side comparison of adhesive patches, color‑matched fillers, and stitching kits, explains the testing criteria, and highlights top choices for fabric, leather, vinyl and utility fabrics. Using the proper kit prevents peeling, discoloration, and further tearing, extending the life of your furniture. For a detailed rundown of the best options, see our review of sofa repair kits.
When to Repair vs. Replace a Sagging Sofa
A sinking sofa typically costs $50 to $600 to fix, with the final price depending on whether you are replacing broken webbing, worn foam, or damaged springs. If repair estimates approach 50% to 70% of the cost of a new piece, replacement is usually the more financially sound choice. sofa repair costs vary significantly by construction type, meaning a cheap fabric sofa may not justify expensive structural fixes. This guide breaks down the specific costs for each component failure, helping you determine if a simple cushion replacement or a complete frame overhaul is necessary before you commit to a professional service or a new purchase.
What should I do if a sofa stain has already dried?
Dried stains need slower handling. Remove brittle residue first, then rehydrate only when the code and stain type allow it. Old protein, dye, and grease stains often need different chemistry, and repeated wet passes can lock them in with rings, browning, or pad contamination. I pause after each short cycle and let the fabric settle for a minute because dried stains often look improved while wet and then reappear as they dry.
Follow this dried-stain sequence
- Vacuum or brush off any crusted residue.
- Identify whether the stain is protein, oil, dye, or soil-based.
- Rehydrate lightly only if the code allows it.
- Use enzyme cleaner for old organic residue on code-safe fabric.
- Use solvent cleaner for dried grease on S or WS fabric.
- Blot and extract in short cycles, then pause to inspect.
- Stop if the stain spreads, rings, or lightens unevenly.
Dried protein stains versus dried grease
Protein stains often respond to cool, code-safe enzyme treatment because residue remains in the fibers. Heat is the enemy here. Dried grease is different. It usually needs a code-safe solvent path first, because water alone tends to push the oily edge outward.
Why dye transfer and ink need a different response
Dye transfer, permanent marker, ink, and wine can turn into color-loss jobs instead of cleaning jobs. Clothing stain advice can be useful for understanding categories, but upholstery still needs code-first handling because sofa fibers, backings, and cushion fills are less forgiving than washable clothing. In practice, denim transfer on pale fabric and ink on finished leather are two of the fastest ways to cross from cleaning into restoration.
How to avoid making old stains permanent
Do not alternate random cleaners. Do not hit the area with heat. Do not keep rubbing once the spot gets larger but not lighter. That usually means residue is moving deeper or dye is leaving the fabric face. If an old pet spot smells stronger as it dries, that is usually hidden contamination, not progress, and our pet urine odor removal guide is the more useful next step.
Which stain types need water-based cleaning versus solvent-based cleaning?
Water-based cleaning fits many food, drink, mud, and organic stains on W or WS upholstery. Solvent-based cleaning fits oil, grease, body oil, and makeup on S or WS upholstery. Enzymes fit active organic residue, and oxygen cleaners belong only on color-safe fabrics that pass testing.
Match food, drink, and mud to the safest first-line cleaner
Start water-based only when the code permits it. Coffee, tea, many sauces, and tracked-in soil usually release with mild detergent and blotting. Mud should dry first if gritty, then be vacuumed before any damp cleaning, or the grit turns into an abrasive paste. Velvet and chenille need extra restraint here because grit plus pressure can crush or roughen the pile.
Use enzymes only where organic residue is still active
Milk, blood, vomit, sweat, and urine are protein or organic stains. On W or WS fabric, an enzyme cleaner can work well if odor or residue remains after blotting. Avoid using enzymes on leather, on X-code fabric, or on upholstery where the test patch shows color movement.
Reserve solvents for code-safe oil and grease work
Lotions, butter, salad dressing, makeup, and body oils usually need a solvent cleaner on S or WS fabric. Apply to a cloth and work in controlled passes. Solvents can strip finishes or move dye, so testing matters even more on natural fibers and dark upholstery. If the upholstery is marked WS and the stain is clearly oily, I still start with the solvent path first, not water.
Use oxygen cleaners carefully on color-safe fabric only
Oxygen-based cleaners can help with some drink and food stains on W or WS fabric, especially where a mild detergent leaves color behind. They can also shift dye or leave a pale patch. Keep them away from leather, solvent-only upholstery, and unknown blends. I have had acceptable results on light synthetic upholstery and poor results on darker natural-fiber blends, so I treat them as a late-stage option, not a first move.
Pet stains and odor rebound
Pet messes often need two jobs: stain removal and contamination removal. If urine reaches the cushion core, the visible spot may improve while odor returns after drying. That is a good point to stop DIY and move to extraction or professional treatment with controlled flushing and recovery. If you are weighing whether to buy a machine for that, our vacuum and extractor buying guide explains the tradeoffs.
Waterproofing costs versus long-term repair expenses
Protecting your upholstery from liquid damage is a budget-critical decision that prevents permanent staining and odor. The cost to waterproof a sofa typically ranges from $15 to $60 for DIY sprays, or $75 to $250 for professional treatments, depending on fabric size and type. sofa waterproofing costs are heavily influenced by material porosity and the need for repeated application. Comparing these upfront costs against the high expense of steam cleaning or replacing a stained couch helps determine if protection is financially sensible for households with pets or children.
When should I avoid steam cleaning a sofa?
Skip steam on solvent-only upholstery, X-code fabric, leather, glued details, velvet-like piles, and any protein or dye stain that heat can set. Steam can distort texture, crack leather finishes, loosen adhesives, and push moisture deep into foam where drying slows and odor starts.
Heat-sensitive fabrics, leather finishes, and adhesive risks
Steam can flatten pile, create shine on some synthetics, and hard-set blood, milk, and dye stains. Leather finishes can dull or blister. Tufting, welts, and laminated backings may use adhesives that dislike heat and trapped moisture. In one velvet test panel I kept for comparison, steam lifted surface soil but permanently changed the nap reflection, so the fabric looked cleaner from one angle and damaged from another.
Extractor limits: suction, tank size, and over-wetting concerns
Extraction machines help most on W and some WS upholstery where rinse recovery matters. Suction changes the outcome, because better recovery leaves less residue in the fabric and less water in the foam. Tank design matters too. Separate dirty and clean tanks are worth looking for because they keep rinse water cleaner through the job. If you are comparing options, our vacuum and extractor buying guide focuses on recovery, hose control, and practical upholstery use rather than headline specs.
Machine buying versus service has a real tradeoff. For a one-time stain, hiring a professional may cost more up front but can be cheaper than buying a machine that is too weak or too wet for the sofa at hand. My rule is simple: if I cannot recover most moisture in two or three slow dry passes, the machine is not the right tool for that cushion.
Cases where hand cleaning is safer than a machine
Hand cleaning is safer on small spots, unknown fabric, natural-fiber upholstery with ring risk, leather, solvent-only codes, and any cushion that already feels damp inside. If a machine cannot recover most of the rinse quickly, it can turn a modest stain into a slow-drying cushion problem.
When to Hire a Professional Couch Cleaning Service
Professional couch cleaning delivers the best results for set-in stains, persistent odors, pet accidents, and delicate fabrics that cannot handle DIY solvents. For loose dust and fresh surface spots, vacuuming and spot treatment at home is usually sufficient. Using the wrong method on upholstery can push stains deeper into fibers or trap moisture inside cushions.
A detailed professional couch cleaning review compares service methods against specific fabric types, evaluates stain and odor outcomes, and outlines exactly when the cost makes sense for your household. It also covers questions to ask before booking so you avoid services that use incompatible chemicals or techniques likely to fade your upholstery quickly.
Common mistakes
Using the wrong cleaner for the upholstery code
W, S, WS, and X are not decoration. A water cleaner on S fabric can spread oil and raise a ring. A solvent on the wrong leather finish can strip sheen. An X code is a stop sign for DIY liquids. If the tag is missing, I treat the sofa as unknown rather than guessing from the fabric feel alone.
Over-wetting cushions and trapping moisture in foam
The face fabric may look fine while the cushion core stays wet. That is when mildew, browning, and odor rebound show up later. Use a spray bottle for control, never a direct soak, and keep airflow moving until the cushion feels dry through the fill. When I check drying, I do not rely on the surface alone; I press the cushion seam and underside too, because hidden dampness lingers there.
Setting stains with heat, hard brushing, or repeated passes
Protein stains hate heat. Delicate weaves hate scrubbing. Old dye stains hate repetition. If a spot is getting wider, paler in one patch, or fuzzy at the surface, the cleaning is no longer helping. Velvet and chenille are especially unforgiving because the texture itself can become the damage.
Treating dye transfer, water rings, or leather finish damage like ordinary spills
Those are failure cases many guides skip. Dye transfer can smear. Water rings can need edge-to-edge blending on the panel. Leather finish loss can require recoloring rather than cleaning. DIY should stop when the defect changes from dirt on the fiber to damage in the fiber or finish. For leather-specific failure signs, our leather furniture cleaning guide goes deeper.
If that didn’t work
- Move from hand blotting to controlled extraction only if the code allows water.
- Move from detergent to enzyme or solvent only if the stain category supports that shift.
- Stop after a few controlled passes if the stain grows, rings, or reaches the cushion fill.
- Call a professional for X-code fabric, solvent-only uncertainty, large pet contamination, dye transfer, or leather finish problems.
Prevention
Vacuum the sofa regularly, keep spills from sitting, and rotate cushions so body oil and abrasion do not build up on one seat. I have had the best results maintaining sofas with frequent dry soil removal, because once grit and oil build up together, spot cleaning gets harder and riskier.
Frequently asked questions
How to clean marks off a sofa
Start by identifying whether the mark is dry soil, oil, or dye, then check the upholstery code. Vacuum dry marks first. On W or WS fabric, use a lightly damp microfiber cloth with mild detergent if testing is clean. On S fabric, use a code-safe solvent cleaner instead. If the mark is on leather, use the maker’s leather-safe method, not a fabric workflow.
How do I get stains off my couch
Use the smallest effective method: blot, match the stain to the code, apply cleaner to a cloth, and dry fast with airflow. Fresh food and drink stains on W or WS fabric often need water-based cleaning. Grease on S or WS upholstery usually needs a solvent path first. If odor remains after the spot looks clean, treat that as a separate problem.
Sources
- IICRC spot-cleaning and textile-care principles used by professional cleaners, including low-moisture testing and fast drying as risk controls
- Furniture manufacturer care labels and owner guidance for W, S, WS, and X upholstery codes
- Leather maker care guidance distinguishing protected or finished leather from aniline, nubuck, and suede-like leathers
- The Woolmark Company consumer fiber-care guidance on wool and natural-fiber sensitivity to agitation, alkalinity, and heat
- General textile-care guidance from major upholstery mills and furniture brands that advise hidden-area testing, white-cloth transfer checks, and avoiding oversaturation
Products related to this article
Sponsored / affiliate links. As an Amazon Associate I earn from qualifying purchases. I may earn additional commission from eligible campaigns.