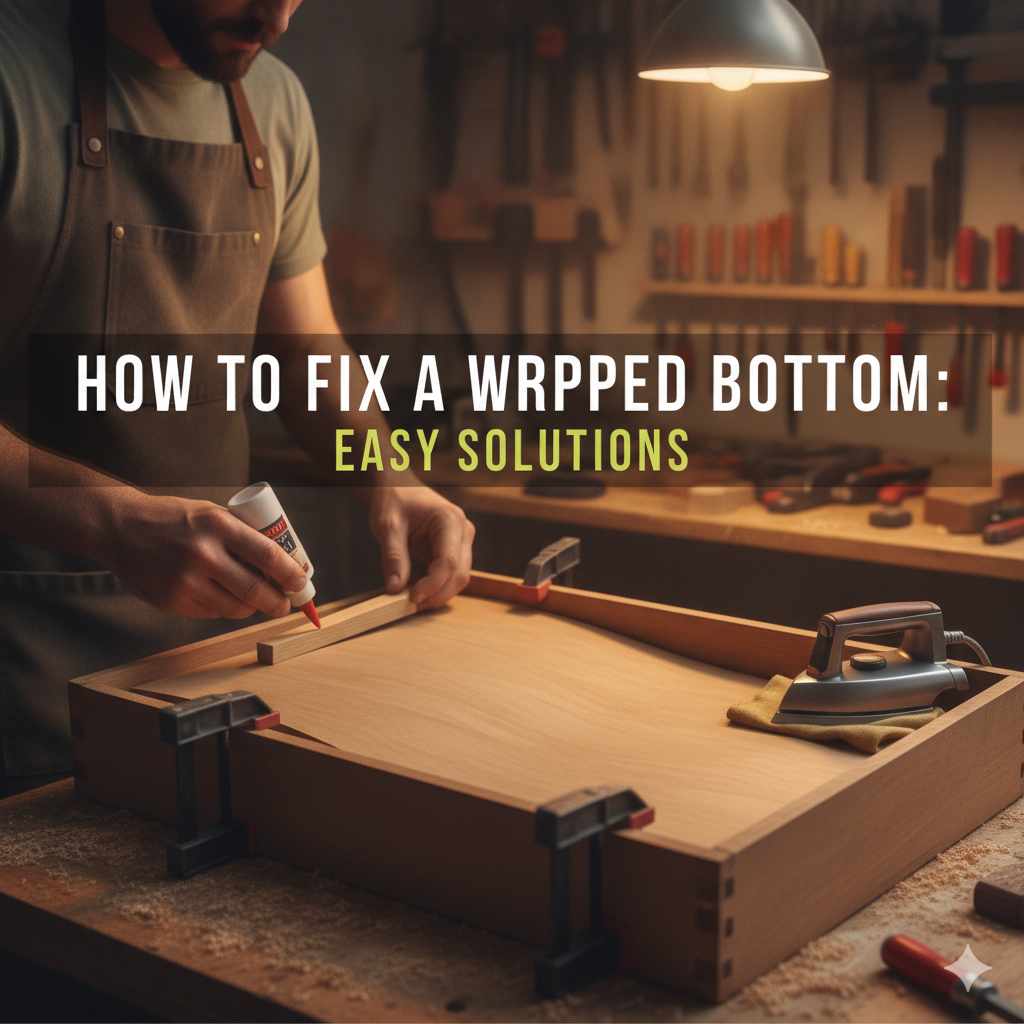
How To Fix A Warped Drawer Bottom: Easy Solutions
It’s a common frustration. You open a drawer, and it feels sticky or uneven. The bottom might sag, making it hard to slide things in and out.
This is often a sign of a warped drawer bottom. It can happen in kitchens, dressers, or any furniture with drawers. Fixing it can seem tricky, but with the right steps, you can often repair it yourself.
This guide will show you how.
A warped drawer bottom means the wood has changed shape. This usually happens from moisture or heat. It makes the drawer hard to use. The good news is you can often fix it without replacing the whole drawer. We’ll walk through the common causes and simple fixes.
Understanding Warped Drawer Bottoms
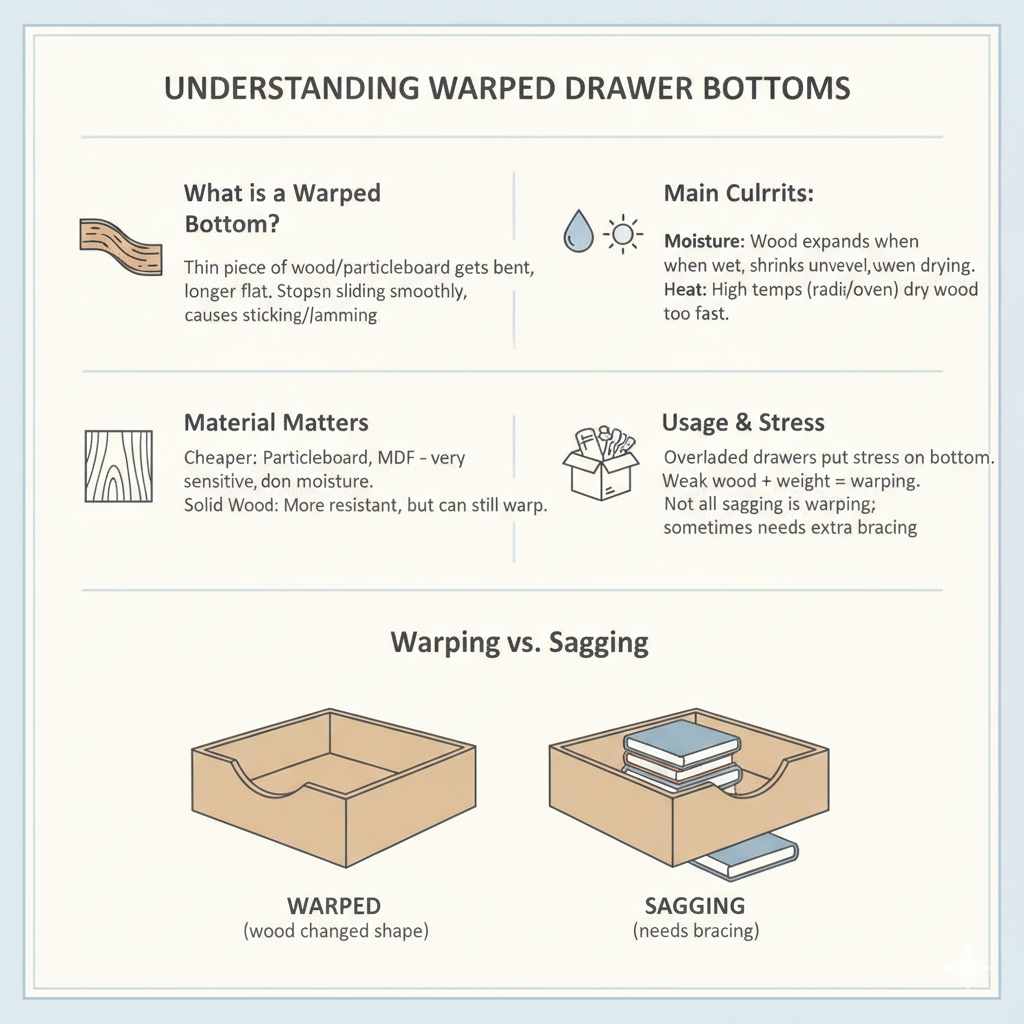
A warped drawer bottom is exactly what it sounds like. The thin piece of wood or particleboard that forms the base of the drawer gets bent. It’s no longer flat.
This change in shape stops the drawer from sliding smoothly in its runners. It can cause sticking, jamming, or even damage to the drawer box itself.
Why does this happen? The main culprit is moisture. Wood expands when it gets wet.
When it dries, it can shrink unevenly. This uneven drying causes the wood to warp. Heat can also play a role.
High temperatures, especially if they are close to a heat source like a radiator or oven, can dry out the wood too fast. This can lead to warping.
The type of wood matters too. Some woods are more stable than others. Cheaper furniture often uses particleboard or MDF.
These materials are very sensitive to moisture. Even a small spill can cause them to swell and then warp as they dry. Solid wood can also warp, but it’s usually more resistant.
The way drawers are used can also contribute. If a drawer is overloaded, the weight puts stress on the bottom. Over time, this stress can encourage warping, especially if the wood is already a bit weak.
It’s important to know that not all sagging is warping. Sometimes, a drawer bottom might just be too thin or not well-supported. It might need extra bracing.
But when the wood itself has changed shape, that’s warping. This is what we’ll focus on fixing.
My Own Drawer Disaster (And What I Learned)
I remember one summer, our dishwasher leaked. It wasn’t a huge flood, just a steady drip under the sink. Most of the mess was contained, but a little bit seeped into the cabinet next to it.
The bottom drawer in that cabinet held our plastic food containers. I didn’t notice the dampness for a few days.
When I finally opened that drawer, it felt wrong. It wouldn’t slide out all the way. I pulled harder, and it caught with a horrible scraping sound.
Looking inside, I could see the bottom panel had bowed upwards in the middle. It looked like a tiny, sad hill. My heart sank.
I thought I’d have to buy a whole new cabinet. It felt like a big, expensive problem. I felt a wave of annoyance, then a bit of panic.
All my containers were trapped!
I spent a frustrating hour trying to jiggle the drawer open. Eventually, I got it out. The bottom was definitely warped.
It was made of thin particleboard. The moisture had soaked in and made it swell. Then, as it started to dry, it didn’t dry flat.
I was so annoyed at myself for not noticing the leak sooner. But I also knew I wanted to try and fix it before giving up.
Drawer Bottom Warping: Common Causes Breakdown
Moisture Exposure: Spills, humidity, leaks (like my dishwasher story). Wood swells, then dries unevenly.
Heat Damage: Proximity to ovens, radiators, or direct sun. Dries wood too fast.
Poor Material Quality: Thin particleboard or MDF is very weak. It absorbs moisture easily.
Age and Wear: Over time, wood can dry out and become brittle. Stress can cause warping.
Heavy Loads: Storing too much weight can stress the drawer bottom, especially if it’s already weak.
Identifying the Warp: Signs to Look For
How do you know if your drawer bottom is actually warped? It’s usually pretty obvious. The first thing you’ll notice is that the drawer doesn’t move smoothly.
It might stick, catch, or feel stiff. Sometimes, you might hear a scraping sound when you try to open or close it.
Look closely at the drawer. When it’s open, check the bottom panel. Does it look flat?
Or is there a curve? You might see it bowed upwards in the middle or sagging downwards at the edges. Sometimes, the entire panel might twist, so the corners aren’t square anymore.
Another sign is if the drawer doesn’t close all the way. It might leave a small gap. Or, if it does close, it might not look right.
The front of the drawer might not be level with the cabinet face. This means the bottom is no longer keeping the drawer box square.
You might also see damage to the drawer box itself. The sides of the drawer might be pushed outwards or inwards because of the warped bottom. This can cause the drawer to become loose or wobbly.
Quick Scan: Is Your Drawer Bottom Warped?
Feel: Drawer sticks or catches.
Look: Bottom panel is curved, bowed, or twisted.
Sound: Scraping when opening/closing.
Fit: Drawer doesn’t close fully or looks crooked.
Box Stability: Drawer feels loose or wobbly.
Fixing a Warped Drawer Bottom: Step-by-Step
Okay, let’s get to the fixes. The best method depends on how bad the warp is and what material the drawer bottom is made of. Most fixes involve trying to flatten the wood or adding support.
Method 1: The Gentle Flattening (For Minor Warps)
This is for when the warp is very slight. You’re not trying to force it, but coax it back into shape.
Step 1: Empty the Drawer. Remove everything from the drawer. This makes it lighter and easier to work with.
Step 2: Assess the Warp. See which way the wood is bowed. You want to apply pressure in the opposite direction.
Step 3: Gather Materials. You’ll need some clamps, a clean, damp cloth, and maybe a heavy book or board. For dampening, use a spray bottle with water.
Step 4: Dampen the Wood. Lightly spray the concave side (the side that’s bent inwards) of the warped area. You don’t want it soaking wet, just damp. You can also use a damp cloth to wipe it gently.
Step 5: Apply Gentle Pressure. Place a block of wood or a flat board across the warped area. Use clamps to gently press down on the board, creating a counter-pressure to the warp. Don’t overtighten the clamps.
You’re not trying to break it.
Step 6: Wait and Check. Let it sit for a few hours or overnight. Check the warp. If it’s improved, great!
If not, you can try again, perhaps with slightly more pressure or by leaving it longer.
Step 7: Dry Thoroughly. Once the warp is gone, let the drawer dry completely in a warm, dry place. Make sure it’s not in direct sunlight, which can cause it to re-warp.
Quick Fix Tips: Gentle Flattening
- Less is more: Start with light dampening and pressure.
- Patience is key: This method takes time.
- Check progress: Don’t leave it clamped too long without checking.
- Dry completely: Moisture is the enemy.
Method 2: Adding Support (For Saggier Drawers)
If the bottom is really sagging, flattening it might not be enough. You might need to add extra support underneath.
Step 1: Remove the Drawer Bottom. This is usually the first step. You might need to gently pry it out. Look for small nails or staples holding it in.
Sometimes, the bottom slides into grooves in the drawer sides.
Step 2: Clean and Flatten. Once the bottom is out, try to flatten it as much as possible. You can lay it flat and place heavy objects on it for a while. If it’s particleboard, be very gentle.
If it breaks, you’ll need a replacement.
Step 3: Get a New Piece (If Needed). If the original bottom is too damaged, you’ll need to get a new piece of thin plywood or hardboard. Measure the old one carefully. Hardware stores can often cut pieces to size.
Step 4: Prepare Support Strips. Get some thin strips of wood, like 1×2 or 1×3 pine. You’ll need enough to go across the width of the drawer, from one side to the other.
Step 5: Attach Supports to Drawer Sides. This is where you add the support. Lay the drawer box on its side. Attach the wooden strips to the inside bottom edge of the drawer sides.
You can use wood glue and screws. Make sure the strips sit flush against the sides and provide a level surface for the drawer bottom to rest on.
Step 6: Re-install the Drawer Bottom. Place the (hopefully flattened) original drawer bottom or your new piece onto the support strips. It should sit flat and securely. You can then secure it with wood glue and small nails or screws.
Make sure not to drive the fasteners through the bottom into the inside of the drawer.
Step 7: Let Glue Dry. Allow any glue to dry completely before putting the drawer back in its cabinet.
Support Strips: How They Help
Function: These strips act like mini-beams. They prevent the drawer bottom from sagging by giving it something solid to rest on.
Placement: They are attached to the inner sides of the drawer box, just above the original bottom edge.
Material: Common pine strips (1×2 or 1×3) work well. They are strong but not too thick.
Attachment: Use wood glue and small screws or nails for a secure hold.
Method 3: The “New Bottom” Approach (For Severely Warped or Damaged)
Sometimes, the drawer bottom is just too far gone. It’s cracked, completely twisted, or made of material that can’t be saved.
Step 1: Remove the Old Bottom. This is usually the first step. Carefully take the old bottom out. Be prepared for it to be fragile.
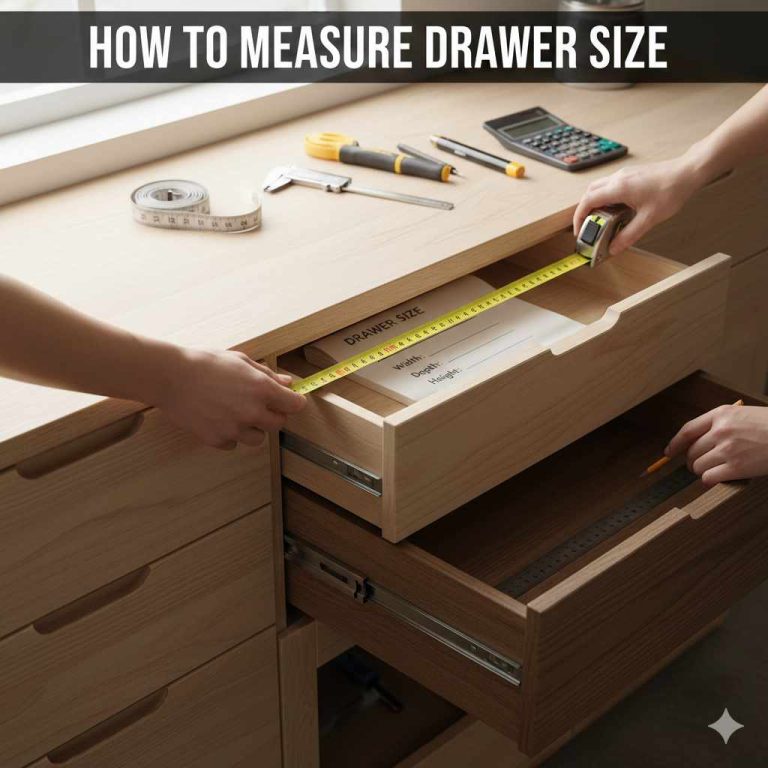
Step 2: Measure Precisely. Measure the length and width of the opening where the drawer bottom sits. Also, measure the thickness of the old bottom if you plan to match it. Take a picture too!
Step 3: Get Replacement Material. Head to your local hardware store. You’ll want a thin sheet of plywood (like 1/4 inch) or hardboard. You can often buy a larger sheet and have them cut it to your exact measurements.
For kitchen drawers, a thicker plywood might be better if the original was thin.
Step 4: Cut the New Bottom (If Needed). If the store didn’t cut it perfectly, you might need to trim it down yourself. Use a straight edge and a utility knife or a fine-toothed saw. Be careful to get clean, straight cuts.
Step 5: Install the New Bottom.
If it slides into grooves: Gently slide the new bottom into the grooves on the drawer sides. If it sits on the bottom edges: Apply a thin bead of wood glue along the bottom edges of the drawer sides. Carefully place the new bottom onto the glue.
* Secure it: Use small finishing nails or staples to secure the new bottom. Drive them into the drawer sides, not the bottom itself. Space them out every few inches.
Step 6: Let Glue Dry. If you used glue, give it time to set before using the drawer.
Material Choices for Drawer Bottoms
Plywood: Offers good strength. 1/4 inch is common. Birch or poplar plywood is stable.
Hardboard/Masonite: Very smooth and inexpensive. Can be less durable if it gets wet.
Particleboard/MDF: Often used in manufactured furniture. Very prone to moisture damage and warping. If replacing, choose plywood.
Real-World Context: Where Warping Happens Most
You’ll see warped drawer bottoms in many different places. Understanding the environment helps prevent it.
Kitchens: These are prime spots. High humidity from cooking, dishwashers, and sinks. Spills are common.
A warped drawer bottom under the sink or near the dishwasher is a classic sign of moisture damage.
Bathrooms: Similar to kitchens, bathrooms have high humidity. Drawers holding towels or toiletries can get damp. Small leaks from pipes can also cause issues.
Garages and Basements: These areas can have fluctuating temperatures and humidity. Wood stored here might be more prone to warping over time due to environmental changes.
Furniture Near Heat Sources: Dressers placed next to radiators or heating vents, or cabinets located near ovens, are at risk. The heat dries the wood too quickly, leading to cracks and warps.
Old or Poorly Made Furniture: As furniture ages, the wood can dry out and become more susceptible. Cheaper furniture often uses thinner materials that don’t stand up well to normal use and environmental stresses.
Heavy Use Drawers: Drawers that are constantly opened and closed, especially if they hold a lot of weight (like utensil drawers or those with heavy dishes), experience more stress. This can accelerate any existing weakness.
Drawer Location vs. Risk of Warping
High Risk: Under sinks, near dishwashers/ovens, humid basements.
Medium Risk: Bathrooms, garages, areas with big temperature swings.
Low Risk: Well-maintained, climate-controlled living areas, drawers with light contents.
What This Means for You: When to Worry and When It’s Okay
So, you’ve found a warped drawer bottom. What does it mean? When is it just a minor annoyance, and when is it a bigger problem?
When it’s Normal: If the warp is very slight and doesn’t affect the drawer’s function, it might be okay to leave it. A tiny bit of sag in a rarely used drawer probably won’t cause major issues. Also, if the drawer is very old and the material is naturally brittle, a small warp might just be part of its age.
When to Worry:
If the drawer sticks or jams: This is the biggest clue. A warped bottom will make the drawer hard to use and could cause further damage. If the drawer feels wobbly or loose: This suggests the warp is affecting the structural integrity of the drawer box.
If the warp is severe: A deep bow or twist means the drawer is no longer square and won’t function correctly. If you see signs of mold or mildew: This means the moisture has been there for a while and could be a bigger issue. * If it’s a kitchen or bathroom drawer: These areas are prone to moisture, so a warp might be a sign of an ongoing problem that needs fixing.
Simple Checks:
Visual Inspection: Open the drawer. Does the bottom look flat? Smoothness Test: Slide the drawer in and out.
Does it move freely? Box Stability: Gently wiggle the drawer. Does it feel solid?
Check for Gaps: When closed, does the drawer front sit flush?
Warped Drawer Bottom Checklist
OK to Ignore If:
- Warp is barely noticeable.
- Drawer still slides perfectly.
- It’s a very old piece and this is normal wear.
Needs Attention If:
- Drawer sticks or jams.
- Drawer feels wobbly.
- Warp is very visible (bowed/twisted).
- Signs of mold or rot are present.
- Moisture source is nearby and unaddressed.
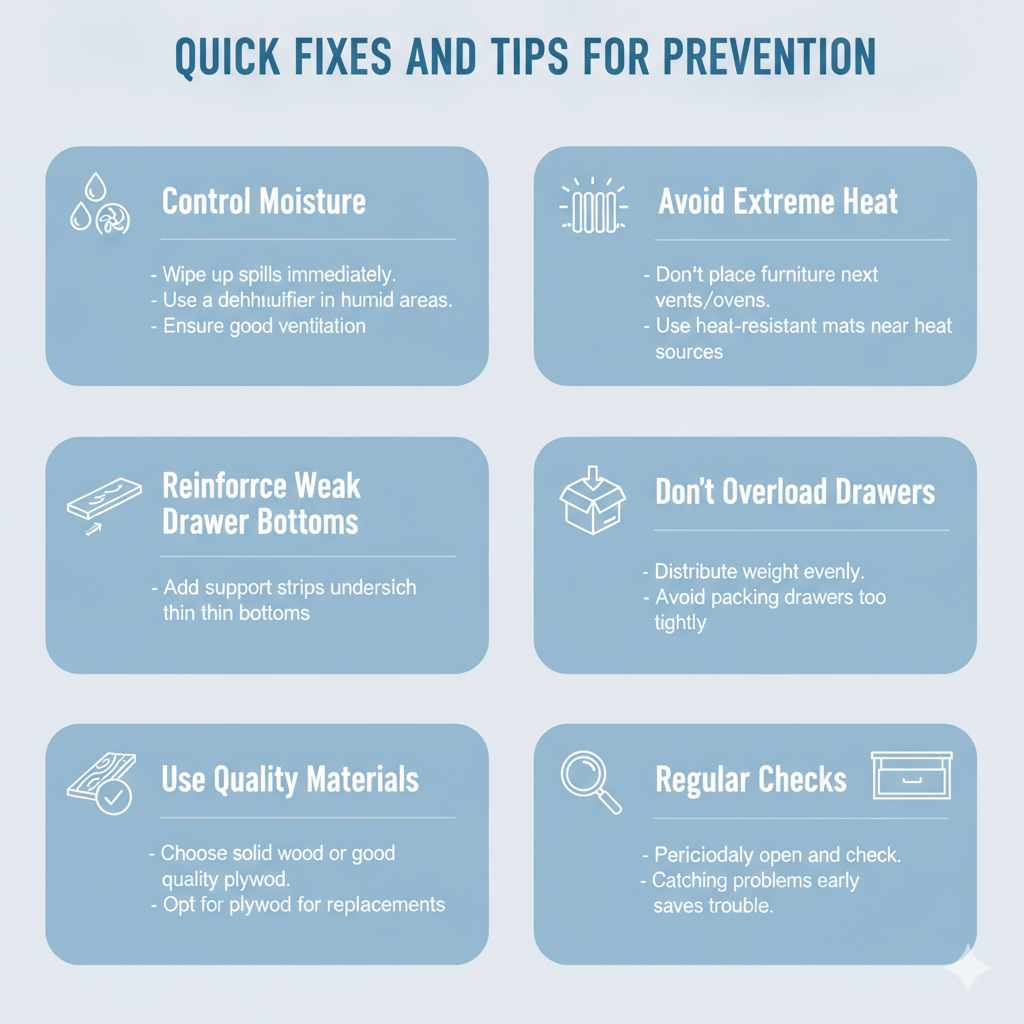
Quick Fixes and Tips for Prevention
While fixing is important, preventing the problem in the first place is even better. Here are some tips.
1. Control Moisture:
Wipe up spills immediately. Use a dehumidifier in humid areas like basements or garages.
* Ensure good ventilation in kitchens and bathrooms.
2. Avoid Extreme Heat:
Don’t place furniture directly next to heating vents or ovens. Consider heat-resistant mats if a drawer is near a heat source.
3. Reinforce Weak Drawer Bottoms:
If you have thin particleboard bottoms, add support strips underneath as described in Method 2. This is a great preventative measure.
4. Don’t Overload Drawers:
Distribute weight evenly. Avoid packing drawers too tightly.
5. Use Quality Materials:
When buying new furniture, look for solid wood or good quality plywood drawer bottoms. If replacing a bottom, opt for plywood.
6. Regular Checks:
Periodically open all your drawers and give them a quick look and slide. Catching a problem early makes it much easier to fix.
Drawer Care: Prevention is Key
Wipe Spills Quickly
Ventilate Damp Areas
Add Support Strips Early
Distribute Weight Evenly
Check Drawers Regularly
Frequently Asked Questions About Warped Drawer Bottoms
Can a warped drawer bottom be fixed?
Yes, often it can be fixed. Minor warps can sometimes be flattened with gentle pressure and moisture. More severe warps may require adding support strips under the bottom or replacing the bottom panel entirely. The success depends on the material and the severity of the warp.
What causes a drawer bottom to warp?
The most common cause is moisture. When wood gets wet, it expands. As it dries, it can shrink unevenly, causing it to warp. Extreme heat can also dry out wood too quickly, leading to warping. Poor quality materials like thin particleboard are also prone to this.
How do I prevent my drawer bottoms from warping?
Preventative measures include controlling moisture by wiping up spills promptly and ensuring good ventilation. Avoid placing furniture near heat sources like radiators or ovens. For drawers with thin bottoms, consider adding extra support strips underneath. Also, try not to overload your drawers.
My drawer bottom is sagging. What should I do?
A sagging drawer bottom often needs support. You can try removing the drawer bottom, flattening it if possible, and then attaching wooden support strips to the inside bottom edges of the drawer sides. The bottom panel then rests on these new supports. If the bottom is too damaged, replace it entirely.
Is it better to repair or replace a warped drawer bottom?
It depends on the damage. For minor warps, repair might be sufficient. If the material is severely damaged, cracked, or completely twisted, replacing the bottom panel is usually the better, more durable solution. Adding support strips can also make a repaired or new bottom last longer.
What kind of wood is best for a drawer bottom?
Thin plywood, like 1/4 inch birch or poplar, is a good choice for drawer bottoms. It’s strong, relatively stable, and holds up well to normal use. Hardboard is another option, though it’s less resistant to moisture than plywood. Avoid particleboard or MDF for replacements if possible, as they are very susceptible to warping.
Conclusion: Bringing Your Drawers Back to Life
A warped drawer bottom is a common problem, but it doesn’t have to be a permanent one. By understanding the causes and using these simple fixes, you can often restore your drawers to full working order. Whether it’s a gentle flattening, adding much-needed support, or replacing the bottom entirely, there’s usually a way to fix it.
Keep an eye out for moisture, and your drawers will thank you.
Products related to this article
Sponsored / affiliate links. As an Amazon Associate I earn from qualifying purchases. I may earn additional commission from eligible campaigns.