Install Bottom Mount Drawer Slides: Step-By-Step Video Guide
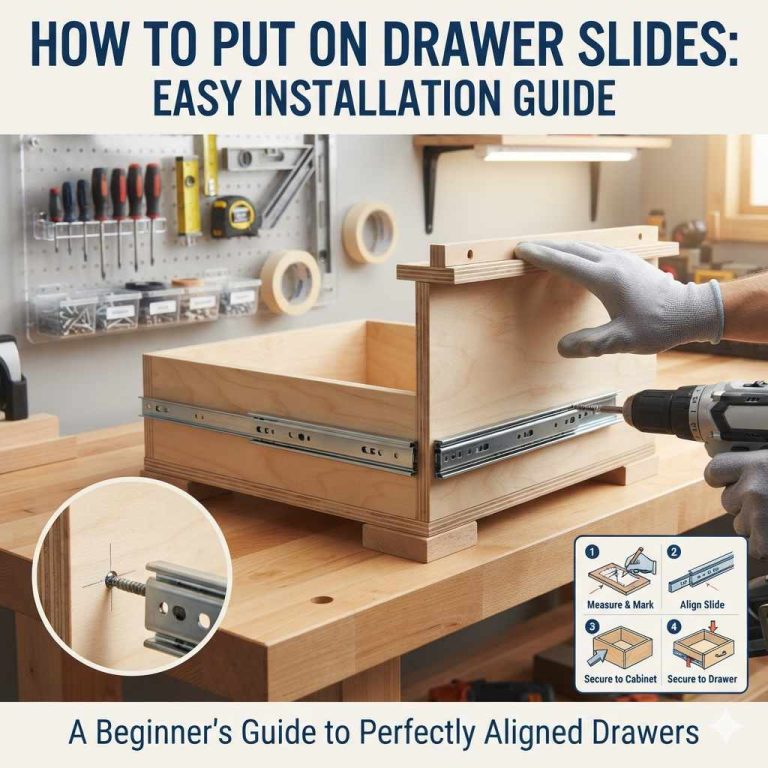
Installing bottom mount drawer slides involves attaching one part of the slide to the cabinet frame and the other part to the bottom of the drawer. Precise measurements, proper alignment, and secure fastening are key to ensuring smooth operation. This guide breaks down the process into simple, actionable steps for a successful installation.
Understanding Bottom Mount Drawer Slides
Bottom mount drawer slides are a popular choice. They attach to the underside of your drawer box. This keeps the slides hidden from view.
It gives your cabinets a cleaner look. They are strong and can hold a good amount of weight. Most modern cabinets use some type of slide system.
Bottom mounts are great for kitchen drawers, desk drawers, and even tool chests.
These slides work in pairs. One part goes on the cabinet. The other part goes on the drawer itself.
They are designed to work together. They guide the drawer in and out. They make sure it stays level.
There are a few types of bottom mount slides. Some are simple, single-extension slides. These let the drawer come out about halfway.
Others are full-extension slides. These let the drawer come out all the way. Full-extension slides are great for deeper drawers.
They let you see and reach everything inside.
The system usually includes a ball-bearing mechanism. This is what makes the drawer slide so smoothly. Little steel balls roll inside tracks.
This reduces friction. It makes opening and closing easy. Even when the drawer is full.
When you buy a set of slides, they come in two pieces. One piece is for the cabinet. The other is for the drawer.
You’ll also get screws. Make sure you have the right size screws. They should be strong enough to hold the weight.
They should also be the right length for your wood.
My First Drawer Slide Fiasco
I remember installing my very first set of bottom mount drawer slides. It was for a small desk I was building in my garage. I’d watched a few videos and read some blog posts.
I thought I knew what I was doing. I carefully measured and drilled pilot holes. I attached the cabinet member of the slide.
Then I attached the drawer member. It seemed straightforward enough.
But when I tried to slide the drawer in, it was a nightmare. It caught, it scraped, and it felt incredibly stiff. I pulled it out and looked closely.
One side was just a hair higher than the other. That tiny difference made all the difference. The whole drawer was tilted.
It looked like it was fighting itself to move.
I felt a rush of panic. My beautiful desk was ruined. Or so I thought.
I spent the next hour fiddling with it. I loosened screws, adjusted the slides, and tried again. It was frustrating.
My hands got greasy. I got sawdust in my hair. But slowly, by making tiny adjustments, I got it to move a little better.
It taught me a huge lesson. Precision is everything with drawer slides. Even a millimeter matters.
After that, I always double-check and triple-check my measurements. And I learned to be patient. Building things takes patience.
Essential Tools for Slide Installation
Before you start, gather these tools:
- Measuring Tape: For accurate measurements.
- Pencil: To mark your lines.
- Drill: With various drill bits for pilot holes.
- Screwdriver: Or a drill bit for screws.
- Level: To ensure things are straight.
- Square: For right angles.
- Safety Glasses: Protect your eyes.
Preparing Your Cabinet and Drawer
This step is super important. It’s where you set yourself up for success. Or for frustration.
Take your time here. It will save you time later.
First, look at your cabinet. You need to decide where the slides will go. For bottom mount slides, you attach them to the side panels of the cabinet.
The bottom edge of the slide should be a specific distance from the bottom of the cabinet. This distance is called the setback. Check the manufacturer’s instructions.
They usually tell you the exact setback. It’s often around 1/2 inch to 3/4 inch.
Use your measuring tape and pencil. Mark a line on the inside of the cabinet side panel. This line will show you where the bottom of the slide will sit.
Make sure this line is perfectly level. Use your level to check it. A crooked line means a crooked slide.
And a crooked slide means a sticky drawer.
Now, look at your drawer. The slides attach to the bottom edges of the drawer box. You need to figure out where the drawer members of the slides will go.
Again, the manufacturer’s instructions are your best friend here. They will tell you how far from the front and back of the drawer the slide should start. They will also tell you how far the slide should be from the bottom edge of the drawer.
It’s important that the slides on both sides of the drawer are exactly the same distance from the front and back. And they should be the same distance from the bottom. This keeps the drawer square.
It also ensures it slides evenly.
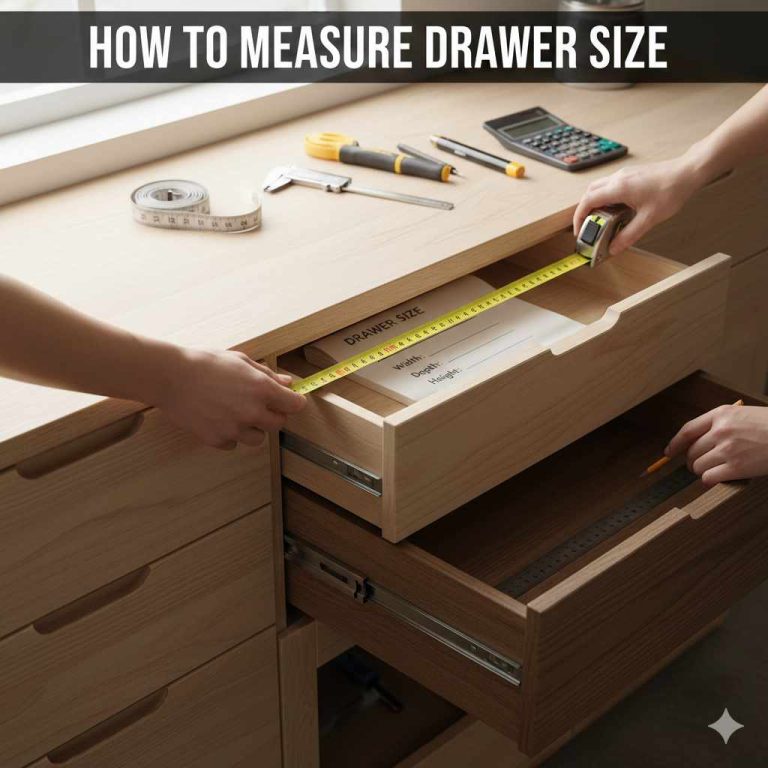
Measure carefully. Mark your lines on the bottom of the drawer box. Use a square to make sure your lines are straight and perpendicular to the sides.
These marks are where you’ll position the drawer slides.
Sometimes, the wood of the drawer box might not be strong enough on its own. Especially if you are carrying heavy items. In these cases, you might want to add a small strip of wood.
This strip attaches to the bottom edge of the drawer. It gives the slide screws something stronger to grip. This is a good idea for heavy-duty drawers.
Attaching the Cabinet Member Slides
Now it’s time to attach the first part of the slides. This is the cabinet member. This piece attaches to the inside of your cabinet.
You’ll be attaching it to the side panel of the cabinet box. Remember that line you drew? That’s your guide.
Position the cabinet member slide against the cabinet side panel. The bottom edge of the slide should line up with your pencil line. The front of the slide should be flush with the front edge of the cabinet.
Or it might be set back a little. Again, check the manufacturer’s instructions. They often have a diagram.
Make sure the slide is perfectly level. Use your level on top of the slide. If it’s not level, adjust it.
A slight tilt here will cause big problems later.
Once it’s in the right spot and level, mark your screw holes. Most slides have pre-drilled holes. Use your pencil to mark through these holes onto the cabinet side.
Drill pilot holes at these marks. Pilot holes are smaller than your screws. They make it easier to drive the screws.
They also prevent the wood from splitting.
Now, drive the screws in. Use the screws provided with the slides. Or use screws that are the right size and type.
Make sure they are snug, but don’t overtighten. Overtightening can strip the screw holes or damage the slide.
Repeat this process for the other side of the cabinet. Make sure the second slide is at the exact same height and level as the first one. This is critical for a balanced drawer.
Double-check everything. Are the slides parallel? Are they level?
Are they at the same height? Are they the same distance from the front? A quick check now can save a lot of headaches.
Quick-Scan Table: Cabinet Slide Placement
| Measurement | Action |
|---|---|
| Distance from bottom of cabinet | Set bottom edge of slide (follow manufacturer specs). |
| Leveling | Ensure slide is perfectly horizontal. |
| Front alignment | Flush with cabinet face or set back as instructed. |
| Pilot holes | Drill before inserting screws. |
Attaching the Drawer Member Slides
Now, let’s move to the drawer itself. This is the other part of the slide. The drawer member.
This attaches to the bottom outside edge of your drawer box.
Remember those lines you marked on the bottom of the drawer? They are your guides here. Place the drawer member slide onto the bottom edge of the drawer.
Align it with your marks. The front of the slide should be a specific distance from the front of the drawer. This distance is usually on the manufacturer’s specs.
The slide should be positioned so it covers the line you drew.
Make sure the slide is straight. It should be parallel to the edge of the drawer. And it should be set in from the side of the drawer by a specific amount.
This is also in the instructions. If the slide is crooked, the drawer won’t slide smoothly. It might bind or get stuck.
Once positioned correctly, mark your screw holes. Again, drill pilot holes. Use the correct screws.
Attach the slide securely. Repeat this for the other side of the drawer.
Crucially, the slides on both sides of the drawer must be identical. They need to be the same distance from the front and back. They need to be the same distance from the bottom edge.
And they must be perfectly parallel to each other. If they aren’t, the drawer will twist and bind when you try to slide it.
To ensure they are the same, some people measure from the front edge of the drawer to the front of the slide. Others measure from the back. Whatever method you use, be consistent.
Use your measuring tape and square religiously.
A common mistake is having one slide slightly higher or lower than the other. Or one is angled slightly differently. This will cause the drawer to tilt.
It will rub against the cabinet sides. It will feel rough to operate.
Contrast Matrix: Drawer Slide Placement Accuracy
Normal Practice
Accurate Measurements: Precisely follow manufacturer guidelines for slide placement. Ensure slides are parallel and at identical heights on both sides of the drawer.
Concerning Practice
Guesswork and Inconsistency: Placing slides by feel or with uneven measurements. This leads to drawers that bind, stick, or tilt.
Separating the Slide Components
Most bottom mount drawer slides have a mechanism that lets you separate the cabinet member from the drawer member. This makes it easier to install them. You usually don’t attach the drawer to the cabinet with the slides fully connected.
Look at the slide. You’ll often see a lever, a clip, or a button. This is the release mechanism.
You need to press or lift this part. While pressing it, you can usually pull the two parts of the slide apart.
The cabinet member stays in the cabinet. The drawer member stays on the drawer. You will then slide the drawer into the cabinet.
The two parts will reconnect as you push the drawer in. This is how the slides engage.
It’s important to understand this release mechanism. Sometimes it can be a little stiff. You might need to use a bit of force.
Or you might need a flathead screwdriver to help gently pry the lever or clip.
Take a moment to practice separating and rejoining the slide components. Do this before you attach them to your cabinet or drawer. This way, you’ll know exactly how it works.
You won’t be struggling with it when the drawer is half-installed.
Once separated, set the drawer member aside for a moment. You’ve already attached it. The cabinet member is in the cabinet.
You are now ready to combine them.
Inserting the Drawer
This is the moment of truth! You’ve attached both parts of the slides. Now it’s time to bring them together.
Carefully align the drawer with the opening in the cabinet.
You want to guide the drawer member of the slide into the cabinet member. They should slide together smoothly. You might need to lift or lower the front of the drawer slightly.
This depends on how the slides are designed.
As you push the drawer in, you should feel the slides engage. They might click into place. Or they might just slide together.
If you feel resistance, don’t force it. Pull the drawer back out. Check your alignment.
Make sure the slides are still level and parallel.
Sometimes, debris can get into the slide mechanism. This can cause sticking. Blow out any dust or wood chips.
Then try again.
If the drawer goes in and out smoothly, congratulations! You’ve done it. Test it a few times.
Open it all the way. Close it all the way. Listen for any scraping sounds.
Feel for any binding.
If it feels a bit stiff, it might need a tiny bit of adjustment. Loosen the screws on the cabinet member slides just a touch. Make a very small adjustment.
Then retighten. Sometimes, just a fraction of a millimeter can make a big difference.
This is the step where you see if all your careful measuring paid off. It’s a satisfying feeling when the drawer glides perfectly.
Observational Flow: Drawer Insertion
Step 1: Align Drawer – Position the drawer in front of the cabinet opening.
Step 2: Guide Slides Together – Gently push the drawer, guiding the drawer slide members into the cabinet slide members.
Step 3: Feel Engagement – Listen or feel for the slides connecting. A click or smooth transition is good.
Step 4: Test Operation – Open and close the drawer several times to check for smooth movement.
Step 5: Adjust if Needed – If sticky, re-check alignment and make minor adjustments to cabinet slides.
Troubleshooting Common Issues
Even with careful work, sometimes things don’t go perfectly. Don’t worry. Most problems with drawer slides are fixable.
Here are some common issues and how to solve them.
Drawer sticks or binds: This is the most common problem. It usually means the slides are not perfectly parallel. Or they are not at the same height on both sides.
Check your measurements again. Ensure the cabinet members are level and at the same height. Check the drawer members are parallel and at the same height.
Sometimes, wood can swell. This can also cause sticking.
Drawer tilts when opening: This also points to an alignment issue. One side of the slide is likely higher than the other. Or it’s not mounted as securely.
Go back and check the level and height of both cabinet slides. Then check the drawer slides.
Drawer won’t close all the way: This can happen if the drawer box is too wide for the cabinet opening. Or if the slides were installed too far forward. Measure the width of your drawer box.
Measure the inside width of your cabinet opening. Make sure there’s enough clearance. Also, check that the drawer member slides are not too far forward on the drawer.
Drawer falls out: This is usually a sign that the slide engagement mechanism isn’t working properly. Or the drawer was never properly seated onto the cabinet members. Ensure the slides are fully engaged.
If the drawer has a locking mechanism, make sure it’s disengaged before trying to remove the drawer. If the slides are damaged, they might need replacing.
Screws won’t tighten: This means the pilot hole is too big. Or the wood is soft. Try using a slightly larger screw.
Or you can fill the hole with wood glue and toothpicks. Let it dry completely. Then drill a new pilot hole.
This will give the screw something solid to grip.
Remember, patience is key. Take a deep breath. Look at the problem logically.
Often, a small adjustment is all that’s needed.
When to Call a Professional
While installing bottom mount drawer slides is a great DIY project, there are times when it might be best to call in an expert. If you’re working with very heavy or expensive cabinetry, you might want professional help.
If you’ve tried troubleshooting and still can’t get the drawer to work correctly, a professional can diagnose the issue. They have specialized tools and extensive experience. They can often fix problems that stump DIYers.
For very large or complex cabinet systems, like built-in wardrobes or custom kitchens, the precision required can be extremely high. A mistake can be costly. In these situations, hiring a carpenter or cabinet installer is a wise choice.
They ensure a perfect fit and smooth operation.
Also, if you’re uncomfortable with power tools or precise measuring, it’s okay to seek help. There’s no shame in knowing your limits. A professional can save you time, frustration, and potential damage to your cabinets.
Stacked Micro-Sections: Professional Help
When to Consider: For high-value cabinets, complex projects, or if you lack confidence with tools.
Benefits: Expertise, precision, time-saving, prevents costly mistakes.
Finding Help: Look for local carpenters, cabinet installers, or handymen with good reviews.
Frequently Asked Questions about Installing Bottom Mount Drawer Slides
What is the difference between bottom mount and side mount drawer slides?
Bottom mount slides attach to the underside of the drawer, making them hidden. Side mount slides attach to the sides of the drawer and cabinet and are often more visible.
How far from the front of the drawer should the slide be installed?
This varies by manufacturer and slide type. Always check the product’s installation manual. Typically, it’s between 1/2 inch to 1 inch from the front edge of the drawer.
Can I use wood screws instead of the ones provided?
It’s best to use the screws recommended by the slide manufacturer. If you must use others, ensure they are the correct size, length, and strength to properly secure the slide without damaging the wood.
My drawer slides are stiff. What can I do?
Ensure the slides are perfectly aligned and parallel. Check for any debris or obstructions. Sometimes, a little graphite lubricant applied to the ball bearings can help, but avoid oily lubricants that attract dust.
How do I know if I have full-extension or partial-extension slides?
Full-extension slides allow the drawer to be pulled out almost completely. Partial-extension slides only allow the drawer to come out about two-thirds of its depth.
What if my cabinet sides are made of particle board?
Particle board is less strong than solid wood. Use shorter screws to avoid going through the other side. Consider using larger washers on the screws.
You can also reinforce the area with wood glue and toothpicks before screwing.
Conclusion
Installing bottom mount drawer slides might seem daunting at first. But by breaking it down into simple steps, it’s very manageable. Remember to measure twice, cut once.
Pay close attention to alignment and level. With a little care and patience, you can achieve smooth, reliable drawers. Enjoy the satisfaction of a job well done!
Products related to this article
Sponsored / affiliate links. As an Amazon Associate I earn from qualifying purchases. I may earn additional commission from eligible campaigns.