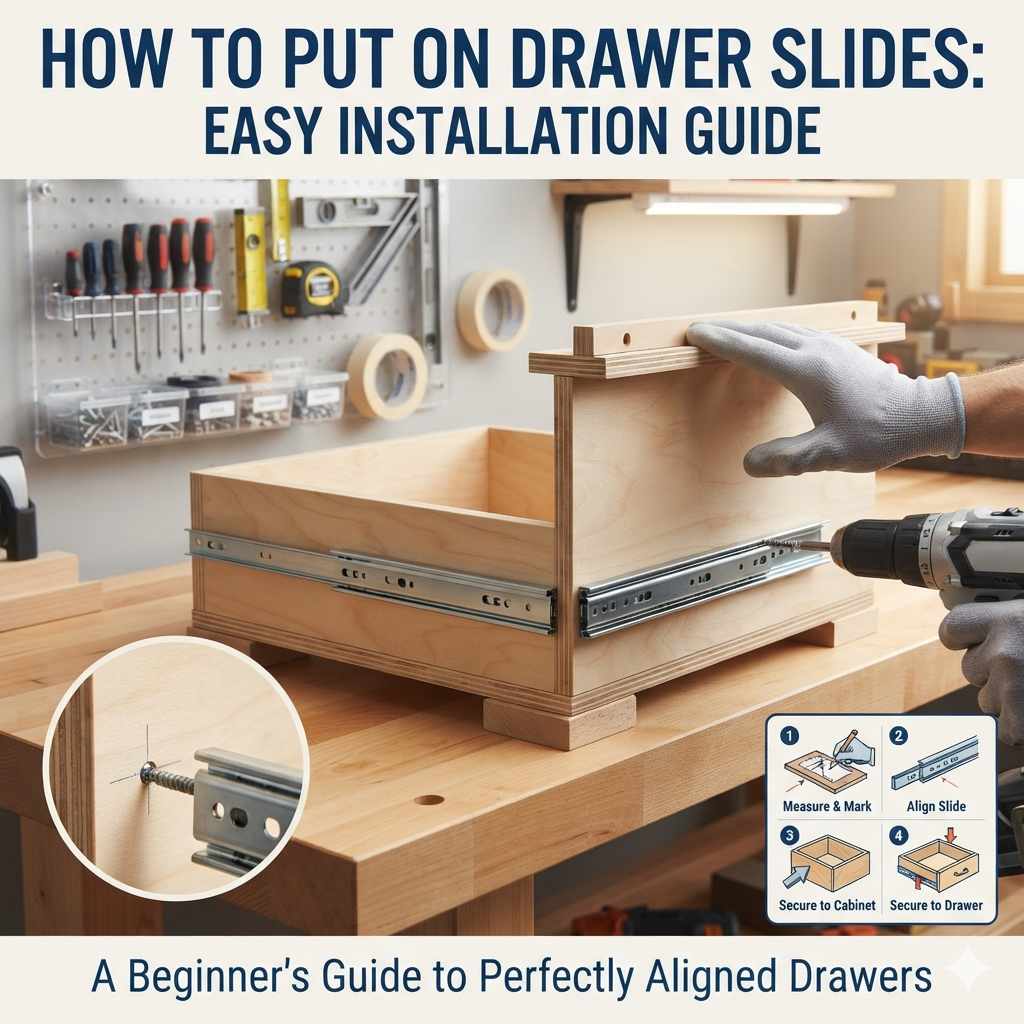
How To Put On Drawer Slides: Easy Installation Guide
Installing drawer slides is a straightforward process when you follow clear steps. This guide explains exactly how to attach them to your cabinets and drawers for a smooth, reliable operation. You will learn about measuring, marking, attaching, and testing your new slides.
Understanding Drawer Slides
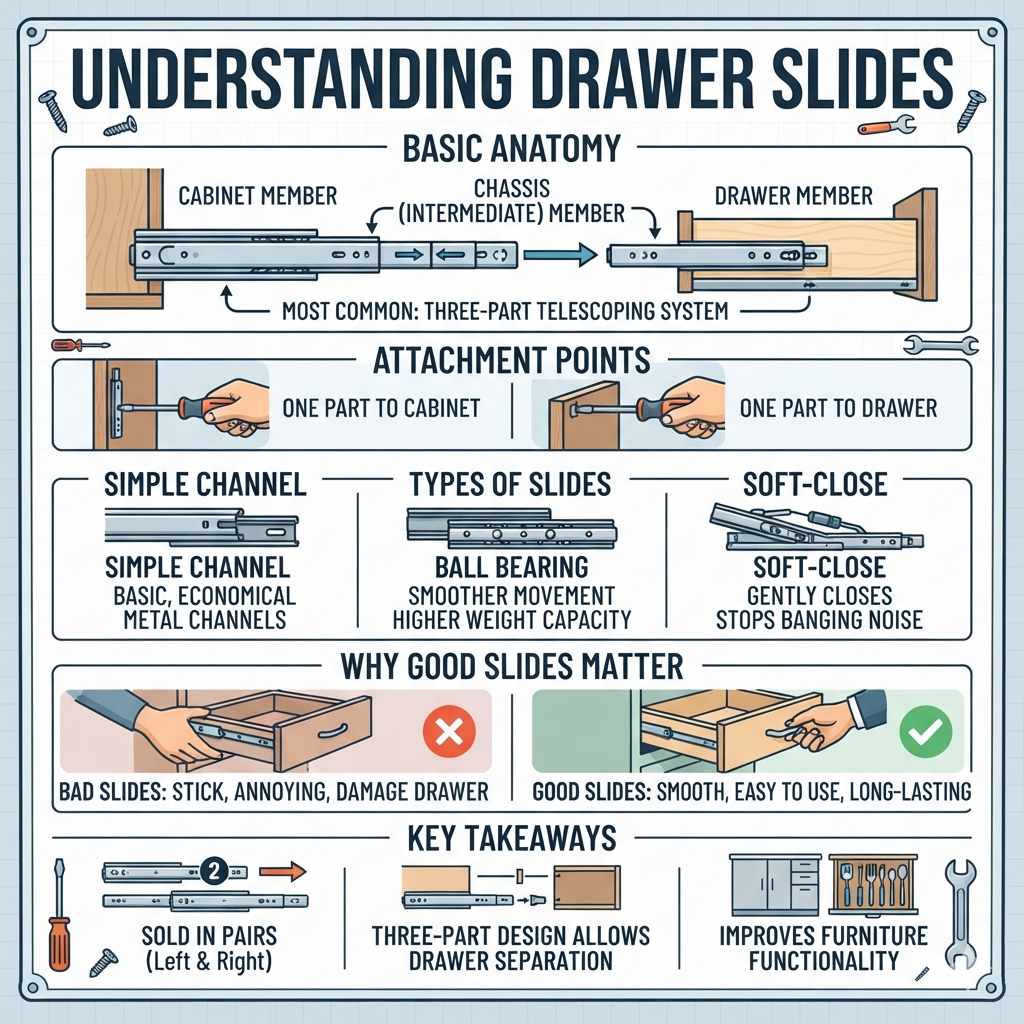
Drawer slides are metal rails. They help drawers move in and out. They have two main parts.
One part attaches to the cabinet. The other part attaches to the drawer side. This design lets the drawer glide smoothly.
It also keeps it from tilting or falling out.
There are different types of drawer slides. Some are simple metal channels. Others have ball bearings inside.
Ball bearing slides move very smoothly. They can also hold more weight. Soft-close slides are another popular type.
They gently close the drawer at the end. This stops loud bangs. Knowing your slide type helps with installation.
Why are they important? Good slides make drawers easy to use. Bad ones make them stick or get stuck.
This can be very annoying. It can also damage the drawer box. Proper installation is key.
It ensures they work well for a long time. It also makes your furniture look and feel better. Think about a kitchen cabinet.
Smooth drawers make cooking much easier. You can find what you need fast.
The basic idea is a track system. One piece moves along the other. They are usually sold in pairs.
One for the left side, one for the right. Always check if the pair is for one drawer. Sometimes you buy them in sets of two.
This means one left and one right slide. Other times you might buy a left and a right separately.
Most common slides use a three-part system. There’s a cabinet member, a chassis member, and a drawer member. The cabinet member screws to the cabinet.
The drawer member screws to the drawer box. The chassis member connects them. It often slides out of the other two.
This lets you separate the drawer from the cabinet for easier work. This is a big help.
My Experience Putting On Drawer Slides
I remember the first time I tried. It was for a custom bookshelf I was building. I wanted deep drawers for my art supplies.
I bought some fancy ball-bearing slides. They looked strong. The box had pictures.
But the actual instructions felt like a foreign language. I stared at them for a long time. I felt that familiar knot of frustration in my stomach.
I was worried I’d ruin the whole project.
I started by holding a slide up to the cabinet side. It looked right. I marked holes.
Then I drilled them. But when I attached the slide, it was crooked. The drawer wouldn’t go in straight.
It caught on one side. I felt a wave of annoyance. I had to take it all apart.
Then I measured again. I realized I hadn’t accounted for the thickness of the drawer front. This is a common mistake.
It adds an extra layer of complexity. I learned that tiny details matter a lot.
I took a deep breath. I went back to the drawing board, literally. I used a ruler and a pencil very carefully.
I drew a straight line. I checked it with a level. This time, I measured from the right spots.
I attached the cabinet member. Then I fitted the drawer member. It slid into place perfectly.
The drawer went in smoothly. It was a small victory. But it felt huge.
That feeling of accomplishment after a struggle is the best.
It taught me that patience is your best tool. And a good tape measure. Don’t rush.
Double-check your marks. It’s always better to measure twice and cut once, or in this case, drill once.
Preparing Your Workspace and Tools
Before you start, get your space ready. Clear the area around the cabinet or drawer. You need room to move.
You don’t want to bump into things. Make sure you have good light. This helps you see your marks clearly.
Now, let’s talk tools. You’ll need a few things. A tape measure is essential.
A good quality one is best. A pencil is for marking. You’ll also need a drill.
It should have drill bits that match your screws. Screwdriver bits for your drill are handy. A level helps ensure things are straight.
A square can also help draw perfect lines.
You will need screws. Your drawer slides usually come with them. If not, check the slide’s size.
Get screws that fit. They should be long enough to hold. But not so long they poke out the other side.
Your slides will likely have specific screw holes. Use those. This makes things easier.
Safety glasses are a good idea. Drilling can send small bits flying. Gloves can protect your hands.
Especially if you’re working with rough wood. It’s always better to be safe.
Essential Tools Checklist
- Tape Measure
- Pencil
- Drill
- Drill Bits (various sizes)
- Screwdriver Bits
- Level
- Square (optional)
- Safety Glasses
- Gloves (optional)
- The Drawer Slides!
Having everything ready saves time. It also stops you from stopping mid-job to find something. Think of it like prepping ingredients before cooking.
It makes the whole process smoother.
Measuring and Marking for Cabinet Slides
This is where accuracy really counts. For standard cabinet drawers, you usually attach the cabinet member to the inside of the cabinet. The exact placement depends on your cabinet and slide.
Most slides have instructions. They often show a line to follow. This line is usually a certain distance from the front of the cabinet.
First, find the front edge of your cabinet opening. This is the face frame or the edge of the cabinet box. Measure back from this edge.
The distance is usually printed on the slide instructions. Let’s say it’s 2 inches. Mark this distance on the cabinet side.
Do this at the front and the back of the cabinet side panel.
Now, use your level. Draw a straight line between these two marks. This line is where the top or bottom of your slide will sit.
Many slides have a specific line to follow. Others you can place as long as it’s straight and parallel to the cabinet front.
Make sure this line is perfectly parallel to the cabinet front. If it’s not, the drawer will not slide straight. It might bind or not close properly.
Check this line with your level. Go from front to back. Also check it side to side.
Once your line is drawn, hold the cabinet member of the slide against the cabinet side. Line it up with your pencil mark. The edge of the slide should be on your line.
The front of the slide should be flush with the cabinet front. Or it should be set back the distance stated in the instructions.
Mark the screw holes. Use your pencil. You can also use a small nail or awl to make a tiny dent.
This helps the drill bit stay put. It prevents the bit from wandering when you start drilling.
Cabinet Slide Placement Tips
- Measure Twice: Always double-check your measurements.
- Use a Level: Ensure your marking line is perfectly straight.
- Follow Instructions: Check your specific slide’s guide for exact placement.
- Front Flush or Set Back: The slide front should align with the cabinet front, or be set back as instructed.
- Mark Screw Holes Clearly: Make small pilot indents for easier drilling.
This careful marking stage is crucial. It sets up the whole drawer for success. A well-marked cabinet side makes attaching the slide easy.
It ensures the drawer will sit level.
Attaching the Cabinet Slides
Now it’s time to attach the cabinet member. Take your drill. Choose a drill bit.
It should be slightly smaller than the screw diameter. This makes it easier to drive the screws. And it helps prevent wood from splitting.
Drill pilot holes at your marked spots. Don’t drill too deep. Just enough to start the screw.
Hold the slide in place. Put your first screw into one of the holes. Start driving it with your drill.
Don’t tighten it all the way yet.
Put in the other screws. Then, check the slide with your level. Make sure it’s still straight and on your line.
If it is, tighten all the screws securely. Don’t overtighten. You don’t want to strip the screw holes.
Or push the slide out of place.
Repeat this process for the other side of the cabinet. If you have multiple drawers, do one cabinet side at a time. This keeps things organized.
It also lets you compare if needed.
Some slides are “full extension.” This means they slide out almost all the way. They usually have three sections. A cabinet piece, a middle piece, and a drawer piece.
The cabinet piece screws to the cabinet. The middle piece often slides out. You might need to do this before marking or attaching.
Check your slide instructions. They will tell you if you need to separate the parts first. Most modern slides have a small lever or clip.
You push this to release the inner part. This lets you take the drawer out. Or install it more easily.
This is a huge help.
Make sure you are using the correct slide for each side. Left and right slides are often not interchangeable. They might have a specific orientation.
Look for markings like ‘L’ and ‘R’ on the slides.
Measuring and Marking for Drawer Slides
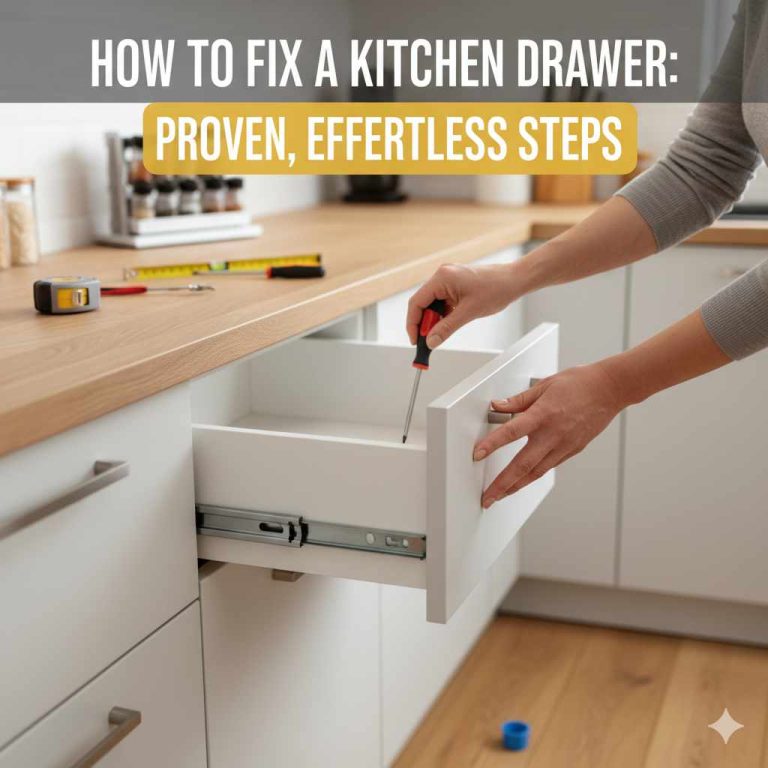
Now you need to attach the other part of the slide. This is the drawer member. It attaches to the side of your drawer box.
The placement here is also very important. It needs to match the cabinet member precisely.
First, consider the drawer box itself. It should be square and solid. If the drawer box is wobbly, fix it first.
Attach the drawer member to the side of the drawer box. Measure from the front of the drawer box. The distance should be the same as you measured for the cabinet.
Usually, this means the drawer member is flush with the drawer front.
But wait, there’s a detail. The drawer front itself adds thickness. You are attaching the slide to the drawer box.
So you need to measure from the front of the drawer box. This might be different from the front of the drawer face. If your drawer has a separate decorative front, measure from the box’s edge.
Use your pencil and tape measure. Draw a straight line on the drawer box side. This line should be parallel to the top edge of the drawer box.
It should be at the same height as the line you drew on the cabinet. If you have a level handy, use it again. Check it’s parallel.
Hold the drawer member of the slide against the drawer box side. Line it up with your pencil mark. The front edge of the drawer member should be flush with the front edge of the drawer box.
Or it might be slightly set back, depending on the slide type. Always check your slide’s manual.
Mark the screw holes. Make sure the slide is perfectly straight and parallel to the top. If it’s crooked, the drawer will bind when it moves.
It might even get stuck.
Drawer Slide Placement Tips
- Drawer Box First: Ensure the drawer box is square and solid.
- Match Cabinet Height: The line on the drawer box should match the cabinet line.
- Consider Drawer Front: Measure from the drawer box edge, not the decorative front.
- Parallel is Key: Draw a line parallel to the drawer box top.
- Flush or Set Back: Align the slide with the drawer box front as per instructions.
This step requires a steady hand. You’re working on a smaller piece. But the same rule applies: accuracy now saves headaches later.
Think of it as the foundation for a smooth-moving drawer.
Attaching the Drawer Slides to the Drawer
Just like with the cabinet, you’ll drill pilot holes. Use a drill bit that’s slightly smaller than your screws. Place the drawer member against the drawer box side.
Line it up with your marks.
Drill your pilot holes through the slide’s screw holes into the drawer box. Again, don’t drill too deep. You don’t want to go through the other side of the drawer box.
Especially if it’s a thin material.
Insert the screws. Start them by hand. Then use your drill to drive them in.
Make sure the slide stays straight as you tighten. Once all screws are in, tighten them snugly. Don’t overtighten.
Repeat this for the other side of the drawer box. Make sure the slides on both sides are at the exact same height. And they are perfectly parallel to the top and bottom of the drawer box.
If one side is higher than the other, the drawer will tilt.
If your slides separate into three parts, you’ll have attached the drawer member to the drawer box. The middle part might already be attached to the cabinet member, or you might have attached a separate piece to the drawer box. Check your specific slide design.
Most modern slides separate easily.
The inner piece of the slide is what usually attaches directly to the drawer box. Or it may slide onto another piece already attached to the drawer box. Read your slide’s manual carefully.
It will show you the exact order of parts.
Consider the type of wood you are drilling into. Softwoods like pine are easier to drill. Hardwoods like oak are tougher.
You might need a slightly larger pilot hole for hardwoods. Or a more powerful drill.
Separating and Connecting Slide Parts
Most modern drawer slides are designed for easy installation. They often have a release lever or clip. This lets you separate the inner slide member from the outer cabinet member.
You’ll usually do this before attaching the drawer member to the drawer box.
First, attach the cabinet member to the cabinet side. Then, extend the slide. You will see a small plastic or metal piece.
This is the release mechanism. Press it. Sometimes you need to press both sides at once.
Or push one while pulling the other. This will allow the inner part of the slide to come out. You’ll be left with the cabinet member on the cabinet.
And the inner slide member detached.
This inner slide member is what usually attaches to the drawer box. Or, some slides might have three parts: cabinet member, chassis member, and drawer member. In that case, the chassis member attaches to the cabinet member.
And the drawer member attaches to the drawer box. Then the chassis member slides into the drawer member. And the whole thing slides onto the cabinet member.
It sounds complicated, but it’s usually intuitive once you see it. The key is to carefully look at the slide parts. See how they fit together.
Your slide’s instructions will have diagrams. These are very helpful.
When you’re ready to put the drawer in, you’ll align the inner slide member (on the drawer) with the outer cabinet member (on the cabinet). Then, you’ll push the drawer in. You should hear or feel a click.
This means the slide parts have reconnected. The drawer is now installed.
Slide Separation Steps
- Attach the cabinet member to the cabinet side.
- Extend the slide fully.
- Locate the release lever or clip.
- Press or pull the release mechanism to detach the inner slide.
- Attach the inner slide member to the drawer box.
- Align the inner slide member with the cabinet member.
- Push the drawer in until it clicks into place.
This separation feature makes installation much easier. You don’t have to wrestle the whole drawer and slide into position at once. It’s a real lifesaver for DIYers.
Installing the Drawer
With both the cabinet members and the drawer members attached, it’s time to put it all together. Take your drawer. Carefully align the inner slide member on the drawer with the outer cabinet member on the cabinet.
You might need to lift the front of the drawer slightly. Or angle it. Gently push the drawer into the cabinet.
You should feel it starting to engage with the cabinet slide. Keep pushing smoothly.
As you push, you should feel or hear a click. This is the slide locking back together. If you don’t hear a click, the slide might not be fully engaged.
Or it might be misaligned.
Don’t force it. If it feels stuck, pull the drawer out slightly. Then try again.
Check that the slides on both sides are still aligned. Make sure there’s nothing blocking the slide’s path.
Once the drawer is in and it feels secure, try sliding it in and out. It should move smoothly. There should be no catching or sticking.
If the drawer sticks, you might need to adjust the slides slightly. Sometimes just a tiny shift can make a big difference. This might mean loosening the screws a bit.
And repositioning the slide very slightly. Then retightening.
Check for level. Does the drawer sit level when closed? Does it stay level when you pull it out?
If it tilts, one slide is likely higher than the other. This requires readjustment.
Consider soft-close mechanisms. If your slides have them, they will engage at the end of the stroke. The drawer will slow down.
And close gently. This is a nice feature. It prevents slamming doors.
Testing and Adjusting
After installation, testing is crucial. This is your chance to see if everything works. And to make any small tweaks needed.
Pull the drawer out completely. Does it come out smoothly? Does it feel stable?
Does it wobble side to side?
Push the drawer back in. Does it go in easily? Does it close all the way?
Listen for any scraping sounds. Or any sounds of things catching.
Load the drawer with some weight. Put a few items inside. Things you would normally store there.
Now try sliding it in and out again. Does it still feel smooth? Some slides perform differently when they have weight on them.
If the drawer feels stiff, check the alignment of the slides. Are they perfectly parallel? Are they at the same height on both sides?
Even a small misalignment can cause stiffness.
Sometimes, the drawer box itself might be slightly out of square. This can also cause issues. If the drawer sticks on one side, check if that side of the drawer box is slightly wider than the other.
If the drawer is loose or wobbly, the screws might not be tight enough. Or the drawer box might be too small for the opening. Or the slides might not be fully engaged.
Double-check that click sound when you install the drawer.
Troubleshooting Common Issues
- Drawer Sticks: Check slide alignment. Ensure they are parallel and at the same height. Verify nothing is blocking the slide.
- Drawer Tilts: One slide is likely higher than the other. Adjust the screws on the higher side.
- Drawer Too Loose: Ensure all screws are tight and the slide is fully engaged. Check drawer box size.
- Drawer Won’t Close Fully: Check for obstructions. Ensure the drawer box is square and the slides are aligned.
- Noisy Drawer: Check for debris in the slide mechanism. Ensure screws are not hitting anything.
Don’t get discouraged if it’s not perfect on the first try. A little bit of adjustment can make a big difference. Think of it as fine-tuning.
Drawer Slide Types and Their Installation Nuances
We’ve mostly talked about ball-bearing slides. They are common and work well. But there are other types too.
Each has its own way of being installed.
Roller Slides: These are older style. They use plastic or metal rollers. They are usually found on less expensive furniture.
Installation is similar. You attach one part to the cabinet. The other to the drawer.
The rollers guide the movement. They are often simpler. But less smooth than ball bearings.
Undermount Slides: These slides are hidden. They mount to the bottom of the drawer box. They offer a clean, modern look.
Installation can be more complex. You often need to be very precise. The slide extends from the bottom edge of the drawer.
And mates with a track on the cabinet floor. Measuring and alignment are critical here. They usually come in sets.
One part mounts to the cabinet. The other to the drawer bottom. They often separate.
Telescoping Slides: These are the heavy-duty ones. Often used for tool chests or industrial applications. They can have many parts.
They offer full extension and high weight capacity. Installation follows similar principles but might be more involved. Often they have more complex release mechanisms.
Soft-Close Slides: These are not a type of slide mechanism itself. They are a feature. Added to ball-bearing or undermount slides.
They have a small piston or damper. This slows the drawer down. It ensures a quiet close.
Installation is usually the same. The soft-close mechanism is often integrated. Or it’s a separate piece that attaches to the slide.
The key is always to read the manufacturer’s instructions for your specific slide. They know their product best. What works for one might not be perfect for another.
Look for specific measurements. And recommended screw types.
Slide Type Quick Guide
- Roller: Basic, uses rollers, less smooth.
- Ball Bearing: Common, uses bearings, smooth, good weight capacity.
- Undermount: Hidden, mounts under drawer, clean look, precise install.
- Telescoping: Heavy-duty, multiple parts, full extension, high capacity.
- Soft-Close: Feature, not a type, adds gentle closing.
Understanding your slide type helps you anticipate the steps. And any special considerations needed. It makes the whole process feel more manageable.
When to Worry: Red Flags During Installation
While installing drawer slides, some things are normal. Small adjustments are expected. But there are red flags.
Things that signal a bigger problem.
Slide Warping or Bending: If a slide part is bent or warped out of the box, don’t try to force it. This is a manufacturing defect. It will cause problems.
Contact the seller for a replacement.
Screws Not Tightening: If screws just spin and don’t tighten, the pilot hole might be too big. Or the wood might be too soft. Or the screw itself is stripped.
Try a slightly larger screw. Or use wood filler. If the hole is in the cabinet, consider anchoring into a stud if possible.
This gives a much stronger hold.
Drawer Box Falls Apart: If attaching the slide causes the drawer box to break or fall apart, the box is not strong enough. You may need to reinforce the drawer box with screws or glue. Or build a new, sturdier drawer box.
Cabinet Frame Cracking: If you see cracks forming in the cabinet frame as you drive screws, you are putting too much force. Or the pilot hole is too small. Or you are drilling too close to an edge.
Stop and assess. You may need to repair the crack with wood glue and clamps.
Slides Don’t Engage: If you push the drawer in and it doesn’t click. Or it feels very loose. The inner and outer slide parts are not aligning.
This could be due to misalignment. Or a damaged release mechanism. Sometimes gently wiggling can help.
But if it’s consistently not engaging, something is wrong with the alignment.
Excessive Force Needed: If you have to push extremely hard to get the drawer in or out, something is wrong. It shouldn’t feel like you’re fighting the slide. This usually points to alignment issues.
Or bent slide parts. Or a warped drawer box.
If you encounter these issues, take a break. Re-read the instructions. Double-check your measurements.
Sometimes stepping away for a few minutes helps you see the problem clearly. If you’re still stuck, it might be worth seeking advice. Or considering if the material itself is the issue.
Maintaining Your Drawer Slides
Once your drawer slides are installed and working well, you want them to stay that way. A little bit of maintenance goes a long way. This keeps them smooth and quiet for years.
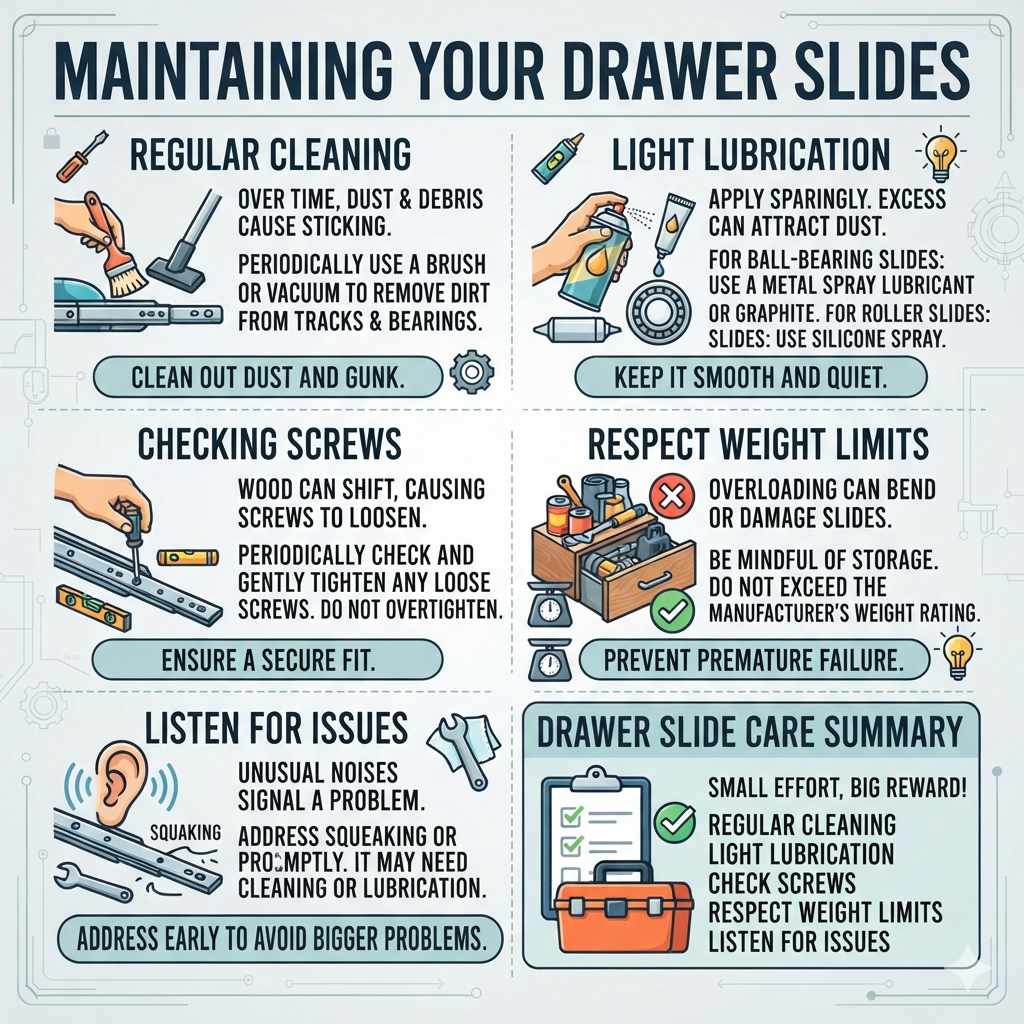
Cleaning: Over time, dust and debris can build up. This can get into the slide mechanism. And make them stick.
Periodically, take a soft brush or a vacuum cleaner with a brush attachment. Clean out any dust and gunk. Pay attention to the ball bearings or tracks.
Lubrication: For ball-bearing slides, a light lubricant can help. Use a spray lubricant designed for metal. Or a dry lubricant like graphite.
Apply it sparingly. You don’t want it to attract more dust. For roller slides, sometimes a little silicone spray is helpful.
For undermount slides, cleaning is usually enough. Excessive lubrication can actually be a problem. It can attract dirt.
Checking Screws: Wood can shift slightly over time. Especially with changes in humidity. It’s a good idea to check the screws holding the slides.
Make sure they are still snug. Don’t overtighten. Just a gentle tightening if they feel loose.
Weight Limits: Every drawer slide has a weight limit. Piling too much stuff into a drawer can strain the slides. This can cause them to bend or fail prematurely.
Be mindful of what you store in your drawers. Especially in kitchens or workshops.
Listen for Changes: If you start hearing squeaking or grinding sounds, it’s a sign. The slide might need cleaning or lubrication. Or there could be a small obstruction.
Address it early before it becomes a bigger problem.
Drawer Slide Care Tips
- Regular Cleaning: Dust and debris can cause sticking.
- Light Lubrication: Use appropriate spray or dry lubricant sparingly.
- Check Screws: Ensure they remain snug over time.
- Respect Weight Limits: Avoid overloading drawers.
- Listen for Issues: Address unusual noises promptly.
Good maintenance means your drawers will keep working smoothly. It extends their life. And makes using your furniture a pleasure.
It’s a small effort for a big reward.
Frequently Asked Questions
How do I know which type of drawer slide to buy?
Consider the weight the drawer will hold and how often it will be used. For general use, ball-bearing slides are a great choice. For heavy loads, look for heavy-duty or telescoping slides.
If you want a clean look, undermount slides are best. Always check the load capacity. Match it to your needs.
Do I need a special drill bit for drawer slides?
No, you don’t need a special bit. Use a standard drill bit that is slightly smaller than the screw you are using. This creates a pilot hole.
It helps prevent the wood from splitting. And makes driving the screw easier. The slide manufacturer might recommend a specific size.
Can I install drawer slides on particleboard or MDF?
Yes, you can. However, particleboard and MDF are softer than solid wood. Screws may not hold as well.
It’s best to use screws designed for these materials. Or use a slightly larger screw if the pilot hole becomes stripped. Reinforcing the area with wood glue can help.
Also, be extra careful not to overtighten screws.
What if my drawer is not square?
A non-square drawer box will cause many problems with slides. Try to square it up by gently pushing on the corners. You can also add corner braces inside the drawer box.
Or use glue and clamps to fix it. If it’s too far gone, you might need to build a new drawer box.
How far back from the front edge should I place the cabinet slide?
This varies by slide type and manufacturer. Most instructions will give a specific measurement. It’s often between 1/8 inch and 1 inch.
This setback helps the drawer front clear the cabinet face frame. Always refer to your slide’s installation manual for the exact distance.
My new drawer slides feel tight. What should I do?
First, double-check that both slides are installed perfectly parallel and at the same height. Even a small difference can cause tightness. Ensure there are no obstructions.
If they are new slides, they might need a little breaking in. Try sliding them in and out a few times with some weight in the drawer. If it persists, check the slide mechanism for debris or try a light lubricant.
Final Thoughts
Putting on drawer slides might seem daunting at first. But with a clear understanding and the right steps, it’s totally doable. Remember to measure carefully.
Use your level often. And don’t rush the process. Each step builds on the last.
Your drawers will glide like new.
Products related to this article
Sponsored / affiliate links. As an Amazon Associate I earn from qualifying purchases. I may earn additional commission from eligible campaigns.