Freezer Drawer Frozen Shut? 3 Ways to Open It Safely
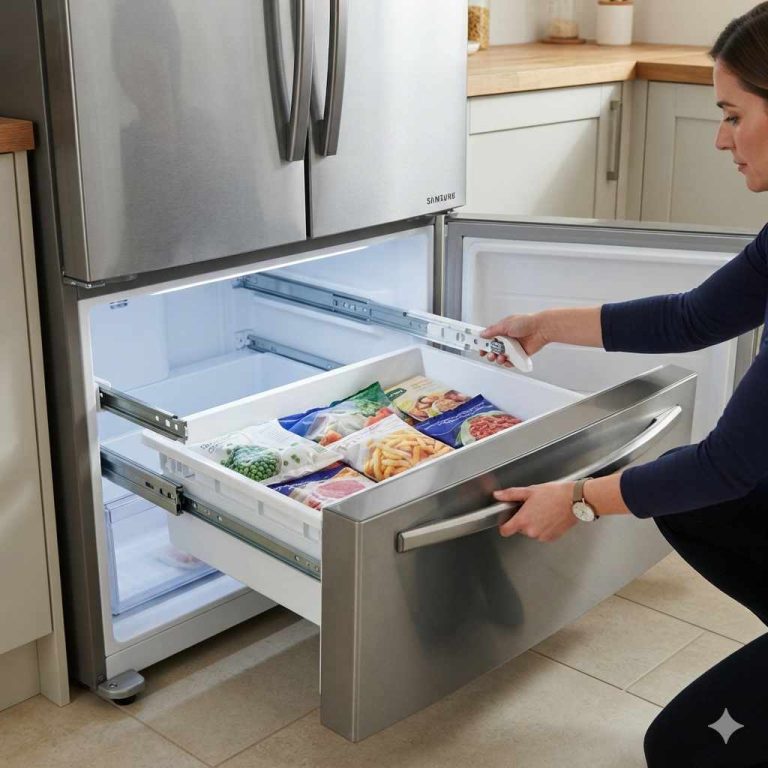
A freezer drawer frozen shut is almost always ice sealing the gasket, not a broken mechanism, and gentle heat from a hair dryer or warm towel melts that seal in a few minutes. Pulling harder instead can snap the drawer slides or crack the front panel, turning a quick fix into a parts order. This guide covers three methods in order of safety, prevention tips, and when the sticking points to a bigger problem worth calling a professional for.
Why Do Freezer Drawers Get Stuck?
Understanding why your freezer drawer is stubbornly refusing to budge is the first step to fixing it. Most often, the culprit is ice build-up. Here’s a breakdown of how that happens:
- Moisture in the Air: Every time you open your freezer, a little bit of warm, humid air gets inside. When this moisture hits the super cold surfaces, it freezes.
- Leaky Door Seal: If the rubber gasket (the seal around the freezer door) is damaged, dirty, or not making full contact, more warm, moist air can enter the freezer. This leads to increased ice formation on the drawer and the freezer walls. The U.S. Department of Energy mentions that a well-sealed appliance is crucial for energy efficiency, and a faulty seal contributes to ice build-up.
- Frequent Door Openings: The more often the freezer door is opened, the more warm air gets in, and the more opportunities there are for ice to form.
- Food Placement: Sometimes, items stored in the drawer’s path or near the edges can cause it to snag and appear stuck, though this is usually less about sealing and more about obstruction.

Tools You Might Need (Optional but Helpful!)
While many fixes require no special tools, having a few items handy can make the process smoother and more effective. You likely have most of these around your home already!
- Hair Dryer: A common household item that’s perfect for gentle warming.
- Warm Water: You’ll need this for a damp cloth or a spray bottle.
- Towel or Cloths: To absorb melted water and protect surfaces.
- Spatula or Plastic Scraper: For gently loosening ice, but always use a plastic one to avoid scratching.
- Spray Bottle: For controlled application of warm water.
- Gloves: To keep your hands warm and provide a better grip.
Best Freezer Drawer Unstick Pick
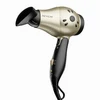
REVLON 1875W Compact Folding Hair Dryer – $16.49
The gentle-heat tool this guide names as Method 1, the most effective and least messy way to melt an ice seal.
- Best for: Method 1 of this guide, aimed at the gasket edge where the ice seal usually forms
- Why we picked it: Compact folding design is easy to keep near the kitchen just for this kind of fix
- Main drawback: Lower wattage than a full-size dryer, so a thick ice seal takes a bit longer to melt
Compare more tools for unsticking and preventing freeze-ups
 Option 1 CRC Food Grade Silicone Lubricant Spray – $16.79
|
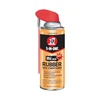 Option 2 3-IN-ONE Rubber Seal Conditioner – $7.68
|
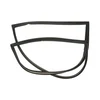 Option 3 GE Refrigerator Door Gasket Replacement – $81.15
|
As an Amazon Associate we earn from qualifying purchases.
Effortless Fixes: Step-by-Step Guide
Don’t despair! These methods are designed to be gentle and effective. Always remember to avoid yanking or forcing the drawer, as this can cause damage to the drawer slides, the drawer itself, or even your freezer’s interior.
Method 1: The Gentle Heat Approach (Hair Dryer)
This is often the most effective and least messy method.
- Unplug the Freezer (Safety First!): For extra safety, especially if you’re using electrical appliances like a hairdryer, it’s wise to unplug your freezer. This also allows for slight warming without it constantly fighting against the cooling cycle.
- Locate the Stuck Area: Identify where the drawer seems to be sticking. It’s usually along the sides or the front where the ice seal is strongest.
- Apply Gentle Heat: Set your hairdryer to a LOW or MEDIUM heat setting. Hold it about 6-10 inches away from the stuck area.
- Move It Around: Keep the hairdryer moving continuously in a circular or back-and-forth motion over the stuck edges. Don’t concentrate the heat on one spot for too long, as this could damage plastic components.
- Test Gently: After a minute or two of warming, gently try to slide the drawer. You should feel it start to loosen. If it’s still stuck, repeat the heating process for another minute or two.
- Wipe Away Moisture: As the ice melts, water will form. Use a towel to dry up any drips to prevent immediate refreezing.
Method 2: The Warm Water Technique
This method uses the power of warm water to melt away the ice seal.
- Prepare Your Warm Water: Heat some water, but not boiling. You want it warm to the touch, similar to bathwater.
- Option A: Damp Cloth: Soak a cloth or towel in the warm water. Wring it out slightly so it’s damp, not dripping. Press the warm, damp cloth firmly against the edges of the stuck drawer where you suspect the ice seal is. Hold it there for a few minutes, reapplying warm water as the cloth cools.
- Option B: Spray Bottle: If you have a spray bottle, fill it with warm water. Spray the warm water generously along the edges of the drawer where it meets the freezer. Let it sit for a few minutes.
- Gently Test: After a few minutes, try to wiggle and slide the drawer open. It should begin to release from the ice.
- Dry Thoroughly: Once the drawer is open, use a dry towel to wipe up all the water inside and around the drawer tracks. This is crucial to prevent new ice from forming immediately.
Method 3: The Ice Scraper (Use with Extreme Caution!)
This should be a last resort and requires a very gentle touch. The goal is to break small ice bonds, not to force the drawer.
If the drawer runs on tracks similar to a kitchen cabinet rather than the appliance-specific rails here, our guide to making drawers slide easier covers the lubrication side of that fix.
- Use a Plastic Scraper: Never use a metal knife or sharp object. A plastic scraper, like a dough scraper or a putty knife made of plastic, is your safest bet.
- Gently Probe: With the drawer still firmly shut, carefully slide the edge of the plastic scraper between the drawer and the freezer frame at the stuck points.
- Work Along the Seam: Gently try to chip away at any visible ice within the seam, or carefully pry just enough to break the ice’s grip. Be very careful not to gouge the plastic of your drawer or freezer.
- Combine with Warmth: This method works best when combined with gentle heat (Method 1) or warm water (Method 2) to soften the ice first.
- Try Opening: After loosening any visible ice, attempt to slide the drawer open.
Preventing Future Freezer Drawer Sticking
Once you’ve successfully freed your drawer, the last thing you want is for it to happen again next week! Here are some tips to keep it sliding smoothly:
- Clean Door Seals Regularly: The rubber gasket around your freezer door is critical. Wipe it down periodically with warm water and mild soap, then dry it. This removes food debris and ensures a good seal. Check for any tears or damage. A good seal isn’t just for preventing ice; it also saves energy!
- Check Freezer Temperature: Ensure your freezer is set to the correct temperature, typically 0°F (-18°C). If it’s too cold, ice formation can be more aggressive. The FoodSafety.gov website provides guidance on safe temperatures for food storage.
- Avoid Leaving the Door Open: Be mindful of how long you leave the freezer door ajar. Try to retrieve or store items quickly.
- Consider Drawer Liners (with caution): Some people use freezer-safe liners on the bottom of drawers. Ensure they don’t interfere with the drawer’s ability to close or slide properly, as this could create its own sealing issues. Smooth, non-stick liners are best.
- Degassing (for new freezers or after defrosting): Sometimes, new freezers or ones that have been recently defrosted can experience temporary sticking issues as the components settle. This usually resolves itself.
Table: Comparing Methods for Unsticking Freezer Drawers
Here’s a quick comparison of the methods to help you choose the best approach:
| Method | Pros | Cons | Effort Level | Best For |
|---|---|---|---|---|
| Hair Dryer | Very effective, controlled heat, quick results. | Requires electricity, need to be careful not to overheat plastic. | Low to Medium | Significant ice build-up, stubborn drawers. |
| Warm Water (Cloth/Spray) | Gentle, uses common items, effective for moderate ice. | Can be a bit messier, requires frequent re-warming of water/cloth. | Low | Slight to moderate ice seals. |
| Plastic Scraper | Can break up ice directly. | High risk of scratching or damaging parts if not used carefully, should be a last resort or used in conjunction with heat/water. | Medium to High (due to caution needed) | Minor ice chips preventing movement, as a supplementary tool. |
When to Call a Professional
While most stuck freezer drawer issues are DIY-friendly, there are times when it’s best to call in an expert:
- Persistent Sticking: If after trying various gentle methods, the drawer remains stubbornly stuck, there might be a more significant mechanical issue.
- Visible Damage: If you notice any cracks, bends, or broken parts on the drawer slides, drawer, or freezer interior, stop trying to force it.
- Freezer Malfunction: If the sticking is accompanied by other problems like the freezer not cooling properly, unusual noises, or error codes, it could indicate a larger appliance problem.
- You’re Uncomfortable: If you’re simply not comfortable performing these steps, it’s always okay to seek professional help.
If the issue is with a regular kitchen drawer rather than the freezer, see this guide to fixing a broken kitchen drawer instead.

Frequently Asked Questions (FAQ)
Q1: Will using hot water damage my freezer drawer?
No, as long as you use warm water and not boiling water, it should not damage your freezer drawer or its components. The key is gentle warmth to melt the ice, not extreme heat. Avoid direct, prolonged high heat from a professional heat gun, which could warp plastic.
Q2: How long does it typically take to unstick a freezer drawer?
With gentle heat or warm water, it usually takes anywhere from 5 to 15 minutes of focused effort. If you’re combining methods, it might be quicker. Patience is key!
Q3: Can I just pull harder to open it?
It’s strongly advised not to pull harder. Forcing the drawer can break drawer slides, damage the drawer itself, or even crack the freezer’s interior lining. Gentle methods are always the safest bet.
Q4: What if there’s no ice, but the drawer is still stuck?
If you don’t see any obvious ice, the drawer might be misaligned, warped, or there could be an obstruction you can’t see. Check that nothing is caught in the runners. If it’s a warping issue or the drawer is truly jammed, you might need a professional’s assessment.
Q5: How often should I check my freezer door seal?
It’s a good idea to check your freezer door seal about once every 3-6 months. Clean it then, and visually inspect it for any signs of wear or damage. A simple test is to close the door on a piece of paper; if you can pull the paper out easily, the seal might need attention.
Q6: What temperature should my freezer drawer be at?
The ideal temperature for the entire freezer, including the drawers, is 0°F (-18°C). This temperature is cold enough to freeze food safely and also helps to minimize excessive moisture build-up that can lead to ice.
Conclusion
Dealing with a stuck freezer drawer can feel like a minor kitchen crisis, but as you’ve seen, it’s a problem with straightforward and accessible solutions. By using gentle heat from a hairdryer, warm water, or careful probing with a plastic scraper, you can overcome this icy obstacle without resorting to brute force. Remember to always prioritize the safety of your appliance and avoid aggressive pulling that could lead to costly repairs.
Keeping your freezer’s door seal clean and ensuring your freezer is at the optimal temperature are your best defenses against future sticking incidents. These preventative measures are simple yet highly effective in maintaining your appliance’s functionality and efficiency. You’ve got this!
So, the next time your freezer drawer decides to play hard to get, you’ll know exactly what to do. You can confidently tackle the issue with these proven, effortless fixes, ensuring your frozen goods are always within easy reach. Enjoy the peace of mind that comes with knowing how to handle this common kitchen annoyance!
Products related to this article
Sponsored / affiliate links. As an Amazon Associate I earn from qualifying purchases. I may earn additional commission from eligible campaigns.