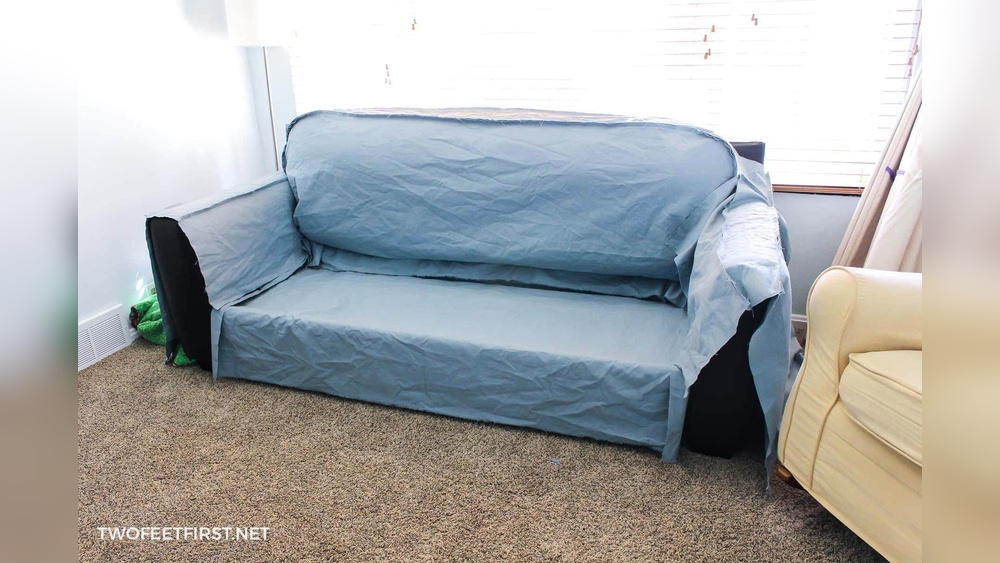
How to Sew Sofa Cover: Step-by-Step Guide for Beginners
Sewing your own sofa cover can give your living room a fresh look while saving money compared to buying custom covers. Many people think this task is only for expert seamstresses, but with the right guidance, anyone with basic sewing skills can create a professional-looking cover.

TAOCOCO
TAOCOCO 100% Waterproof Recliner Couch Covers with…
- 【100% WATERPROOF FABRIC】We use high-grade fabric to undergo waterproof treatment by coating a waterproof layer on the top, to ensu…
- 【HIGH QUALITY MATERIAL】TAOCOCO reclining loveseat covers are made of choiceness material, quilted from 5 layers of durable fabric,…
- 【DIMENSIONS GUIDE】3 seater recliner cover fit the sofa with each seat width of 23.6 in, see measurement guide in photos. Thanks to…
As an Amazon Associate I earn from qualifying purchases.
This guide will show you how to sew a sofa cover step by step, from choosing materials to fitting the finished cover on your sofa. You’ll also find practical tips and real-life insights that help you avoid common mistakes. Whether you want to protect your new furniture or update an old sofa, this project brings a big impact for a modest investment of time and effort.
Why Sew Your Own Sofa Cover?
Making your own sofa cover gives you control over every detail. You can pick the fabric, color, and fit that match your home. Store-bought covers often fit poorly or come in limited styles. A custom cover solves these problems and often costs less.
Sewing at home also means you can choose durable materials that last longer, especially if you have pets or children. If you spill something, you can remove and wash the cover or even sew a replacement. Plus, the process offers satisfaction, there’s pride in seeing your handiwork every time you relax on your sofa.
Planning Your Sofa Cover Project
Before you start sewing, good planning will save you time and frustration. Begin by studying your sofa’s shape. Is it a simple rectangle, or does it have curves and extra cushions? Measure the sofa carefully, being off by even an inch can cause a poor fit.
Essential Tools And Materials
Here’s what you need for most sofa cover projects:
- Measuring tape (preferably soft and flexible)
- Fabric (amount depends on sofa size and repeat pattern)
- Matching thread
- Sewing machine (a basic model is fine)
- Sharp fabric scissors
- Pins or fabric clips
- Chalk or fabric marker
- Seam ripper (for corrections)
- Iron and ironing board
- Elastic bands or Velcro (optional for fitted covers)
- Zippers or ties (optional, for cushion closures)
Pro Tip: Always pre-wash your fabric before cutting. This prevents shrinking and helps the cover fit well after washing.
Choosing The Right Fabric
Not all fabrics are equal for sofa covers. You want something durable, washable, and not too stretchy. Here’s a quick comparison:
| Fabric Type | Pros | Cons |
|---|---|---|
| Cotton Duck | Durable, easy to sew, washable | Wrinkles easily |
| Denim | Strong, resists tears, stylish | Can be stiff, heavy to handle |
| Twill | Soft, comes in many colors | Prone to fading |
| Polyester Blend | Wrinkle-resistant, easy to clean | Can pill, less breathable |
| Canvas | Very tough, good for pets | May feel rough |
If you’re unsure, visit a fabric store and feel samples. Consider how the fabric will look and feel in your living room.
Measuring Your Sofa
Accurate measurements are critical. Use a flexible measuring tape and write down all dimensions:
- Width: Arm to arm.
- Depth: Front edge to back.
- Height: Floor to top of backrest.
- Arm height and width.
- Cushion sizes (if removable).
- Seat depth and back width.
Add 2-4 extra inches to each measurement for seam allowances and possible shrinkage.
Example: For a 75-inch wide sofa, buy fabric that is at least 79 inches wide. If your sofa has a skirt or unique shape, add more.
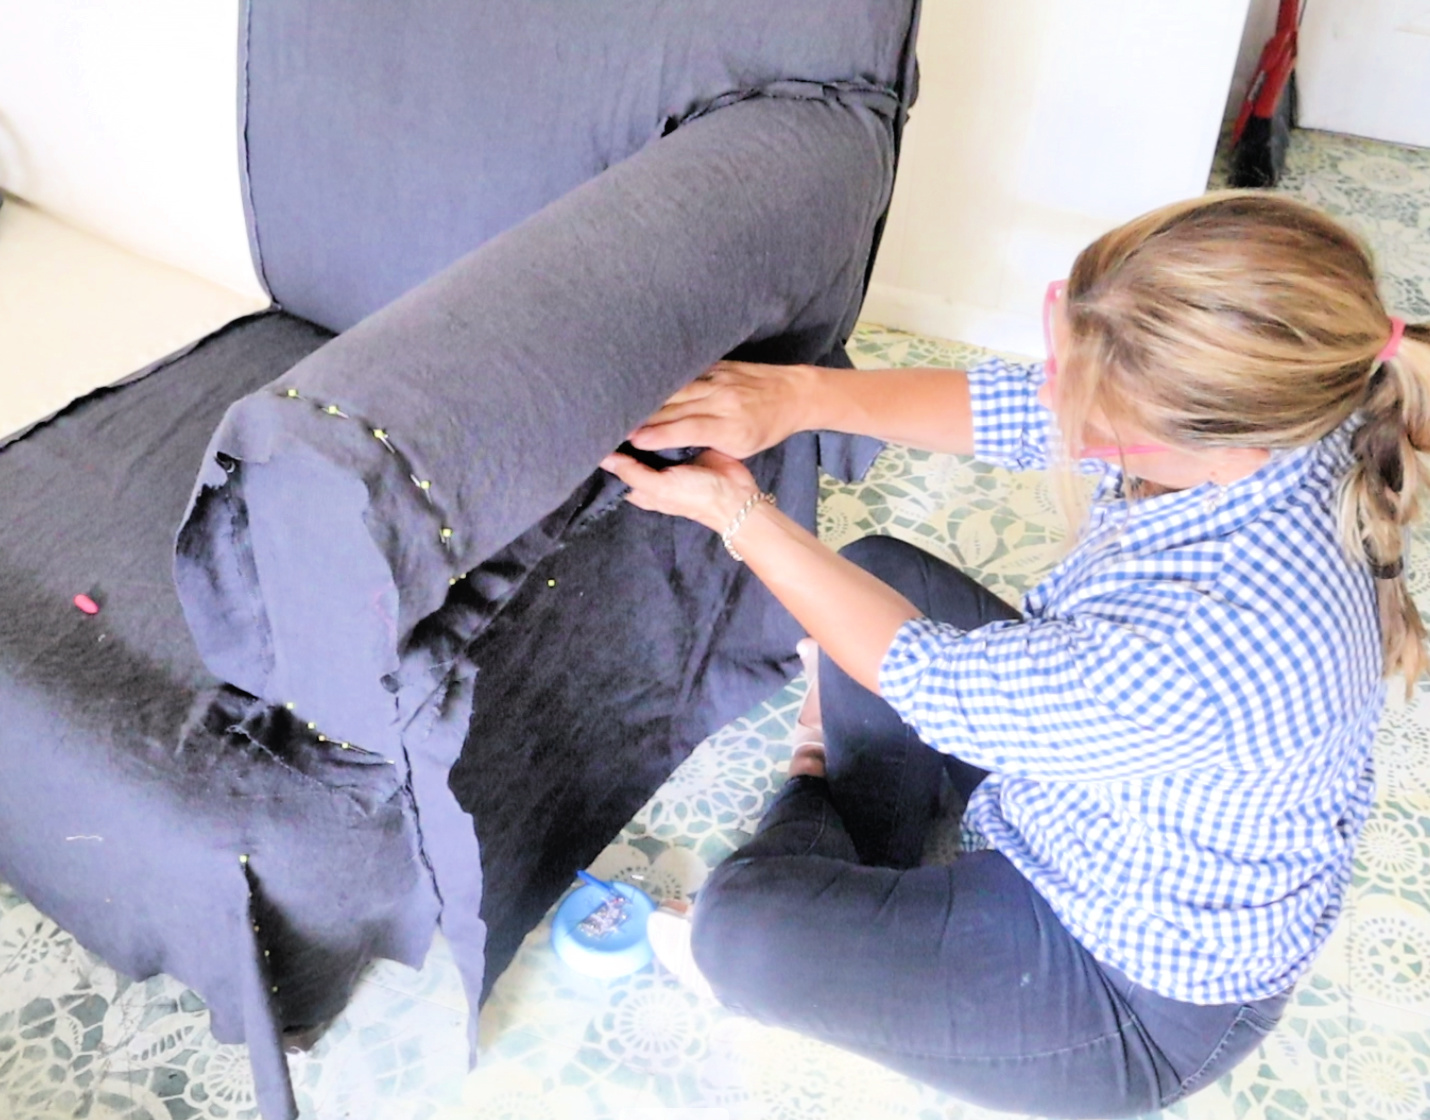
Credit: mimzyandcompany.com
Creating A Sofa Cover Pattern
You don’t need a commercial pattern for a sofa cover. Instead, make your own by using the sofa as a guide.
Making A Paper Or Muslin Pattern
Lay large sheets of pattern paper or inexpensive muslin fabric on each section of your sofa. Pin or tape it in place, then trace the outline. Mark where seams and openings will go. Label each piece (e.g., back, seat, arm). This step takes time but leads to a better fit.
If your sofa is symmetrical, you may only need to pattern one arm or cushion and reverse it for the other side.
Cutting The Fabric
After making your pattern, lay it on your chosen fabric. Pin it down to prevent shifting. Cut each piece, adding a seam allowance (usually 1 inch) around each edge.
Pro Tip: Mark the right side and wrong side of each piece to avoid confusion during sewing.
Sewing The Main Sections
With your fabric cut, it’s time to sew. Start with the largest pieces and work your way to the smaller ones.
Sewing The Back And Seat
Pin the back panel to the seat panel, right sides together. Sew with a straight stitch, backstitching at each end. Press the seam open with an iron. Repeat for any side panels.
Attaching The Arms
Join the arm panels to the seat and back using the same method. Pin, sew, and press. If your sofa has rounded arms, sew slowly around curves for a smooth finish.
Making Cushion Covers
Removable cushion covers are easier to wash. Cut two pieces per cushion: one for the top, one for the bottom. Add a zipper, Velcro, or envelope closure to one edge for easy removal.
Example: In my experience, envelope-style closures are fastest for beginners, while zippers give a neater look but require more skill.
Adding Details And Closures
A cover that fits well and stays put needs a few finishing touches.
Hemming And Finishing Edges
Fold the raw edges under by about half an inch and press. Sew a straight or zigzag stitch to prevent fraying. For a more professional look, use a serger if you have one.
Closures: Zippers, Ties, Or Velcro
Closures help you remove and wash the cover. Consider these options:
- Zippers: Hidden along the back or sides, give a tailored look.
- Ties: Simple to sew; add at corners or under cushions.
- Velcro: Easy to use, especially for beginners.
Choose the method that suits your skills and sofa style.
Elastic Or Fitted Corners
To keep the cover from sliding, add elastic bands inside the bottom hem or sew fitted corners. This is especially helpful for sofas with curved arms or seats.
Fitting And Adjusting Your Sofa Cover
After sewing, test the cover on your sofa. It may not fit perfectly the first time, this is normal.
- Start by placing the cover over the sofa and checking all seams.
- Adjust any tight or loose areas by pinning and resewing.
- For removable cushions, try inserting them and checking for gaping or stretching.
Pro Tip: Don’t rush this step. Precise adjustments now mean you’ll enjoy a better-looking cover for years.
Caring For Your Finished Sofa Cover
A homemade sofa cover is only useful if you can keep it clean and looking new.
- Wash regularly: Choose a gentle cycle and mild detergent.
- Avoid high heat: Air dry or use low heat to prevent shrinkage.
- Repair quickly: Mend any small tears before they grow.
If you have pets, brush off hair before washing. For stains, spot clean right away.
Common Mistakes And How To Avoid Them
Even experienced sewers make mistakes. Here are some common ones, and how to avoid them.
- Skipping pre-washing: Unwashed fabric can shrink, ruining your fit.
- Cutting corners on measurements: Always measure twice.
- Ignoring seam allowances: Add extra fabric for seams and hems.
- Using slippery or stretchy fabric: These are much harder to sew.
- Not labeling pattern pieces: This leads to confusion during assembly.
- Choosing the wrong thread: Use strong, color-matched thread for durability.
Example: When I first made a sofa cover, I forgot to pre-wash the fabric. After one wash, it shrank and looked odd, costing me many hours of extra work.

Credit: www.youtube.com
Visualizing The Steps: Process Overview
Here’s a summary of the key steps to keep you on track:
| Step | Description |
|---|---|
| 1. Measure | Write down all sofa dimensions, add seam allowance |
| 2. Choose Fabric | Pick a durable, washable material |
| 3. Make Pattern | Trace sofa sections onto paper or muslin |
| 4. Cut Fabric | Pin and cut with extra for seams |
| 5. Sew Sections | Join main panels, then add arms and cushions |
| 6. Finish Edges | Hem and add closures (zippers, ties, Velcro) |
| 7. Fit and Adjust | Test on sofa, fix any fit issues |
| 8. Care | Wash and repair as needed |
Cost Comparison: Diy Vs. Store-bought Sofa Covers
Many people wonder if making their own cover is worth the effort. Here’s a basic comparison:
| Option | Typical Cost | Customization | Longevity |
|---|---|---|---|
| DIY Sofa Cover | $50, $200 (fabric + tools) | Full control over fabric, color, fit | High (with quality fabric) |
| Store-Bought Cover | $100, $500 (standard sizes) | Limited styles, generic fit | Medium (depends on material) |
| Custom-Ordered Cover | $300, $1000+ | Perfect fit, wide choice | High |
DIY covers are the best choice for those wanting a specific look and a perfect fit at a lower price.
Advanced Tips For A Professional Finish
If you want your sofa cover to look even better, try these extra steps:
- Piping or welt cord: Adding piping along seams gives a crisp, elegant look. You’ll need extra fabric and a piping foot for your sewing machine.
- Double stitching: Reinforces seams, especially on high-stress areas like arms and cushions.
- Hidden zippers: Place zippers in less visible spots, such as under the seat or at the back.
- Matching patterns: If you use a patterned fabric, line up stripes or prints for a seamless appearance.
Pro Tip: For large sofas, sew covers in sections and join them with zippers or ties for easier removal and washing.
When To Consider Professional Help
Some sofas are very complex, with curves, recliners, or deep tufts. If you feel overwhelmed or want a perfect finish, it’s smart to ask for help from an upholsterer. This is also a good idea if your sewing machine cannot handle heavy fabrics.
If you want more resources or inspiration, the The Spruce site offers helpful guides and visuals.

Credit: www.youtube.com
Frequently Asked Questions
How Much Fabric Do I Need For A Sofa Cover?
The amount depends on your sofa’s size and style. A standard three-seat sofa usually needs 12, 16 yards of 54-inch wide fabric. Measure each part and add extra for seams, shrinkage, and pattern matching. If you use a patterned fabric, buy at least one extra yard.
Can I Sew A Sofa Cover Without A Sewing Machine?
It’s possible, but much harder and slower. Hand sewing works for small repairs or cushion covers, but for a full sofa cover, a sewing machine is best. It creates stronger seams and saves hours of time. If you don’t own a machine, consider borrowing or renting one.
What Is The Best Fabric For Pet Owners?
Look for canvas, denim, or microfiber. These fabrics resist scratches, don’t trap pet hair as much, and wash easily. Avoid velvet or loose-weave fabrics, they attract hair and snag easily. For extra protection, choose darker colors or patterned fabrics to hide stains.
How Do I Keep The Sofa Cover From Slipping?
Add elastic bands, sew fitted corners, or use gripper strips underneath. Some people use Velcro or ties to attach the cover to the sofa’s frame. Placing a non-slip rug pad under the cover also helps keep it in place, especially if the sofa is used often.
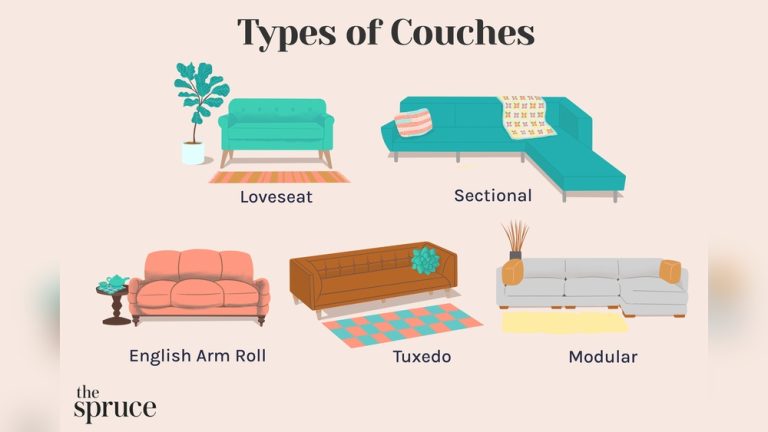
Can I Make A Cover For A Sectional Or L-shaped Sofa?
Yes, but it takes more planning. Sew separate covers for each section or cushion. Label each piece clearly and fit one section at a time. Sectional sofas may need extra fabric and more closures (like zippers or ties) to make the cover easy to put on and remove.
Making your own sofa cover is a rewarding project. With careful planning, the right tools, and a bit of patience, you can create a cover that looks great and protects your sofa for years. Whether you’re refreshing your decor or saving a worn-out favorite, sewing your own cover is a practical and creative solution.
Related pick: Check today's price on Amazon
Products related to this article
Sponsored / affiliate links. As an Amazon Associate I earn from qualifying purchases. I may earn additional commission from eligible campaigns.