
How to Remove Water Rings From a Wood Dresser
For white water rings on a wood dresser, start with dry heat or a light oil-based fix; for dark stains, stop and move to a wood bleach or refinisher only after you confirm the finish is open or already removed enough for the treatment to reach the wood. White rings usually come from moisture in the finish, while dark spots usually mean water reached the wood fibers. Push too hard and you can strip the topcoat, raise veneer, or turn a small ring into a larger repair.
Identify the stain


Start by matching the mark to the damage, not the furniture style. White haze usually means moisture is trapped in or on the finish; dark gray, brown, or black staining usually means water reached the wood itself. The safest rule is to treat white marks as surface-level first and treat dark marks as wood-level damage only after you confirm the finish is stable. See Better Homes & Gardens’ overview at Better Homes & Gardens and the repair guidance from The Family Handyman.
Identify the finish
A hidden-spot finish test tells you whether the surface can tolerate a solvent or only a mild fix. Shellac softens with denatured alcohol, lacquer may soften with lacquer thinner, and many polyurethane or conversion finishes resist both. Test in a concealed area first, using a cotton swab with a tiny amount of solvent and stopping immediately if the finish smears, softens, or changes sheen; if it does soften, stop and move to stripping or refinishing rather than continuing with solvent spot treatment. For finish-solvent behavior, see Minwax finish guidance and Woodworker’s Journal on finish identification.
Choose the safest fix
Pick the least aggressive method that fits the stain and the finish. White rings often respond to oil, gentle heat, or a finish-compatible solvent check; dark stains often need oxalic acid or a full refinish if the damage has reached the wood. If the finish is antique, veneered, or already thin, stop earlier and preserve what remains.
A dresser top can be riskier than a plain table because the surface is often flatter, the edges are more exposed, and drawer hardware can get in the way of careful cleaning before spot repair. That matters when you are deciding whether to use heat, a solvent, an oil-based fix, or sanding. The safest path depends on ring color, finish type, age, and whether the top is veneered.
White rings and white haze usually sit in the finish, so they often can respond without sanding. Dark rings, black spots, or gray-brown stains are different; they usually mean water penetrated the finish and into the wood itself. On oak, walnut, and teak, that darkening can also involve tannins, so a bleach-based step is often the next move. For oxalic-acid stain treatment, see Popular Woodworking on oxalic acid for water stains.
Remove white rings
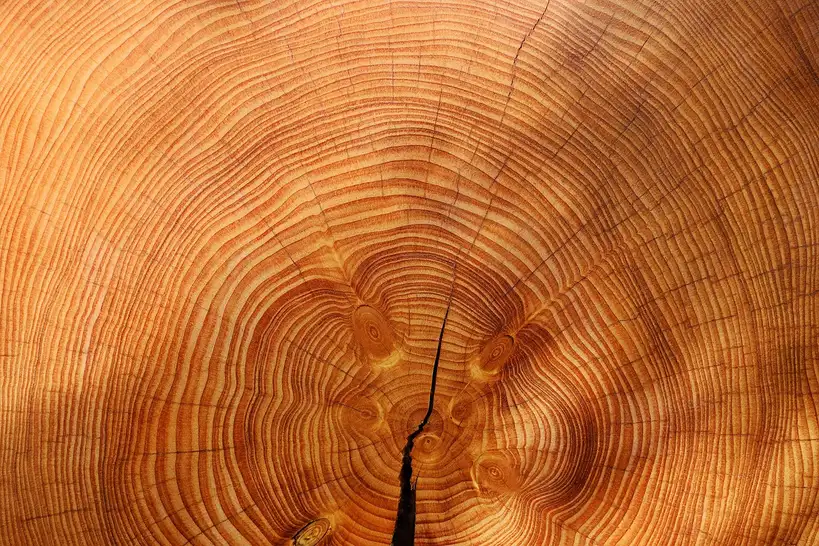
For a fresh white ring, begin with mayonnaise or petroleum jelly. That is the safest first attempt for finish-level moisture damage, and white water rings can often be lifted with an iron or mayonnaise. Use heat only with care, because too much heat can soften the finish around the mark rather than only under it. Never let a hot iron touch the wood directly; keep a cloth barrier in place and move in short intervals. General solvent and heat cautions are also covered by Penn State Extension’s wood-finishing safety guidance.
- Clean the spot with a dry cloth.
- Apply a thin layer of mayonnaise or petroleum jelly over the ring.
- Leave it in place for hours, then wipe it off and inspect the finish.
- If the mark is still faint, repeat once before moving to a stronger method.
For a surface-level white mark that looks like a chalky film, use a 1:1 white vinegar and olive oil mix. Rub lightly, then wipe clean with a dry cloth. This works for shallow haze, not for a stain that has already moved into the wood. Vinegar can dull some finishes, and oils can leave residue that attracts dirt, so stop if the area feels slick, cloudy, or harder to clean.
Suppose a 10-inch white ring sits on a lacquered dresser top after a cup was left overnight. A careful mayo treatment may be enough if the finish is still intact. If the cloth picks up color or the shine turns patchy, stop and test for lacquer response before trying anything else.
Remove dark stains
For dark water stains, oxalic acid or wood bleach is the next step, but the finish usually must be removed or opened first so the bleach can reach the stained wood. That is the usual path for tannin stains and black spots because the problem is in the wood fibers, not only the finish. Use careful spot treatment, then let the surface dry fully before deciding whether sanding is needed. For oxalic-acid use and limits, see Rockler’s guidance on removing water stains and bleaching wood.
A stubborn dark stain may need oxalic acid or wood bleach, followed by full dresser refinishing when stains are too deep. Chemical strippers should stay on the surface only for the time listed on the product label, and sanding guidance should follow the specific condition of the top rather than a fixed shortcut. Use those steps only when the finish is already beyond simple repair. For stripper dwell and sanding progression, see This Old House on stripping furniture and Wood sandpaper guidance from Wood Magazine.
Picture a walnut dresser top with a dark ring near the back edge. If the stain does not lighten after careful bleach treatment, refinishing becomes the practical next step. On veneer, stop before aggressive sanding eats through the top layer.
When to refinish
Sanding is for deep damage, not the first move. If the topcoat is already stripped, the stain is dark through the wood, or the bleach step leaves a shadow, refinishing is more realistic than repeated spot fixes. On dresser tops, the risk is greatest at edges and around hardware cutouts. If the sheen is gone over a wide area, if the wood swells or feels fuzzy, or if a careful spot treatment makes no visible change after one attempt, that is a strong sign to stop and refinish.
- Strip the failed finish if needed.
- Sand with 100-grit to open pores.
- Move to 180-grit to smooth the surface.
- Remove dust fully before applying a new finish.
Do not sand veneer until you are sure the stain has moved through the finish and into the wood layer. Thin veneer can disappear quickly, and antique surfaces often lose value when the original finish is removed too far. On antique pieces, keep any original finish that still protects the wood unless the damage is clearly beyond spot repair.
Mistakes to avoid
Do not scrub harder when a ring barely changes. That usually polishes the finish unevenly and makes the repair more obvious. Do not use vinegar, toothpaste, or baking soda on a deep dark stain; those are surface tools, not wood-stain removers. Also avoid direct iron-to-finish contact, and do not keep applying oil-based remedies after the surface turns slick or greasy.
- Do not treat every mark as the same problem.
- Do not skip the finish test.
- Do not sand veneer or antique tops early.
- Do not flood shellac, lacquer, or edge banding with solvent.
- Do not skip ventilation, goggles, gloves, or a respirator when using bleach or stripper.
A common first-timer mistake is trying mayo, then toothpaste, then sanding in the same session. That can make the finish cloudy before you know which layer was damaged. Try one method, wipe clean, then recheck the spot under bright light.
Prevention is simple: use coasters, keep damp items off the top, and dry spills right away. On dresser tops, that matters more near edges and around knobs where liquid can sit unnoticed.
Frequently asked questions
How to remove water stains from dark wood furniture
Dark wood often shows tannin stains clearly, so oxalic acid is usually the most relevant first bleach step. Use it carefully on the spot only, then assess whether the area needs sanding and a new topcoat. Avoid relying on vinegar, mayo, or toothpaste for this type of mark.
Decision guide: identify the finish and decide whether to stop or redo
| Stain color | Finish type | Stain age | Safe first method | What not to try | Expected outcome | Stop or redo threshold |
|---|---|---|---|---|---|---|
| White haze | Unknown or sealed topcoat | Fresh | Mayo or petroleum jelly, left in place for hours, then wiped clean | Heavy sanding, strong bleach, repeated scrubbing | Often lightens or lifts without removing finish | If the ring stays unchanged after one careful try |
| White ring | Lacquer | Fresh to recent | Test with lacquer thinner in a hidden spot, then use heat or oil if safe | Water-heavy cleaners, aggressive abrasives | May soften or reflow if the finish is lacquer | Stop if the finish smears or dulls beyond the ring |
| White ring | Shellac | Fresh to recent | Test with denatured alcohol in a hidden spot, then use gentle heat | Soaking, scrubbing, solvent flooding | May respond because shellac can dissolve with alcohol | Stop if color lifts into the cloth or sheen changes fast |
| White mark | Polyurethane or conversion finish | Fresh to moderate | Mayo, petroleum jelly, or a 1:1 white vinegar and olive oil mix for surface marks | Expecting the finish to re-melt with solvent | May improve if the damage is only on the surface | If no visible change after the first safe method |
| Dark spot | Any finish with exposed wood | Older | Oxalic acid or wood bleach as careful spot treatment | Mayo, toothpaste, or vinegar as the main fix | Can lighten tannin staining before refinishing | Stop if the mark keeps spreading or the veneer lifts |
| White haze | Wax or oil finish | Fresh to recent | Dry buffing first, then a very small amount of compatible wax or oil after cleaning | Solvent flooding, aggressive heat, bleach | May reduce cloudiness if the issue is residue or moisture sitting in the surface film | Stop if the surface turns sticky, uneven, or darker after one pass |
| Dark stain | Veneer or antique top | Any age | Spot bleach only, then reassess under bright light | Heavy sanding, repeated scraping, full-strip methods too early | May lighten without losing the original surface | Stop if the veneer swells, thins, or shows color transfer to cloth |
Products related to this article
Sponsored / affiliate links. As an Amazon Associate I earn from qualifying purchases. I may earn additional commission from eligible campaigns.