How to Organize Top of Dresser: A Stylist’s Guide to a Clutter-Free Surface
You know the scene: you set your keys down for a second, and suddenly the dresser top is a black hole for receipts, loose change, and that one lip balm you can never find. It’s the most visible flat surface in the bedroom, yet it’s treated like a temporary holding pen. The problem isn’t that you’re messy — it’s that the dresser top is a high-traffic landing zone without a system.
This guide walks you through a practical, design-minded approach to fixing it for good. You’ll learn what deserves to stay, how to map your space with a stylist’s 60/30/10 rule, which containers actually work (and which are dust magnets), and how to keep it looking tidy even when you’re rushing out the door. No vague advice — just specific steps you can apply in an afternoon.

SNSLXH
SNSLXH 4-Tier Clear Makeup Organizer Bathroom Storage…
- 4-Tier 4-Drawer Bathroom Counter Organizer: Unlike other makeup organizers storage that only feature 2 drawers, ours offers an enh…
- Improved User Experience & Ideal Size: Our makeup organizer is equipped with slide rails for smooth drawer operation. Perfect dime…
- Maximize Your Countertop Space: With two spacious shelves and four practical drawers, your entire skincare collection—from cleanse…
As an Amazon Associate I earn from qualifying purchases.
If you need a solid storage foundation first, a clear acrylic unit like the SNSLXH 4-Tier Clear Makeup Organizer handles the heavy lifting. Its four drawers and two shelves give you defined zones for daily skincare and jewelry, while keeping everything visible so you don’t lose track of what you own. It’s a practical starting point, but you’ll still want to read through the styling formula below — the container alone won’t fix the clutter habit.
The “Landing Strip” Problem: Why Dresser Tops Get Messy
Walk into any bedroom and look at the dresser. What do you see? A pile of mail, a phone charger, a few coins, maybe a half-empty water glass. It’s not that you chose to put those there — they just landed. That’s because the dresser top is at waist height, right where your hand naturally drops things when you walk in the door.
This spot also has no natural boundaries. Unlike a drawer that closes or a shelf with edges, the top is an open canvas. Without defined zones, every surface becomes fair game. The result is visual noise — the brain registers every loose object as unfinished business, which makes the whole room feel more chaotic even if the bed is made.
The fix is to treat the dresser top like a front porch: a place for a few intentional items, not a storage shed. That means deciding what belongs there, giving each item a home, and leaving enough empty space to let the surface breathe.
The Pre-Organization Purge: What Actually Belongs Up There?
Before you buy a single tray or organizer, take everything off the dresser. Every bottle, every receipt, every stray earring. Put it all in a pile on the bed or floor. This sounds obvious, but most people skip it and try to organize around the clutter — which never works.
The “Keep, Donate, Discard” Method
Now go through the pile item by item. Ask three questions: Do I use this weekly? Does it earn its space visually? Would I miss it if it disappeared? Anything you haven’t touched in three months goes in the donate box. Anything broken, expired, or clearly trash goes in the discard pile. Be honest — that perfume sample from 2026 isn’t coming back.
For the keep pile, separate into two categories: daily essentials and decorative items. Daily essentials are things you reach for every morning or night — your watch, a hand cream, the glasses you wear to read in bed. Decorative items are things that make you smile — a small plant, a framed photo, a pretty dish. If an item falls into neither category, it doesn’t belong on the dresser top.
Categorizing Daily Essentials vs. Decorative Items
Here’s a rule of thumb: daily essentials should take up about 70% of your dresser top space, and decorative items the remaining 30%. That split keeps the surface functional without making it look like a store display. If you’re short on space, prioritize the essentials and let the decor go minimal.
One more purge tip: if you own multiples of the same thing — five hand lotions, three pairs of scissors — keep only the one you actually use and store the rest elsewhere. The dresser top is not a backup stash.
Measuring and Mapping Your Space (The 60/30/10 Rule)
Grab a tape measure. Write down the length and depth of your dresser top. Most dressers are between 36 and 60 inches wide, but yours might be different. You need these numbers to choose organizers that fit without overcrowding.
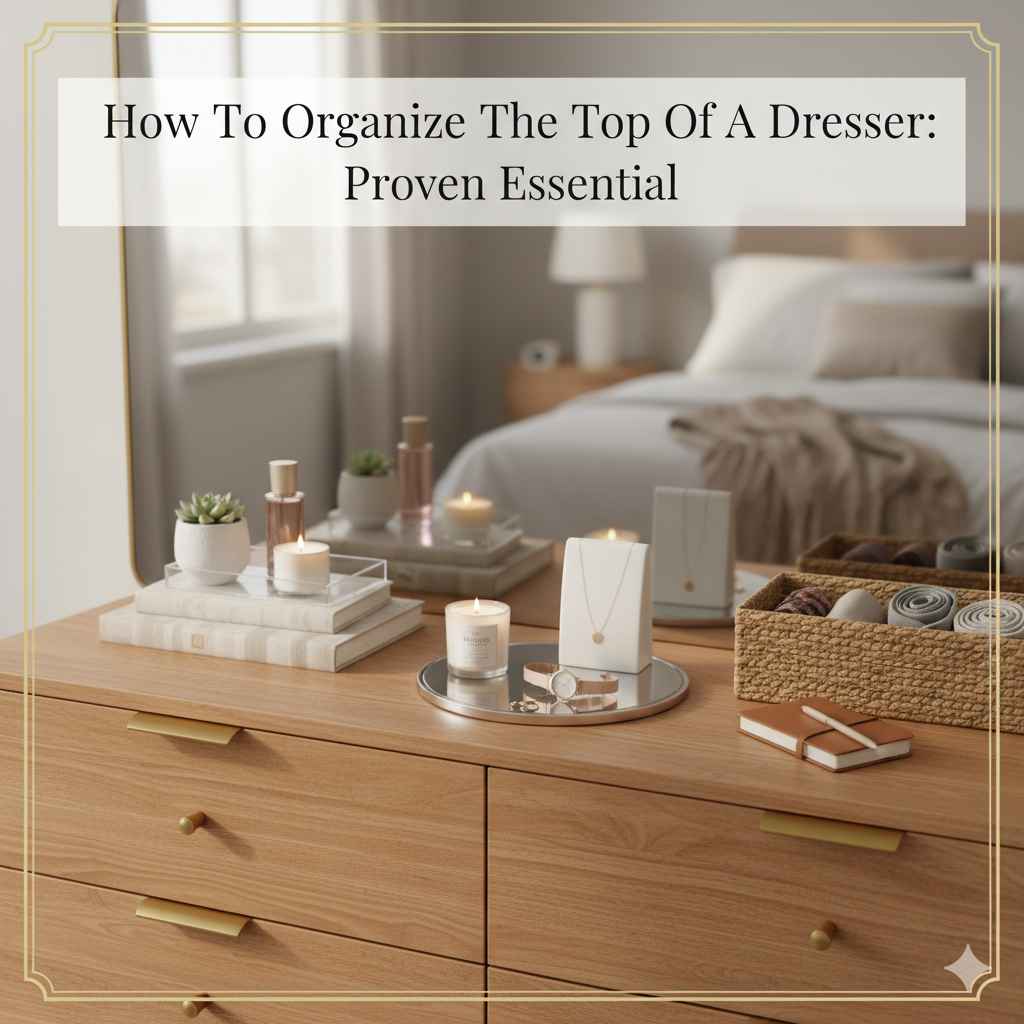
Now apply the 60/30/10 rule from interior design. Divide your dresser top into three visual zones: 60% for the main storage (your organizer, trays, or stack of baskets), 30% for secondary items (a lamp, a jewelry stand), and 10% for pure decoration (a small plant, a candle). This ratio keeps the eye moving without feeling cluttered.
Here’s how it might look on a 48-inch dresser: the 60% zone is a large acrylic organizer on the left, the 30% zone is a valet tray and a small lamp in the middle, and the 10% zone is a tiny succulent on the right. Leave at least six inches of empty surface on one side — that empty space is what makes the whole arrangement feel intentional rather than stuffed.
If you’re working with a small dresser, skip the lamp and go with a wall-mounted sconce instead. That frees up the 30% zone for something you actually use daily.
Strategic Storage: The Best Containers for Every Item
Not all organizers are created equal. The material matters more than you think — it affects dust buildup, cleaning effort, and how the piece looks in your room. Here’s a quick breakdown of the common options:
| Material | Best For | Dust & Cleaning | Style Vibe |
|---|---|---|---|
| Clear acrylic | Makeup, skincare, jewelry | Shows dust; wipes clean fast | Modern, minimalist |
| Wood | Watches, glasses, valet items | Hides dust; needs polish | Warm, traditional |
| Wicker or rattan | Loose items, charging cords | Collects dust in weave; vacuum needed | Boho, casual |
| Ceramic or stone | Jewelry, small trinkets | Easy to wipe; can chip | Elegant, heavy |
Acrylic is the best all-around choice for a dresser top because it’s see-through — you can find your stuff without digging, and it doesn’t visually weigh down the surface. The downside is that it shows dust, but a quick wipe with a microfiber cloth handles that in under a minute. Wood is warmer but hides what’s inside, so you’ll forget what you own. Wicker looks charming but traps dust in its weave, which is a pain to clean.
Trays and Catch-alls for Small Items
Every dresser top needs a catch-all tray. This is the designated spot for the things that would otherwise scatter — keys, loose change, a watch, a lip balm. A shallow tray, about 8 by 5 inches, gives you a defined boundary. When you walk in the door, you drop your keys there instead of on the dresser itself.
Choose a tray with a slight lip so small items don’t roll off. A ceramic or metal tray works well; avoid anything too deep or you’ll start burying things at the bottom. If you share the dresser with a partner, get two trays and label them — one for each person’s daily carry.
Vertical Storage for Perfume and Jewelry
Perfume bottles and jewelry are the two things that most often clutter a dresser top. The solution is to go vertical. A tiered acrylic riser lets you see all your perfume bottles at a glance, which also prevents you from buying a second bottle of the same scent because you forgot you owned it. For jewelry, a standing jewelry organizer with hooks or a small tree keeps necklaces from tangling and earrings from disappearing.
The SNSLXH 4-Tier Clear Makeup Organizer I mentioned earlier fits this need well. Its top two shelves are perfect for perfume and skincare, and the four drawers below can hold jewelry, makeup palettes, or even small tech accessories. The drawers slide smoothly, which is more than I can say for some cheaper organizers I’ve tested. It’s not perfect — the clear plastic shows fingerprints — but it’s a solid workhorse for a dresser top.
Tech Management: Hiding the Cords
Charging cables are the number one clutter magnet on a dresser top. A single phone charger plus a smartwatch charger can turn into a spaghetti mess within a week. The fix is a small cable management box or a cord clip. Run the cable from the outlet to the box, then feed the end through the box’s opening. Your phone charges on top of the box, and the cord stays hidden inside.
If you don’t want a box, use a simple adhesive cord clip to route the cable down the back of the dresser and out of sight. The key is to give the cord a fixed path — otherwise it wanders. And if you have multiple devices, label each cord with a small tag so you know which one is which.
The Styling Formula: Creating Visual Balance
Storage alone won’t make your dresser look good. You need a styling formula that turns a collection of boxes and trays into a cohesive display. This is where most organization guides stop short — they tell you what to buy but not how to arrange it.
The Rule of Three and Height Variation
The rule of three is a classic styling trick: group items in odd numbers, because odd groupings feel more natural to the eye than even ones. On a dresser top, that means three objects — a tall lamp, a medium plant, a low tray — arranged in a triangle. The eye moves between them without getting stuck.
Height variation matters just as much. If everything is the same height, the surface looks flat and boring. Mix a tall item (a 12-inch lamp or a vase) with a medium item (a 6-inch organizer) and a low item (a 2-inch tray). The contrast creates visual interest. If your dresser is against a wall, place the tallest item at the back and the shorter ones in front — that way nothing blocks your view.
Another tip: leave one empty corner on the dresser. It feels counterintuitive, but empty space actually makes the rest of the arrangement look more deliberate. You’re not filling every inch; you’re curating a small scene.
The Shared Dresser: Organizing for Two
Sharing a dresser top with a partner is a negotiation. You have different stuff, different habits, and different tolerances for clutter. The worst approach is to just split the surface in half — that creates a boundary war and usually ends with one person’s stuff creeping into the other’s side.
Instead, divide by category, not by territory. Give each person their own catch-all tray for daily essentials. Use a shared valet tray for things like keys and sunglasses that you both use. If you both have jewelry, get separate organizers — a shared jewelry box is a recipe for tangled chains and missing earrings.
For tech, use a single charging station with two cables, each labeled. That way, both phones charge in one spot without a cord fight. And agree on a simple rule: at the end of the day, anything that isn’t in its designated spot gets put away. That rule alone prevents 90% of the mess.
If your partner is a natural clutterer, don’t nag — just make the system so easy that putting things away takes less effort than leaving them out. A tray with a lip, a charger with a cable clip, a drawer for loose items — those small friction removers do the work for you.
Maintenance: The 5-Minute Reset Habit
Organizing is a one-time event; staying organized is a habit. The good news is that a dresser top only needs about five minutes of attention per day. At night, before you turn off the light, do a quick sweep: put the catch-all items back in their tray, move the phone charger to its spot, and toss any trash. That’s it.
Once a week, take a damp cloth and wipe the entire surface — including the tops of your organizers. Dust settles fast, especially on dark wood. A quick wipe prevents the grime from building up, which makes the dresser look clean even when it’s not perfectly styled.
Every season, do a deeper reset. Take everything off, re-evaluate what you actually use, and swap out seasonal items. For example, in winter, you might keep a heavier hand cream on the dresser; in summer, you might swap it for a lighter lotion. This seasonal rotation keeps the dresser from becoming a graveyard of half-used products.
If you skip the daily reset for a week, don’t panic. The system will still work — you just need to spend ten minutes on a Sunday to get back on track. That’s the beauty of a defined system: it’s forgiving.
FAQ: Solving Common Dresser Top Dilemmas
How do I keep my dresser top from getting cluttered again?
The key is the daily 5-minute reset and having a designated spot for every item. If you don’t have a tray for your keys, they’ll land on the dresser. If you don’t have a cable clip, the charger will wander. The system only works if you maintain it, but it’s a small effort compared to the weekly frustration of a messy surface.
What if I have too much stuff for a small dresser top?
Then you need to edit, not expand. Go back to the purge step and be ruthless. Keep only daily essentials and one or two decorative items. Move the rest to a drawer, a shelf, or a cabinet. If you still have overflow, consider a wall-mounted shelf above the dresser for extra storage — that uses vertical space without making the top feel crowded.
Should I use a jewelry box or a jewelry stand?
It depends on your collection. A jewelry box with compartments is better if you have lots of pieces and want to keep them dust-free. A stand or tree is better if you wear a few pieces daily and want them visible. For a dresser top, a stand takes up less space and adds height, which helps with the styling formula. If you have fine jewelry, a box with a soft lining is safer.
How do I organize a dresser top in a shared bedroom?
Divide by category, not by territory. Give each person their own catch-all tray and jewelry organizer. Use a shared tray for communal items like keys and remotes. Set a rule that everything gets put away at night. If your partner is less organized, make the system as friction-free as possible — a tray with a lip and a labeled charging station work wonders.
What’s the best material for a dresser top organizer?
Clear acrylic is the most practical for most people. It’s see-through, easy to clean, and visually lightweight. Wood is warmer but hides contents and needs occasional polishing. Wicker looks nice but traps dust. If you have a lot of dust in your bedroom, go with acrylic or ceramic — they’re the easiest to wipe clean.
Final Thoughts: The Reward of a Clear Surface
A tidy dresser top does more than just look nice. It reduces the mental load of visual noise, making your bedroom feel calmer and more restful. It also saves you time — you stop hunting for your keys or that lip balm because everything has a place. And it sets a positive tone for the rest of the room; when the dresser looks good, the whole space feels more put together.
Here are the key actions to take away:
- Purge everything off the dresser first, then sort into keep, donate, and discard piles.
- Apply the 60/30/10 rule to divide your space into storage, secondary items, and decor.
- Use a catch-all tray for daily essentials — it’s the single most effective clutter preventer.
- Go vertical with tiered organizers for perfume and a stand for jewelry.
- Hide charging cables with a small box or cord clips to eliminate the biggest clutter magnet.
- Style with the rule of three and vary heights — tall, medium, low — for visual balance.
- Adopt the 5-minute nightly reset and a weekly dust wipe to keep it looking good.
If you’re still in the market for a storage solution, the SNSLXH 4-Tier Clear Makeup Organizer is a reliable choice — just measure your dresser first to make sure it fits. And if you want to go deeper on protecting that surface, check out this guide on dresser top protection. For more on styling around the dresser, see mirror sizing tips to complete the look. The effort you put in today will pay off every single morning when you walk into a clean, calm bedroom.
Products related to this article
Sponsored / affiliate links. As an Amazon Associate I earn from qualifying purchases. I may earn additional commission from eligible campaigns.