How To Stain Cabinets Without Sanding
Transforming dated or worn cabinets can dramatically refresh the look of your kitchen or bathroom. But the thought of endless sanding, dust, and mess often discourages homeowners from updating their cabinetry. Fortunately, modern techniques and products allow you to stain cabinets without the hassle of sanding, saving hours of labor while still achieving a professional, beautiful finish.
This process leverages advanced bonding agents, liquid deglossers, and gel stains to deliver remarkable results with far less effort.
In this comprehensive guide, you’ll discover every essential step for staining cabinets without sanding. We’ll explore the science behind adhesion, compare products, offer real-world examples, and provide expert tips to ensure lasting durability. Whether you’re a DIY enthusiast or a homeowner seeking a cost-effective update, this article will equip you with the knowledge to rejuvenate your cabinets confidently and efficiently.
Key Takeaways
- Staining cabinets without sanding is possible using liquid deglossers and bonding primers.
- The right choice of gel stains or bonding stains is critical for adhesion and lasting results.
- Proper cleaning and preparation impact the final finish more than any single product.
- This method is ideal for wood, veneer, and laminate cabinets, but not for all surfaces.
- Planning, patience, and following each step precisely yield the best outcomes.

Credit: www.youtube.com
Understanding The Staining Process Without Sanding
Skipping the sanding step may sound risky, but advances in cabinet refinishing products have made it safe and effective under the right conditions.
How Modern Products Enable No-sand Staining
Manufacturers have developed liquid deglossers (sometimes called liquid sandpaper) and bonding primers that chemically etch and clean the cabinet surface. These products break down the existing finish, allowing new stains and finishes to adhere securely. Gel stains, in particular, are formulated for superior coverage and grip, even on slick surfaces.
The Science Of Adhesion
Adhesion is crucial for a lasting stain. Modern bonding agents contain solvents that interact with polyurethane, lacquer, or painted cabinet surfaces. This micro-etching process increases surface tension, creating a slightly roughened layer ideal for new coatings.
When To Avoid No-sand Methods
While no-sand staining works for most cabinets, it’s not suitable for surfaces with heavy peeling, wax residue, or severe water damage. In such cases, traditional sanding is necessary to remove loose material and achieve a durable finish.

Credit: www.youtube.com
Tools And Materials Needed
Proper tools and high-quality materials are essential for success. Here’s what you’ll need to achieve a professional finish without sanding.
Essential Supplies
- Liquid deglosser (e.g., Klean-Strip, Krud Kutter)
- Gel stain or bonding stain (oil- or water-based, depending on preference)
- Bonding primer (optional, for especially slick or laminate surfaces)
- Cleaner/degreaser (TSP or a similar product)
- Lint-free cloths and tack cloths
- High-quality brushes and foam applicators
- Painter’s tape
- Protective gloves and safety glasses
- Drop cloths
Choosing The Right Stain
There are two main categories: gel stains and bonding stains. Gel stains are thicker, making them ideal for vertical surfaces and achieving even color. Bonding stains are formulated with advanced resins for maximum adhesion.
Comparison Table: Stain Types
| Stain Type | Best For | Dry Time | Durability | Ease of Use |
|---|---|---|---|---|
| Gel Stain | Wood, Veneer, Laminate | 8-10 hrs | High | Easy |
| Bonding Stain | Slick Surfaces, Laminate | 4-6 hrs | Very High | Moderate |
| Liquid Stain | Raw Wood | 2-4 hrs | Moderate | Easy |
Safety First
Always work in a well-ventilated area. Many deglossers and stains emit strong fumes, so gloves, safety glasses, and, if possible, a respirator are recommended for safety.
Step-by-step Guide To Staining Cabinets Without Sanding
With the right tools and products, you can achieve a flawless, long-lasting finish by following this step-by-step process.
Step 1: Remove Cabinet Hardware And Doors
Detach all handles, knobs, and hinges to avoid staining them. Label the doors and hardware for easy reassembly.
Step 2: Clean Thoroughly
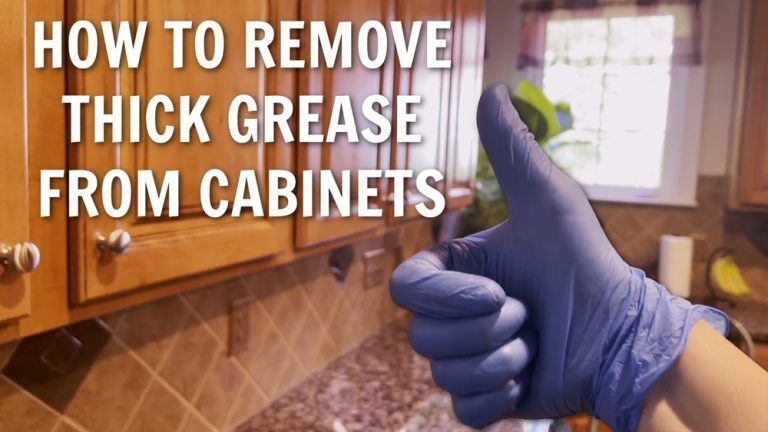
Grease and grime are the primary causes of adhesion failure. Clean all surfaces with a degreaser like TSP. Pay special attention to areas near the stove and sink.
- Wipe down with a damp cloth after cleaning.
- Let the cabinets dry completely.
Step 3: Apply Liquid Deglosser
Saturate a lint-free cloth with the liquid deglosser and rub it over all cabinet surfaces. Work in small sections and follow the manufacturer’s instructions for dwell time.
- Pro Tip: Use a new cloth once the first becomes soiled to avoid spreading residue.
Step 4: Tape Off And Protect Surrounding Areas
Use painter’s tape to mask off walls, countertops, and floors. Lay down drop cloths to catch drips.
Step 5: Optional, Apply Bonding Primer
For especially slick surfaces (like laminate or high-gloss cabinets), apply a bonding primer. Allow it to dry as directed.
Step 6: Apply Gel Stain Or Bonding Stain
Stir the stain thoroughly. Using a brush or foam applicator, apply a thin, even coat in the direction of the wood grain.
- Allow to dry according to product instructions.
- Apply additional coats for deeper color, allowing full dry time between coats.
Step 7: Apply A Protective Topcoat
After the stain is fully dry, apply a clear polyurethane or water-based topcoat to protect the finish.
- Use a high-quality brush for a smooth application.
- Allow ample drying and curing time.
Step 8: Reassemble Cabinets
Once all surfaces are dry and cured, reinstall hardware and rehang doors. Remove all tape and protective coverings.

Credit: www.pneumaticaddict.com
Real-world Examples And Case Studies
Learning from real projects is invaluable. Below are three case studies illustrating how homeowners and professionals have successfully stained cabinets without sanding.
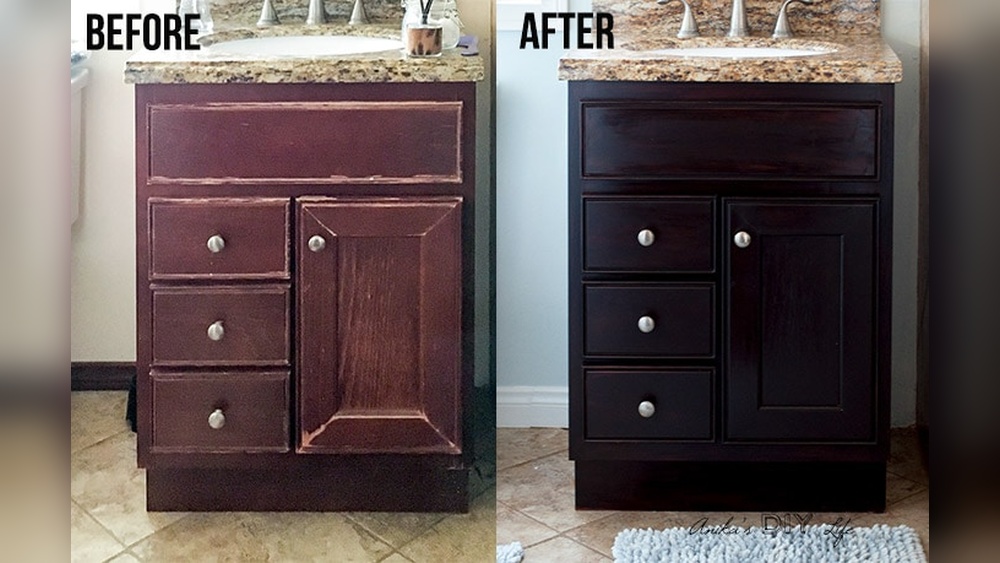
Example 1: Oak Kitchen Cabinet Makeover
A homeowner in Texas wanted to update their 1990s oak cabinets. After cleaning and deglossing, they used a popular gel stain in a rich walnut shade. The transformation was dramatic, with the cabinets gaining a modern, deep color. Two years later, the finish remains durable with no peeling.
Example 2: Bathroom Veneer Cabinets
A professional contractor refinished a client’s bathroom cabinets made of thin veneer. By using a bonding primer followed by a water-based bonding stain, the surface accepted the new color without any sanding. The cabinets have held up well in the humid bathroom environment for over a year.
Example 3: Laminate Cabinet Refresh
A DIY enthusiast in my experience tackled slick white laminate cabinets. After a thorough cleaning and application of a strong deglosser, they used a specialty bonding stain. The project took a weekend, and the finish has survived daily use with minimal maintenance.
Common Mistakes And How To Avoid Them
Avoiding pitfalls is key to a successful cabinet staining project. Here are the most frequent mistakes and strategies to prevent them.
Skipping Thorough Cleaning
Failure to remove grease and contaminants is the top reason stains fail to adhere. Always spend extra time on cleaning, especially around handles and stovetops.
Rushing The Deglosser Step
Not allowing the deglosser to work as directed can lead to poor adhesion. Follow the product’s instructions precisely for best results.
Applying Stain Too Thickly
Thick coats of stain can lead to uneven color and long drying times. Multiple thin coats provide a smoother, more durable finish.
Neglecting A Topcoat
Skipping the protective topcoat exposes your cabinets to moisture, stains, and scratches. Always finish with a high-quality clear sealant.
Not Testing First
Different materials and finishes react uniquely. Always test your process on a hidden area before starting the entire project.
Comparing No-sand Vs. Traditional Sanding Methods
Understanding the benefits and limitations of both methods helps you choose the right approach for your project.
Table: No-sand Vs. Sanding Methods
| Feature | No-Sand Method | Traditional Sanding |
|---|---|---|
| Time Required | 6-10 hours | 12-20 hours |
| Mess Level | Minimal | High (dust) |
| Skill Needed | Beginner-Friendly | Intermediate/Advanced |
| Surface Compatibility | Wood, Veneer, Laminate | Mostly Wood |
| Finish Durability | High (with proper prep) | Very High |
| Cost | Low, Moderate | Moderate, High |
When To Choose Each Method
- No-Sand Method: Ideal for updating cabinets quickly, especially if they are in good condition and you want to avoid a big mess.
- Traditional Sanding: Best for severely damaged, peeling, or previously waxed surfaces.
Product Recommendations And Reviews
Choosing high-quality products is essential for a successful cabinet staining project. Here’s a look at some top-rated options.
Best Liquid Deglossers
- Klean-Strip Liquid Sandpaper: Highly effective for removing gloss and preparing surfaces.
- Krud Kutter Gloss-Off: Excellent cleaning and deglossing action in one step.
Top Gel And Bonding Stains
- General Finishes Gel Stain: Well-known for ease of use and rich color options.
- Minwax PolyShades: Combines stain and polyurethane for added convenience.
Recommended Topcoats
- Varathane Water-Based Polyurethane: Fast-drying and low odor.
- Minwax Fast-Drying Polyurethane: Excellent for high-traffic kitchens.
Table: Top Product Features
| Product | Type | Best Feature | Approx. Cost |
|---|---|---|---|
| Klean-Strip Liquid Sandpaper | Deglosser | Rapid Effect | $8/qt |
| General Finishes Gel Stain | Gel Stain | Deep Color | $22/qt |
| Varathane Water-Based Poly | Topcoat | Low Odor | $15/qt |
- For detailed product specifications, visit the Home Depot Paint Department.
Tips For Maintaining Stained Cabinets
Preserving your investment is easy with a few routine maintenance steps.
Regular Cleaning
Wipe cabinets with a soft, damp cloth weekly. Avoid abrasive cleaners or scouring pads, which can scratch the finish.
Immediate Spill Cleanup
Promptly clean up spills, especially oily or acidic substances, to prevent staining and damage.
Avoiding Excessive Moisture
Don’t let water sit on cabinet surfaces, particularly near sinks and dishwashers. Use a dry cloth to remove moisture immediately.
Routine Inspection
Check high-traffic areas for wear, especially around handles. Touch up minor scratches with a matching stain marker.
Pro Tip: Small Touch-ups With A Cotton Swab Dipped In Gel Stain Can Keep Cabinets Looking New For Years.
Staining Cabinets Without Sanding: Environmental Impact
Choosing a no-sand method isn’t just about convenience, it’s also a greener solution.
Reduced Dust And Waste
Traditional sanding generates significant wood dust, which can contain chemical residues from old finishes. No-sand staining minimizes airborne particles and reduces landfill waste from sandpaper and debris.
Low-voc Product Options
Many modern stains and topcoats are now available in low-VOC (volatile organic compound) formulations, which are healthier for your home’s air quality and better for the environment.
Energy Savings
Skipping sanding reduces the need for power tools and electricity, lowering your project’s overall carbon footprint.
- For more on sustainable home improvement, see EPA Green Homes.
Troubleshooting: Fixing Common Issues
Even with careful preparation, issues can arise. Here’s how to address common problems.
Stain Not Adhering
If the stain peels or rubs off easily, the surface wasn’t properly cleaned or deglossed. Re-clean and reapply the deglosser, then restain.
Uneven Color
Uneven coverage is often due to applying too much stain at once or not wiping off excess. Use thin coats and wipe away extra product promptly.
Tacky Or Sticky Finish
This typically results from insufficient drying time or excessive humidity. Allow extra time for curing, and consider using a fan to improve air circulation.
Milky Topcoat
A cloudy or milky appearance often indicates moisture trapped in the finish. Allow more drying time between coats, and apply topcoat in thin layers.
Example: When I Tested A Water-based Stain In A Humid Climate, The Finish Stayed Tacky For Over 24 Hours, Switching To A Dehumidifier Resolved The Issue.
Alternatives To Staining Cabinets Without Sanding
While staining is effective, some homeowners may prefer other no-sand cabinet makeover options.
Cabinet Painting
High-adhesion paints and bonding primers allow you to paint cabinets without sanding, offering unlimited color choices and a modern look. See our guide on how to repaint cabinets white for more kitchen renovation ideas.
Cabinet Refacing
Professional refacing involves attaching new veneer or laminate to cabinet faces. It’s more expensive but offers a completely new appearance without replacing your cabinet boxes.
Peel-and-stick Veneers
Peel-and-stick wood or laminate veneers are an easy DIY alternative for a dramatic change. They require careful application but no sanding or staining.
Comparison Table: Staining Vs. Other Methods
| Method | Cost | DIY-Friendly | Durability | Time Required |
|---|---|---|---|---|
| No-Sand Staining | Low, Moderate | Yes | High | 1, 2 days |
| Painting | Low, Moderate | Yes | High | 2, 3 days |
| Refacing | High | No (Pro) | Very High | 3, 5 days |
| Peel-and-Stick Veneers | Moderate | Yes | Moderate | 1, 2 days |
- For more tips on preserving kitchen upgrades, read our article on choosing the right canning jar.
Frequently Asked Questions
What Types Of Cabinets Can Be Stained Without Sanding?
Most wood, veneer, and laminate cabinets can be stained using a no-sand method. However, cabinets with extensive damage, wax, or peeling finish may require traditional sanding. Metal and plastic cabinets are not suitable for staining and should be painted with appropriate products.
How Long Does The No-sand Staining Process Take?
Typically, the process can be completed in one to two days. Cleaning, deglossing, and staining usually take several hours, with drying time required between each step. Adding a topcoat extends the timeline but ensures a durable finish.
Is Staining Without Sanding As Durable As Traditional Methods?
If executed properly, the durability is comparable to traditional sanding methods, especially when using high-quality deglossers, bonding stains, and topcoats. The key is thorough cleaning and strict adherence to product instructions.
Can I Change My Cabinet Color From Light To Dark Or Vice Versa?
Darkening cabinets is straightforward with gel or bonding stains. Lightening is more challenging and may require additional coats of bonding primer or paint. For a dramatic color change, painting or refacing is often more effective.
What Are The Risks Of Staining Without Sanding?
Risks include poor adhesion, peeling, or uneven finish if the surface is not properly prepared. Using the correct products and following each step carefully minimizes these risks. Always test on a small area first for best results.
Staining cabinets without sanding offers a practical, efficient way to revitalize your kitchen or bathroom with minimal mess and disruption. Armed with the right products, careful preparation, and the steps outlined here, you can achieve stunning results that rival professional makeovers. If you’re considering other upgrades, check out our guides on pickling vs canning salt or explore the differences between canning salt and regular salt for more kitchen inspiration. Your refreshed cabinets will serve as a testament to the power of modern DIY techniques, no sanding required.
Related pick: Check today's price on Amazon
Products related to this article
Sponsored / affiliate links. As an Amazon Associate I earn from qualifying purchases. I may earn additional commission from eligible campaigns.