How to Repair a Tear in Leather Sofa: Easy Steps for Lasting Fix
A leather sofa is more than just a piece of furniture. It’s a symbol of comfort, style, and sometimes even a family’s history. But even the best leather sofas can suffer tears from sharp objects, pet claws, or daily wear.
A rip in the leather can seem like a disaster, but with the right approach, you can restore your sofa’s beauty without spending a fortune on professional repair. Understanding how to repair a tear in a leather sofa is a practical skill that saves money, extends the life of your furniture, and keeps your living space looking its best.
If you’ve never repaired leather before, the process might seem intimidating. However, many leather repairs are manageable at home with basic tools and a careful approach. This guide covers everything you need to know: from assessing the damage, choosing the right repair method, using repair kits, and understanding when to call a professional. You’ll also find tips that even experienced DIYers often overlook. By the end, you’ll feel ready to tackle that tear and restore your sofa’s value and appearance.
Understanding Leather Sofa Tears
Not all leather tears are the same. Before you start repairing, it’s important to know what kind of damage you’re dealing with. Leather can tear due to sharp objects, continuous pressure, or aging. The type and location of the tear will influence your repair approach.
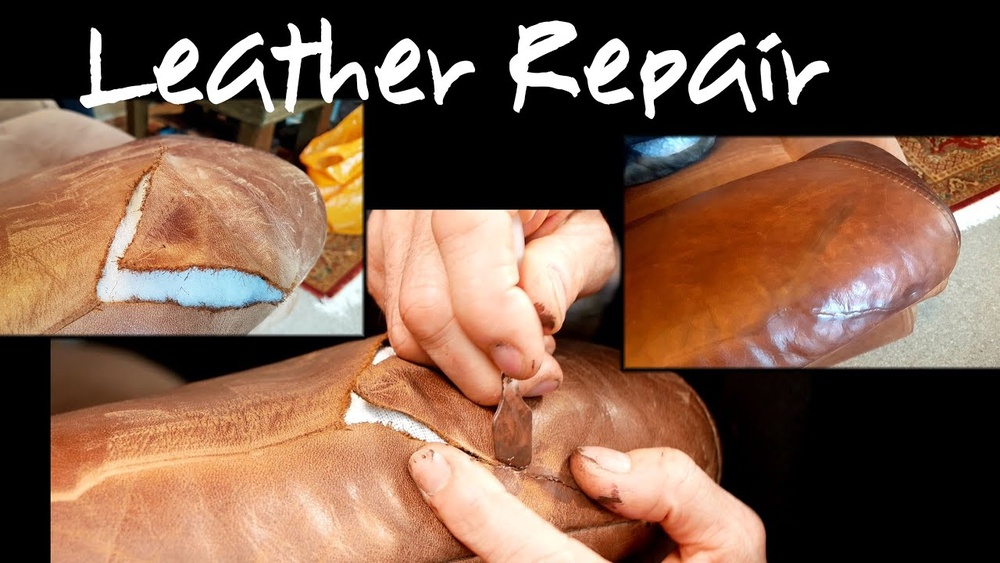
A surface tear is usually shallow and does not go all the way through the leather. A deep tear may expose the fabric or foam beneath. Puncture holes are small but can widen over time. Each type requires a specific technique and materials for the best result.
Example: A cat scratch that cuts through the leather is a different problem than a small hole from a dropped pen. Both need care, but the repair steps and products will differ.
Assessing The Damage
Before picking up any tools or glues, take a close look at the tear. Check:
- Size: Is the tear less than two inches or much larger?
- Depth: Does it go through to the padding or is it just on the surface?
- Edges: Are the edges clean or jagged?
- Location: Is it on a seat cushion, armrest, or a less visible area?
Pro Tip: Take a photo of the tear in good light. This helps you compare before and after, and is useful if you need advice from a professional or a store.
If the tear is larger than three inches, involves seams, or the leather is brittle and flaking, a professional repair may be safer. For most small to medium tears, DIY repair is possible and effective.
Choosing The Right Repair Method
Different repair methods suit different types of tears. Here’s a quick comparison of common approaches:
| Repair Method | Best For | Difficulty | Longevity |
|---|---|---|---|
| Leather Repair Kit | Small tears, surface cracks | Easy | Medium |
| Patch (Subpatch + Adhesive) | Deep tears, holes | Medium | High |
| Liquid Leather | Fine cracks, scratches | Easy | Low-Medium |
| Professional Reupholstery | Large tears, seams, old leather | Hard (DIY not advised) | Very High |
Most people start with a leather repair kit. These kits contain all the basics: backing fabric, adhesive, color compounds, and texture papers. For deeper tears, a patch method using a subpatch and leather glue offers more strength and durability.
Essential Tools And Materials
Before you begin, gather your materials. Having everything ready keeps the process smooth and helps avoid mistakes. Here’s what you’ll need for most leather sofa tear repairs:
- Leather repair kit (includes backing fabric, adhesive, colorant, texture paper)
- Sharp scissors
- Tweezers
- Soft cloths
- Rubbing alcohol or mild soap
- Palette knife or spatula
- Leather conditioner
- Fine sandpaper (optional, for smoothing)
- Hair dryer (for faster drying)
- Matching leather dye (if your kit does not include colorant)
Pro Tip: Always test any product on a hidden part of the sofa before using it on the tear. This avoids unexpected color changes or damage.
Step-by-step Guide To Repairing A Tear In Leather Sofa
Every leather sofa and tear is unique, but the following step-by-step process covers most home repairs. Read through all steps before starting, and adjust as needed for your sofa’s specific material and color.
1. Clean The Area
Dirt, oils, and old conditioner can stop adhesives from working well. Use a soft cloth with rubbing alcohol or a leather-safe cleaner to wipe the area around the tear. Let it dry fully.
2. Trim And Tidy The Tear
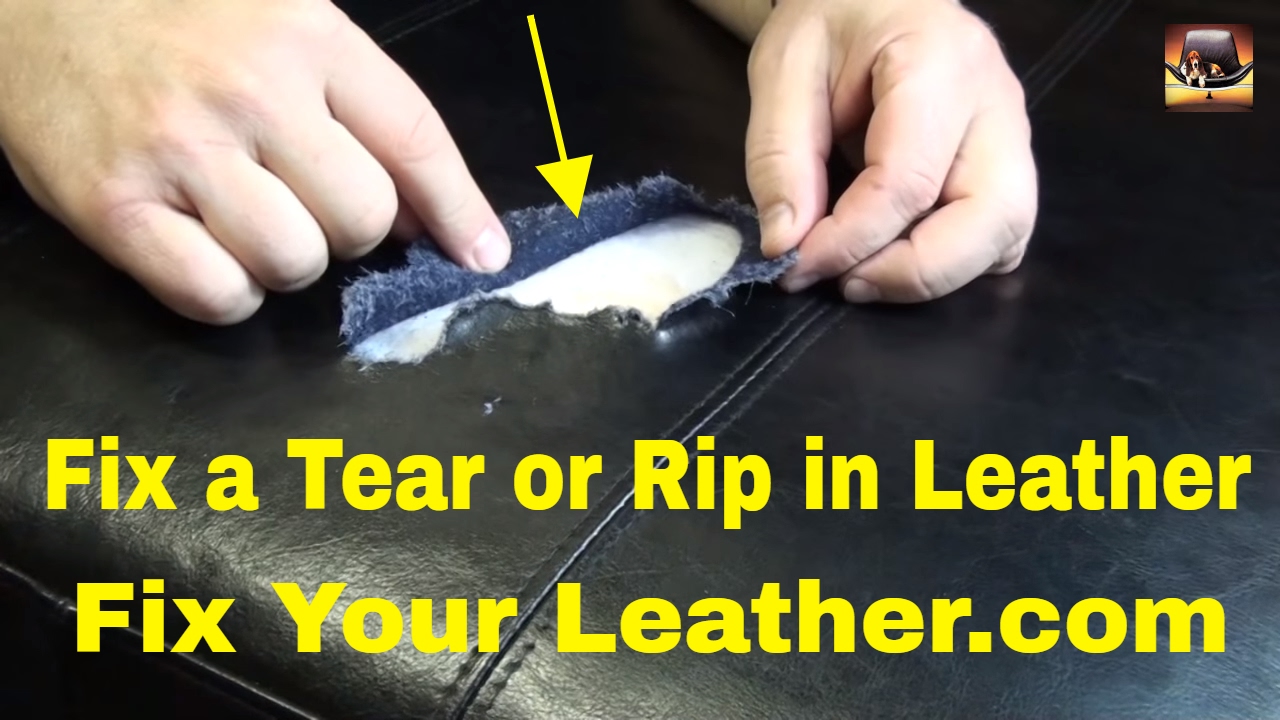
Carefully trim any loose threads or jagged edges with sharp scissors. If the backing fabric or foam is sticking out, gently push it back in with tweezers. Be gentle, rough handling can make the tear bigger.
3. Insert The Subpatch (for Deep Tears)
If the tear goes all the way through, you’ll need a subpatch. Cut a piece of the backing fabric from your kit about 0. 5 inch larger than the tear on all sides. Use tweezers to slide it under the leather so it supports the torn area.
Smooth the subpatch flat under the leather with the palette knife or a blunt tool. Make sure it lies flat and covers the full tear.
4. Apply Leather Adhesive
Using a palette knife, apply a thin layer of leather adhesive to the underside of the torn leather edges and onto the subpatch. Press the edges of the tear down onto the patch, making sure they line up neatly.
Hold the edges in place for a few minutes, or use a heavy book wrapped in plastic to keep pressure on the area as the glue sets. Check the adhesive’s instructions for drying time, this usually takes 10-30 minutes.
5. Fill And Level The Surface
If the tear is deep, there may be a small gap or dip in the repair area. Use the filler compound from your repair kit to fill in the gap. Apply in thin layers, letting each layer dry before adding the next.
Smooth with a palette knife for a flush finish.
6. Texture And Color Match
Once the filler is dry, it’s time to blend the repair with the rest of the sofa. Most kits include texture papers that mimic leather grain. Place the correct paper over the repair and gently heat it with a hair dryer to set the pattern.
Mix the colorant to match your sofa’s shade. Apply it in thin coats, letting each coat dry before adding more. For best results, dab the color on with a sponge for a natural look.
Example: In my experience, mixing two or three shades often gives a closer match than using a single color straight from the kit.
7. Finish And Condition
After the final layer of color is dry, apply a leather conditioner to the entire repaired area. This helps restore shine and flexibility and protects against future damage.
Wait at least 24 hours before using the sofa to let all products fully cure.
Matching Leather Color And Texture
One of the trickiest parts of leather repair is matching the color and texture. Leather, especially natural leather, can have slight color changes due to age, sunlight, or cleaning products.
Here are some practical tips for better matching:
- Mix colorants gradually: Start lighter, then add darker tones until you get a good match.
- Use natural light: Check your work in daylight, not just under lamps.
- Texture papers: Press them lightly for a subtle pattern, or harder for deeper grain.
If your sofa is a unique color or finish, consider contacting the manufacturer for advice on color matching. Some brands sell small bottles of their official dye.
Common Mistakes To Avoid
Even experienced DIYers can make simple errors. Here’s a quick overview of frequent mistakes and how to avoid them:
| Mistake | Why It’s a Problem | How to Avoid |
|---|---|---|
| Using too much glue | Glue can seep onto visible leather and leave stains | Apply glue sparingly with a palette knife |
| Skipping cleaning | Dirt blocks adhesive, repair will not last | Always clean with rubbing alcohol first |
| Poor color match | Repair stands out, looks obvious | Test colors on hidden area first |
| Rushing drying times | Products don’t set, repair fails | Follow kit drying instructions exactly |
Pro Tip: If in doubt, take your time. Most failed repairs happen because of rushing or skipping steps.
When To Seek Professional Help
DIY repair is ideal for small and medium tears, but some situations require a skilled touch. Consider calling a professional if:
- The tear is larger than 3-4 inches
- The damage involves seams or stitching
- The leather is very old, cracked, or brittle
- The sofa is very expensive or antique
A professional can match colors, textures, and finishes more precisely and may offer a warranty on their work. For high-value sofas, this extra investment is often worth it for peace of mind.
Caring For Your Repaired Leather Sofa
Once your repair is complete, proper care will help it last. Regular cleaning and conditioning keep leather soft and prevent future tears.
Basic Leather Care Tips
- Dust weekly with a soft, dry cloth.
- Clean spills quickly with a damp cloth, don’t let liquids soak in.
- Use leather conditioner every 4-6 months to keep the leather supple.
- Avoid direct sunlight which can dry and fade the leather.
- Keep pets’ nails trimmed to avoid new scratches.
A repaired area may be more sensitive than the rest of the sofa, especially in the first few months. Treat it gently and avoid harsh cleaners.
Diy Vs Professional Repair: Cost And Results
Many people wonder if it’s better to repair a leather sofa themselves or pay for a professional. Here’s a side-by-side comparison to help you decide:
| Aspect | DIY Repair | Professional Repair |
|---|---|---|
| Average Cost | $10-$40 (kit) | $80-$300+ |
| Time Required | 1-2 hours (excluding drying) | Several days (drop-off/pickup) |
| Skill Needed | Beginner-Intermediate | Expert |
| Result Quality | Good (with care) | Excellent |
| Warranty | None | Often included |
For small tears, DIY kits are cost-effective and can give great results. For complex damage, the extra cost of a professional may be worth it.
Credit: www.youtube.com
Environmental Impact Of Leather Repair
Repairing rather than replacing your sofa has a real environmental benefit. The U.S. Environmental Protection Agency estimates that over 12 million tons of furniture waste ends up in landfills each year. Even a single repaired sofa can help reduce this impact.
Leather repair kits also generate less waste than buying new furniture. Many brands are now offering eco-friendly adhesives and fillers, making this choice better for the planet.
Insights Many Beginners Miss
- Matching gloss, not just color: Even if you get the color right, a mismatch in gloss (matte vs shiny) can make a repair stand out. Some kits include a gloss topcoat, use it if needed.
- Letting repairs cure fully: Products may feel dry in 30 minutes, but full strength takes up to 24 hours. Using the sofa too soon is a common reason repairs fail.
- Subpatch placement: The subpatch must be completely flat and cover beyond the tear, or the repair may peel up at the edges over time.
These details can make the difference between an obvious patch and an invisible repair.
Frequently Asked Questions
What If The Tear Is On A Seam Or Stitching?
Repairs on seams are more complex because the area is under more stress. Standard repair kits often don’t work well here. It’s best to have a professional re-stitch or reupholster the seam. Attempting to glue or fill a seam tear may only last a short time and could make professional repair harder later.

Credit: www.youtube.com
Can I Use Household Glue Or Super Glue On Leather?
Regular household glues are not designed for leather’s flexibility and can damage the material. Super glue becomes hard and brittle, leading to cracks. Always use a glue labeled for leather, these stay flexible after drying and bond better with the leather fibers.
How Can I Prevent Future Tears In My Leather Sofa?
To reduce the risk of new tears: keep sharp objects away, trim pets’ nails, avoid sitting in the same spot every time, and use throws or covers in high-use areas. Regular conditioning also keeps leather supple and less likely to crack or tear.

Credit: paco-casal.com
Is There A Difference Between Real Leather And Fake Leather Repair?
Yes, faux leather (also called PU leather) repairs differently. Many repair kits work for both, but fake leather is more prone to peeling rather than tearing. Repairs on faux leather may not last as long, and sometimes replacement of the panel is the only long-term solution.
Where Can I Find More Information Or Video Guides?
For more visual learners, the Leather Repair Company YouTube channel offers step-by-step videos on many repair techniques. Seeing the process can help you understand the finer details before you start.
Restoring A Leather
Products related to this article
Sponsored / affiliate links. As an Amazon Associate I earn from qualifying purchases. I may earn additional commission from eligible campaigns.