How To Refinish A Dresser With Chalk Paint Like A Pro
Refinishing a dresser with chalk paint involves minimal prep, easy application, and a beautiful matte finish. It transforms old furniture into a custom piece with a quick and straightforward process, suitable for beginners.

Country Chic Paint
Country Chic All-in-One Chalk Paint for Furniture,…
- All-in-One Formula: This furniture paint includes a built-in primer and top coat, providing seamless application on wood, metal, l…
- Durable & Long-Lasting: Backed by 80 years of experience, our paint delivers a tough, long-lasting finish with excellent adhesion.…
- Quick-Drying, Chalky Matte Finish - Dries within 30 minutes to a chalky matte finish that’s easy to distress if desired, yet highl…
As an Amazon Associate I earn from qualifying purchases.
What is Chalk Paint and Why Use It?
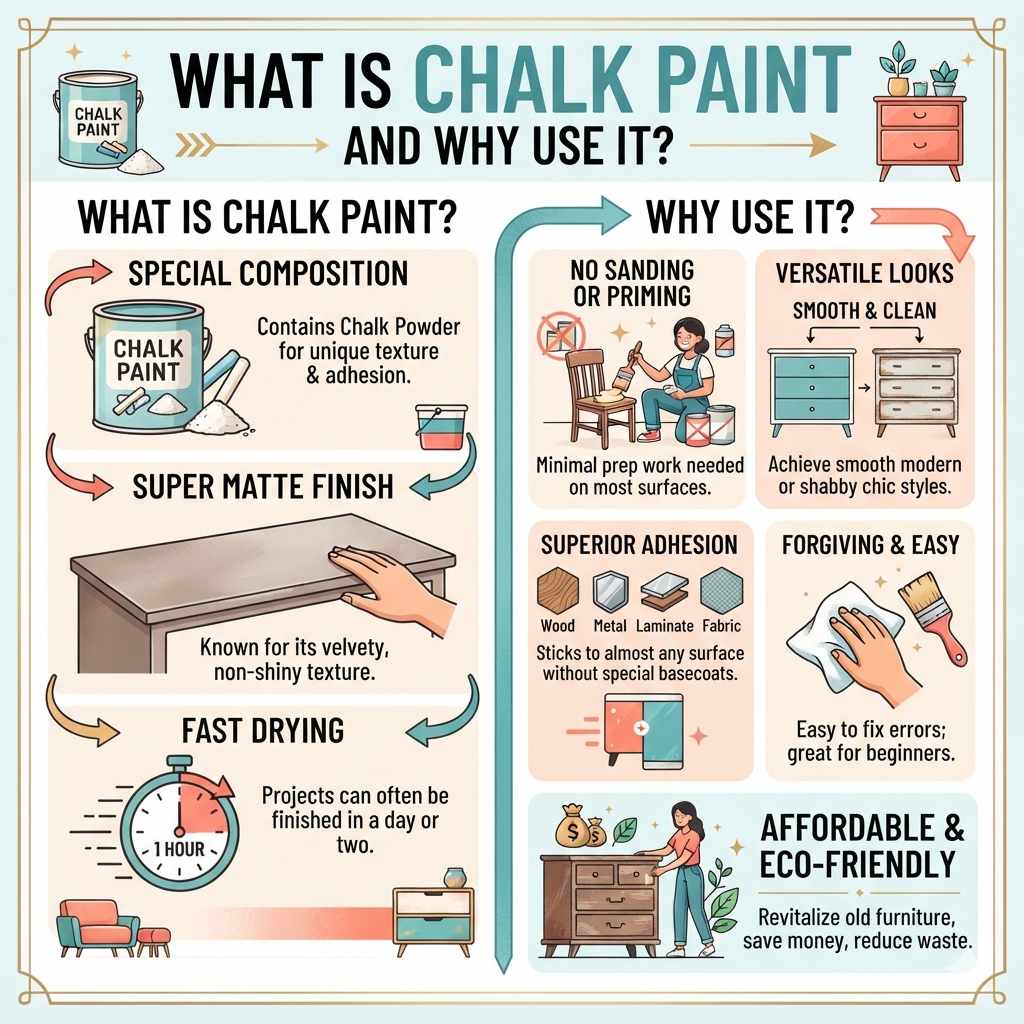
Chalk paint is a special kind of paint. It’s known for its super matte finish. It also sticks to almost anything.
You often don’t need to do much sanding first. This is a big deal for many people. Sanding can be messy and time-consuming.
Chalk paint contains chalk powder. This is what gives it its unique texture and adhesion. It dries very fast.
This means you can often finish a project in a day or two. Think about painting a wall. This paint works a bit like that.
But it’s for furniture.
Why do so many people love chalk paint for furniture? One main reason is its versatility. You can use it to create many different looks.
Want a smooth, clean finish? You can do that. Prefer a distressed, vintage look?
Chalk paint is perfect for that, too. It works well on wood, metal, laminate, and even fabric. It’s a forgiving paint.
If you make a small mistake, it’s usually easy to fix. This is a huge plus for anyone new to furniture painting.
The final look is a soft, chalky texture. This is different from glossier paints. It gives furniture a warm, inviting feel.
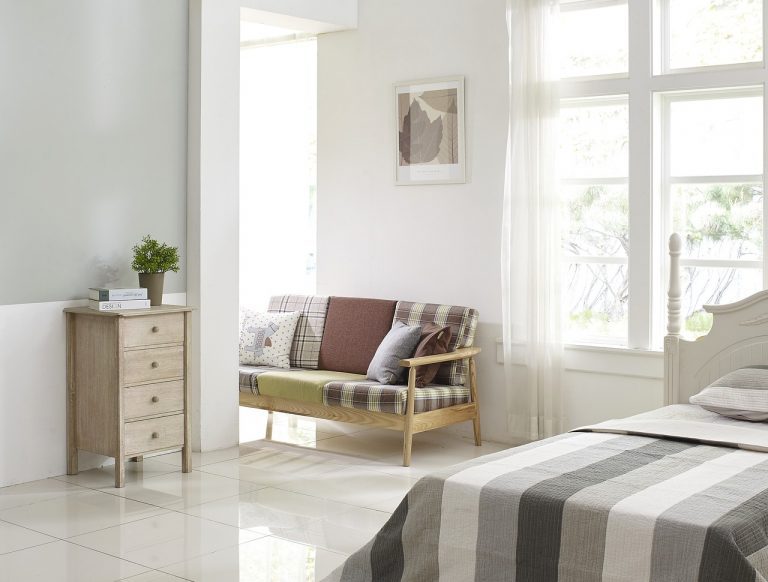
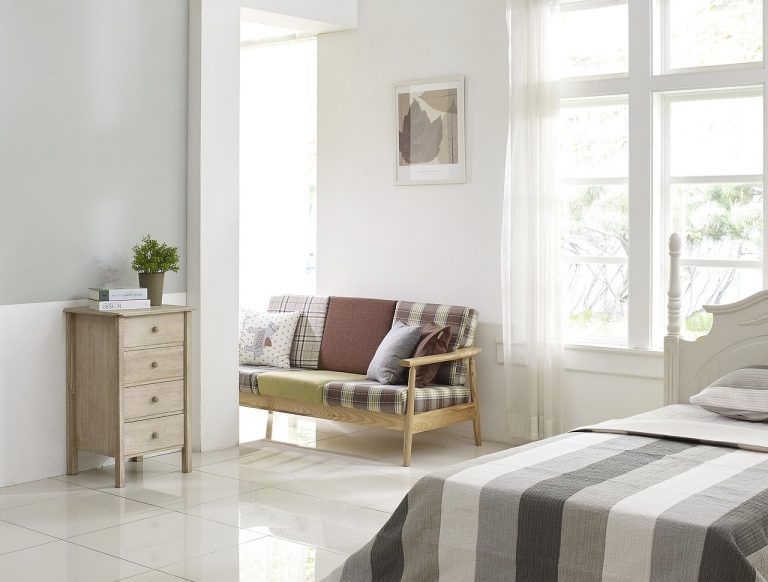
It’s a great way to update tired pieces. You can change the whole vibe of a room with just one painted dresser. It’s a fantastic way to express your style.
Plus, it’s often more affordable than buying new furniture. It lets you bring old, forgotten items back to life. This is good for your wallet and the planet.
My First Chalk Paint Project: A True Story
I remember my first attempt at chalk painting a dresser. It was a sturdy, dark wood piece. It sat in my guest room, looking so drab.
I was nervous. I’d seen beautiful examples online. But my own skills felt shaky.
I bought a small can of off-white chalk paint. I also got some wax. The instructions said “minimal prep.” That sounded great!
I gave the dresser a quick wipe-down. Then I just started painting.
The first coat went on okay. It looked a bit streaky. I thought, “Uh oh.” But the can said two or three coats might be needed.
So I kept going. The second coat covered much better. It had that lovely matte look.
I felt a wave of relief. Then came the waxing. I rubbed that wax all over.
It felt strange. The paint looked darker. I wasn’t sure if I liked it.
I buffed it. It started to shine a little. It looked okay, but not amazing.
It felt… soft. Almost too soft.
That dresser still sits there. It’s not bad, but it’s not the showstopper I dreamed of. What went wrong?
Looking back, I skipped a few crucial steps. I didn’t really clean it well. I didn’t understand the importance of the topcoat.
I learned that even with easy paints, a little extra care makes a big difference. My experience taught me that while chalk paint is forgiving, understanding the process is key to getting that professional look. You need more than just paint.
Chalk Paint vs. Milk Paint vs. Latex Paint
Chalk Paint:
- Super matte finish.
- Excellent adhesion.
- Minimal to no prep sanding needed.
- Dries fast.
- Needs a topcoat (wax or poly).
- Great for vintage or modern looks.
Milk Paint:
- More prone to chipping and cracking naturally.
- Can be used to create an antique look.
- Often comes in powder form, needs mixing.
- Can be unpredictable, which is part of its charm.
- Typically needs a bonding agent if you want it to stick.
Latex Paint:
- Most common paint for walls and furniture.
- Comes in many finishes (matte, eggshell, satin, semi-gloss, gloss).
- Requires thorough sanding and priming for good adhesion.
- More durable on its own than chalk paint.
- Takes longer to cure fully.
Getting Ready: The Prep Work
Okay, let’s talk about getting ready. Even with chalk paint, good prep makes a world of difference. Think of it as setting a good foundation.
This step ensures your beautiful new finish will last. It’s not about making things perfect, but about making them ready for paint.
First, you need to clean the dresser. Really clean it. Use a good degreaser or a mild soap and water.
Get rid of all dust, grime, and old polish. Old wax or furniture polish can cause problems. It can make the new paint peel.
A clean surface is super important. Wipe it down with a damp cloth afterward. Let it dry completely.
Do you need to sand? This is where chalk paint shines. For most chalk paints, you don’t need to sand the whole piece.
But there are times when a light scuff sand is helpful. If the dresser has a really glossy or slick finish, a quick going-over with fine-grit sandpaper (like 150 or 220 grit) can help. You’re not trying to remove the old finish.
You just want to rough it up a bit. This gives the new paint something to grab onto. Make sure to wipe away all the sanding dust afterward.
A tack cloth is great for this. It picks up the finest dust particles.
Are there any repairs needed? Now is the time to fix them. Are drawers sticking?
Do you have loose hardware? Are there any dents or deep scratches? Small repairs are best done before painting.
You can use wood filler for dents. For sticky drawers, sometimes a little wax or soap on the runners helps. Check for any loose veneer too.
You can glue that down.
What about the hardware? You have a choice here. You can paint the hardware.
Or you can remove it. Sometimes, removing it and painting it separately gives the best result. If you’re painting it, clean it well.
If you’re leaving it, you might want to tape it off carefully. But often, taking it off makes painting easier. For a completely different look, you can replace the hardware too.
This is a simple way to change the style.
Prep Checklist
Clean Thoroughly: Use degreaser or soap/water. Remove all dirt and old wax.
Light Sand (Optional): For slick surfaces, use 150-220 grit sandpaper. Don’t remove the old finish.
Wipe Dust: Use a damp cloth or tack cloth.
Make Repairs: Fix dents, scratches, and loose parts.
Hardware: Decide to clean, paint, or replace.
Applying Chalk Paint: Layers of Color
Now for the fun part! Applying the chalk paint. Remember my first project?
I learned that patience and thin coats are key. You want to build up the color gradually.
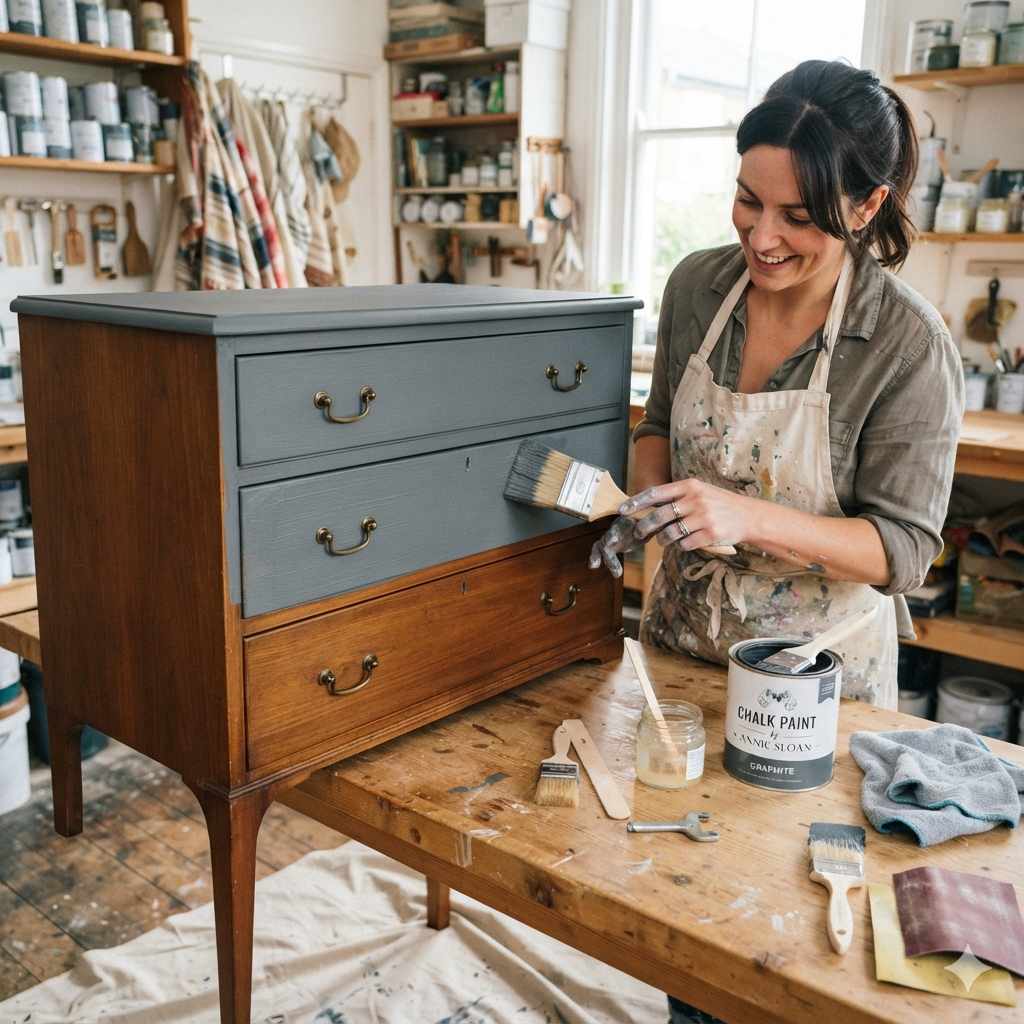
Start with your chosen color. You’ll likely need a good quality brush. A synthetic brush works well for water-based paints.
Many people prefer chalk-style brushes. They have softer bristles. These can create nice brush strokes if you want them.
Or, you can use a foam roller for a super smooth finish. Rollers work best on flat surfaces like drawer fronts and sides.
Dip your brush or roller into the paint. Don’t overload it. Wipe off excess paint on the side of the can.
Apply the paint in thin, even coats. Work in one direction. For wood grain, follow the grain.
If you want visible brush strokes, you can add them intentionally. Some people like to paint in slightly different directions on each coat to add depth.
Let the first coat dry. Chalk paint dries very quickly. This is one of its best features.
It might feel dry to the touch in 15-30 minutes. But it needs a bit longer before the next coat. Read the paint can’s instructions.
Usually, waiting an hour or two is enough. Don’t rush this step. Rushing can lead to lifting or unevenness.
Apply a second coat. This coat should cover much better. It will start to hide any streaks from the first coat.
Again, use thin, even strokes. If you want a deeper color or more coverage, you can add a third coat. Most projects only need two coats.
But sometimes a third is needed for very dark wood or very light paint colors.
What if you see drips or heavy spots? Don’t panic. While the paint is still wet, you can often go back over it gently.
Smooth it out. If it’s already dry, you can lightly sand the area. Then wipe away the dust and apply a thin coat of paint over the sanded spot.
It’s usually fixable.
Quick Paint Tips
Thin Coats: Always apply thin layers of paint.
Follow Grain: Paint with the wood grain on flat surfaces.
Dry Time: Let each coat dry fully before the next.
Brush Strokes: Decide if you want them visible or hidden.
Fix Mistakes: Lightly sand and repaint wet or dry spots.
Distressing for a Vintage Look
This is where chalk paint really gets fun for a vintage vibe. Distressing means making the furniture look older. It creates wear and tear that happens naturally over time.
It gives furniture character.
You can distress furniture after the paint has dried. Usually, you do this after the final coat of paint. Some people like to distress between coats.
This can create a deeper, layered look. For a simple distressed look, wait for the paint to be completely dry. Then, use fine-grit sandpaper (around 150-220 grit).
Gently rub the sandpaper over edges and raised areas. Think about where real furniture would get worn down. This includes corners, drawer edges, and the edges of the dresser frame.
Don’t go overboard. A little distressing goes a long way. You want it to look natural, not damaged.
If you sand too much, you might go through to the old finish. That’s okay sometimes, but be mindful. Wipe away the dust after sanding.
You can use a dry cloth or a slightly damp one.
Another method is using a wet rag. After painting but before the paint is fully cured (it’s still a bit soft), you can rub off small areas with a damp cloth. This is great for softer distressing.
It’s easier to control than sanding. You can create subtle wear marks this way. Be careful not to use too much water, or you can remove too much paint.
Some people use a sanding block. This can help you get even pressure across larger areas. You can also use steel wool (fine grade, like 0000) for a softer distressing effect.
Whatever method you choose, take your time. Step back and look at it often. Does it look like natural wear?
Or does it look like you attacked it with sandpaper?
Distressing Zones
Edges: Corners and edges of the dresser frame.
Drawer Fronts: Edges and corners of drawers.
Raised Details: Any decorative moldings or trim.
Hardware Areas: Around where knobs or pulls are attached.
Top Surface: Areas that get the most use, like the very top edges.
The Importance of the Topcoat: Sealing Your Work
This is the step I skipped on my first project. And boy, did I learn my lesson. Chalk paint is soft.
It can easily get scuffed or marked. You need a topcoat to protect it. It’s like putting a clear shield over your beautiful paint job.
The most common topcoat for chalk paint is wax. Furniture wax gives a lovely, soft sheen. It also protects the paint.
It comes in clear, dark, white, and sometimes colored versions. Clear wax is the most common. Dark wax can be used to add an aged look and depth.
White wax can give a slightly lighter, more ethereal finish.
How do you apply wax? Use a wax brush or a soft, lint-free cloth. Dip your brush into the wax.
You don’t need a lot. Apply it in thin, even coats. Work in small sections.
Brush it on in a criss-cross motion. Then, go back over it in a single direction to smooth it out. Make sure to get into all the nooks and crannies.
Let the wax sit for a few minutes. Then, buff it. Use a clean, soft, lint-free cloth.
Buff in a circular motion. This brings out the sheen. It makes the surface smooth.
You’ll see the paint color deepen slightly. Buffing is key to a good finish. It removes excess wax and creates that beautiful soft glow.
You might need two coats of wax. Let the first coat dry for about 30 minutes to an hour. Then apply a second thin coat.
Buff again. The more you buff, the more the finish will shine. But remember, you still want that soft, matte look, not a high gloss.
You can reapply wax every 6-12 months to refresh the finish.
What if you need more durability? Some people worry that wax isn’t tough enough for high-traffic pieces like dressers or tabletops. For those situations, a water-based polycrylic or polyurethane can be used.
These are clear protective sealers. Make sure you choose a water-based product. Oil-based polyurethanes can yellow the chalk paint over time.
Apply polycrylic in thin coats. It dries clear. It offers excellent protection.
You can buff wax over polycrylic for a softer feel, if desired.
Topcoat Choices
Furniture Wax:
- Pros: Easy to apply, beautiful matte to satin sheen, enhances color, good for low-traffic areas.
- Cons: Needs reapplication, can be damaged by heat or moisture.
Polycrylic/Polyurethane (Water-Based):
- Pros: Very durable, excellent protection against scratches and moisture, good for high-traffic areas.
- Cons: Can sometimes alter the chalky feel, needs careful application to avoid brush marks.
Special Techniques: Glazing and Layering
Once you’ve mastered the basics, you might want to try some more advanced techniques. These can give your dresser a truly unique, high-end look.
Glazing: Glazing adds depth and highlights details. You can use a glaze over your topcoat of paint. Glazes are usually thin and translucent.
You apply them and then wipe away the excess. This leaves color in the crevices and low spots. It makes details pop.
It can make a piece look much older and more intricate. You can buy glaze or make your own. A simple glaze can be made from watered-down paint or a commercial glaze mixed with a bit of your topcoat (like wax or polycrylic).
Apply the glaze to a small section at a time. Use a brush or cloth. Then, use a damp cloth or brush to wipe away the excess.
Work quickly. You want the glaze to settle into the details. Then wipe it off the raised surfaces.
This process really brings out carved details or moldings.
Layering Colors: Instead of just one color, you can layer two or three. Start with your base color. Let it dry completely.
Then, apply your second color. Don’t cover the first color completely. You can apply it unevenly.
Or, you can use sandpaper to reveal the color underneath. This creates a beautiful, aged effect. It looks like the dresser has been painted many times over the years.
To layer effectively, think about the colors you’re using. A dark color under a lighter color works well for distressing. A lighter color under a darker color can create a more subtle effect.
You can distress more aggressively between layers to show more of the undercoat. This technique takes practice, but it can lead to stunning results. It makes each piece one-of-a-kind.
Stenciling: Stencils are another way to add custom details. You can find stencils for almost any pattern. They can be floral, geometric, or even script.
Apply the stencil after your paint is dry. Use a stencil brush or a small roller. Dab the paint on lightly.
This prevents paint from seeping under the stencil. Once the paint is dry, carefully peel off the stencil. You can then seal over the stencil.
This adds a polished touch to your piece. It makes it look professionally designed.
Adding Depth & Detail
Glazing: Adds shadows and highlights to carvings and details.
Color Layering: Creates an aged look by revealing underlying paint colors.
Stenciling: Adds custom patterns and designs for a unique touch.
Antiquing Wax: Dark wax can be used to add an aged patina.
Real-World Context: Dressers in American Homes
Think about a dresser in a typical American home. It’s often a workhorse. It sits in a bedroom.
It holds clothes. It might also be a surface for lamps, photos, or decorative items. In older homes, dressers are often solid wood.
They have dovetailed drawers and sturdy construction. They’ve been around for decades.
In many homes, furniture is updated not because it’s broken, but because styles change. A dark, heavy dresser might not fit a light, airy modern bedroom. Or a blonde, mid-century dresser might feel dated in a farmhouse-style room.
This is where chalk paint becomes a hero. It allows homeowners to adapt their existing furniture to their current taste. It saves them from buying new.
The climate in different parts of the U.S. can also play a role. In humid areas, ensuring good adhesion and a strong topcoat is extra important.
Moisture can affect paint and finishes. In very dry climates, wood can expand and contract more. This might mean checking drawers and hinges are still working smoothly after painting.
User behavior is also key. A dresser in a child’s room will get more wear and tear than one in a guest room. For a child’s room, using a durable topcoat like polycrylic is a very smart choice.
This ensures the paint finish can withstand bumps, scrapes, and cleaning. The goal is often to make the furniture look beautiful but also be functional for daily life.
What This Means for You: When is it Normal?
So, what does all this mean for your dresser project? It means you have a lot of control. You can create almost any look you want.
You can make it look brand new, or you can make it look like it’s been in your family for generations.
When it’s normal:
- A matte or eggshell finish.
- Slightly visible brush strokes (if you like that look).
- Gentle wear on edges and corners if you distressed it.
- A smooth but not overly shiny surface if you used wax.
- The paint feels soft to the touch.
When to worry (or at least troubleshoot):
- The paint is peeling or chipping unexpectedly. (Likely a prep issue.)
- The finish feels sticky or gummy even after drying and waxing. (Paint not fully cured, or too much wax applied too soon.)
- There are visible streaks after multiple coats. (Paint applied too thinly or unevenly.)
- The paint is easily scratching off. (Topcoat was skipped or is not sufficient.)
Simple checks:
Run your hand over the surface. Does it feel smooth? Can you easily push your fingernail into the paint (after it’s cured)?
If so, you need a better topcoat.
Open and close the drawers. Do they still work smoothly? If not, you might need to adjust them or use a bit of wax on the runners.
Look at the overall appearance. Does it match the style you were going for? If not, don’t despair.
Chalk paint can often be painted over or distressed further.
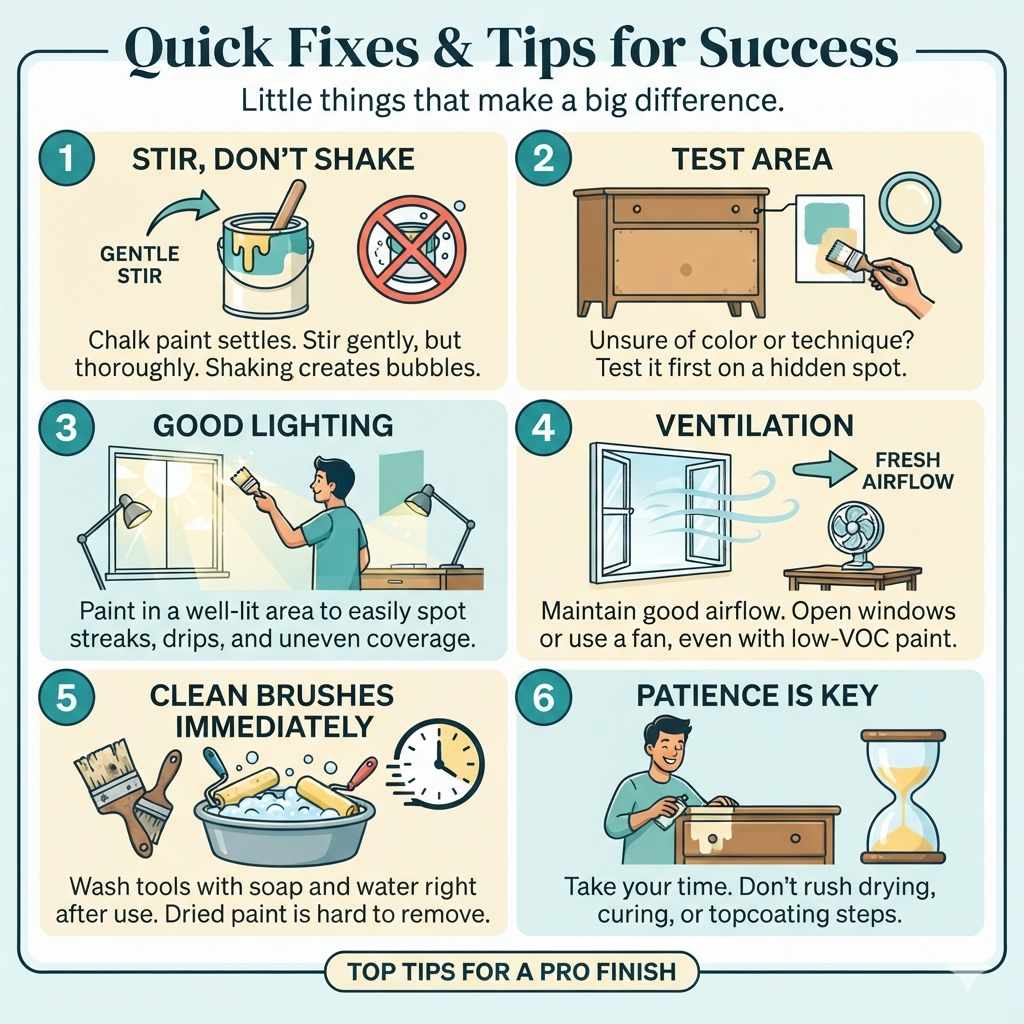
Quick Fixes & Tips for Success
Here are a few quick pointers to keep in mind. These are the little things that can make a big difference.
Stir, Don’t Shake: Chalk paint settles. Stir it gently but thoroughly. Don’t shake the can.
Shaking can create tiny air bubbles that show up in your finish.
Test Area: If you’re unsure about a color or technique, test it on the back or bottom of the dresser first. This hidden spot is perfect for seeing how the paint and topcoat will look.
Good Lighting: Paint in a well-lit area. Good light helps you see streaks, drips, and uneven coverage as you work.
Ventilation: Even though chalk paint is water-based and low-VOC, it’s still a good idea to have good ventilation. Open windows or use a fan.
Clean Brushes Immediately: Wash your brushes and rollers with soap and water right after you finish painting. Dried paint is much harder to remove.
Patience is Key: This is the biggest tip. Rushing any part of the process, especially drying and topcoating, can lead to problems. Take your time.
Enjoy the process.
Top Tips for a Pro Finish
Stir Gently: Always stir chalk paint; never shake.
Test First: Try colors and techniques on an unseen area.
Work in Light: Paint in a well-lit space to catch mistakes.
Clean Tools Fast: Wash brushes right after use.
Allow Full Cure Time: Don’t rush drying or sealing steps.
Frequently Asked Questions about Refinishing Dressers
Can I use any topcoat over chalk paint?
You can use most topcoats, but water-based polycrylic is highly recommended for durability. Oil-based polyurethane can yellow the paint. Furniture wax is also very popular for a softer sheen, but it needs more frequent reapplication and offers less protection against scratches.
How do I prevent chalk paint from looking chalky or dusty?
The chalky look is normal for chalk paint. To prevent it from looking too dusty or matte, apply a good quality furniture wax or a water-based polycrylic topcoat. Buffing the wax well will bring out a lovely soft sheen.
What if my dresser has a sticky drawer after painting?
This can happen if the paint adds thickness to the drawer runners. Try rubbing a bit of clear furniture wax or bar soap on the wooden runners. Sometimes, very light sanding of the edges can also help.
Do I need to seal the inside of dresser drawers?
It’s not always necessary to seal the inside of drawers, especially if they are unfinished wood. However, if you want to protect them from stains or make them easier to clean, you can use a clear water-based polycrylic. Avoid waxes inside drawers as they can transfer onto clothes.
How many coats of chalk paint does a dresser usually need?
Most dressers need two to three thin coats of chalk paint. The exact number depends on the color of the dresser underneath, the color of the paint, and the desired coverage. Always ensure full coverage with the final coat.
Can I paint over a previously painted or stained dresser with chalk paint?
Yes, chalk paint adheres very well to most surfaces. After cleaning, you typically don’t need to sand unless the surface is very slick or glossy. A light scuff sand can help ensure optimal adhesion.
Conclusion
Refinishing a dresser with chalk paint is a rewarding project. It lets you breathe new life into old furniture. With a little preparation, careful application, and the right topcoat, you can achieve beautiful results.
Your dresser can become a stunning focal point in your home. Enjoy the process and the amazing transformation!
Related pick: Check today's price on Amazon
Products related to this article
Sponsored / affiliate links. As an Amazon Associate I earn from qualifying purchases. I may earn additional commission from eligible campaigns.
 Country Chic All-in-One Chalk Paint for Furniture, Cabinets, Home Decor, Eco-Friendly, Matte Finish, Built-In Primer & Top Coat for Wood, Metal - Vanilla Frosting (Off White) - 8 oz (237 ml)
![Furniture Wax - 100% Natural Sealant for Chalk Furniture Paint or Raw Wood, Light Protection, Easy To Apply, No Odor, Eco-Friendly - 7 Color Choices - Antiquing [Brown] (8 oz)](https://m.media-amazon.com/images/I/41ZNmSTmwhL._SL500_.jpg) Furniture Wax - 100% Natural Sealant for Chalk Furniture Paint or Raw Wood, Light Protection, Easy To Apply, No Odor, Eco-Friendly - 7 Color Choices - Antiquing [Brown] (8 oz)
Furniture Wax - 100% Natural Sealant for Chalk Furniture Paint or Raw Wood, Light Protection, Easy To Apply, No Odor, Eco-Friendly - 7 Color Choices - Antiquing [Brown] (8 oz)