How to Paint Leather Chairs: Easy Steps for a Stunning Makeover
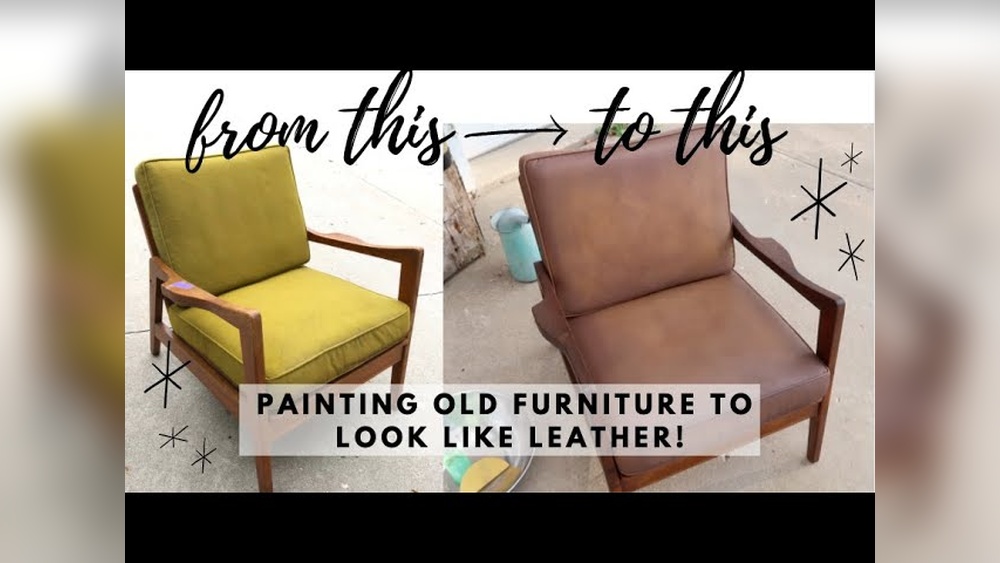
Giving your leather chair a fresh look with paint is a creative way to update your furniture without buying something new. Many people think painting leather is difficult or risky, but with the right steps, it’s both safe and effective.
Whether your chair is old and cracked or just looks outdated, the right paint and careful preparation can make a big difference. In my experience, even beginners can get great results if they pay attention to detail and use the right products.
This guide will walk you through everything you need to know about how to paint leather chairs, from preparation to finishing touches, so your project is successful the first time.
Why Paint Leather Chairs?
Leather chairs are expensive and often well-made. But over time, colors fade, styles change, or you might simply want a new look. Instead of replacing your chair, painting leather is a smart way to refresh it. Modern leather paints are flexible and designed to bond with leather surfaces, making them last longer than most people expect.
Painting also lets you customize the color, add patterns, or cover up stains and scratches. For example, if you bought a used leather chair with a few marks, painting can cover these flaws completely. Some people also use paint to create unique designs, such as stripes or geometric shapes.
Another non-obvious benefit: painting can help seal and protect old leather, extending its life. If your chair has minor cracks or dryness, some paints can actually fill tiny gaps, making the surface smoother.
Choosing The Right Paint For Leather Chairs
Not every type of paint works on leather. Using the wrong paint can cause peeling, cracking, or a sticky finish. Here’s what to consider:
Types Of Paint
- Acrylic Leather Paint: Specially made for leather, stays flexible, and resists cracking.
- Leather Dye: Penetrates the leather, changing the color from within. Best for a natural look.
- Spray Paint for Leather: Good for even coverage but requires careful masking.
- Regular Acrylic Paint: Sometimes used in a pinch, but needs a flexible additive to work on leather.
Pro Tip: Never use wall paint or oil-based paints. They won’t flex with the leather and will crack.
Comparing Paint Options
To help you see the main differences, here’s a quick comparison:
| Type | Finish | Durability | Best For |
|---|---|---|---|
| Acrylic Leather Paint | Satin/Matte | High | Most chairs |
| Leather Dye | Natural | Very High | Changing color completely |
| Spray Paint | Even, smooth | Medium | Large surfaces |
The safest choice for most projects is acrylic leather paint. Brands like Angelus, Fiebing’s, or Tarrago are trusted by professionals and hobbyists.
Supplies And Tools You’ll Need
Before starting, gather all materials. Having everything ready avoids mistakes and saves time.
- Acrylic leather paint (color of your choice)
- Leather preparer and deglazer (removes old finish)
- Fine sandpaper (400, 600 grit)
- Lint-free cloths (for cleaning and drying)
- High-quality paintbrushes (soft bristle, small and medium sizes)
- Foam applicators or sponges (for smooth coats)
- Masking tape (to protect non-leather areas)
- Drop cloth or old sheet (to protect floors)
- Gloves (to keep hands clean)
- Leather sealer/finisher (for durability)
Optional:
- Leather filler (for cracks or holes)
- Hair dryer (for faster drying between coats)
Pro Tip: Buy all your supplies from reputable art or leather supply stores. Cheap or generic paints often peel or fade quickly.
Preparing Your Leather Chair
Preparation is the most important part of painting leather. Skipping steps can ruin the final look. Here’s how to get your chair ready:
Clean The Leather
Start by removing dust and dirt. Use a mild soap and water or a leather cleaner. Avoid soaking the leather, just dampen a cloth and wipe all surfaces. Let the chair dry completely.
Remove The Old Finish
Most leather has a protective topcoat. This must be removed so paint can stick. Apply leather preparer and deglazer with a cloth, rubbing gently until the surface feels less shiny. This step opens the leather’s pores and helps the paint bond.
Repair Damage
If your chair has cracks, holes, or rough spots, use leather filler to fix them. Apply a small amount with a palette knife or your finger. Let it dry, then sand smooth with fine sandpaper.
Sand Lightly
Gently sand the leather with 400, 600 grit sandpaper. This smooths out any bumps and helps paint grip better. Wipe off dust with a lint-free cloth.
Mask Non-leather Areas
Use masking tape to cover wood, metal, or fabric parts. Lay a drop cloth under the chair to protect the floor.
How To Paint Leather Chairs: Step-by-step
Once your chair is prepared, follow these steps for best results.
1. Test Your Paint
Before painting the whole chair, test the paint on a small, hidden area. Let it dry fully. Check for peeling, cracking, or color problems. If it looks good, continue.
2. Apply The First Coat
Dip your brush or sponge into the paint. Apply a thin, even coat using smooth, long strokes. Don’t try to cover everything at once, thick layers can crack.
Let the first coat dry for at least 1 hour (or as recommended on the paint label). Use a hair dryer on low to speed up drying if needed.
3. Add More Coats
Most leather needs 2, 4 thin coats for solid color. After each coat dries, lightly sand any rough spots, wipe off dust, and add the next layer. Paint in the same direction for a smooth look.
Pro Tip: It’s better to use more thin coats than one thick one. Thin layers stay flexible and last longer.
4. Check For Missed Spots
After the final coat, inspect the chair under good light. Touch up any missed areas with a small brush.
5. Apply Sealer/finisher
Once the paint is fully dry (wait at least 24 hours), apply a leather sealer. This protects the paint from scratches and stains. Use a clean brush or sponge, applying a thin, even layer. Some sealers come in matte, satin, or gloss finishes.
Let the sealer dry according to instructions. For extra protection, you can add a second coat.
Painting Patterns Or Designs
If you want more than a solid color, you can add patterns:
- Use stencils to create shapes or designs.
- Paint stripes or geometric shapes with masking tape.
- For an aged or vintage look, dab a darker color with a sponge after the base color dries.
Example: On one project, I used a gold paint pen to outline the edges of a black leather chair, creating a stylish accent.
Drying And Curing: What To Expect
Leather paint dries quickly to the touch, but full curing can take days. Avoid sitting on or moving the chair for at least 48 hours. For best results, wait 5, 7 days before heavy use.
If the weather is humid, curing may take longer. Place the chair in a well-ventilated area but out of direct sunlight. Do not use heaters too close to the leather, as this can cause cracking.
Caring For Your Painted Leather Chair
A painted leather chair needs some care to keep it looking new.
- Clean gently: Use a soft, damp cloth. Avoid strong cleaners.
- Avoid sharp objects: Painted leather can scratch, so be careful with zippers or pets.
- Condition rarely: If needed, use a leather conditioner sparingly. Too much can soften the paint.
- Re-seal yearly: Apply a new coat of sealer every year to keep the finish strong.
Pro Tip: Place the chair away from direct sunlight. UV rays can fade both paint and leather over time.
Common Mistakes When Painting Leather Chairs
Many beginners make mistakes that can ruin their hard work. Here are some to avoid:
- Skipping preparation: Not cleaning or deglazing leads to poor paint bonding.
- Using thick coats: Thick layers crack and peel. Always use thin coats.
- Choosing the wrong paint: Household paints will not last on leather.
- Not sealing the paint: Skipping the final sealer makes the chair vulnerable to stains and scratches.
- Rushing drying times: Using the chair too soon can ruin the finish.
Pro Tip: Always read the paint and sealer instructions. Each brand can have slightly different requirements.
How Painted Leather Chairs Hold Up Over Time
When done right, painted leather lasts for years. However, the durability depends on:
- Quality of paint and sealer
- Amount of use (daily vs. occasional)
- How well the chair was prepared
Here’s a simple durability comparison:
| Method | Expected Lifespan | Maintenance Needs |
|---|---|---|
| Professional dyeing | 7+ years | Low |
| DIY acrylic paint + sealer | 3, 5 years | Medium |
| No sealer used | 1, 2 years | High |
Non-obvious insight: Even top-quality leather paints can wear faster in high-use areas, like the seat or armrests. Touch up these spots as needed to keep the chair looking fresh.
Cost And Time Estimate
Painting a leather chair is much cheaper than buying new furniture. Here’s a rough breakdown:
| Item | Estimated Cost (USD) |
|---|---|
| Leather paint (2-3 bottles) | $20, $30 |
| Preparer/deglazer | $10 |
| Sealer/finisher | $10, $15 |
| Brushes, tape, cloths | $10 |
| Total | $50, $65 |
The project usually takes 2, 3 days including drying time, but only a few hours of actual work.
When Not To Paint Leather Chairs
Painting is not always the best solution. Avoid painting if:
- The leather is flaking or peeling badly (it won’t hold paint).
- The chair is valuable or antique (painting can reduce value).
- You want a dramatic texture change (paint does not make leather soft or rough).
In these cases, consider professional restoration or reupholstering.
Sustainability And Environmental Impact
Painting and restoring furniture is more eco-friendly than buying new. By updating your leather chair, you reduce waste and use fewer raw materials. Choose water-based leather paints for lower VOCs (volatile organic compounds).
Dispose of leftover paint and chemicals properly, never pour them down the drain. Check your local regulations for safe disposal.
Creative Ideas For Painted Leather Chairs
Painting isn’t just for changing color. Some creative ideas include:
- Color blocking: Use two or more colors for a modern look.
- Hand-painted designs: Add flowers, animals, or abstract art.
- Personalization: Paint your initials or a favorite quote.
- Ombre effect: Blend one color into another for a stylish gradient.
Example: A friend painted her white leather chair with navy blue stripes and added gold dots. It became the centerpiece of her living room.
For more inspiration and techniques, you can visit WikiHow’s guide on painting leather furniture.
Frequently Asked Questions
Can I Paint Over Colored Or Dark Leather?
Yes, but it may take more coats to cover dark colors with lighter paint. Use a white or light gray base coat if you want to change from dark to light. Always test in a small area first.
Will The Paint Crack When I Sit On The Chair?
If you use acrylic leather paint and apply thin, even coats, the finish should stay flexible. Cracking often happens when people use thick layers or the wrong type of paint. Regular touch-ups on high-use spots help prevent this.
How Do I Fix Mistakes During Painting?
If you notice a drip or uneven spot while the paint is still wet, wipe it away with a damp cloth. For dry mistakes, lightly sand the area and repaint. If the mistake is large, you may need to deglaze and repaint that section.
Is It Safe To Paint Leather Chairs Indoors?
Yes, as long as you use water-based leather paints and work in a well-ventilated room. Always protect your floors and nearby furniture. If you are sensitive to fumes, wear a mask or open windows.
Can I Use Spray Paint For Leather Chairs?
Some spray paints are designed for leather, but most regular spray paints are not flexible enough. If you choose spray paint, make sure it’s labeled for leather, and apply thin layers. Mask all areas you don’t want painted and spray outdoors if possible.
Painting a leather chair is a satisfying project that can transform your space. With careful preparation and the right products, you’ll enjoy a fresh, custom look for years. Remember, patience and attention to detail are your best tools for a professional result.
Products related to this article
Sponsored / affiliate links. As an Amazon Associate I earn from qualifying purchases. I may earn additional commission from eligible campaigns.