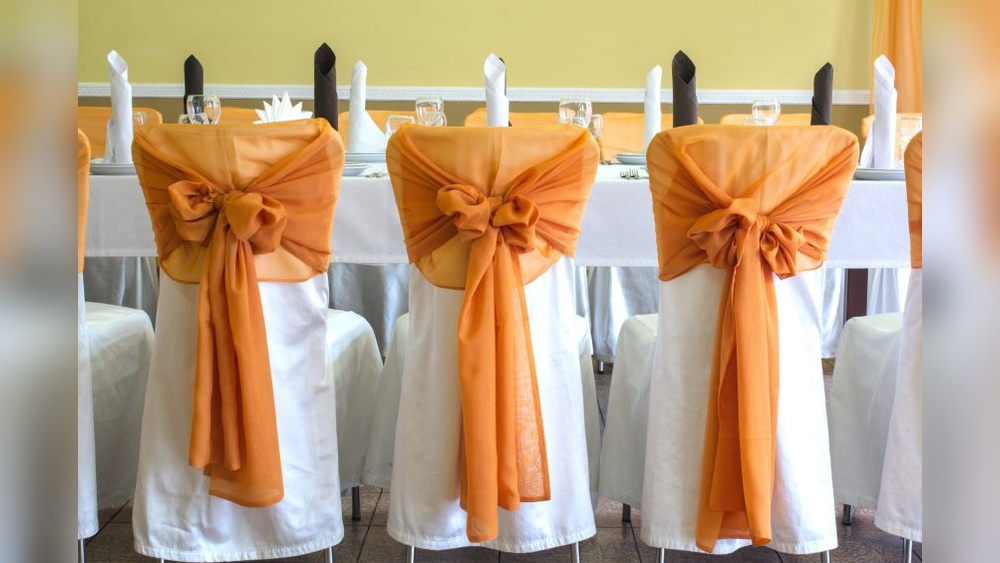
How to Tie Chair Sashes: Step-by-Step Guide for Stunning Decor
Tying chair sashes might seem like a small detail, but it has a big impact on the atmosphere of any event. Whether you’re planning a wedding, corporate gala, birthday party, or baby shower, chair sashes bring color, style, and elegance to ordinary seating. But if you’ve never tied a sash before, or you want your results to look truly professional, you’ll need a bit more than just enthusiasm. Knowing the right materials, techniques, and creative ideas helps you achieve beautiful, lasting results that impress every guest.
Many people underestimate this task and end up with uneven bows, slipping knots, or messy finishes. In my experience as an event decorator, the difference between a rushed, basic tie and a well-executed sash is obvious, and guests do notice. This guide breaks down everything you need to know: from choosing the best sash fabrics to mastering popular knots and troubleshooting common mistakes. Let’s dive into the art of tying chair sashes so your next event stands out for all the right reasons.
Understanding Chair Sashes And Their Importance
Chair sashes are long, decorative pieces of fabric used to wrap around the backs of chairs. They’re more than just a pretty touch, they’re a key part of many event themes and can tie together the look of a room.
Why are they important?
- They add color and texture, making plain chairs look sophisticated.
- Sashes can match other elements, like tablecloths, napkins, or floral arrangements.
- They help reinforce a theme, such as rustic, modern, romantic, or vintage.
- For rented venues, sashes can cover worn or mismatched chairs, giving a cohesive look.
Types of events that benefit from chair sashes:
- Weddings and anniversaries
- Corporate functions and award nights
- Birthday and graduation parties
- Baby and bridal showers
Pro Tip: Even budget events can look upscale with the right sash choice and a neat tie.
Choosing The Right Chair Sash
The first step is selecting the right sash for your chairs and event type. This decision affects both appearance and how easy the sash is to tie.
Popular Chair Sash Fabrics
Different fabrics create different effects. Here’s a quick comparison:
| Fabric Type | Look & Feel | Best For | Ease of Tying |
|---|---|---|---|
| Organza | Sheer, shimmery | Weddings, formal events | Easy |
| Satin | Smooth, shiny | Weddings, parties | Medium |
| Polyester | Matte, sturdy | Corporate, all events | Easy |
| Burlap | Rustic, textured | Outdoor, rustic themes | Hard |
| Lace | Delicate, detailed | Vintage, romantic | Medium |
Satin and organza are the most common choices for weddings, while burlap works well for rustic or outdoor events. Polyester sashes are a practical choice for large gatherings due to their durability and low cost.
Sash Size And Shape
Most chair sashes are about 6-8 inches wide and 108 inches long. Wider sashes make fuller bows, while narrow ones work better for knots or twists. Double-check chair size before buying; banquet chairs need longer sashes than folding chairs.
Matching Sashes To Chairs
Not all sashes fit every chair. Here’s a quick guide:
| Chair Style | Best Sash Type | Notes |
|---|---|---|
| Banquet | Wide satin, organza | Fits most sashes, bows look best |
| Chiavari | Organza, lace, tulle | Try wraps or weaves for slender backs |
| Folding | Polyester, burlap | Simple knots or rosettes work well |
| Conference | Satin, polyester | Check for arms that may block tying |
Pro Tip: If the chair is odd-shaped, bring a sash for a test fit before ordering in bulk.
Essential Tools And Preparation
A perfect sash tie starts before you even pick up the fabric.
What You Need
- Clean, pressed sashes: Wrinkles look messy. Iron or steam before use.
- Measuring tape: For even placement.
- Step stool: For high-backed chairs.
- Safety pins or clips: To secure tricky knots.
- Chair covers (optional): For a base color or to hide old chairs.
Prepping The Sashes
- Sort sashes by color and fabric.
- Lay them flat to avoid new wrinkles.
- Iron on low for delicate fabrics; steam works best for organza and lace.
- For outdoor events, keep sashes inside until last minute to avoid dust or dew.
Pro Tip: Always have a few extra sashes on hand for accidents or last-minute guest additions.
Basic Chair Sash Tying Techniques
Let’s get hands-on. Different ties suit different looks and chair types. Here are the most popular methods, with step-by-step instructions and insights for each style.
The Classic Bow Tie
This is the most traditional and popular way to tie a chair sash. It looks formal, fits most chairs, and works with almost any fabric.
Steps:
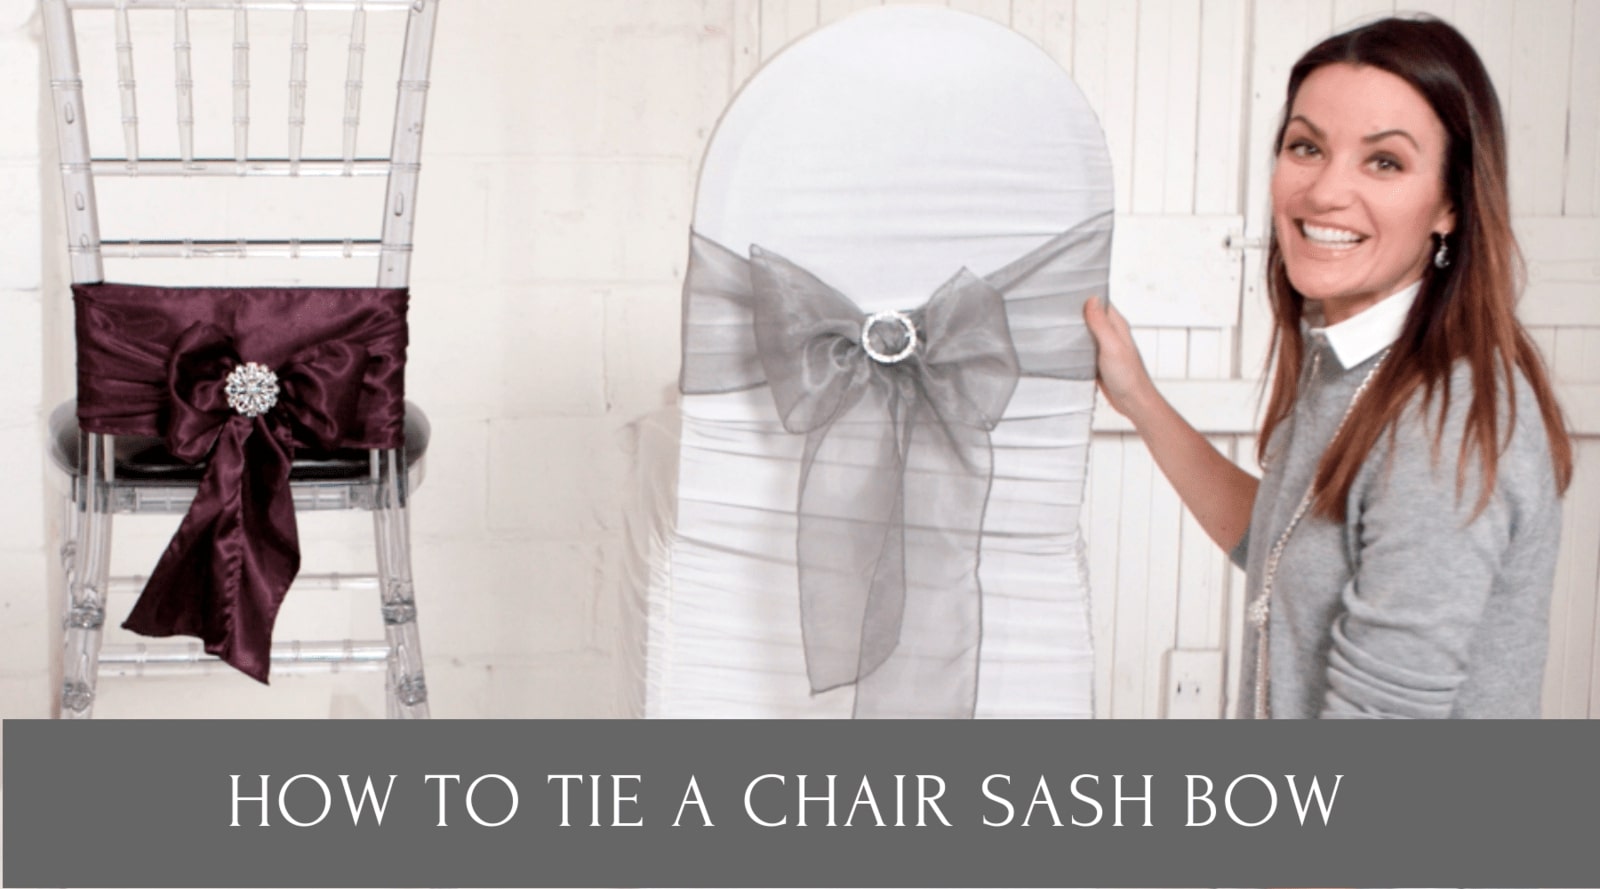
- Center the sash at the back of the chair, with equal lengths on both sides.
- Cross the ends, then tie a single knot, pulling tight against the chair.
- Form two loops (bunny ears) and tie them together like shoe laces.
- Adjust the bow so both loops and tails are even.
- Fluff the loops for a fuller look.
Tips:
- For fuller bows, use wide or double-layered sashes.
- Organza holds shape well, while satin may slip, tie extra tight.
The Rosette Knot
A rosette adds a romantic, floral touch. It’s great for weddings and looks best with organza or tulle.
Steps:
- Tie a basic knot at the center of the chair back.
- Twist one end tightly, then wrap it around itself to form a spiral.
- Tuck the tail under the spiral and secure it with a pin if needed.
- Repeat with the other tail or leave it hanging.
Tips:
- Don’t over-tighten, or the rosette won’t look soft.
- Use contrasting colors for extra flair.
Side Bow
For a modern twist, tie the bow at the side of the chair instead of the center.
Steps:
- Drape the sash so one side is longer.
- Slide both ends to one side of the chair back.
- Tie a bow as usual, letting tails hang down the side.
Tips:
- Side bows work well with banquet chairs.
- Use this style to highlight aisle seats or VIP areas.
The Double-knot
This is a simple, no-fuss method for casual events or sturdy fabrics.
Steps:
- Wrap the sash around the chair back.
- Tie a single knot, then tie another knot over it.
- Let the ends hang, or tuck them under the knot.
Tips:
- Works best with polyester and burlap.
- Use for outdoor events where wind might untie bows.
The Wrap-around
This style gives a sleek, banded look, especially with Chiavari or slim-backed chairs.
Steps:
- Place the sash at the bottom of the chair back.
- Wrap it diagonally or horizontally, spiraling up the chair.
- Tuck the ends at the top and secure with a pin.
Tips:
- Great for two-tone color schemes.
- Combine with a flower or brooch for added interest.

Credit: www.youtube.com
Advanced And Creative Sash Styles
Once you’ve mastered the basics, try these advanced or creative ideas to make your décor stand out.
The Weave
Weaving sashes through chair spindles creates a dramatic effect, perfect for high-impact décor.
How to do it:
- Use multiple narrow sashes.
- Starting from the bottom, alternate weaving in and out of the chair’s vertical bars.
- Secure ends at the top or bottom.
Best for: Chiavari or cross-back chairs.
Note: This takes more time and planning, so allow extra setup.
The Diagonal Drape
For a soft, romantic look, drape the sash diagonally across the chair back.
How to do it:
- Start at the top left of the chair.
- Drape the sash down to the bottom right.
- Secure both ends tightly or let one end flow to the floor.
Best for: Outdoor weddings, boho themes.
Using Brooches, Flowers, And Accessories
Adding a brooch, silk flower, or jeweled pin can turn a simple knot into a showstopper.
Ideas:
- Attach a rhinestone brooch at the center of a bow.
- Pin a silk rose to a rosette.
- Use colored clips to match the event’s palette.
Pro Tip: Accessories work best with solid-color sashes so details stand out.
Layered Sashes
Layering two sashes of different colors or textures adds depth and richness.
How to do it:
- Place one sash over another before tying.
- Use a wider sash as the base, a narrow one on top.
- Tie as usual; adjust so both colors show.
Best for: Formal events, color-themed parties.
Common Mistakes And How To Avoid Them
Even experienced decorators make mistakes. Here’s how to avoid the most frequent issues with chair sashes.
Uneven Bows
Problem: One loop or tail is longer than the other.
Solution: Always center the sash before tying. After tying the knot, adjust both sides before making the bow.
Slipping Knots
Problem: Bows come undone during the event, especially with satin sashes.
Solution: Double-knot the base or use a hidden safety pin. Choose matte fabrics for outdoor events.
Wrinkled Sashes
Problem: Creased or wrinkled sashes look unprofessional.
Solution: Iron or steam all sashes before tying. For delicate fabrics, use a pressing cloth.
Not Enough Sash Length
Problem: Sashes are too short for large chairs, resulting in small or tight bows.
Solution: Measure a chair before ordering. Add at least 6-12 inches for tying.
Ignoring Chair Shape
Problem: Using the wrong tie for the chair style.
Solution: Test ties on one chair before committing to a style. Some knots work better on certain chair backs.
Time Management And Setup Tips
Decorating with chair sashes can take longer than you expect, especially for large events.
- Estimate setup time: For standard bows, budget about 2-3 minutes per chair for beginners, 1-2 minutes if experienced.
- Work in teams: Assign one person to prep sashes, another to tie, and a third to adjust and finish.
- Start with important chairs: Focus on head tables, VIP sections, or ceremony aisles first.
- Have a toolkit: Keep safety pins, scissors, and extra sashes nearby for quick fixes.
Pro Tip: For big events, do a test run before the actual day. This helps spot issues and speeds up the process.
Cleaning And Reusing Chair Sashes
After the event, you’ll want to keep sashes in good condition for reuse.
- Remove gently: Don’t pull or yank, especially with delicate fabrics.
- Shake out debris: Grass, glitter, or crumbs can damage fabric over time.
- Wash according to fabric: Satin and polyester can usually be machine washed; organza and lace may need hand washing or dry cleaning.
- Store flat or rolled: Avoid folding to prevent creases.
Example: I once stored 100 satin sashes folded in a box. When I needed them again, deep creases made them hard to use. Now, I roll or hang them for easy reuse.
Chair Sash Trends And Creative Inspiration
Chair sash styles change with fashion and event trends. Staying current can make your event feel fresh and stylish.
- Eco-friendly fabrics: Burlap and cotton are popular for sustainable events.
- Bold colors: Bright, contrasting sashes are trending for modern parties.
- Minimalism: Simple knots, single drapes, or neutral shades look elegant and timeless.
- Personalized tags: Some events add name tags or small keepsakes to each sash for a personal touch.
For inspiration, browse sites like Pinterest or major event design blogs, or check out event showcases from professionals.
Frequently Asked Questions
What’s The Best Way To Transport Large Numbers Of Chair Sashes?
Keep sashes flat or rolled in storage bins. Avoid stuffing them in bags, which causes wrinkles. If possible, transport on hangers or in garment bags for delicate fabrics. For huge events, rent or borrow clothing racks.
Can Chair Sashes Be Tied Onto Chairs With Arms?
Yes, but it may take extra effort. Use longer sashes and tie bows or knots above the armrest area. Alternatively, try a drape style or use elastic bands to hold sashes in place.

Credit: www.youtube.com
How Do I Keep Chair Sashes From Slipping Down The Chair?
Use a small piece of double-sided tape or a discreet safety pin on the back side of the sash. For very smooth fabrics like satin, a textured chair cover underneath can help prevent slipping.
Are There Alternatives To Fabric Sashes For Chair Decoration?
Absolutely. Ribbons, greenery, macramé cords, or paper garlands can be creative alternatives. Some events use scarves, scarves, or even LED string lights for a unique look.
Credit: www.totallydazzled.com
Where Can I Find More Detailed Tutorials Or Video Guides?
For step-by-step visuals, check out reputable event planning resources or YouTube channels focused on wedding décor. One reliable option is the The Knot, which offers visual tutorials and additional tips
Products related to this article
Sponsored / affiliate links. As an Amazon Associate I earn from qualifying purchases. I may earn additional commission from eligible campaigns.