How Do You Make a Chair: Step-by-Step Guide for Beginners
Building your own chair is a project that combines creativity, practical skills, and a sense of accomplishment. Whether you want a simple wooden seat for your home or you’re interested in learning basic furniture making, knowing how to make a chair is a valuable skill.
This guide will walk you through the process, from choosing the right materials to finishing the final touches, and provide insights that help you avoid common mistakes. By the end, you’ll have a clear understanding of what it takes to create a sturdy, comfortable, and attractive chair, even if you are a beginner.
Understanding The Basics Of Chair Design
Before you start cutting wood or buying supplies, it’s important to know what makes a good chair. Chairs are more than just four legs and a seat; they require careful design for both comfort and stability. The height, width, and angle of the seat and backrest all affect how the chair feels.
A standard dining chair is usually about 18 inches high from the floor to the seat. The seat width is often around 16 to 18 inches, and the backrest is typically tilted slightly backward for comfort. Armrests, if present, should be at a comfortable height for most users.
Pro Tip: Sit on several chairs you like before starting your project. Notice what feels comfortable. Measure those chairs to use as a reference.
Choosing The Right Materials
The material you choose shapes the look, strength, and durability of your chair. Most home-built chairs use wood, but you might also consider metal or plastic if you have the tools and experience.
Common Wood Types For Chairs
- Pine: Affordable, easy to work with, but softer and less durable.
- Oak: Strong, durable, with a classic look. Slightly harder to cut and sand.
- Maple: Very strong and smooth. Good for painted finishes.
- Birch: Stable and attractive, commonly used in modern furniture.
When selecting wood, check for straight boards without large knots, cracks, or warping. The moisture content should be low (ideally around 6-8%) to prevent future cracking.
Comparing Popular Chair Woods
Here’s a comparison of common woods for chair making:
| Wood Type | Strength | Ease of Use | Cost | Best For |
|---|---|---|---|---|
| Pine | Moderate | Easy | Low | Beginner projects |
| Oak | High | Medium | Medium-High | Classic chairs |
| Maple | Very High | Hard | High | Modern, painted chairs |
| Birch | High | Medium | Medium | Contemporary designs |
Pro Tip: For your first project, choose a wood that balances cost and ease of use, like pine or birch.
Essential Tools And Safety Gear
Building a chair requires some basic tools and safety equipment. You don’t need a full workshop, but investing in quality tools makes the process smoother and safer.
Basic Tools Needed
- Measuring tape and ruler
- Pencil for marking
- Saw (hand saw or circular saw)
- Drill and a set of drill bits
- Screwdriver (manual or electric)
- Clamps to hold pieces together
- Wood glue
- Sandpaper (various grits)
- Square (for right angles)
- Hammer (if using nails)
Safety Equipment
- Safety glasses to protect your eyes
- Dust mask (especially when sanding)
- Hearing protection if using power tools
- Gloves for handling rough wood
Warning: Never skip safety equipment. Even simple projects can cause injuries without proper protection.
Planning Your Chair: Drawing And Measurements
Sketching your chair before you start cutting wood helps prevent costly mistakes. Even a simple drawing with dimensions gives clarity.
Key Measurements To Decide
- Seat height: Usually 18 inches
- Seat width: 16-18 inches
- Seat depth: 16-17 inches
- Backrest height: 32-34 inches from the floor
- Legs: Should form a square or rectangle under the seat
If you want armrests, decide their height and width based on your body size or those who will use the chair most.
Example: When I built my first chair, I made the seat too narrow because I didn’t measure my favorite kitchen chair first. It ended up uncomfortable.
Step-by-step: How To Make A Chair
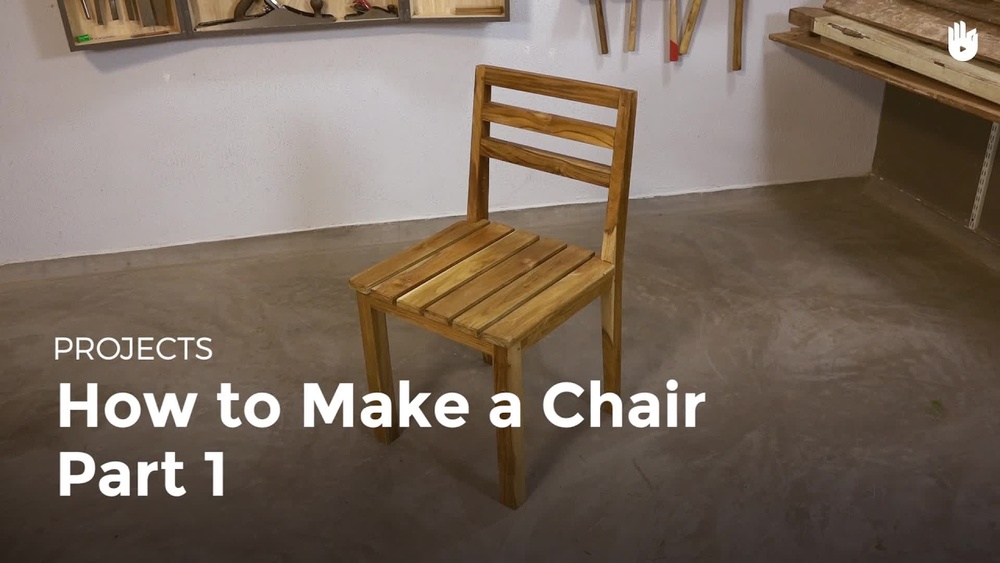
Let’s break down the actual building process. This guide focuses on a simple wooden chair without armrests, ideal for beginners.
1. Cut The Wood Pieces
Measure and mark your wood before cutting. You’ll need:
- 4 legs (each 18 inches long)
- 2 seat rails (front and back) (16 inches each)
- 2 seat rails (sides) (18 inches each)
- Seat panel (16 x 18 inches)
- 2 backrest supports (32 inches each)
- 1 backrest panel (16 inches wide, 6-8 inches tall)
Cut each piece carefully, keeping edges straight. Sand the cut edges to remove splinters.
2. Build The Seat Frame
Lay the seat rails out in a rectangle. Attach the corners using wood glue and screws or dowels for strength. Use a square to check corners are exactly 90 degrees.
Clamp the frame and let the glue dry for at least 30 minutes.
3. Attach The Legs
Position each leg at a corner of the seat frame. Drill pilot holes to prevent wood from splitting, then attach using screws and glue. Make sure legs are vertical.
Double-check that all four legs are even so your chair won’t wobble.
4. Fix The Seat Panel
Place the seat panel on top of the frame. Attach using screws from underneath, or glue and clamp for a seamless look. Leave a slight overhang (about 1/2 inch) for comfort.
5. Build And Attach The Backrest
Attach the two backrest supports to the rear seat rails, making sure they’re straight and secure. Then fix the backrest panel at your desired height and angle.
You can shape the backrest for extra comfort by rounding the top edges or tilting it slightly backward.
6. Sand And Smooth All Surfaces
Use coarse sandpaper (80 grit) first, then medium (120-150 grit), and finally fine (220 grit) for a smooth finish. Pay extra attention to corners and edges.
7. Finish And Protect
Apply your chosen finish, paint, stain, or clear varnish, to protect the wood and bring out its beauty. Allow it to dry fully between coats.
Warning: Always finish your chair in a well-ventilated space. Many finishes release strong fumes.
Common Mistakes And How To Avoid Them
Even experienced builders make mistakes. Here are some common errors and ways to avoid them:
- Uneven legs: This is the most frequent issue. Always check leg lengths before attaching and after assembly. Sand down longer legs if needed.
- Weak joints: Skipping glue or using too few screws can cause wobbling. Use both glue and screws for all main joints.
- Splintered edges: Rushing cuts or using dull saws causes rough edges. Use sharp tools and sand after every cut.
- Ignoring wood grain: Wood should be cut so that the grain runs along the length of the piece for strength.
- Not pre-drilling holes: Driving screws directly into wood can cause splitting. Always drill pilot holes.
Pro Tip: Dry-fit all pieces together before gluing or screwing. This lets you check fit and make adjustments.

Credit: www.youtube.com
Comparing Joinery Techniques For Chair Building
How you connect the chair parts matters for strength and appearance. Here’s a quick comparison:
| Joinery Method | Strength | Skill Needed | Tools Required | Best For |
|---|---|---|---|---|
| Screws + Glue | Good | Beginner | Drill, screwdriver | First projects |
| Dowels | Very Good | Intermediate | Drill, dowel jig | Visible joints |
| Mortise and Tenon | Excellent | Advanced | Saw, chisel | Professional chairs |
| Pocket Holes | Good | Beginner/Intermediate | Pocket hole jig | Hidden joints |
For your first chair, screws plus glue work well and are forgiving of small errors.
Customizing Your Chair
Once the basic chair is built, you can add features to suit your style or needs.
Adding Armrests
Armrests add comfort but require extra planning. Measure carefully so they aren’t too high or low. Attach them securely to both the backrest and front legs.
Upholstering The Seat
A padded seat is more comfortable, especially for long sitting. Cut a foam cushion to size, cover with fabric, and staple it to the underside of the seat.
Decorative Touches
Example: I once painted a set of chairs in different bright colors for a children’s playroom. It made the space cheerful and each child had a favorite color.
Finishing And Protecting Your Chair
The right finish protects your chair from spills, dirt, and daily use. The most common finishes are:
- Clear varnish: Shows wood grain, durable, water-resistant.
- Paint: Adds color, hides wood flaws, easy to update.
- Oil finish: Deepens wood color, feels natural, but needs regular reapplication.
Apply finish with a brush or cloth in thin, even coats. Sand lightly between coats for a smooth result.
Cost Breakdown: Diy Chair Vs. Store-bought
Making your own chair can save money, but costs vary depending on materials and tools. Here’s a typical breakdown:
| Item | DIY Cost (USD) | Store-Bought Cost (USD) |
|---|---|---|
| Wood and Materials | $20, $60 | , |
| Basic Tools (one-time) | $50, $150 | , |
| Ready-Made Chair | , | $60, $200 |
If you already have tools, building a chair is often less expensive than buying a high-quality one. Plus, you get a custom piece and learn valuable skills.

Credit: www.wikihow.com
Advanced Tips For Long-lasting Chairs
If you want your chair to last for many years, consider these advanced tips:
- Use hardwood instead of softwood for more durability.
- Add corner braces under the seat for extra strength.
- Apply felt pads to the leg bottoms to protect floors and prevent wobbling.
- Store chairs indoors or use exterior finishes if they’ll be outside.
- Regularly check screws and joints and tighten as needed.
Pro Tip: Even minor changes in humidity can loosen chair joints over time. Re-glue or tighten joints if you notice wobbling.
Why Build Your Own Chair?
Making your own chair is more than a budget project. You learn design, woodworking, and problem-solving. You also get a sense of pride every time you sit in your finished chair. For families, it’s a great way to teach kids basic skills and patience.
Building your own furniture is also a step toward sustainability, as you can choose eco-friendly materials and avoid mass-produced items.
For more detailed woodworking techniques and safety tips, you can read resources like the Wikipedia page on woodworking.

Credit: www.youtube.com
Frequently Asked Questions
How Can I Make My Chair Stronger?
You can make your chair stronger by using hardwood like oak or maple, applying glue in addition to screws, and adding corner braces beneath the seat. Mortise and tenon joints are also known for their strength, though they require more skill.
What Finish Is Best For A Kitchen Chair?
For kitchen chairs, a clear polyurethane varnish works well because it is water-resistant, easy to clean, and protects against spills. Oil finishes give a natural look but may need reapplication if the chair gets a lot of use.
Can I Use Reclaimed Wood To Make A Chair?
Yes, reclaimed wood is a great choice for making chairs if it is sturdy and free from rot or old nails. Sand it well, and check for cracks that could affect strength. Reclaimed wood gives a unique look and is environmentally friendly.
How Do I Fix A Wobbly Chair?
To fix a wobbly chair, check all joints and screws. Tighten any loose hardware. If joints are loose, apply fresh wood glue and clamp until dry. For uneven legs, carefully sand down the longer leg until the chair sits flat.
Is It Possible To Make A Chair Without Power Tools?
Yes, you can make a simple chair using only hand tools like a saw, hammer, screwdriver, and sandpaper. It will take more time and effort, but it’s a good way to learn basic skills and build confidence.
Building a chair is a rewarding project, whether you want to furnish your home or just enjoy working with your hands. With careful planning, the right materials
Products related to this article
Sponsored / affiliate links. As an Amazon Associate I earn from qualifying purchases. I may earn additional commission from eligible campaigns.