How To Make A Bean Bag Chair: Easy Diy Guide
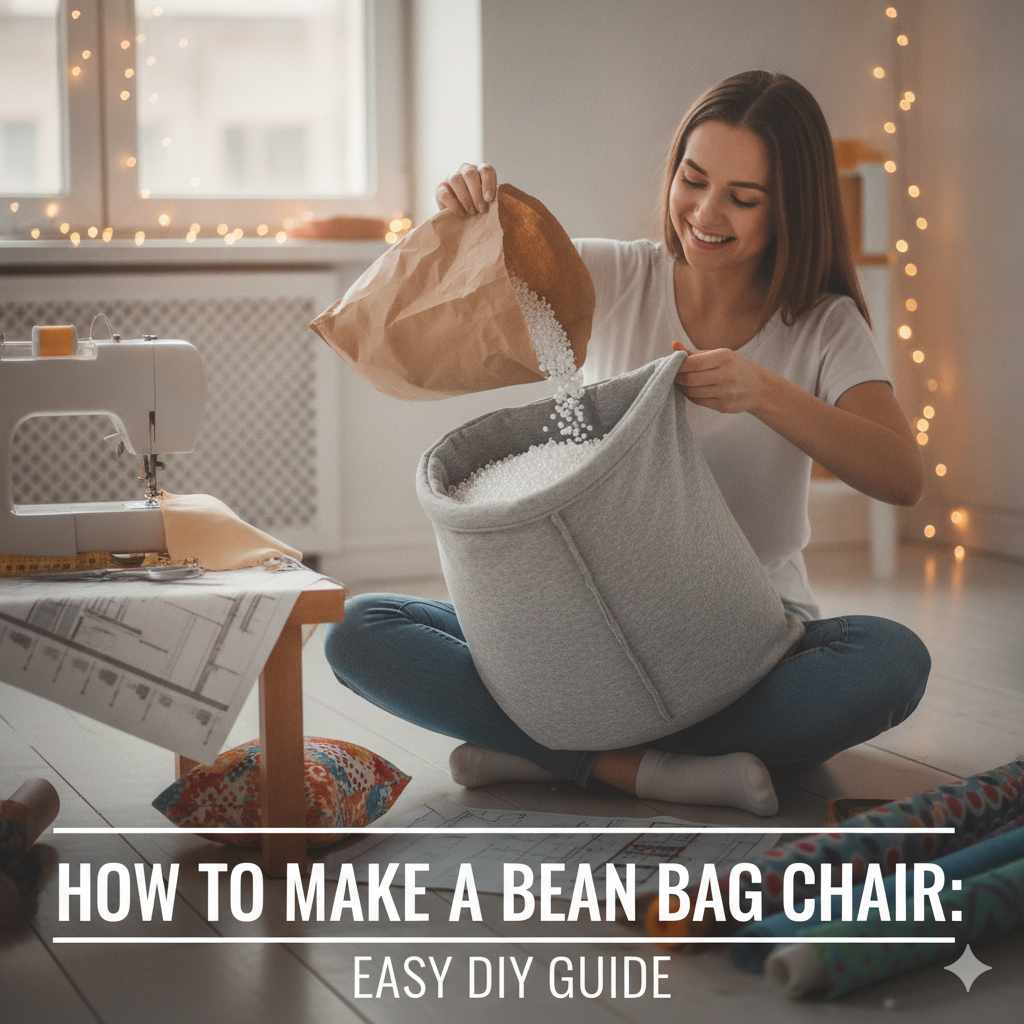
Creating a DIY bean bag chair involves selecting durable fabric, cutting out large circles or shapes, sewing them together with a strong seam, and filling it with the right kind of stuffing. It’s a rewarding process that results in unique, comfortable seating perfect for any room.
What is a Bean Bag Chair?
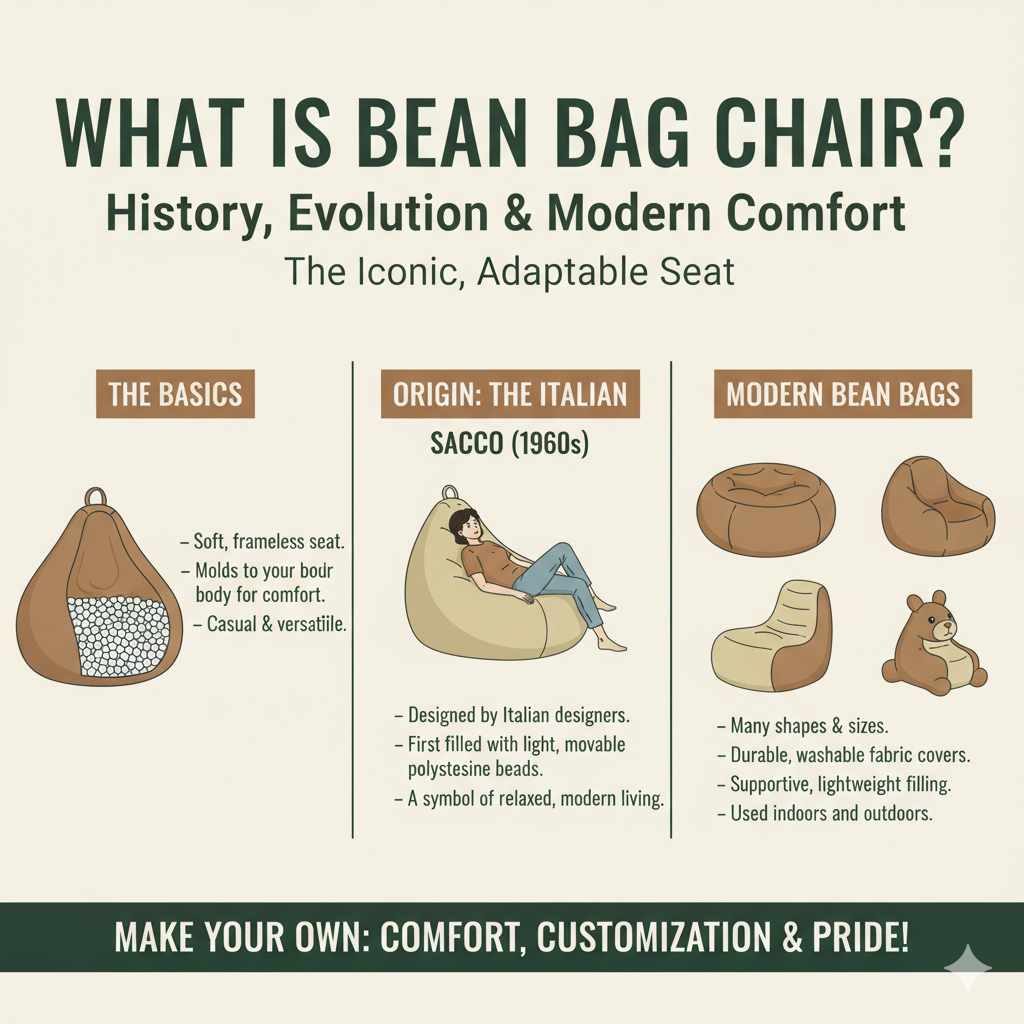
A bean bag chair is a soft seat. It has no rigid frame. Instead, it’s filled with small, flexible material.
This material lets it mold to the sitter’s body. It’s super comfortable. It’s also very casual.
People use them for relaxing. They are popular in living rooms. They are also found in kids’ rooms.
They can even be used outdoors. Modern bean bags use special filling. This filling makes them supportive.
They are not just lumpy sacks anymore.
The idea for bean bag chairs started in Italy. It was in the 1960s. Several designers worked on the concept.
The first popular one was called the “Sacco”. It was a pear-shaped bag. It was filled with polystyrene beads.
These beads were light. They moved easily. This made the chair very adaptable.
It quickly became a symbol of relaxed living. It was modern and fun. It changed how people thought about furniture.
Today, bean bag chairs come in many shapes. Some are round. Others are more like traditional chairs.
Some are even shaped like animals. They can be big enough for two people. They can also be small for a child.
The outer cover is usually fabric. This fabric needs to be strong. It must also be washable.
The filling is key to comfort. It needs to be lightweight but supportive. We will explore how to make one yourself.
My First Bean Bag Adventure
I remember the first time I decided to make a bean bag chair. It was for my nephew’s birthday. He was about seven.
He loved lounging around. I thought a giant bean bag would be perfect. I went to the fabric store.
I saw all these colorful, fuzzy fabrics. I picked out a bright blue one. It felt so soft and plush.
I also got a strong canvas for the inside liner.
Cutting out those giant circles felt daunting. I had never sewn something so big. My sewing machine seemed tiny for the task.
I worried about the seams holding up. What if the filling spilled out? That would be a huge mess.
I could picture tiny beads everywhere. I spent hours sewing the liner. Then I carefully sewed the outer cover.
I triple-checked every stitch.
Filling it was the hardest part. I bought bags and bags of polystyrene beads. Pouring them in was slow.
They seemed to get everywhere. It took a long time. When it was finally full, it was huge!
My nephew loved it. He jumped right on. It cradled him perfectly.
Seeing his happy face made all the work worth it. That first bean bag taught me a lot about patience and strong seams.
Choosing Your Fabric Wisely
Outer Cover Fabric: You need something tough. It should also look good. Canvas, denim, or thick upholstery fabric work well.
For kids’ rooms, consider fun prints. Outdoor bean bags need water-resistant material.
Inner Liner Fabric: This is important. It holds the filling. Use a strong, non-stretchy fabric.
Muslin or a sturdy cotton duck is a good choice. It prevents beads from escaping.
Gathering Your Materials
To make a bean bag chair, you need a few things. First, you need fabric. You’ll need two kinds.
One is for the outer cover. The other is for an inner liner. The outer fabric should be strong.
It should also be nice to touch. Think canvas, denim, or a thick upholstery fabric. For the inner liner, use something very strong.
It should also be non-stretchy. Muslin or a strong cotton duck is good. You’ll need a lot of fabric.
Measure carefully.
Next, you need filling. The most common filling is polystyrene beads. You can buy these online or at craft stores.
They are lightweight. They also hold their shape well. You will need a lot of beads.
A large bean bag can take many cubic feet of filling. Some people use shredded foam. This makes a denser, more supportive seat.
It’s also quieter than beads.
You’ll also need a sewing machine. Make sure it can handle thick fabric. You’ll need strong thread.
Polyester thread is a good choice. It’s durable. You’ll also need a zipper.
A strong, long zipper is best. It lets you add or remove filling. Scissors or a rotary cutter are needed for fabric.
A measuring tape is also essential. Don’t forget pins to hold the fabric.
Essential Tools for Your Project
- Fabric: Outer cover fabric and inner liner fabric.
- Filling: Polystyrene beads or shredded foam.
- Zipper: A long, heavy-duty zipper.
- Sewing Machine: Capable of handling thick materials.
- Strong Thread: Polyester or heavy-duty cotton thread.
- Scissors/Rotary Cutter: For cutting fabric accurately.
- Measuring Tape: For precise measurements.
- Pins: To hold fabric pieces together.
- Chalk or Fabric Marker: For marking cutting lines.
Designing Your Bean Bag Shape
Bean bag chairs can be many shapes. The classic shape is a big circle. It’s simple to cut and sew.
You can make it flat. Or you can give it some depth. This depth makes it more chair-like.
Another popular shape is a teardrop or pear shape. This shape is good for leaning back. It gives more support to your back.
Think about how you want to use the bean bag. Do you want to lounge flat? A simple round shape works well.
Do you want to sit up and read? A pear shape or a chair-like shape is better. You can also make it a long rectangle.
This can be used as a floor cushion. Or it can be a lounging pillow.
For a simple round bean bag, you will cut two large circles. You will also cut a long strip of fabric. This strip forms the sides.
The width of the strip determines the depth of the bean bag. For a pear shape, you’ll cut two pear shapes. You’ll also cut a strip for the middle.
The exact pattern depends on the design. Many free patterns are available online. You can also draw your own.
Just remember to add seam allowance.
Popular Bean Bag Shapes
Round: Classic, simple, and versatile. Great for lounging.
Pear/Teardrop: Offers back support for sitting upright. Ideal for reading or watching TV.
Square/Rectangular: Can be used as a floor cushion or a large pillow.
Modular: Some designs have multiple sections that can be rearranged.
Step-by-Step: Making the Inner Liner
First, let’s make the inner liner. This is the bag that holds the filling. It needs to be strong.
Use your sturdy, non-stretchy fabric for this. Measure and cut your fabric pieces. For a simple round bean bag, you need two large circles.
The size depends on how big you want it. A 4-foot diameter is common for adults.
You will also need a long strip for the sides. The length of this strip is the circumference of your circles. The circumference is pi times the diameter.
So, for a 4-foot diameter circle, you need about 12.5 feet of fabric for the sides. The width of this strip is your desired depth. Let’s say 10 inches wide.
Make sure to add seam allowance to all measurements.
Now, sew the short ends of the side strip together. This forms a loop. Then, pin one edge of this loop to the edge of one circle.
Sew them together with a strong seam. Use a long stitch length. A double stitch or a serged edge is even better.
This makes it very strong. Repeat with the other circle on the other end of the side strip. You now have a basic bag shape.
Leave an opening. This is where the zipper will go.
Inner Liner Construction Tips
Seam Strength: Use a reinforced stitch. A double stitch or a French seam is ideal. This prevents beads from escaping.
Zipper Placement: Install the zipper along one of the side seams. Ensure it’s long enough for easy filling.
Smooth Curves: When sewing the circles to the side strip, ease the fabric. Clip curves if needed to help them lay flat.
Installing the Zipper
The zipper is important. It lets you add or remove filling. It also allows for washing the outer cover.
Install the zipper in the inner liner first. This is usually done along one of the side seams. Cut a slit in the seam allowance.
Then, carefully sew the zipper in place. Follow your sewing machine’s instructions for zipper insertion. Make sure it’s very secure.
If you are using a very long zipper, you might want to use two. This can make it easier to handle. Or, you can use a heavy-duty zipper.
These are made for upholstery. They are tougher. Check that the zipper moves smoothly.
It should open and close without snagging. This is crucial for adding the filling later.
For the outer cover, you’ll install the zipper similarly. You might want the zipper to be a design feature. You can use a contrasting color.
Or you can hide it neatly. The zipper on the outer cover is for removing it for washing. Make sure it’s long enough.
This makes taking it off and putting it back on easier.
Zipper Installation Do’s and Don’ts
Do: Use a heavy-duty zipper. Consider a zipper at least 36 inches long for easy filling.
Don’t: Use a thin, plastic zipper. It will likely break under pressure.
Do: Reinforce the ends of the zipper with extra stitching.
Don’t: Rush the zipper installation. Take your time for a clean finish.
Step-by-Step: Making the Outer Cover
Now for the outer cover. This is the visible part. Use your decorative and durable fabric.
The process is similar to the inner liner. Cut out your shapes. If you are making a round bean bag, cut two large circles.
Cut a long side strip. The dimensions should match your inner liner. Remember to add a seam allowance.
A 1/2 inch or 5/8 inch seam allowance is good.
Pin the side strip to one of the circles. Sew them together. Then, attach the other circle to the other end of the side strip.
You will now have a shell. Leave an opening for the zipper. This opening should be large enough.
It needs to fit your zipper. You can install the zipper along a straight side seam. Or you can put it in the middle of a circle.
Ensure the zipper is very strong. It will be used often.
Sew the remaining parts of the seams. Make sure all seams are very strong. You can sew over them twice.
This gives extra durability. A strong seam is critical for bean bag chairs. They get a lot of stress.
Check that all edges are neat. Trim any excess threads.
Outer Cover Design Ideas
- Color Blocking: Use different colored panels for a modern look.
- Piping: Add a decorative cord along the seams for a finished edge.
- Embroidery: Personalize the cover with a name or design.
- Appliqué: Sew on fabric shapes for a playful touch.
Filling Your Bean Bag Chair
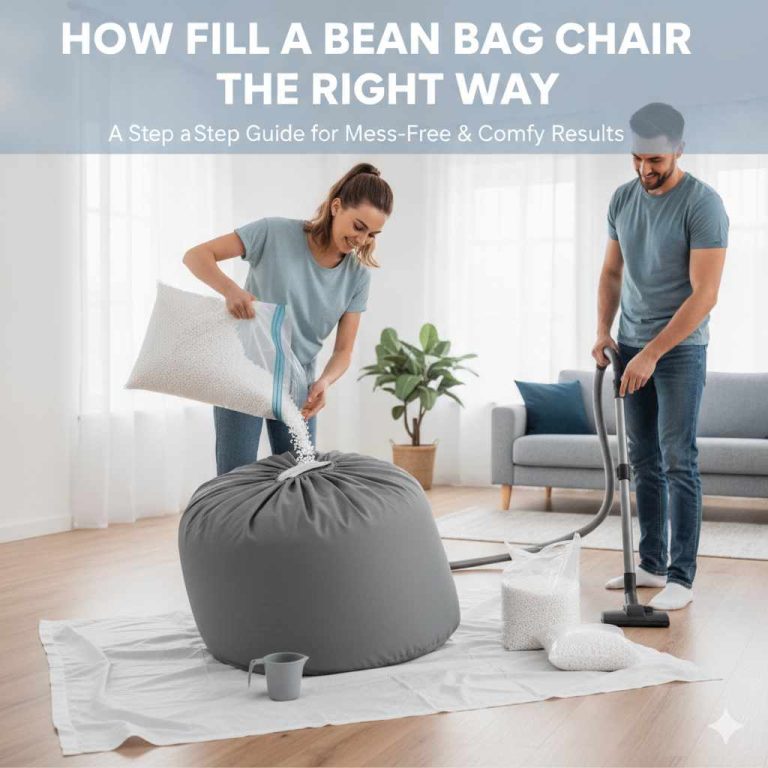
This is the exciting part! Once both the inner liner and outer cover are ready, it’s time to fill them. Put the inner liner bag flat on the floor.
Open the zipper. Start pouring in the polystyrene beads. Do this slowly and carefully.
It’s best to have a helper. One person can pour. The other can help guide the beads.
Fill the liner until it’s mostly full. It should feel firm but still squishy. You don’t want it rock hard.
It should be comfortable to sink into. It’s better to slightly underfill it at first. You can always add more beads later.
If you overfill it, it might be too stiff.
Once the liner is filled, close its zipper. Then, place the filled liner inside the outer cover. Close the outer cover’s zipper.
Now your bean bag chair is ready! Test it out. See how it feels.
If it’s too soft, you can open the inner liner and add more beads. If it’s too hard, you can remove some.
Filling Best Practices
Ventilation: Fill in a well-ventilated area. Polystyrene dust can be an irritant.
Tools: Use a funnel or a plastic bottle with the bottom cut off to direct beads into the liner.
Level: Try to fill it evenly for balanced comfort.
Future Adjustments: Keep some extra beads on hand for topping up later.
Real-World Context: Where Bean Bags Shine
Bean bag chairs are incredibly versatile. They fit into many parts of a home. In a family room, they are perfect for kids.
They offer a soft spot for playing games or watching movies. They can be easily moved. This is great for rearranging furniture.
They also make a nice addition to a teen’s bedroom. They offer a casual place to hang out with friends.
In a college dorm room, bean bags are a lifesaver. Space is often limited. A bean bag offers comfortable seating without taking up much room.
It can be easily stored away if needed. They are also popular in playrooms. They provide a safe place for young children to sit.
The soft material reduces the risk of bumps and bruises.
Some people use them in home offices. They offer a way to take a quick break. You can lounge comfortably while reading or thinking.
For basements or game rooms, they are ideal. They add to the relaxed atmosphere. They are also great for movie rooms.
Everyone can get comfortable.
Bean Bag Placement Ideas
- Living Room: For casual lounging and extra seating.
- Kids’ Bedroom/Playroom: A fun and safe seating option.
- Teen Lounge Area: Perfect for gaming or hanging out with friends.
- Home Office: For quick breaks and comfortable reading.
- Basement/Game Room: Enhances the relaxed, fun atmosphere.
- Reading Nook: Create a cozy spot for a quiet afternoon.
What This Means for You: When is it Normal?
Seeing your bean bag chair settle over time is normal. The filling, especially polystyrene beads, will compress. This is why you might need to add more filling now and then.
If the chair becomes too flat, it’s time for a top-up. This is a sign of a well-loved bean bag.
It’s also normal for the fabric to show some wear. Depending on the fabric and how it’s used, it might get a little faded. Or it might show slight pilling.
This is especially true if it gets a lot of direct sunlight. Regular cleaning of the outer cover is also normal. This keeps it looking and smelling fresh.
The sound of the filling shifting is also normal. Polystyrene beads will make a rustling sound. This is part of their charm.
If the chair starts making loud ripping noises, that’s not normal. That could mean a seam is coming apart. Or the filling material itself is breaking down.
Bean Bag Chair: Normal vs. Concerning
Normal: Filling compresses over time. Fabric shows slight wear or fading. Filling makes rustling sounds.
Concerning: Loud ripping sounds from seams. Large tears in the fabric. Mold or mildew growth.
A strong, unusual odor.
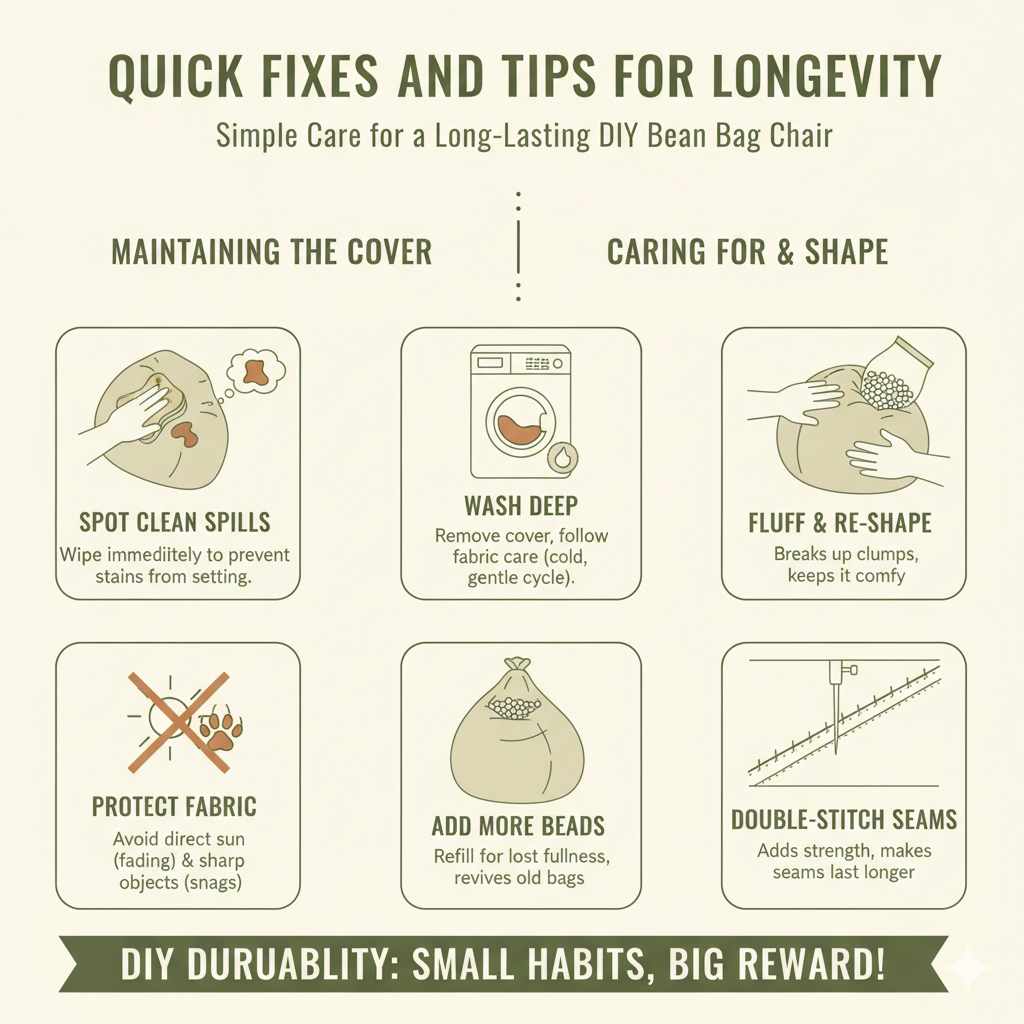
Quick Fixes and Tips for Longevity
To keep your DIY bean bag chair looking great, follow a few tips. For the outer cover, spot clean spills immediately. This prevents stains from setting.
For a deep clean, remove the outer cover. Wash it according to the fabric care instructions. This usually means cold water and a gentle cycle.
If the filling starts to clump, you can fluff the chair. Just push and shape it. If it loses its fullness, add more beads.
You can buy bags of replacement filling. This can revive an old bean bag. Consider where you place your bean bag.
Avoid direct, strong sunlight. This can fade the fabric. Also, keep it away from sharp objects.
If you have pets, their claws can snag the fabric. You might want to keep the bean bag in a pet-free zone. Or choose a very tough fabric.
A double-stitched seam is a great tip. It adds a lot of strength. It will help your bean bag last much longer.
Tips for a Long-Lasting Bean Bag
- Regular Fluffing: Reshape the chair daily to maintain its loft.
- Spot Cleaning: Address spills right away with a damp cloth.
- Washing the Cover: Remove and wash the outer cover periodically.
- Topping Up Filling: Add more beads when the chair feels too flat.
- Sun Protection: Keep the chair out of direct, prolonged sunlight.
- Pet-Proofing: Consider a tougher fabric or placement if pets have sharp claws.
Frequently Asked Questions About DIY Bean Bags
How much filling do I need for a bean bag chair?
The amount of filling depends on the size of your bean bag. A standard adult-sized bean bag chair (around 4 feet in diameter) typically needs between 7 to 10 cubic feet of polystyrene beads. It’s always best to buy a little extra, as you can always add more or store the rest for later.
Can I use regular sewing thread?
For the best durability, especially for the inner liner, it’s recommended to use heavy-duty polyester thread. This thread is stronger and more resistant to stretching than standard cotton thread. This helps ensure your seams hold up under pressure from the filling and use.
What kind of fabric is best for a child’s bean bag?
For children’s bean bags, look for fabrics that are durable, easy to clean, and comfortable. Canvas, denim, or a sturdy cotton blend are good choices for the outer cover. Consider fun patterns or bright colors.
For safety, ensure any stuffing is non-toxic and the seams are very secure.
How do I make the bean bag chair hold its shape better?
To improve shape retention, ensure you use a good quality filling that doesn’t compress too easily. Overfilling slightly can also help, but be careful not to make it too stiff. Using a denser filling like shredded foam or a mix of beads and foam can also provide more structure and support.
Is it hard to sew a bean bag chair?
Sewing a bean bag chair is a moderate-level sewing project. It requires sewing through thick fabrics and handling large pieces. If you have basic sewing skills and a good sewing machine, you can certainly do it.
Taking your time and following steps carefully is key to success.
Can I make a bean bag chair without a zipper?
While it’s possible to make a bean bag without a zipper, it’s not recommended. A zipper on the inner liner is essential for adding or removing filling. A zipper on the outer cover makes it easy to remove for washing.
Without these, filling and cleaning become very difficult processes.
Conclusion
Making your own bean bag chair is a rewarding project. It lets you create a custom piece of furniture. It’s comfortable and fun.
You’ve learned about the materials. You’ve also learned the steps involved. Remember to use strong seams.
And choose durable fabrics. Have fun with your creation! It will be a favorite spot for lounging.
Products related to this article
Sponsored / affiliate links. As an Amazon Associate I earn from qualifying purchases. I may earn additional commission from eligible campaigns.