
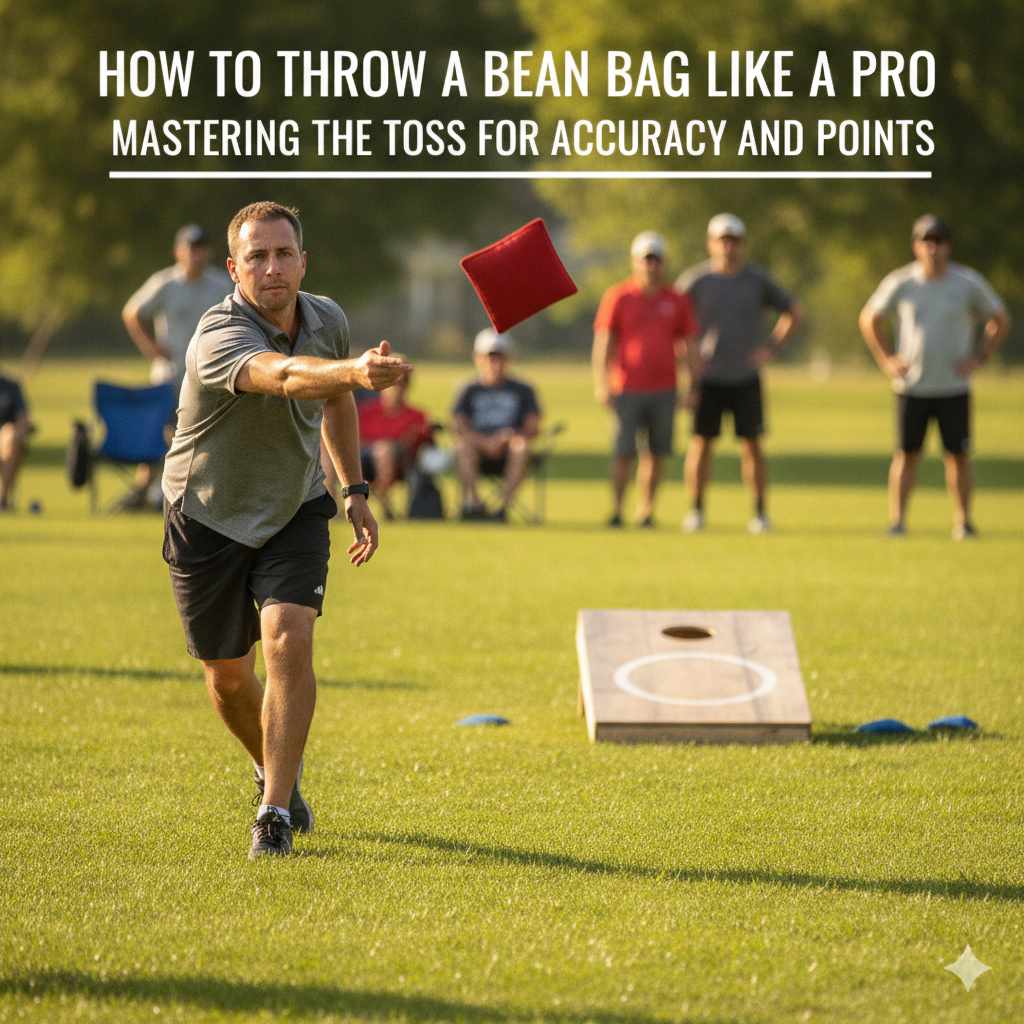
Throwing a bean bag like a pro involves a consistent stance, a smooth arm motion, and a controlled release. Focus on accuracy and power through practice and understanding the physics of the throw, not just brute force. Proper technique can turn good shots into great ones.
Understanding the Bean Bag Toss
What makes a bean bag fly true? It’s a mix of things. You need to stand right.
Your arm needs to move in a smooth way. And the moment you let go is super important. This isn’t about throwing hard.
It’s about throwing smart. Think of it like a gentle push. You want the bag to go where you aim.
It should also land softly. This helps it stay put. Or maybe slide just right.
Why does it matter so much? Because a good throw wins games. It also makes playing more fun.
Nobody likes missing every time. You want to feel in control. You want to see your bag land close.
Or even go in the hole. This all comes from knowing how to throw it. It’s a skill you can build.
With the right steps, you’ll see progress fast. It’s about building muscle memory. It’s about fine-tuning your moves.
In this guide, we’ll cover the best ways to stand. We’ll look at the perfect arm swing. We’ll talk about how to release the bag.
We’ll also cover common slip-ups. You’ll learn how to practice. You’ll get tips to make your throws better.
Get ready to impress your friends. You’ll be tossing like a champ in no time.
My Own Bean Bag Blunders
I remember my first Cornhole tournament. I was so excited! I had played in my backyard a lot.
I thought I was pretty good. But the pressure was on. The crowd was watching.
My first toss went way too high. It sailed over the board. My second toss was too low.
It hit the grass right in front. Panic started to set in. My face felt hot.
My hands felt sweaty.
I was trying too hard to be strong. I was just flinging the bags. I wasn’t thinking about control.
My elbow was all over the place. I would flick my wrist too much. Or not enough.
It was a mess. My partner shot me a worried look. We lost that first game badly.
I felt so disappointed. I knew I could do better. I just didn’t know how.
That day was a wake-up call. I went home and watched videos. I read articles.
I practiced in my yard for hours. I learned that it’s not about being a bodybuilder. It’s about being smooth.
It’s about being steady. It’s about learning the right steps. I started to feel a change.
My throws got more consistent. I began to land them on the board. Sometimes, I even got a good roll.
It felt amazing. This is the journey we’re going on now.
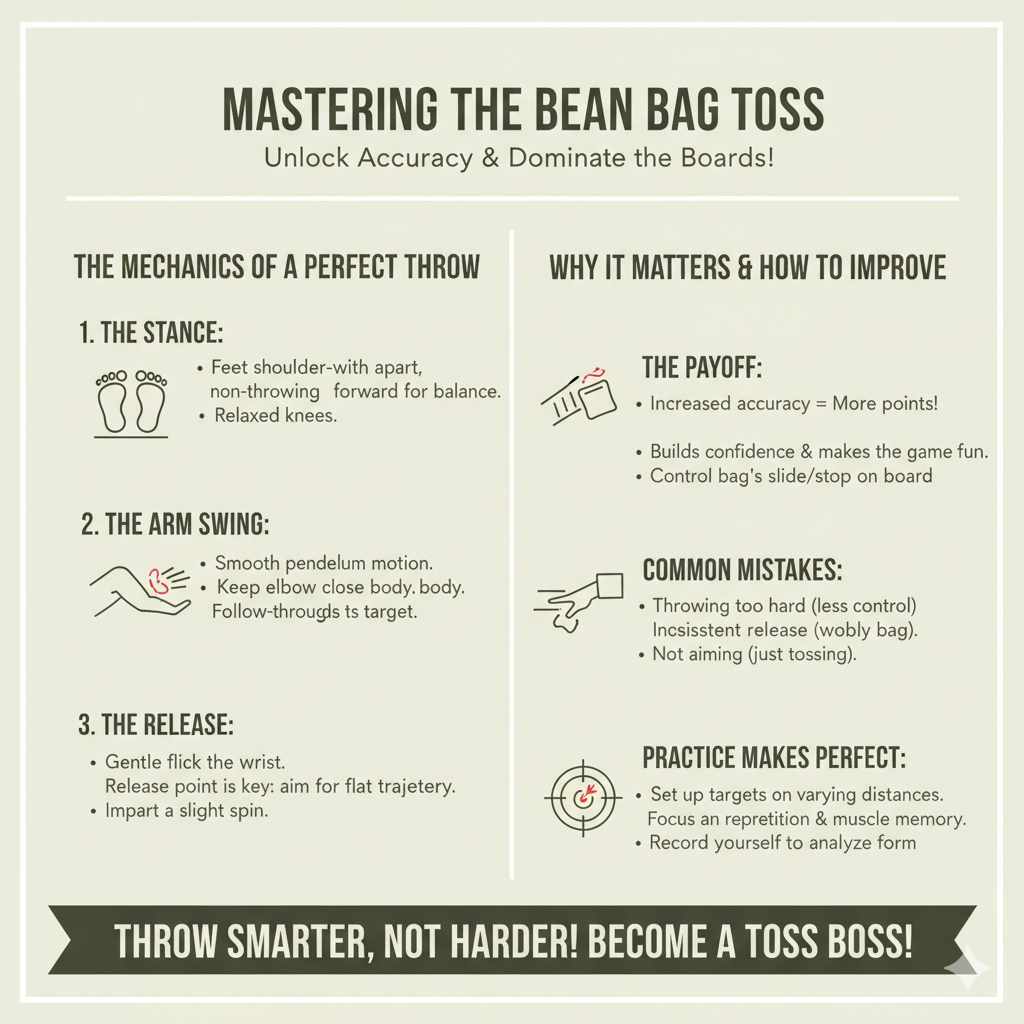
Key Elements of a Great Toss
Stance: Stand firm. Keep your feet even. Don’t lean too far forward.
Be balanced.
Grip: Hold the bag gently. Don’t squeeze too hard. Let it rest in your palm.
Arm Motion: Use a smooth, pendulum swing. Think about a clock’s hand. Your arm goes back, then forward.
Release Point: Let go at the right time. This is key for height. Aim for around eye level.
Follow-Through: Keep your arm moving after release. This helps with accuracy. Your arm should end up pointing at your target.
Finding Your Perfect Stance
Let’s talk about where you stand. This is the first step. It matters a lot.
Think of a house’s foundation. If it’s wobbly, the house isn’t strong. Your stance is the same for your throw.
You need to feel steady. Most people stand with their feet shoulder-width apart. Some like to have one foot slightly ahead.
This can give you a bit more power.
Try this: Stand facing the target. Your feet should be about as wide as your shoulders. If you’re right-handed, your left foot might be a little forward.
If you’re left-handed, your right foot. Don’t lock your knees. Keep them a little bent.
This helps you stay balanced. It also lets you move easily.
Keep your weight mostly on your back foot. As you swing forward, shift your weight. Your front foot will then bear more weight.
This natural shift helps your throw. It adds power. But it also keeps things smooth.
Don’t lean over too much. Try to keep your upper body fairly upright. A relaxed posture is best.
Avoid tension. Tension makes your throw jerky.
Most people miss this: You don’t need to be right on the line. Most games have a set distance. Learn that distance.
Stand a comfortable distance from it. Some pros stand a bit further back. This gives them more time to aim.
Others prefer to be closer. Find what feels right for you. Your goal is to feel stable and ready.
Not rushed or off-balance.
Stance Check: Quick Guide
Feet: Shoulder-width apart.
Knees: Slightly bent, not locked.
Weight: Mostly on back foot, shift forward.
Posture: Upright but relaxed, avoid leaning too much.
Comfort: Stand at a distance that feels natural.
The Art of the Bean Bag Grip
How you hold the bean bag matters. It affects your release. It affects your spin.
And it affects how the bag flies. You don’t want to grip it too tightly. Imagine crushing a soda can.
That’s too much. If you squeeze too hard, your hand gets tense. This makes your throw stiff.
A good grip is usually a relaxed one. For most people, this means letting the bag rest in your palm. Your fingers should be curled around it.
But not squeezing. Think of holding a baby bird. You want to be gentle.
You want it to feel secure. But not crushed.
Some players like to use a few fingers. Others use their whole hand. There are different ways to hold it.
You might see players using a “four-finger” grip. This means four fingers are on top of the bag. Your thumb is on the bottom.
This can give you good control. It often leads to a straighter throw.
Another common way is a “three-finger” grip. Three fingers are on top. Your thumb and pinky might be on the side.
This can allow for more spin. Spin can make the bag curve. It can also make it land softer.
Experiment to find what feels best for you. What feels natural in your hand? What lets you feel the bag?
The key is consistency. Once you find a grip you like, stick with it. Use that same grip every single time.
This helps build muscle memory. It makes your throws more predictable. If your grip changes each time, your throw will too.
It’s like a painter using a different brush for each stroke. You want the same brush for the same effect.
Mastering the Arm Swing
The arm swing is the engine of your throw. It needs to be smooth. It needs to be fluid.
Think of a pendulum on a clock. It swings back and forth. It has a steady rhythm.
Your arm should do the same. It swings back, then it swings forward.
Start with the bag at rest. Let it hang by your side. Then, bring it back.
Your arm should move in a controlled arc. Your elbow should bend. Your arm should go back until it’s behind you.
But don’t force it. Keep it comfortable. Your shoulder is the pivot point.
As you bring your arm forward, it should be like a whip. But a gentle whip. The motion starts low.
It goes up in a smooth arc. Your elbow leads the way. Your forearm and wrist follow.
The bag stays close to your body. This keeps your throw controlled. It prevents wild swings.
Many people make a mistake here. They bend their elbow too much. Or they don’t bend it enough.
They might throw like they’re batting a baseball. That’s too jerky. Or they might just push the bag forward.
That lacks power. The pendulum motion is the sweet spot. It balances power and control.
What’s often overlooked is the follow-through. After you let go of the bag, your arm keeps moving. It should continue in the direction of your target.
This is super important for accuracy. If you stop your arm motion too soon, your throw can go off course. Your arm should end up pointing towards where you want the bag to go.
It’s like finishing a dance move.
Arm Swing Steps
Backswing: Smooth arc backwards. Comfortable range.
Forward Swing: Elbow leads. Fluid motion upwards.
Close to Body: Keep arm motion contained.
Follow-Through: Arm continues toward target after release.
Rhythm: Find a steady, consistent pace.
The Crucial Moment: Releasing the Bag
The release is everything. It’s the split second when the bag leaves your hand. This determines the height and the trajectory.
It’s where all your practice pays off. Imagine juggling. The moment you toss one ball up is critical.
The bean bag release is like that.
Most pros aim for a release point around eye level. Some might release slightly higher or lower. This depends on the type of throw.
But eye level is a good starting point. If you release too low, the bag will likely hit the ground. Or it won’t get enough loft.
If you release too high, it will go too far up. It might overshoot the target.
How do you know when to release? It’s a feeling. As your arm swings forward, the bag starts to feel like it’s coming off your hand.
You let go with a gentle flick. It’s not a hard push. It’s more of a smooth separation.
Your fingers uncurl. The bag glides out.
Spin is important here too. If you want a straighter shot, you might have less spin. Your hand will come through more cleanly.
If you want a bag that slides or curves, you might add a little extra spin with your fingers. This is often done with your index finger or middle finger. As the bag leaves your hand, you give it a little twist.
What trips people up? Releasing too late. Or too early.
If you hold on too long, you’ll push the bag. If you let go too soon, it will fly erratically. It takes practice to get this timing right.
Focus on feeling the bag in your hand. Feel when it’s ready to go. Don’t rush it.
Think about your target. Are you trying to sink the bag in the hole? Or just land it on the board?
For the hole, you might want a slightly higher arc. For landing on the board, a flatter arc might be better. Adjust your release point slightly.
But always try to be consistent.
Release Point Tips
Ideal Height: Around eye level.
Motion: Gentle, smooth separation.
Timing: Let go as the bag naturally comes off your hand.
Spin Control: Adjust with finger flick for desired effect.
Consistency: Aim for the same release point every time.
Common Mistakes and How to Avoid Them
We all make mistakes. It’s part of learning. But knowing what to watch out for helps a lot.
One big mistake is throwing too hard. People think more power means better throws. But it often means less control.
You end up swinging wildly. The bag goes everywhere.
Another common error is a jerky arm motion. Instead of a smooth swing, it’s a jab or a flick. This makes the bag unstable.
It won’t fly straight. Remember that pendulum motion. Keep it smooth and steady.
Avoid any sudden movements. Your arm should feel like one piece.
Not following through is another big one. You throw the bag, and then you stop your arm. This kills your accuracy.
Your body naturally wants to keep moving. Let your arm follow that motion. It guides the bag.
It ensures a clean release.
People also often forget about their stance. They might shift their weight too much. Or they lean too far forward.
This makes them lose balance. If you’re off-balance, your throw will be off. Focus on staying grounded.
Keep your weight distribution stable.
What about the grip? A death grip is terrible. It makes your hand stiff.
You can’t get a good feel for the bag. Loosen up. Hold it gently.
Let your fingers feel the texture. This connection is important for control.
Finally, people tend to rush. They want to throw quickly. But rushing leads to sloppy technique.
Take your time. Set up your stance. Get your grip right.
Make your swing. Release. Follow through.
Each step is important. Slow down and focus on doing each part well.
Mistake Watchlist
Too Hard: Leads to loss of control.
Jerky Motion: Destroys accuracy.
No Follow-Through: Affects trajectory and precision.
Unstable Stance: Throws off balance and aim.
Tight Grip: Causes stiffness and poor release.
Rushing: Results in sloppy, inconsistent throws.
Real-World Scenarios and Practice
Imagine you’re at a backyard barbecue. The Cornhole boards are set up. Friends are playing.
You grab a bag. How do you approach it? First, find your spot.
Stand where you feel comfortable. You know your stance. You know your grip.
Take a deep breath.
You’re not trying to win the Super Bowl. You’re just having fun. But you still want to make a good throw.
So, you go through the motions. Backswing. Smooth forward swing.
Release at eye level. Follow through. The bag sails.
It lands on the board. Maybe it slides a little. Nice!
What if you’re playing in a tournament? The pressure is higher. The stakes are different.
This is where practice really shines. In a tournament, you see different boards. Some are faster.
Some are slower. The bags might be older or newer. You learn to adapt.
But the core technique stays the same.
I once played on a very fast board. My usual gentle toss sent the bags flying off the back. I had to adjust my release.
I threw with less power. I aimed a little lower. It took a few throws to get it right.
But because I understood the basics, I could adapt. I didn’t panic.
Practice doesn’t always mean playing a full game. You can practice your swing. You can practice your release.
Set up one board. Throw ten bags. Focus on one thing each time.
Today, focus on your stance. Tomorrow, focus on your follow-through. Even ten minutes a day makes a difference.
Try different types of throws. The “slider” is a low, fast throw that slides. The “floater” is a higher, slower throw that drops.
Learning these variations adds a new layer. But always master the basic, consistent throw first. That’s your foundation.
Practice Drills
Consistency Count: Throw 10 bags. Count how many land on the board. Aim to increase that number.
Release Focus: Throw 5 bags. Focus only on your release point. Is it the same each time?
Stance Stability: Throw 5 bags. Focus only on your stance and weight transfer. Are you balanced?
Follow-Through Fanatic: Throw 5 bags. Focus on your arm’s follow-through. Does it point to the target?
Blind Toss: Throw 3 bags with your eyes closed (after aiming). Feel the motion.
What This Means For Your Game
So, what’s the takeaway from all this? It means you can get better. You don’t have to accept wild throws.
You can learn to control your toss. It’s not magic. It’s technique.
It’s practice.
When is your throw normal? When it’s consistent. When it lands where you expect it to.
Even if you miss the board sometimes, if your throw felt the same each time, that’s good. It means your technique is steady. You can then make small adjustments.
When should you worry? If your throws are all over the place. If one goes way left, the next way right.
If you feel a lot of pain when you throw. Or if your arm feels very tired. This could mean you’re using the wrong muscles.
Or you’re putting too much strain on yourself.
Simple checks: After a throw, how did it feel? Did it feel natural? Did it feel controlled?
Could you repeat the feeling? If yes, you’re on the right track. If no, maybe re-watch a video or think about your technique.
Understanding these mechanics can transform your game. You’ll feel more confident. Your teammates will trust you more.
And most importantly, you’ll have more fun. Because when you can reliably make good shots, the game becomes more engaging. You’re part of the action, not just hoping for lucky breaks.
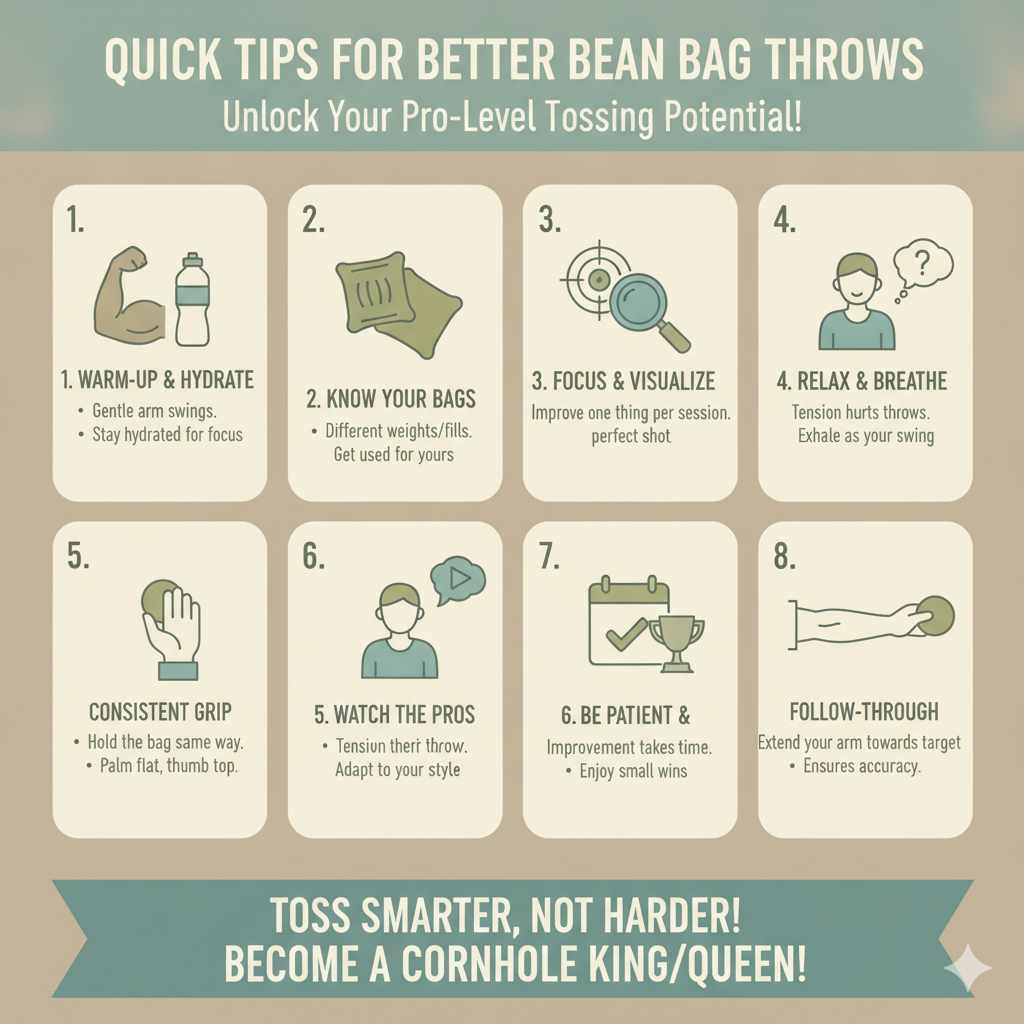
Quick Tips for Better Bean Bag Throws
Here are some simple things to remember. They can help a lot. Keep them in mind every time you throw.
- Warm-up: Do a few gentle arm swings before you start.
- Hydration: Drink water. Being dehydrated can affect focus.
- Know Your Bags: Different bags have different weights and feels. Get used to yours.
- Focus on One Thing: Don’t try to fix everything at once. Pick one aspect to improve per practice session.
- Watch the Pros: See how they stand, grip, and swing. But remember to adapt it to what works for you.
- Visualize: Before you throw, picture the bag landing exactly where you want it.
- Relax: Tension is the enemy of a good throw. Breathe out as you swing.
- Be Patient: Improvement takes time. Celebrate small wins.
Fast Tips Summary
Warm Up: Essential for preventing strain.
Stay Hydrated: Affects mental and physical performance.
Bag Feel: Understand your equipment.
Single Focus: Don’t overwhelm yourself.
Learn by Watching: Observe and adapt.
Visualize Success: Mental rehearsal helps.
Relax Your Body: Crucial for smooth motion.
Patience Pays Off: Skill develops over time.
Frequently Asked Questions
What is the best way to hold a bean bag?
The best way is usually a relaxed grip. Let the bag rest in your palm with your fingers curled around it, but not squeezing. Experiment with four-finger or three-finger grips to see what feels most comfortable and gives you the best control.
How high should I aim my bean bag throw?
Aim for a release point around eye level. This usually results in a good arc that lands the bag on the board or in the hole without going too far. Adjust slightly based on how you want the bag to land – a bit higher for a drop, a bit lower for a slide.
Is it better to throw hard or soft?
It’s better to throw with controlled power, not just raw force. A smooth, consistent swing is more important than throwing as hard as you can. Too much force leads to loss of control.
Focus on technique and a fluid motion.
How do I make my bean bag throw more accurate?
Accuracy comes from consistency. Focus on a stable stance, a consistent grip, a smooth arm swing, and a repeatable release point. Practicing regularly and concentrating on each element of the throw will improve your accuracy over time.
Can spin on a bean bag help?
Yes, spin can help. A little spin can make the bean bag fly straighter and land softer, sometimes allowing it to “stick” on the board. Too much spin can make it curve.
Most players learn to add a slight spin with their fingers at the release point.
How far should I stand from the target?
This depends on the game, but most games have a set distance (like Cornhole). Stand at a comfortable distance from that line. You should feel stable and have enough room for your arm swing without feeling rushed.
Experiment to find your sweet spot.
Final Thoughts on Your Bean Bag Game
So there you have it! Throwing a bean bag well is a skill. It’s built on simple, repeatable steps.
From your stance to your follow-through, each part plays a role. Remember to keep it smooth, controlled, and consistent. Practice is your best friend here.
Be patient with yourself.
With focus and practice, you’ll soon be making those satisfying tosses. You’ll be a force to reckon with at your next game. Enjoy the process and have fun out there!


