How to Make a Throne Chair: Step-by-Step DIY Guide
Building a throne chair is more than just a woodworking project, it’s a chance to create a piece of furniture that feels grand, impressive, and personal. Whether you want a throne chair for a themed event, your living room, or a photo studio, crafting your own can be both rewarding and challenging.
Many people are surprised to learn that with patience, basic tools, and careful planning, you can make a throne chair that stands out. This guide will show you step by step how to make a throne chair, what to consider before you start, and how to add your unique style.
Understanding The Throne Chair: What Makes It Special?
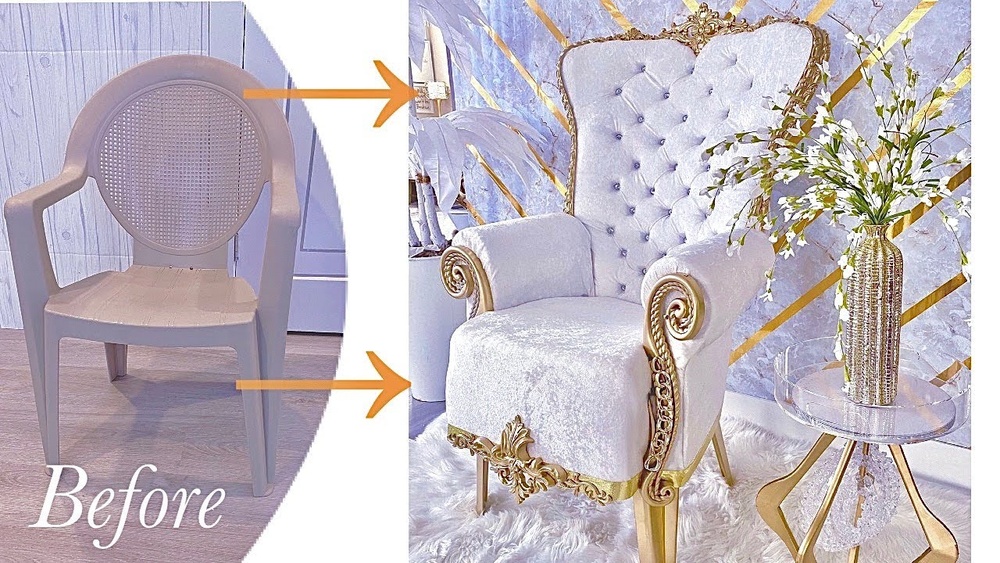
A throne chair is not just a large seat. It is designed to look regal and imposing, often with tall backs, rich fabrics, and detailed carvings or decorations. Traditionally, thrones were used by royalty or important leaders, so their design often included symbols of power and status.
Today, throne chairs are used at weddings, in photography studios, and as standout pieces in homes. Their main features usually include:
- High backrest: Often taller than a normal chair, sometimes with a curved or pointed top.
- Wide seat: For comfort and presence.
- Armrests: Often thick or detailed.
- Decorative elements: Such as carvings, tufted upholstery, or gold/silver accents.
Knowing these features will help you plan your design and materials.
Planning Your Throne Chair Project
Before you buy any wood or fabric, take time to plan every detail. A well-thought-out plan will save money, time, and stress.
Decide On Style And Size
Ask yourself:
- Where will the chair be used? (Home, event, studio)
- Who will use it? (Child, adult, multiple people)
- What look do you want? (Classic, modern, fantasy, rustic)
Measure the space where the chair will go. A throne chair is usually 50, 70 inches tall, 30, 36 inches wide, and 28, 34 inches deep. Adjust these numbers for your needs.
Make A Simple Sketch
Draw your idea on paper. Mark the height, width, and depth. Add notes about shapes, decorations, and colors. This doesn’t have to be artistic, just clear enough for you to follow.
Gather Materials And Tools
The main supplies for a throne chair are:
- Wood: For the frame (pine, oak, plywood are common)
- Foam: For seat and back padding
- Fabric: Velvet, leather, or heavy upholstery fabric
- Batting: To soften corners and edges
- Decorative trim: Nails, buttons, gold leaf, or carvings (optional)
- Paint or stain: For wood finish
Essential tools include:
- Saw (circular, miter, or hand saw)
- Drill and bits
- Screws and wood glue
- Staple gun
- Measuring tape and ruler
- Sandpaper
- Hammer
If you plan to carve wood or add complex shapes, you may need extra tools.
Cost And Time Estimates
Building a throne chair can cost between $150 and $500, depending on materials and design. Expect to spend 15, 30 hours on your first build, spread across several days.
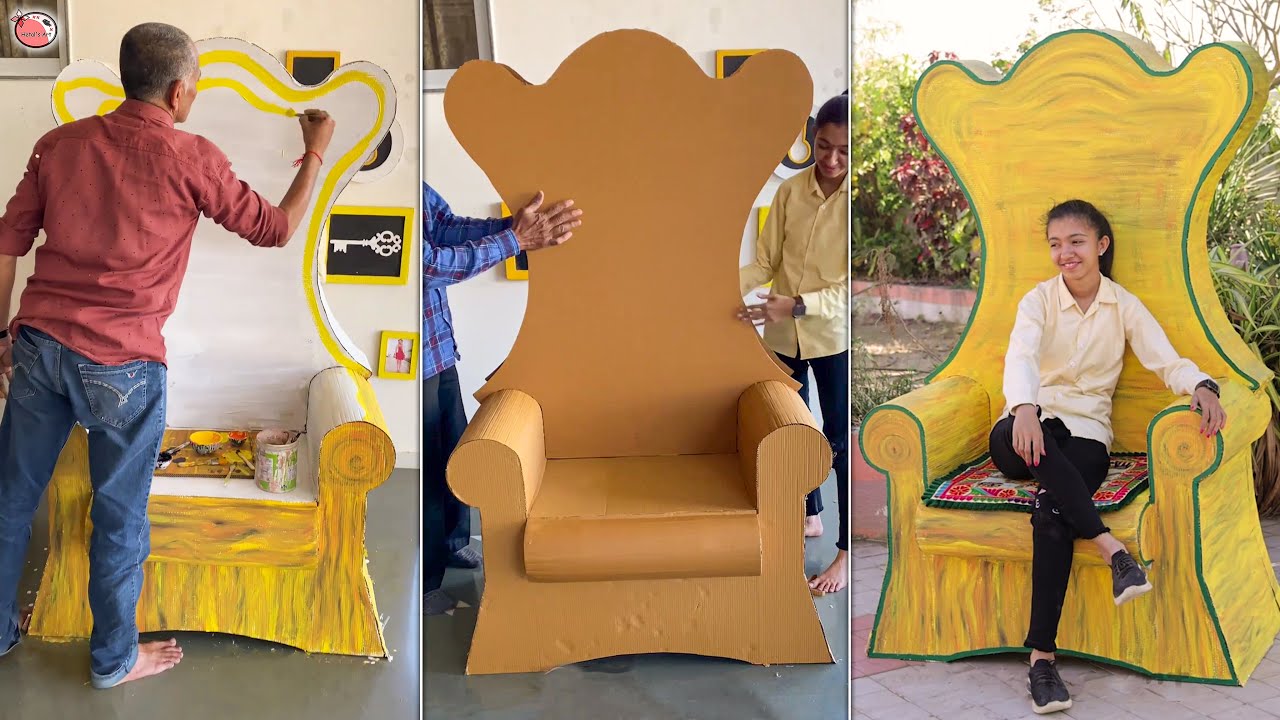
Credit: www.youtube.com
Step-by-step: Building The Throne Chair Frame
The frame is the chair’s backbone. It must be strong enough to hold weight and support tall features.
Build The Base
- Cut the seat base from 3/4-inch plywood. Typical size is 24×24 inches.
- Build four legs from solid wood (about 18, 20 inches tall).
- Attach legs to the corners of the base with screws and wood glue. Use angle brackets for extra strength if needed.
- Add support beams under the seat, connecting each pair of legs.
Construct The Backrest
- Cut two tall side pieces for the backrest (at least 40, 50 inches tall).
- Attach these vertically to the back corners of the seat base.
- Connect the tops of these pieces with a horizontal wood beam.
- If your design has a curved or pointed top, cut this shape from plywood and attach it.
Add Armrests
- Cut two armrest pieces (28, 32 inches long).
- Attach one end to the seat base and the other to the backrest posts, about 8 inches above the seat.
- Add vertical support under each armrest for stability.
Secure All Joints
Check every connection. Use extra screws, glue, and brackets where needed. The frame should not wobble or flex.
Example:
When I built my first throne chair, I realized that the tall back can make the chair tip backward if the seat is too small or the legs are too short. Adding extra depth to the seat base (up to 28 inches) and slightly angling the backrest forward helped keep the chair stable.
Shaping And Smoothing: Making It Comfortable
A throne chair should feel as good as it looks. Now is the time to add curves, smooth edges, and make the frame ready for padding.
Round Sharp Edges
Use a sander or sandpaper to round off the seat, armrests, and top of the backrest. This makes the chair safer and more comfortable.
Add Extra Features
If you want carved details, now is the best time. Simple designs can be made with a jigsaw or wood carving tools. For beginners, glue-on trim or wood appliqués can give a similar look with less effort.
Test The Frame
Sit on the chair and test its strength. If any part creaks or moves, reinforce it before moving on.

Credit: www.youtube.com
Upholstering: Adding Comfort And Style
Upholstery is where your throne chair comes alive. The right fabric and padding will make your chair both beautiful and comfortable.
Padding The Seat And Back
- Cut foam to fit the seat and backrest. Use 2, 4 inches thick foam for the seat, and 1, 2 inches for the back.
- Place batting over the foam to soften the edges.
- Attach foam and batting to the wood with spray adhesive.
Choosing Fabric
Pick a heavy, durable fabric. Velvet, brocade, and faux leather are popular choices for throne chairs. Choose a color that matches your theme.
Stapling Fabric In Place
- Lay fabric over the padded area. Leave extra fabric on all sides.
- Flip the chair and pull the fabric tight. Staple it underneath the seat and behind the backrest.
- Fold corners neatly. For a smooth look, cut small slits in the fabric at tight curves.
- Trim excess fabric after stapling.
Tufting And Decorative Details
For a classic look, you can add tufted buttons to the backrest. Use a long needle and strong thread to pull buttons through the foam and fabric, then secure them at the back. Decorative nails, gold leaf, or painted accents can be added to the wood parts.
Comparison Of Upholstery Fabrics
Here is a quick comparison of common throne chair fabrics:
| Fabric Type | Pros | Cons |
|---|---|---|
| Velvet | Soft, rich look | Shows stains easily |
| Faux Leather | Durable, easy to clean | Can feel hot, less breathable |
| Brocade | Elegant patterns | Can snag, harder to clean |
Pro Tip: Use a staple gun with a narrow tip for tight corners, this gives a cleaner finish.
Painting And Finishing Touches
Now it’s time to make your throne chair shine.
Sand And Prime
If you want a painted look, first sand all exposed wood. Wipe away dust, then apply a primer. This helps paint stick better and gives a smoother finish.
Painting Or Staining
Use high-quality paint or stain. Gold, silver, or deep colors give a royal look, but you can choose what fits your style. Apply at least two coats, letting each dry fully.
Attach Decorative Trim
Glue or nail trim, appliqués, or decorative nails to the arms, legs, and backrest. For a metallic look, use gold leaf or metallic paint. If you want extra shine, a clear glossy sealant can be sprayed on after painting.
Comparison: Paint Vs. Stain For Throne Chairs
| Finish | Best For | Durability | Look |
|---|---|---|---|
| Paint | Bold, modern designs | Good, but can chip | Bright, smooth |
| Stain | Classic wood look | Very durable | Natural, rich |
Final Assembly
Check all screws and joints again. Attach any separate parts (like the seat cushion) and test the chair for wobbles. Add felt pads to the bottom of the legs to protect your floor.
Personalizing Your Throne Chair
This is where you can let your creativity shine. A throne chair is a personal statement.
- Paint family crests, initials, or symbols on the backrest.
- Add LED lights under the seat for a modern touch.
- Use contrasting fabrics for a bold look.
- Add a removable cushion or pillow for extra comfort.
Example: One reader created a “winter queen” throne by using white faux fur, silver paint, and blue LED lights. This kind of unique style makes the chair truly one-of-a-kind.
Common Mistakes And How To Avoid Them
Many beginners make similar errors when building their first throne chair. Here’s what to watch for:
- Weak frame: If you use thin wood or skip supports, the chair may wobble or break. Use thick, sturdy materials, and test the frame before adding upholstery.
- Poor measurements: Always double-check your sizes, especially for the seat and backrest.
- Messy upholstery: Rushing the stapling can lead to wrinkles or loose fabric. Pull fabric tight and staple slowly.
- Ignoring comfort: Some people focus on looks and forget padding. A hard seat will not be used, no matter how beautiful.
- Overdoing decorations: Too many details can look crowded. Pick one or two standout features.
Safety Tips For Building And Using A Throne Chair
A throne chair is larger and heavier than most chairs, so safety is important.
- Always use safety gear: Goggles, gloves, and a dust mask when cutting or sanding wood.
- Make sure your workspace is clear of clutter.
- Do not overload the chair with heavy objects or more people than it is designed for.
- Anchor tall backrests securely to the seat to prevent tipping.
Throne Chair Vs. Regular Armchair: What’s The Difference?
To better understand what sets a throne chair apart, see this side-by-side comparison:
| Feature | Throne Chair | Regular Armchair |
|---|---|---|
| Height | 50, 70 inches | 36, 42 inches |
| Seat Width | 30, 36 inches | 22, 28 inches |
| Decorations | Carvings, gold leaf, tufting | Minimal, simple |
| Purpose | Statement, ceremonial | Everyday sitting |

Credit: www.youtube.com
Sustainability: Choosing Eco-friendly Materials
If you care about the environment, think about using recycled wood, water-based paints, or natural fabrics. Many people now choose eco-friendly foam and organic cotton. These materials can reduce your throne chair’s environmental impact.
According to the US Environmental Protection Agency, furniture manufacturing is a major source of landfill waste (EPA). Choosing reused or sustainable materials helps minimize waste.
When To Hire A Professional
If you want complex carvings, rare fabrics, or a chair for heavy daily use, hiring a furniture maker may be worth the cost. They have special tools and experience to handle advanced details. On the other hand, making your own is rewarding and allows you to create a piece that reflects your personality.
Frequently Asked Questions
How Much Weight Can A Homemade Throne Chair Support?
A well-built throne chair with a solid wood frame can usually support 250, 300 pounds. For extra strength, add thicker support beams and use hardwood instead of softwood. If you plan to seat more than one person or need a higher weight limit, consult a professional for frame design tips.
What Are Good Alternatives To Expensive Upholstery Fabrics?
Affordable options include canvas, denim, or heavy cotton blends. While they may not look as luxurious as velvet or brocade, they are strong and easy to clean. You can also use fabric remnants or secondhand curtains for unique styles at a lower cost.
Can I Build A Throne Chair Without Power Tools?
It is possible, but much harder. Hand saws, hammers, and screwdrivers will work, but the job takes longer and may not be as precise. For beginners, renting or borrowing a drill and saw can save hours and give a better result.
How Do I Transport A Large Throne Chair?
Throne chairs are bulky. If possible, build the chair in the room where it will stay. If you must move it, remove the seat cushion, backrest, or legs for easier transport. Use blankets to protect the finish, and always lift with two people.
What Is The Best Way To Clean A Throne Chair?
Vacuum fabric regularly to remove dust. Spot-clean stains with mild soap and water (test first in a hidden spot). For wood parts, use a soft cloth and wood cleaner. Avoid harsh chemicals or soaking the chair, as this can damage both wood and upholstery.
Creating a throne chair takes patience, creativity, and a willingness to learn. Each project is a little different, and you’ll make discoveries as you go. In my experience, the most rewarding part is seeing your vision come to life, piece by piece.
With careful planning and attention to detail, you’ll have a throne chair that
Products related to this article
Sponsored / affiliate links. As an Amazon Associate I earn from qualifying purchases. I may earn additional commission from eligible campaigns.