How To Paint A Bookcase
Painting a bookcase is more than a basic DIY upgrade, it’s an opportunity to transform a utilitarian piece into a striking focal point or a harmonious element of your room’s design. With the right approach, even an old, worn-out bookcase can become an elegant centerpiece or a pop of color that defines your space.
Whether you want to restore a classic wooden shelf or modernize a thrift-store find, mastering the art of painting a bookcase can save money, unleash creativity, and ensure a truly custom result.
Yet, not every painted bookcase project leads to a flawless finish. Common mistakes, like peeling paint, visible brush marks, or uneven coverage, can leave DIYers frustrated and wishing they’d called a pro. This comprehensive guide will walk you through the process from start to finish, highlighting professional tips, product comparisons, and real-world examples, so you can achieve a durable, beautiful finish that elevates your space.
Key Takeaways
- Preparation is crucial: Cleaning, sanding, and priming your bookcase are essential steps for a smooth, lasting finish.
- Choosing the right paint and tools: Selecting high-quality materials tailored to your bookcase’s surface type ensures professional results.
- Techniques matter: Proper application, whether brushing, rolling, or spraying, makes a visible difference in the end result.
- Finishing touches: Sealing and curing add durability and protect your hard work for years to come.
- Common pitfalls can be avoided: With careful planning and attention to detail, you can sidestep the most frequent DIY painting mistakes.
Assessing Your Bookcase And Planning The Project
Before opening a paint can, a thorough assessment of your bookcase’s material, condition, and intended look sets the stage for a successful transformation.
Identifying Bookcase Materials
Bookcases are made from a variety of materials, each requiring a specific painting approach:
- Solid wood: Sturdy and sandable, ideal for painting or staining.
- Veneer: A thin wood layer over composite board, requiring gentle sanding and priming.
- Laminate or melamine: Slick, non-porous surfaces that demand specialized primers for paint adhesion.
- Metal: Less common, but needs rust-resistant, metal-appropriate paints and primers.
Understanding your bookcase’s material helps you select compatible primers and paints, reducing the risk of peeling or chipping.
Evaluating Condition And Repairs
Inspect for:
- Cracks or loose joints: Repair with wood glue and clamps.
- Holes, dents, or gouges: Fill with wood filler or putty, then sand smooth.
- Grease, wax, or grime: Clean thoroughly, as paint will not adhere to dirty surfaces.
Addressing these issues upfront not only enhances appearance but also extends the lifespan of your bookcase.
Deciding On Style And Color
Consider:
- Room aesthetics: Do you want your bookcase to blend in or stand out?
- Usage: High-traffic bookcases benefit from darker or satin finishes that hide scuffs.
- Trends vs. timelessness: Vibrant colors can energize a space, while neutrals offer versatility.
A well-chosen color can complement your existing décor or introduce a bold new accent.
Gathering Supplies
Quality materials are essential for professional results. At minimum, you’ll need:
- Screwdriver (for hardware removal)
- Drop cloths or plastic sheeting
- Painter’s tape
- Sandpaper (80, 120, and 220 grit)
- Tack cloth or microfiber cloth
- Quality brushes and/or rollers
- Appropriate primer
- Paint (latex, acrylic, or oil-based)
- Topcoat or sealer (if desired)
- Protective gloves and mask
Pro Tip: Don’t skimp on brushes or rollers, cheap tools often shed bristles or leave streaks, undermining your hard work.
Preparation: Cleaning, Sanding, And Priming
Preparation is where most DIY paint jobs are won or lost. Investing effort here guarantees a smoother, longer-lasting finish.
Cleaning The Surface
Remove all books and objects. Disassemble removable shelves and hardware (hinges, knobs, glass doors) for easier access.
- Vacuum dust from crevices.
- Wash with warm, soapy water or a degreaser (especially for kitchen or thrifted pieces).
- Rinse and allow to fully dry before proceeding.
Any lingering oil, wax, or residue will prevent primer and paint from bonding correctly.
Sanding For A Smooth Finish
Sanding creates a surface for paint to grip and smooths imperfections.
- Start with coarse (80-120 grit) for rough spots or glossy surfaces.
- Follow with fine (220 grit) for an even texture.
- Wipe away dust with a tack cloth between sandings.
For laminate or melamine, sand just enough to dull the sheen without breaking through the surface.
Pro Tip: In my experience, using a sanding block ensures even pressure and avoids gouges, hand sanding is best for corners and details.
Filling Holes And Repairing Damage
After sanding, fill any holes or dings with a quality wood filler. Allow to dry, sand again, and wipe clean.
If your bookcase has deep scratches or damage, repeat this process as needed for a flawless finish.
Taping And Masking
Use painter’s tape to:
- Protect edges you don’t want painted (e.g., glass panels, adjacent walls)
- Create crisp color-blocked designs if desired
Press tape edges firmly to prevent paint bleed.
Priming: The Secret To Durability
Primer evens out color, blocks stains, and provides a reliable base for paint to adhere.
- Bare or stained wood: Use a stain-blocking, shellac-based or oil-based primer.
- Veneer/laminate: Use a bonding primer designed for slick surfaces.
- Previously painted surfaces: A general-purpose latex primer often suffices.
Apply primer in thin, even coats, allowing full drying between layers. Lightly sand after priming for an ultra-smooth finish.
Choosing Paints, Primers, And Tools
The right paint and primer combination is the backbone of a beautiful, resilient bookcase. Understanding your options ensures you achieve both the look and longevity you desire.
Types Of Paint: Pros And Cons
Selecting the best paint depends on material, desired sheen, and durability needs.
| Paint Type | Best For | Pros | Cons |
|---|---|---|---|
| Latex (Water-Based) | Wood, MDF, Veneer | Low odor, easy clean-up, quick dry | Less durable than oil for heavy use |
| Acrylic | Most surfaces | Flexible, fade-resistant, low VOC | May require extra coats for coverage |
| Oil-Based | Wood, Metal | Extremely durable, smooth finish | Strong fumes, slow drying, tough cleanup |
| Chalk Paint | Furniture, Vintage Looks | No sanding/priming (in some cases), matte look | Requires wax or topcoat, less durable alone |
| Spray Paint | Metal, Small Shelves | Even finish, quick application | Overspray risk, limited color range |
Pro Tip: For high-traffic bookcases, oil-based or enamel paints offer superior durability. For most home projects, high-quality acrylic latex is a great balance of ease and performance.
Primer Selection For Material And Paint
Matching your primer to both surface and paint type is essential.
- Wood/veneer: Stain-blocking latex or oil primer
- Laminate: Bonding primer (e.g., Zinsser BIN or Kilz Adhesion)
- Metal: Rust-inhibiting primer
For more on choosing the right product, see Bob Vila’s primer guide.
Choosing Brushes, Rollers, And Sprayers
- Brushes: Angled synthetic brushes for corners and edges; quality bristles prevent streaks.
- Rollers: Small foam rollers for flat panels; minimize stippling.
- Sprayers: Provide ultra-smooth finish but require masking and ventilation.
| Tool | Best For | Finish Quality | Ease of Use |
|---|---|---|---|
| Brush | Edges, Details | High (with quality brush) | Easy |
| Foam Roller | Flat Surfaces | Very smooth | Easy to moderate |
| Sprayer | Large Projects | Professional-level | Moderate to hard |
Pro Tip: For most home projects, a combination of brush (for edges) and mini foam roller (for panels) yields the best results.
Comparing Sheens: Which Finish Is Best?
The paint’s sheen impacts both appearance and cleanability.
- Flat/matte: Hides imperfections, but scuffs easily.
- Eggshell/satin: Low sheen, easier to clean, ideal for bookcases.
- Semi-gloss/gloss: Reflects light, very durable, shows surface flaws.
For bookcases, satin strikes a practical balance between style and resilience.
Painting Techniques And Application: Step-by-step
With your bookcase prepped and materials ready, painting is where your vision comes to life. Proper technique ensures even coverage, sharp lines, and a professional finish.
Setting Up Your Workspace
- Ventilation: Work in a well-ventilated area (open windows, fans).
- Protection: Lay down drop cloths and tape off adjacent surfaces.
- Organization: Arrange all tools and paints within easy reach.
Applying Primer
- Stir primer thoroughly before use.
- Brush into corners and detailed areas first.
- Roll flat panels with a foam roller, using light, even pressure.
- Allow to dry fully (per manufacturer’s instructions).
- Lightly sand with 220-grit sandpaper for smoothness, then wipe clean.
Painting: Brush, Roll, Or Spray
- Start with edges and corners using a quality angled brush.
- Use a foam roller for large, flat surfaces, apply in light, overlapping strokes.
- Feather out edges before paint dries to avoid lap marks.
- Apply multiple thin coats, allowing full drying between each.
Pro Tip: Paint in long, continuous strokes following the grain (for wood) to minimize visible brush marks.
Drying Times And Curing
- Drying time depends on paint type (typically 2, 4 hours for latex, longer for oil-based).
- Wait at least 24 hours before reassembling and placing objects on shelves.
- Full cure (maximum hardness and durability) can take 1, 2 weeks. Avoid heavy use until then.
Troubleshooting Common Issues
- Drips and runs: Sand lightly and touch up with thin coats.
- Bubbles: Usually from over-rolling or painting in humid conditions; sand and repaint.
- Uneven coverage: Multiple thin coats build a solid, even color.
Finishing Touches: Sealing, Hardware, And Styling
Sealing For Durability
Applying a protective topcoat is optional but recommended for high-traffic or kids’ rooms.
- Polycrylic: Water-based, non-yellowing, easy cleanup.
- Polyurethane: Oil-based, extremely durable, but may yellow with age.
- Wax: Used with chalk paint, adds a soft sheen.
Apply topcoat in thin, even layers with a clean brush or foam applicator. Allow to cure fully before heavy use.
Reattaching And Upgrading Hardware
- Clean or replace handles, hinges, and decorative elements.
- Spray paint existing hardware for a fresh look.
- Upgrade with new knobs or pulls for added style.
Small hardware changes can dramatically elevate the finished piece.
Reassembling And Placing Shelves
- Insert shelves only after paint is fully cured to avoid sticking or chipping.
- Adjust shelf heights for your specific storage needs and visual balance.
Styling Your Painted Bookcase
Curate your bookcase with intention:
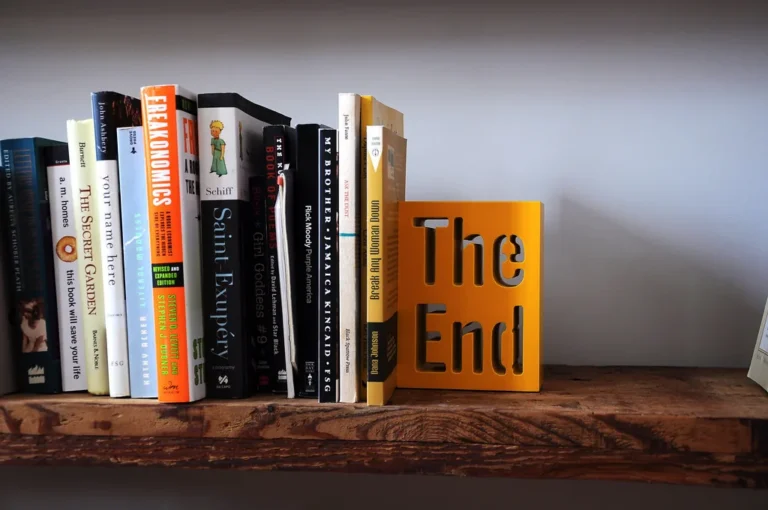
- Group books by color or size for visual harmony.
- Add art, plants, or collectibles for personality.
- Leave some negative space to avoid clutter.
A painted bookcase is as much about display as storage, balance is key.
Real-world Example: Thrift Store Transformation
One homeowner purchased a battered veneer bookcase for $15 at a local thrift store. After cleaning, light sanding, and applying a high-quality bonding primer, they chose a rich navy latex paint in a satin finish. A new set of brass pulls completed the look.
The project required two days (including drying time) and less than $50 in supplies, yielding a custom piece that’s now the living room’s highlight.
Case Studies And Creative Ideas
Learning from others’ experiences can inspire your own project and help you avoid common pitfalls.
Case Study 1: Vintage Oak Bookcase Restoration
A family inherited a solid oak bookcase with deep scratches and a dark, dated stain. After thorough cleaning and sanding, they filled imperfections and used a shellac-based primer to block tannin bleed-through. Two coats of high-quality acrylic latex paint in a soft white transformed the piece. The result: a bright, modern fixture that maintained the wood’s character.
Case Study 2: Small Space Solution
A renter needed extra storage but wanted to add color without risking their security deposit. They found a compact, laminate bookcase and used a bonding primer followed by two coats of pastel green latex paint. The lightweight, portable piece now adds a cheerful accent to their home office.
Case Study 3: Kids’ Room Makeover
A children’s room bookcase required both durability and fun. After sanding and priming, the parents used semi-gloss paint in alternating stripes of blue and yellow. A water-based polycrylic topcoat sealed the finish, making it both colorful and easy to clean.
Comparing Diy Vs. Professional Bookcase Painting
Is it worth painting your own bookcase, or should you hire a pro? Here’s a breakdown:
| Aspect | DIY | Professional |
|---|---|---|
| Cost | Low (typically $30, $100 in materials) | High ($150, $400+ per bookcase) |
| Time Investment | 1, 2 days (including drying/curing) | 1, 3 days (but less of your time) |
| Finish Quality | Good (with prep and patience) | Excellent; flawless finishes |
| Customization | Unlimited, hands-on | Subject to shop’s options |
| Convenience | DIY labor required | No personal labor |
For most home projects, DIY painting is cost-effective and highly customizable. If you want a factory-smooth finish on a prized antique, professional spraying may be worth the investment.
Maintenance And Long-term Care
A painted bookcase can last for years with proper care. Here’s how to keep it looking fresh:
Regular Cleaning
- Dust weekly with a soft, dry cloth.
- Wipe spills immediately with a damp cloth to prevent stains.
- Avoid harsh chemicals that could damage the paint or topcoat.
Preventing Chips And Scratches
- Use felt pads under decorative items or bookends.
- Handle shelves gently during rearrangement.
- Rotate displayed items to avoid permanent impressions.
Touch-up Tips
- Keep a small amount of leftover paint for future touch-ups.
- For chips, lightly sand the area, clean, then dab with a small brush.
- Avoid overloading shelves to prevent sagging or stress cracks in the finish.
Pro Tip: If you plan to move the bookcase, wrap it in blankets and lift, rather than drag, to protect the paint.
Environmental And Safety Considerations
Painting furniture safely is essential for both your health and the environment.
Ventilation And Fumes
- Paint in well-ventilated areas.
- Use low-VOC or zero-VOC paints for indoor projects.
- Wear a mask when sanding or spraying.
Safe Disposal Of Paint And Supplies
- Never pour paint down the drain.
- Allow leftover paint to dry before discarding, or donate to community projects.
- Dispose of rags and brushes according to local regulations, oil-based products may be hazardous.
For more on safe paint disposal, visit the EPA’s paint recycling guide.
Eco-friendly Paint Options
Many modern paints are formulated to minimize environmental impact:
- Low- and zero-VOC paints emit fewer harmful fumes.
- Water-based formulas reduce hazardous waste.
- Natural paints (milk paint, clay-based finishes) offer sustainable alternatives.
Whenever possible, choose products certified by reputable organizations such as GREENGUARD or Green Seal.
Frequently Asked Questions
How Can I Paint A Laminate Bookcase Without The Paint Peeling Off?
To paint a laminate bookcase successfully, start by lightly sanding the surface just enough to dull the sheen, avoid sanding through the laminate layer. Apply a high-quality bonding primer specifically designed for slick surfaces (such as Zinsser or Kilz Adhesion). Let the primer dry completely before applying your chosen paint in thin, even coats. This combination ensures the paint adheres well and resists peeling.
Is It Necessary To Remove The Back Panel Before Painting A Bookcase?
Removing the back panel is optional but recommended for the best results, especially if the panel is thin or can be detached easily. Painting the back separately ensures full coverage and reduces the risk of drips or missed spots. If removal isn’t possible, carefully mask the edges and paint with a brush or small roller for even application.
What’s The Best Way To Achieve A Smooth, Brush-mark-free Finish?
For a smooth finish, use high-quality synthetic brushes for edges and a small foam roller for flat surfaces. Always paint with the grain (if applicable) and apply multiple thin coats rather than one thick layer. Lightly sand between coats with fine-grit sandpaper (220 grit) and wipe away dust. Consider using a paint conditioner, which extends drying time and allows brush marks to level out.
Can I Use Spray Paint On A Large Bookcase?
Spray paint is best for smaller bookcases or metal surfaces due to its even coverage and quick drying time. For large bookcases, using a paint sprayer (not aerosol cans) with appropriate primer and paint can produce a flawless finish, but it requires masking, proper ventilation, and practice. Spray painting large pieces outdoors or in a garage is ideal to avoid overspray indoors.
How Long Should I Wait Before Putting Books Back On My Painted Bookcase?
Wait until the paint is fully cured before loading shelves, this typically takes 7, 14 days, even if the paint feels dry to the touch within hours. Early use can lead to sticking, impressions, or damage to the finish. If possible, keep the bookcase empty and ventilated during the curing period for best results.
A beautifully painted bookcase can redefine a room, offering both functionality and style. By following each stage, from careful preparation to mindful maintenance, you’ll create a custom piece that stands out for years to come. For more creative home improvement ideas, explore resources like choosing the right canning jar makes preserving food easier or discover practical tips in Freeze-drying vs canning: Which is better for long-term food storage?. With patience, attention to detail, and the right tools, any bookcase can become a statement piece that reflects your unique taste.
Products related to this article
Sponsored / affiliate links. As an Amazon Associate I earn from qualifying purchases. I may earn additional commission from eligible campaigns.

![Furniture Wax - 100% Natural Sealant for Chalk Furniture Paint or Raw Wood, Light Protection, Easy To Apply, No Odor, Eco-Friendly - 7 Color Choices - Antiquing [Brown] (8 oz)](https://m.media-amazon.com/images/I/41ZNmSTmwhL._SL500_.jpg)