How To Hang A Cabinet Door
Hanging a cabinet door may seem like a straightforward task, but achieving a professional, seamless fit requires careful planning, the right tools, and an understanding of the nuances that differentiate a mediocre installation from an outstanding one. Whether you’re replacing old doors, upgrading your kitchen, or building cabinets from scratch, mastering this skill can dramatically enhance the look and function of your living space.
Even slight misalignments can result in doors that won’t close correctly, unsightly gaps, or ongoing frustration every time you reach for a cup or plate.
The difference between a satisfying DIY project and an endless headache often comes down to precision, patience, and a few insider tips. This guide draws on proven techniques, real-world examples, and professional standards to help you hang cabinet doors like a seasoned pro.
From selecting hinges to fine-tuning final adjustments, you’ll find actionable advice and practical comparisons designed to save you time, minimize errors, and deliver flawless results.
Key Takeaways
- Proper hinge selection and mounting are crucial for durability and smooth operation.
- Accurate measurements prevent misalignment and future issues with cabinet doors.
- Using the right tools and hardware significantly impacts installation ease and door performance.
- Step-by-step preparation and adjustment ensure professional-level results, even for beginners.
- Mistakes such as poor alignment or overtightening screws can be fixed with simple solutions.
- Real-world examples and comparison tables in this guide aid in selecting the best method for your needs.
Understanding Cabinet Door Types And Hinges
Choosing the correct cabinet door and hinge type is the foundation for a successful installation. The type of door and hinge you select will affect appearance, accessibility, and ease of installation.
Cabinet Door Types
The most common types of cabinet doors include:
- Overlay doors: Cover the cabinet frame partially or fully, creating a modern look.
- Inset doors: Sit flush within the cabinet frame, offering a classic, clean appearance.
- Partial overlay doors: Expose part of the cabinet frame, balancing accessibility and style.
- Glass-panel doors: Incorporate glass for display cabinets.
Example: If you’re updating a traditional kitchen, inset doors with concealed hinges can create a timeless effect, whereas overlay doors with soft-close hardware offer a sleek, contemporary finish.
Hinge Varieties
Hinges are more than just hardware, they influence door function, longevity, and aesthetics. Common hinge types include:
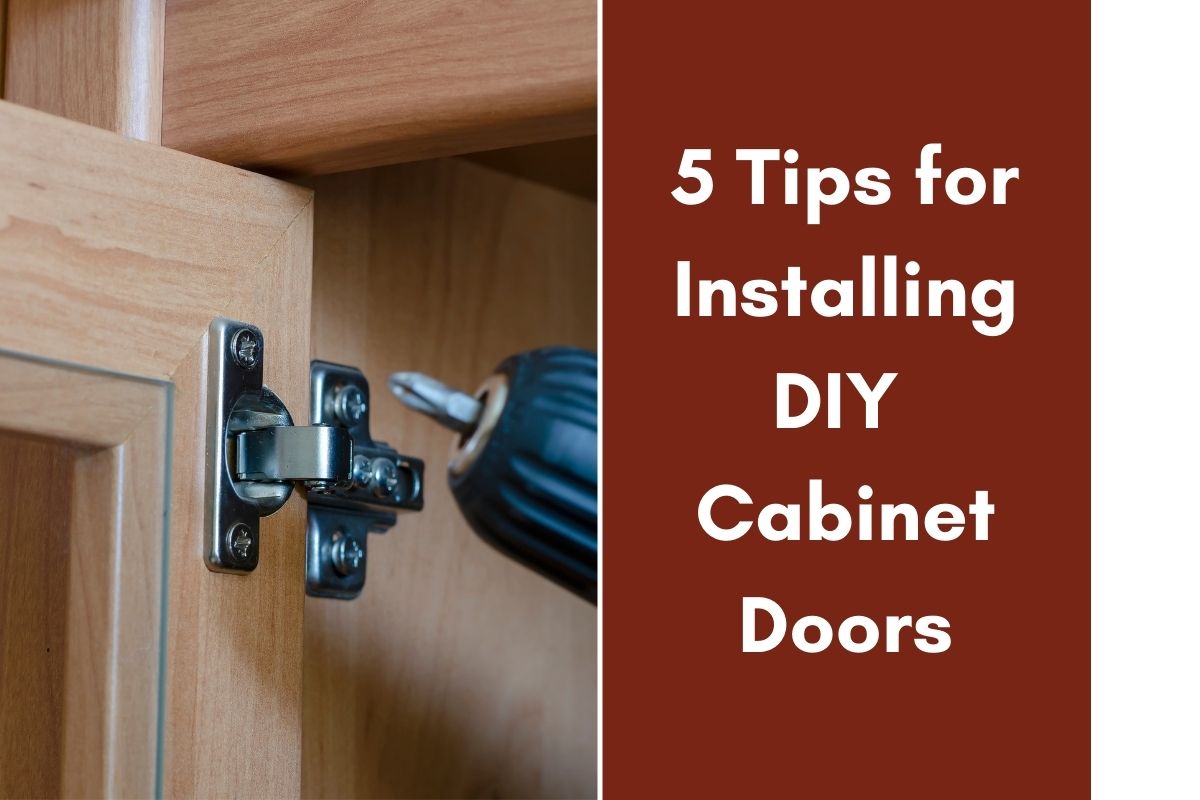
- Concealed (European) hinges: Hidden from view; allow for easy adjustment and a modern look.
- Butt hinges: Visible when the door is closed; often used for traditional cabinetry.
- Overlay hinges: Designed specifically for overlay doors; available in partial and full overlay versions.
- Pivot hinges: Used for specialty doors and unique applications.
The table below compares the most popular hinges:
| Hinge Type | Visibility | Adjustability | Typical Use | Installation Difficulty |
|---|---|---|---|---|
| Concealed (Euro) | Hidden | High (3-way) | Modern cabinets | Medium |
| Butt | Visible | Low | Traditional cabinets | Easy |
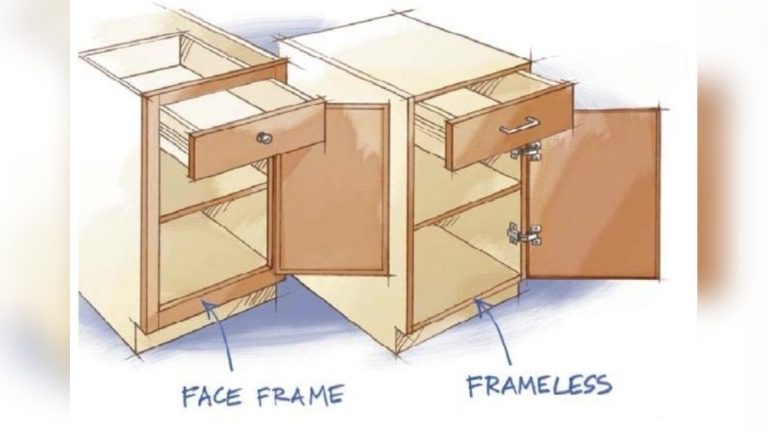
| Overlay | Partial/Visible | Medium | Face-frame cabinets | Easy |
| Pivot | Visible | Low | Specialty doors | Challenging |
Pro Tip: For most DIYers, concealed European hinges offer the best balance of adjustability and aesthetics. They’re especially forgiving if you need to make small tweaks after hanging the door.
Matching Doors And Hinges
It’s essential to pair the right hinge with your door style and cabinet construction. For example, a full overlay hinge won’t work with an inset door. Manufacturers often provide compatibility guides, review these before purchasing.
External Resource: For a comprehensive overview of hinge types and their applications, see this guide from Wikipedia.
Credit: www.cabinetnow.com
Tools And Materials Needed
Having the correct tools and materials at hand streamlines the process and ensures a quality outcome.
Essential Tools
- Drill/driver: For pilot holes and screw installation
- Screwdrivers: Both Phillips and flathead
- Tape measure: Accurate measuring is vital
- Combination square: For marking straight lines
- Pencil/marker: For precise layout
- Level: Ensures doors hang straight
- Clamps: To hold doors in place during installation
- Awl: For marking pilot holes
- Hinge jig or template: Optional, but helpful for repeatable hinge placement
Hardware And Materials
- Hinges: Chosen to match your door and cabinet style
- Mounting screws: Typically provided with hinges; ensure proper length
- Cabinet doors: Pre-finished or ready to paint/stain
- Bumpers or soft-close mechanisms: For quieter operation
- Wood filler: For correcting minor errors
Optional Upgrades
- Soft-close adapters: Retrofits for standard hinges
- Decorative hardware: Knobs or pulls to match your style
Example: When I tested both manual and power screwdrivers, I found that a power drill with a clutch setting greatly reduced the risk of overtightening and stripping screws, a common issue with softer cabinet woods.
Tool And Material Comparison Table
| Tool/Material | Purpose | DIY Skill Level | Cost Range |
|---|---|---|---|
| Drill/Driver | Drilling holes, driving screws | Beginner | $30, $100 |
| Hinge Jig | Accurate hinge cup drilling | Intermediate | $20, $50 |
| Concealed Hinges | Door mounting | Beginner | $3, $8 per pair |
| Soft-close Adapter | Quiet door closing | Beginner | $4, $10 per hinge |
Safety Considerations
- Wear safety glasses when drilling.
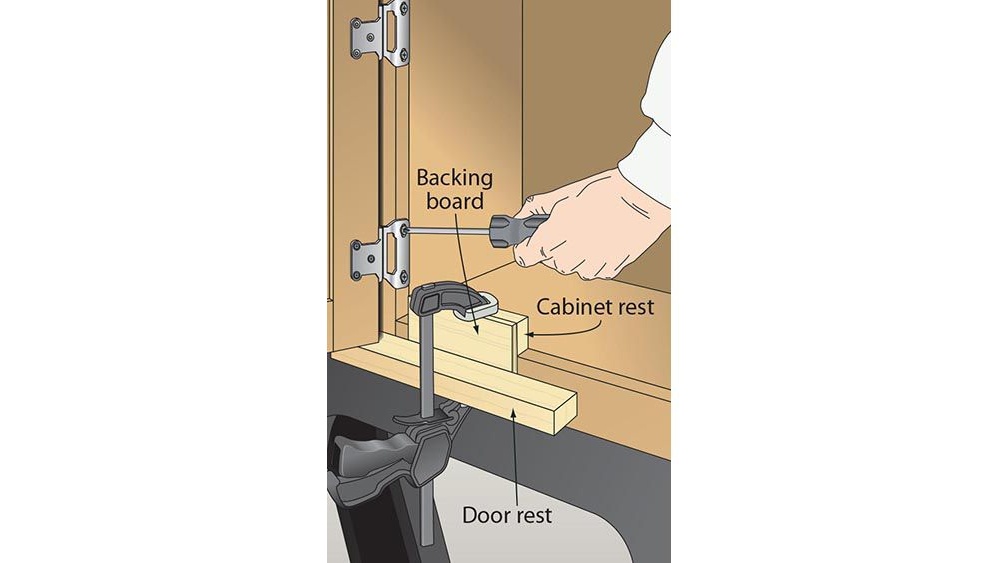
- Secure doors with clamps to prevent slipping.
- Keep fingers clear when closing or testing hinge movement.

Credit: www.popsci.com
Measuring And Marking For Precise Installation
Accurate measurements are the bedrock of a professional cabinet door installation. Even small deviations can cause misalignment, rubbing, or unsightly gaps.
Measuring Door Placement
Start by determining the correct position for the door relative to the cabinet box:
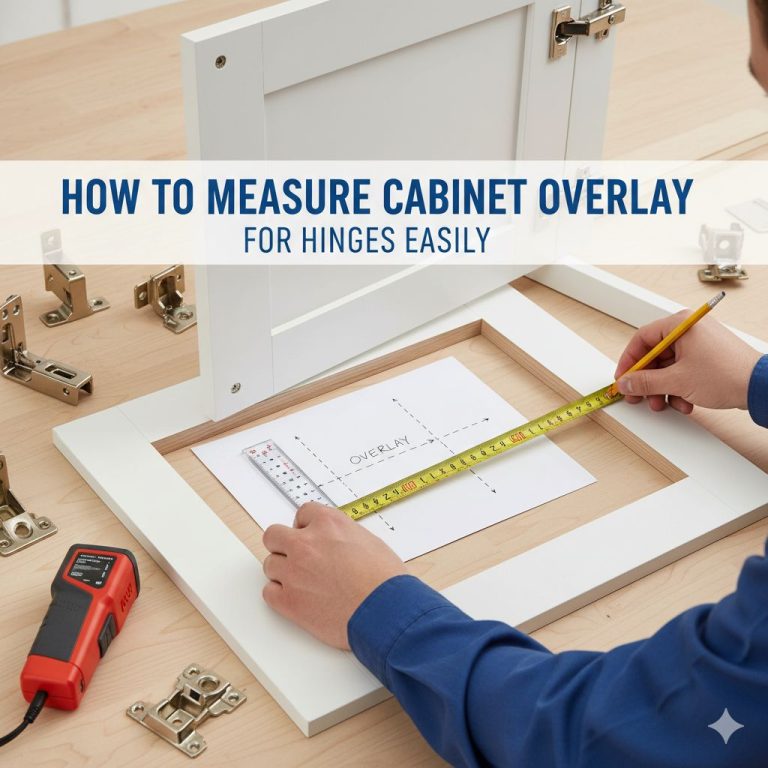
- Overlay doors: Measure the desired overlay (the amount the door covers the cabinet frame) and mark accordingly.
- Inset doors: Ensure the door fits perfectly within the frame with an even reveal on all sides.
- Multiple doors: Leave a consistent gap (typically 1/8 inch) between adjacent doors for smooth operation.
Example: In a recent kitchen remodel, I used playing cards as spacers to achieve a uniform reveal between double doors, a simple trick that delivers professional results.
Marking Hinge Location
For most standard cabinet doors:
- Place hinges 2-4 inches from the top and bottom edges of the door.
- For taller doors, consider adding a third hinge centered between the top and bottom.
- Use a hinge template or jig for repeatable, accurate placement.
Mark both the door and cabinet box. Double-check hinge orientation (left/right, top/bottom) before drilling.
Drilling Pilot Holes
Drill pilot holes for screws to prevent wood splitting and to ensure the hinge sits flush. Use a drill bit slightly smaller than your screw diameter.
Warning: Overdrilling or using the wrong bit size can cause the screws to strip or the hinge to sit loose, compromising door stability.
Checklist For Accurate Marking
- [ ] Overlay or inset correctly measured
- [ ] Hinge positions marked and double-checked
- [ ] Pilot holes aligned with hinge holes
- [ ] Cabinet and door orientation confirmed
Internal Link Example
For those interested in the differences between canning jar types, see Choosing the right canning jar makes preserving food easier for an analogous discussion on precision and fit.
Credit: www.rockler.com
Step-by-step Guide To Hanging A Cabinet Door
Now that you’ve prepared your tools, materials, and measurements, you’re ready to hang your cabinet door. This process can be broken down into clear, manageable steps.
Attaching Hinges To The Door
- Align the hinge template on the marked positions.
- Drill pilot holes for the screws, be cautious not to drill through the door.
- Screw the hinges onto the door, ensuring they are flush and secure.
- Check hinge movement, they should swing freely without resistance.
Example: I once installed hinges on a painted MDF door and overtightened the screws, causing the hinge cup to sink into the wood. Using a torque-limited screwdriver solved this issue in subsequent projects.
Positioning The Door On The Cabinet
- Support the door with shims or a helper to maintain the correct height and reveal.
- Align the hinge plates on the cabinet box with your markings.
- Clamp the door in place if possible.
Attaching Hinges To The Cabinet
- Drill pilot holes through the hinge plate into the cabinet side or frame.
- Drive screws into the pilot holes, securing the hinge plate.
- Test door swing, ensure the door opens and closes without rubbing or catching.
Pro Tip: If working alone, place a piece of painter’s tape on the cabinet face to mark the bottom edge of the door for consistent alignment.
Adjusting For Perfect Fit
Most modern concealed hinges offer three-way adjustment:
- Up/down: Move the door higher or lower.
- Left/right: Shift the door side-to-side.
- In/out: Adjust depth for flush fit.
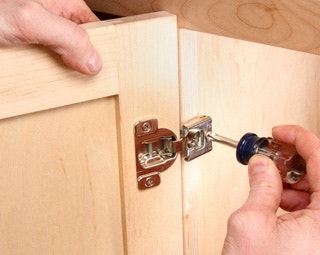
Use a screwdriver to fine-tune each direction until the door sits perfectly.
Installing Additional Hardware
- Add soft-close adapters if desired.
- Install knobs or pulls using a template for consistent placement.
- Apply bumpers to dampen noise and protect the finish.
Final Inspection
- Check that all screws are tight.
- Verify that doors open and close smoothly.
- Ensure consistent gaps and reveals.
Internal Link: For a comparison of preservation methods that require precise sealing, see Freeze-drying vs canning: Which is better for long-term food storage?.
Common Mistakes And How To Avoid Them
Even experienced DIYers encounter challenges when hanging cabinet doors. Understanding common pitfalls can help you sidestep frustration and achieve professional results.
Misalignment And Uneven Gaps
Cause: Inaccurate measurements or failure to use spacers.
Solution: Use shims, playing cards, or a commercial door alignment tool for consistent spacing.
Hinge Binding Or Stiff Operation
Cause: Overtightened screws, crooked hinge installation, or debris in hinge cups.
Solution: Loosen screws slightly and realign hinges. Clean out any debris before final tightening.
Stripped Screw Holes
Cause: Using the wrong screw size or overdriving screws.
Solution: Fill the hole with a wooden toothpick and wood glue, then reinstall the screw once dry.
Door Sagging Over Time
Cause: Heavy doors, insufficient hinges, or poor-quality hardware.
Solution: For tall or heavy doors, use a third hinge. Invest in high-quality, load-rated hinges.
Paint Chipping Or Finish Damage
Cause: Using power tools carelessly or overtightening hardware.
Solution: Hand-tighten final turns, and protect painted surfaces with painter’s tape during installation.
Example: A client once reported that their newly installed doors were scraping the cabinet base after a week. The issue was traced to inadequate pilot holes, which caused the screws to work loose. Reinforcing the holes and retightening solved the problem.
Internal Link Example
For more on how different salt types affect preservation quality, see Canning salt and iodized salt differ in purity and use, making the right choice important for safe, quality food preservation.
Advanced Tips For Flawless Cabinet Door Hanging
For those seeking perfection or tackling more challenging installations, advanced techniques can elevate your results.
Using A Hinge Jig For Consistency
A hinge jig ensures that multiple doors have perfectly aligned hinge cups. This is especially useful when installing several doors in a row, such as on a pantry or wall of cabinets.
Pro Tip: Invest in a quality jig if you plan to hang more than a few doors, it saves time and reduces errors.
Installing Soft-close Hinges
Soft-close hinges are increasingly popular for their ability to prevent slamming and extend door life. They require careful alignment but are well worth the effort for high-traffic areas.
Handling Large Or Heavy Doors
- Use three or more hinges for tall or solid wood doors.
- Consider reinforcing screw holes with longer or thicker screws for added support.
Integrating With Existing Cabinets
If you’re replacing doors on existing cabinets, match the hinge overlay and screw hole pattern to minimize patching and refinishing.
Retrofitting Inset Doors
Inset doors require precise measurement and often specialized hinges. Practice on scrap material before final installation.
Data Table: Hinge Load Ratings
| Hinge Type | Max Door Weight | Recommended Door Height | Best Use Case |
|---|---|---|---|
| Standard Concealed | 11 lbs | Up to 40″ | Kitchen cabinets |
| Heavy-Duty Concealed | 22 lbs | Up to 60″ | Pantry/utility cabinets |
| Butt Hinge | 10 lbs | Up to 36″ | Traditional cabinets |
External Resource: For detailed hinge load testing data, refer to Blum’s technical information.
Real-world Example
A homeowner wanted to upgrade their kitchen with glass-panel doors. After measuring and marking meticulously, they used concealed soft-close hinges and a hinge jig for uniformity. The result was a visually appealing, functional upgrade that improved the kitchen’s usability and value.
Troubleshooting And Fixing Installation Issues
Even with careful planning, issues can arise during cabinet door installation. Knowing how to quickly troubleshoot and correct these problems saves time and frustration.
Door Won’t Close Properly
- Check for obstructions: Remove any debris or hardware interfering with closure.
- Verify hinge adjustment: Loosen and reposition as needed.
- Assess hinge type: Some doors require specialty hinges for thick or framed cabinets.
Door Sits Too High Or Low
- Adjust vertical position: Use the hinge’s height adjustment screw.
- Add or remove shims: Fine-tune placement as necessary.
Door Rubs On Adjacent Surfaces
- Shift horizontally: Adjust the hinge’s left/right screw.
- Check for warping: Replace warped doors or sand edges carefully.
Screw Heads Strip Or Break
- Use the correct driver bit: Prevents cam-out and damage.
- Replace damaged screws: Use matching hardware for aesthetics and strength.
Damaged Cabinet Surface
- Patch with wood filler: Sand and refinish as needed.
- Install a hinge cover plate: Conceals minor damage around the hinge area.
Internal Link: For insight into how proper sealing and closures matter in food preservation, explore Canning vs bottling: which method is best for preserving food?.
Real-world Case Studies And Examples
Concrete examples illustrate how various approaches and hardware choices yield different results.
Case Study 1: Modern Kitchen Makeover
A DIYer replaced traditional overlay cabinet doors with full overlay slab doors. Using concealed soft-close hinges and a hinge jig, they achieved a seamless, minimalist look. The key to success was meticulous measurement and using spacers to maintain an even 1/8-inch gap between doors.
Case Study 2: Restoring Vintage Cabinets
An owner of a 1950s home wanted to preserve original inset cabinet doors. They sourced reproduction butt hinges and carefully matched the hinge mortises. The result was a restored kitchen that retained its period charm, with doors that opened and closed smoothly for the first time in decades.
Case Study 3: Pantry Organization Upgrade
A family with young children installed heavy-duty concealed hinges on large pantry doors. They added three hinges per door and reinforced the mounting with longer screws. The doors now withstand daily use without sagging or misalignment.
Example: When I helped a friend retrofit soft-close mechanisms onto existing cabinet doors, we discovered that some older hinges were incompatible. Upgrading to modern concealed hinges solved the problem and gave the kitchen a quieter, more refined feel.
Frequently Asked Questions
What’s The Difference Between Full Overlay And Partial Overlay Cabinet Doors?
Full overlay doors cover nearly the entire cabinet frame, leaving only a small gap between doors. Partial overlay doors expose more of the cabinet frame, creating a wider reveal. Your choice affects both appearance and the type of hinge required.
Can I Reuse Existing Screw Holes When Replacing Cabinet Doors?
While possible, reusing old screw holes may lead to a loose fit if the wood is worn or stripped. For optimal strength, fill old holes with wood filler, allow to dry, and drill new pilot holes slightly offset from the originals.
How Do I Fix A Cabinet Door That Won’t Stay Closed?
This issue is often caused by misaligned hinges or worn catch mechanisms. Adjust the hinge position for a tighter fit, or install magnetic catches or soft-close hardware to keep the door securely shut.
What Type Of Screws Should I Use For Cabinet Hinges?
Use #6 or #8 wood screws that match the thickness of your cabinet walls and doors. Ensure they are long enough to anchor securely but not so long that they protrude through the opposite side.
Are There Special Considerations For Hanging Glass-panel Cabinet Doors?
Yes, glass-panel doors require careful handling to avoid damage. Use soft-close hinges to prevent slamming, and consider edge-protectors or rubber bumpers. Always support the glass area when drilling or installing hardware.
A well-hung cabinet door is more than a finishing touch, it’s a functional upgrade that elevates your entire kitchen or workspace. By following the steps and expert advice outlined above, you can tackle this DIY project with confidence and achieve lasting, professional results.
With the right preparation, attention to detail, and an understanding of common pitfalls, hanging a cabinet door becomes an accessible skill for homeowners at any level.
Products related to this article
Sponsored / affiliate links. As an Amazon Associate I earn from qualifying purchases. I may earn additional commission from eligible campaigns.