
Learning how to install hidden door hinges transforms a plain doorway into a seamless, custom feature. This beginner guide breaks down the process into simple, achievable steps, requiring basic tools to achieve that sleek, invisible look for your secret door.**
Have you ever dreamed of a secret room or just want a modern, ultra-clean look for your woodwork? Standard door hinges stick out, ruining that seamless design. Installing hidden door hinges, sometimes called invisible hinges, gives you that high-end, custom finish. It can seem scary, like something only a professional carpenter can handle. Don’t worry! With the right preparation and clear instructions, you can absolutely tackle this project yourself. We are going to walk through every step so you can confidently achieve that magic, camouflaged doorway!
Why Choose Hidden Door Hinges? The Style Factor
Choosing invisible hinges is an aesthetic decision first and foremost. They are perfect for creating custom storage solutions, reading nooks, or simply achieving minimalist interior design. When the door is closed, you shouldn’t see any hardware.
The Benefits of Going Invisible:
- Sleek Aesthetics: They provide an unbroken, clean line across your walls and doors.
- Customization: Essential for high-end built-ins or functional wall panels.
- Space Saving: They often allow the door to sit perfectly flush with the surrounding wall structure.
However, because they are hidden, installation requires more precision than standard butt hinges. Precision is key, but we will make it easy!

Tools and Materials Checklist: Get Everything Ready
Preparation is half the battle, especially for projects requiring tight tolerances like this one. Before touching your wood, gather everything listed here. This ensures smooth operation without unnecessary trips to the hardware store.
Essential Tools for Installation
You don’t need huge, complicated machinery. Most of these items are likely already in your home workshop.
- The Hidden Hinges: Purchase high-quality hinges rated for the size and weight of your door. Always check the manufacturer’s recommended installation guide, as hinge types vary.
- Router and Router Bits: This is critical. You need a router to carve out the mortises (recesses) for the hinge bodies. A template guide bit is often very helpful for beginners.
- Chisels: Sharp chisels are necessary for cleaning up the corners after routing.
- Drill/Driver: For drilling pilot holes and driving screws.
- Measuring Tape and Pencil: For accurate marking placements.
- Clamps: Essential for securing your hinges and templates during routing.
- Safety Gear: Safety glasses and a dust mask are non-negotiable when routing wood.
- Level: To ensure your setup is perfectly plumb.
Understanding Your Hidden Hinges
Not all hidden hinges are created equal. The most common type used for DIY projects involves a cylindrical body that sits inside a routed pocket. These are sometimes called Soss hinges or concealed European hinges. They typically open 180 degrees when fully installed.
Before starting, identify the specific type you purchased. The placement diagrams and routing depths will be specific to the brand and model.
Types of Concealed Hinges
| Hinge Type | Best For | Installation Complexity (Beginner) |
|---|---|---|
| Cylindrical (Soss-style) | Flush doors, lightweight interior doors | Medium (Requires accurate routing) |
| Pivot Hinges | Heavy doors, unique swinging designs (Often used for secret doors) | High (Requires accurate floor/header mounting) |
| European Concealed Hinges | Cabinetry, framed doors | Medium (Often uses pre-drilled cups) |
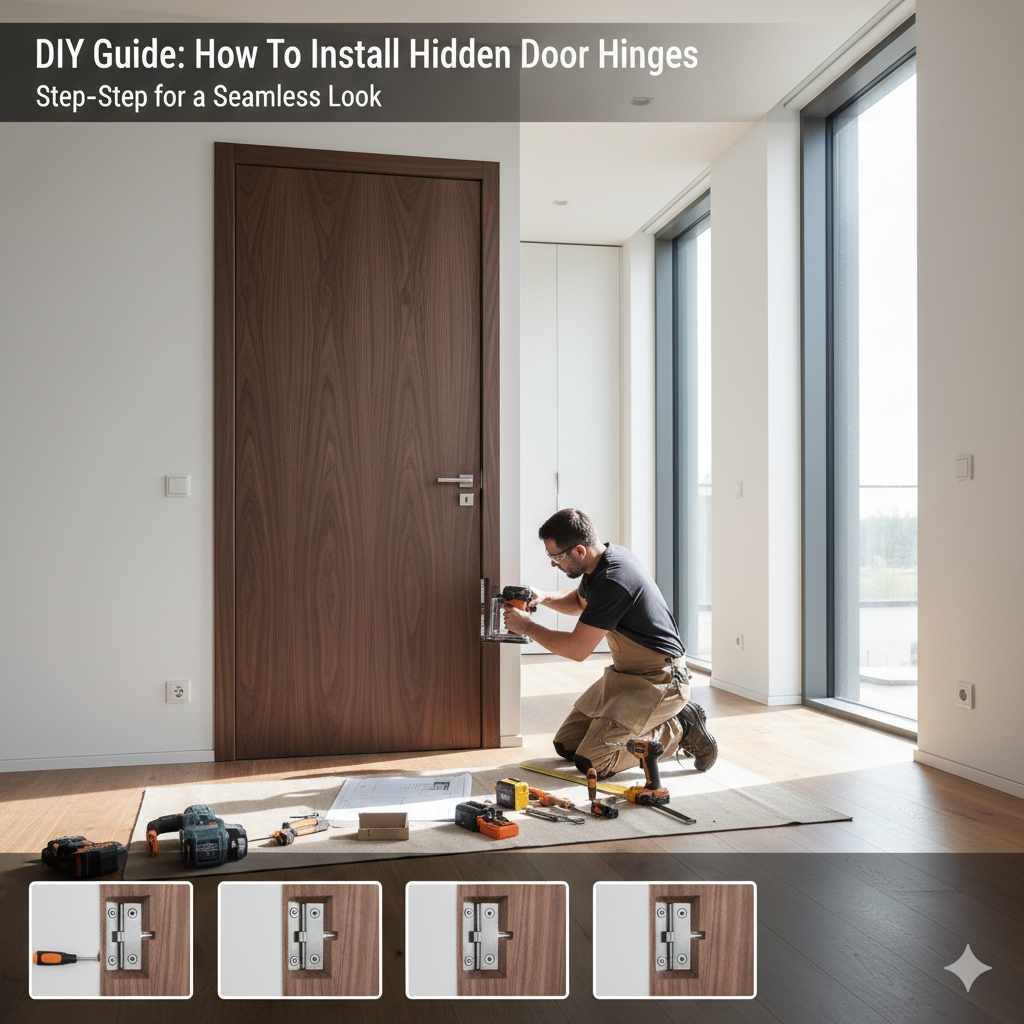
Step 1: Preparing the Door Slab
We start with the moving part: the door. Accuracy here determines how well the door will fit and operate later on. Measure twice, cut once—or in our case, measure twice, route once!
Marking Hinge Locations
Standard door construction usually places hinges at the top, middle, and bottom. For a hidden door, the location is slightly more flexible, but adherence to the hinge manufacturer’s instructions is vital for proper alignment.
- Consult the Template: If your hinges came with a template, use it! This is often the easiest way to ensure perfect placement.
- Measure from the Edges: Typically, the first hinge is placed 7 to 10 inches from the top and bottom edges of the door. Measure this distance carefully on the hinge edge of your door slab.
- Mark the Centerline: Lay the hinge flat on the door edge where marked. Trace the outline of the hinge body and mark where the cylindrical parts will sit.
- Check Door Thickness: Ensure your door slab is thick enough to accommodate the full depth of the hinge body. Most quality cylindrical hinges require at least a 1 3/8 inch thick door, ideally thicker.
Step 2: Routing the Mortises (The Cavities)
This is the most technical step. The router carves out a precise recess (mortise) so that when the hinge is installed, its body sits perfectly flush (level) with the surface of the wood.
If you are new to routing, watch a quick video tutorial first! Safety first—wear those glasses!
Techniques for Routing the Mortises
- Attach the Template (If Used): Clamp your template securely onto the marked area on the door edge. Ensure the template is slightly offset by the bearing/guide on your router bit so it routes the exact shape needed.
- Set Router Depth Correctly: This is crucial. Set your router base depth so that it cuts exactly the depth required for the hinge body to sit flush. If you cut too deep, the hinge won’t close properly; too shallow, and the hinge will stick out.
Routing Technique: Keep the router moving slowly and steadily around the template or following your lines. Make multiple shallow passes rather than trying to remove all the wood in one go. This prevents tear-out and gives you a cleaner pocket.
- Check the Fit: Once routed, clear out the dust. Place the hinge body—without screws—into the pocket. It should sit perfectly smooth with the wood surface. If it pokes up, use a sharp chisel to carefully shave down the high spots.
For further information on achieving high precision with routers, consult reliable woodworking sources, such as guides from organizations detailing best practices for joinery. (For example, general guidelines on router safety and technique can be found through organizations focused on construction standards, ensuring you work safely and efficiently.)
Step 3: Installing Hinges onto the Door Slab
Now that the pockets are perfect, it’s time to secure the hardware.
- Drill Pilot Holes: Using a drill bit slightly smaller than the hinge screws, drill pilot holes into the base of the routed pocket. This prevents the wood from splitting when you drive the screws in.
- Position and Screw In: Place the hinge body into the mortise. Drive the mounting screws in gently until the hinge is snug. Do not overtighten yet.
- Test Fit (If Possible): If you have the frame ready, briefly test the door fit before moving to the frame installation. You want to make sure the door closes cleanly without binding on the rough opening.
Step 4: Preparing the Door Frame or Jamb
The frame preparation mirrors the door preparation. Because the door needs to swing freely without touching the frame, the precision required for the jamb mortises is often even more demanding.
Key Considerations for the Frame
- Door Swing Clearance: Remember that the gap (reveal) between the door and the frame usually needs to be very tight—often 1/8 inch or less—for the hidden hinge look to work beautifully.
- Hinge Placement: Mark the corresponding locations on the door jamb or the framing studs where the other half of the hinge mechanism will mount. These points must align perfectly with the hinges on the door.
Step 5: Routing and Installation on the Frame
This is where many beginners find frustration if their measurements aren’t perfect. If the door hinges line up perfectly, the frame hinges should also align perfectly, assuming the door frame is plumb and square.
- Transfer Marks: Carefully transfer the centerlines and outlines from the door onto the frame where the hinges will be installed. It helps to hold the open door in place temporarily if possible, but be extremely careful not to scratch the surfaces.
- Route the Frame Mortises: Use the same technique as Step 2 to route the matching recesses into the frame or the side stud where the door will hang.
- Mount the Frame Hinges: Install the second half of the hinge mechanism into these newly routed pockets, again using pilot holes and moderate tightening.
Step 6: Assembling and Fine-Tuning the Door
It’s the moment of truth! Lift the door and align the two halves of the hidden hinges. Most contemporary hidden hinges have a mechanism that allows them to click or slide together upon closing.
Adjusting for a Perfect Swing
Even with careful routing, you might need minor adjustments. High-quality hidden hinges usually come with small adjustment screws.
Look closely at your hinge hardware. You will usually find screws that allow adjustment in three directions:
- Side-to-Side (Lateral): Perfect for making the door seal evenly against the weatherstripping or trim.
- In and Out (Depth): Adjusts how far the door sits into the frame (the reveal).
- Up and Down (Vertical): Ensures the door doesn’t sag and aligns perfectly with the top header.
Adjust these screws incrementally. Swing the door open and closed several times after each small adjustment. You are aiming for smooth movement and perfect alignment when closed—no sticking, no rubbing!
Dealing with Heavy Doors or Custom Builds
If you are building a bookshelf door or a very thick, solid wood entryway, standard cylindrical hinges might not provide enough support. For these substantial projects, you need to consider heavy-duty pivot hinges.
Pivot Hinge Considerations
Pivot hinges mount to the top and bottom floor/header structure, rather than the side jamb. This takes the entire weight off the narrow frame edge, making them ideal for massive doors, but they demand absolute flatness in the floor and ceiling.
- Floor Plate Precision: The bottom pivot point must be screwed securely into the subfloor or header beneath your finished flooring.
- Header Alignment: The top assembly must be anchored firmly into the structural header above the door opening.
- Professional Installation: For pivot hinges on heavy doors, consulting with a contractor about structural load is wise, even if you do the final hardware mounting yourself.
Maintaining Your Invisible Hinges
Once installed and perfectly aligned, these hinges generally require very little maintenance. This is one of their perks compared to traditional hinges that might need oiling or tightening over time!
Long-Term Care Tips
- Keep it Clean: Avoid getting excessive paint, drywall mud, or heavy dust into the hinge mechanism during any subsequent decorating projects.
- Check Tightness Annually: If you notice the door starting to sag after a year or two, turn off the lights, grab a flashlight, and inspect the screws on both the door and frame sides. Gently tighten any that feel loose.
- Lubrication (Rarely): If the door ever starts squeaking, you may need specialized dry lubricant suitable for the metal alloy of your hinge, but avoid standard oil sprays which can attract dirt.

Troubleshooting Common Installation Issues
It’s okay if things don’t go perfectly the first time. Here is how to diagnose and fix the most common hurdles beginners face when installing how to install hidden door hinges.
Common Problems and Quick Fixes
| Symptom | Likely Cause | The Fix |
|---|---|---|
| Hinge sits too high/low in the pocket | Router depth was set incorrectly. | Remove hinge, carefully chisel out a little more depth until flush. |
| Door scrapes the frame when closing | Misalignment between door mortise and frame mortise. | Use the adjustment screws on the hinge to shift the door slightly side-to-side or in/out. |
| Door will not close fully (a gap remains) | Hinge body is too proud (sticking out) or the door is binding. | If stuck proud, deepen the routed pocket slightly. If binding, check that the hinge pins/knuckles fully interlock. |
| Wood tear-out during routing | Router bit was dull or speed was too slow/fast. | Clean up edges carefully with a sharp chisel. For future cuts, ensure clean passes. |
Frequently Asked Questions (FAQs) for Beginners
Q1: Can I install hidden hinges on an existing, pre-hung door?
A: It is very difficult. Pre-hung doors are designed for standard hinges. Installing hidden hinges requires routing precise, deep pockets. It is usually easier to build a new, custom door slab that matches the existing rough opening, or use pivot hinges if applicable.
Q2: How deep should the router cut be for a standard cylindrical hinge?
A: This depends entirely on your specific hinge model. Always check the manufacturer’s manual! Generally, the cut must match the exact height and depth of the hinge body so it sits perfectly flush with the wood surface.
Q3: Do hidden hinges support heavy doors, like solid wood or metal?
A: Most decorative hidden hinges (like Soss-style) are rated for standard interior doors (under 100 lbs). For heavier doors, you must use reinforced, high-capacity hidden hinges or switch to a heavy-duty pivot hinge system.
Q4: What is the secret to getting the reveal (gap) tight enough?
A: Tight reveals depend on two things: perfectly routed mortises and a door frame that is square and plumb. Use your adjustment screws on the hinge to compensate for tiny frame imperfections after mounting the door.
Q5: Do I need to use a template when routing for these hinges?
A: While you can freehand route if you are an expert, using a router jig or template designed specifically for your hinge model is highly recommended for beginners. Templates ensure the depth and placement are exactly the same for every hinge.
Q6: Can I install hidden hinges without a router?
A: It is extremely challenging and usually results in poor fit. Hidden hinges require deep, consistent recesses. A router is the only tool that provides the necessary precision for routing the mortise consistently across the door and frame.
A Final Word on Effortless Style
Installing hidden door hinges is truly a fantastic way to elevate your home’s design. It moves your door from a functional necessity to a piece of architectural feature. You have taken a project that looks intimidatingly professional and broken it down into manageable, step-by-step actions.
Remember, the magic of this hardware lies in precision. Take your time when measuring and routing those mortises. Every careful cut you make now translates directly into a seamless, beautiful operation later. Don’t fear the router; respect it, use your safety gear, and trust your measurements. You are building something truly custom and stylish for your home, and achieving that clean, modern look is absolutely within your reach. Go ahead and enjoy your stunning, secret-door perfection!


