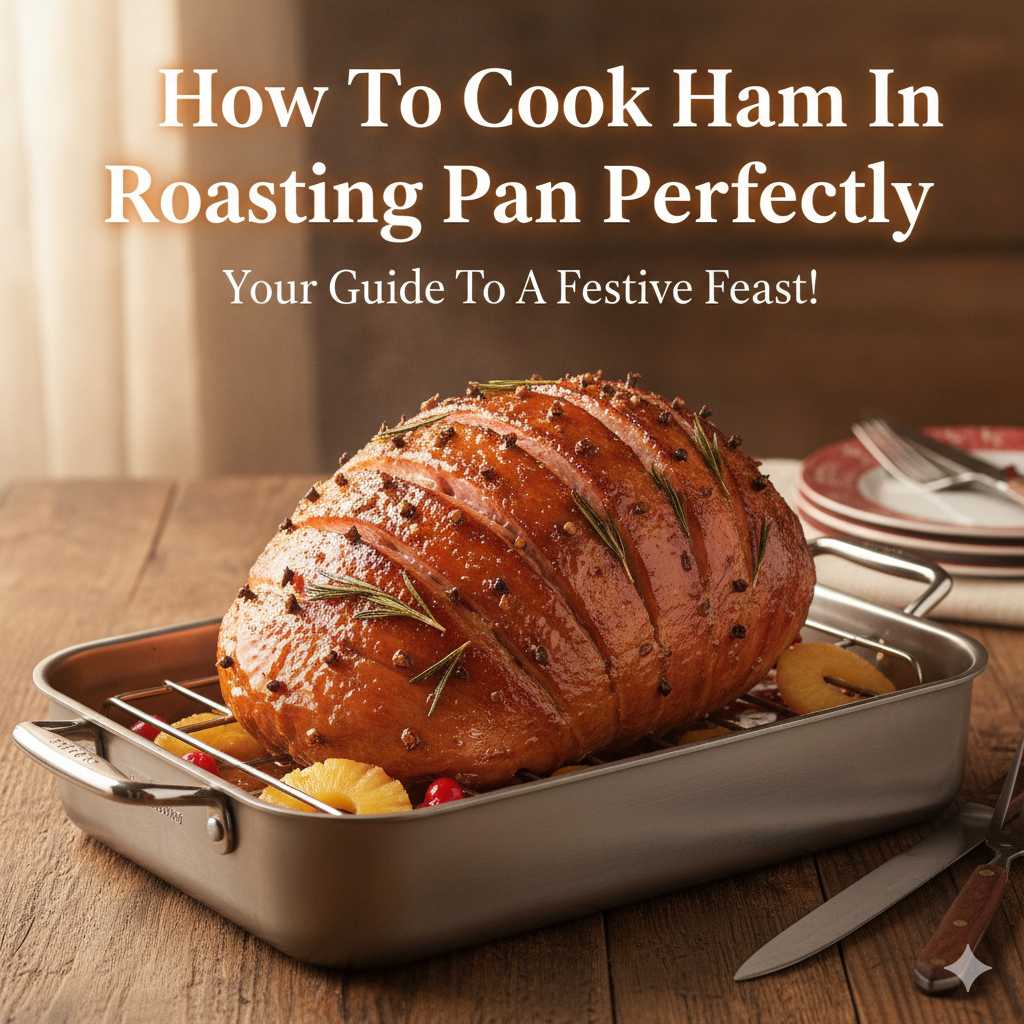
You’re looking at your beautiful ham, ready for a feast. But how do you get it just right in the roasting pan? It feels like a big task, and you want it perfect.
Nobody wants a dry, tough ham when everyone’s gathered around. We’ve all been there, wondering about the best way to get that golden-brown crust and tender, juicy inside. Let’s walk through it together, step-by-step.
Cooking ham in a roasting pan involves selecting the right ham, preparing it properly, using the correct oven temperature and cooking time, and allowing it to rest. This ensures a moist, flavorful, and perfectly cooked ham for any occasion.
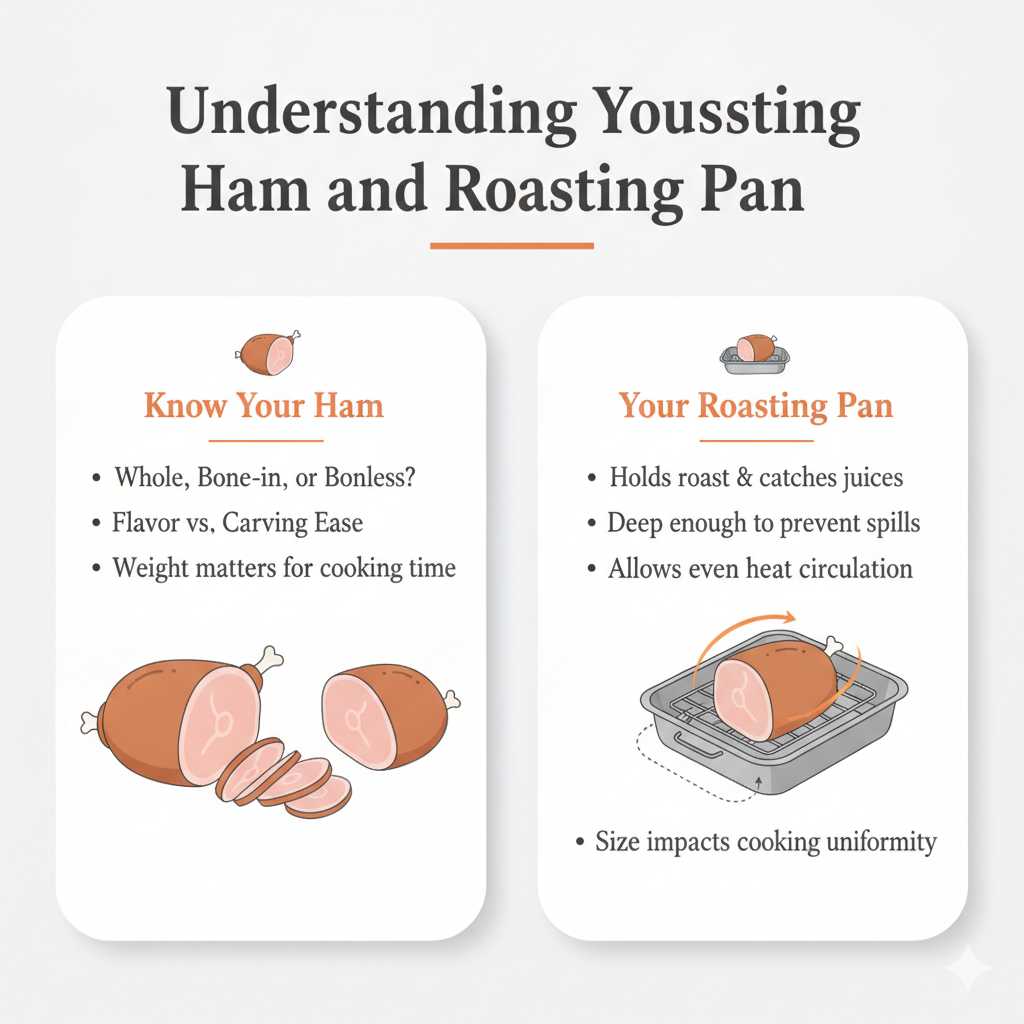
Understanding Your Ham and Roasting Pan
First things first, what kind of ham are you working with? This matters a lot for cooking. You might have a whole bone-in ham, a half ham, or maybe even boneless.
Each cooks a little differently. Bone-in hams often have more flavor. Boneless ones can be easier to carve.
Your roasting pan is your best friend here. It’s designed to hold your roast and catch all those delicious juices. A good pan is deep enough so the ham doesn’t spill over.
It also lets the heat circulate well around the ham. If your pan is too small, the ham might cook unevenly.
Think about the size of your ham. A big, thick ham needs more time and a different approach than a smaller, thinner one. Knowing your ham’s weight is key for figuring out cooking times.
Don’t guess; check the label or ask your butcher. This is the first step to success.
Prepping Your Ham for the Pan
So, you’ve got your ham. What’s next? You need to get it ready.
For most hams, especially pre-cooked ones, you don’t need to do much. Often, the best thing is just to unwrap it. Sometimes, there’s a plastic cap on the bone.
Make sure to remove that. It’s not meant to be cooked on.
If your ham has a thick skin or a hard fat cap, you might want to score it. Scoring means making shallow cuts across the fat. Do this in a diamond pattern.
Be careful not to cut into the meat itself. This helps the fat render and lets glazes seep in better. It also looks nice.
Some people like to rinse their ham. This is usually not necessary for pre-cooked hams. It might even wash away some flavor.
If you have a fresh, uncured ham, then yes, you’d want to rinse it. Always check the packaging for specific instructions. When in doubt, skip the rinse for pre-cooked.
Now, think about resting the ham. Yes, resting. Just like steak, ham benefits from a rest.
If you’re carving it right out of the oven, it can lose juices. Letting it rest helps the juices settle back into the meat. This makes it more tender and moist.
Plan for this time.
Choosing the Right Temperature and Time
Oven temperature is super important. For most hams, you want a moderate oven. Around 325°F (160°C) is a common sweet spot.
Too hot, and the outside will dry out before the inside is warm. Too cool, and it takes forever, and you might not get that nice crust.
How long should you cook it? This is where ham weight comes in. For pre-cooked hams, you’re mostly just reheating them.
A general rule is about 15 to 20 minutes per pound at 325°F (160°C). For a 10-pound ham, that’s roughly 2.5 to 3.5 hours.
But this is just a guide. The most reliable way to know if it’s done is to use a meat thermometer. You want the internal temperature to reach 140°F (60°C) for pre-cooked hams.
For a fresh, uncured ham, aim for 160°F (71°C).
Always insert the thermometer into the thickest part of the ham. Try not to touch the bone, as this can give a false reading. If you’re using a glaze, you’ll likely add that near the end of cooking.
We’ll talk more about that later. For now, focus on the base cooking time.
Ham Cooking Quick Guide
Ham Type: Pre-cooked Ham (bone-in or boneless)
Oven Temp: 325°F (160°C)
Approx. Time per Pound: 15-20 minutes
Target Internal Temp: 140°F (60°C)
Rest Time: 15-20 minutes
The Roasting Pan Setup
Now, let’s get that ham into the roasting pan. What should go in the pan with it? Some people like to add a little liquid.
This can help keep the oven moist and create steam. Water is fine. Broth or apple cider also adds nice flavor.
About half an inch to an inch of liquid is usually enough.
You can also add aromatics. Think onions, carrots, celery, or herbs like rosemary and thyme. These will perfume the ham as it cooks.
They also contribute to the drippings, which can be used for gravy later. Don’t overthink this part. Simple is often best.
Place the ham in the pan with the cut side down, if it has one. For bone-in hams, sometimes placing them cut-side down helps them cook more evenly. If it’s a whole ham, the bone side is often down.
The goal is to have the thickest part of the ham facing upwards, so it gets the most direct heat.
You might want to use a roasting rack. A rack elevates the ham. This allows hot air to circulate all around it.
It also keeps the bottom of the ham from sitting in the drippings. This can help prevent a soggy bottom. If you don’t have a rack, you can use thickly sliced carrots or onions to prop it up.
Covering the ham is another consideration. For the first part of cooking, especially for thicker hams, you might want to cover it with foil. This helps it cook through without drying out.
You’ll remove the foil later to let the skin crisp up. A loosely tented foil is usually best.
Glazing Your Ham: Adding Flavor and Shine
Glazing is where you can really make your ham shine. Most pre-cooked hams are already tasty, but a glaze adds another layer of flavor and a beautiful finish. Glazes are usually applied in the last 30-60 minutes of cooking.
You want to do this when you’ve removed the foil cover.
What makes a good glaze? They are typically sweet and a little tangy. Brown sugar, honey, maple syrup, and fruit juices like orange or pineapple are common bases.
You can add spices like cinnamon, cloves, or nutmeg. A touch of mustard or vinegar can add a nice bite.
Here’s a simple glaze idea: Mix about a cup of brown sugar with a quarter cup of pineapple juice. Add a tablespoon of Dijon mustard. You can also throw in a teaspoon of ground cloves.
Stir it all together until the sugar dissolves.
Apply the glaze using a brush. You want to coat the entire surface of the ham. Then, continue cooking.
You’ll want to reapply the glaze a couple of times during that last hour. This builds up a nice, sticky coating. Keep an eye on it so it doesn’t burn.
A little char is okay, but burnt sugar is bitter.
If your glaze starts to get too dark too fast, you can loosely tent it with foil again. Or, you can reduce the oven temperature slightly. The goal is a beautiful, glossy finish that’s caramelized, not burnt.
This step really makes the ham look and taste festive.
Easy Ham Glaze Recipe
Ingredients:
- 1 cup brown sugar
- 1/4 cup pineapple juice (or orange juice)
- 1 tablespoon Dijon mustard
- 1/2 teaspoon ground cinnamon
- 1/4 teaspoon ground cloves
Instructions:
Mix all ingredients in a small bowl. Stir until well combined. Apply to ham during the last 30-60 minutes of baking, reapplying every 15-20 minutes.
The All-Important Rest
Once your ham hits that magic internal temperature of 140°F (60°C), it’s time to take it out. But don’t start carving immediately! This is the rest period, and it’s crucial for juicy ham.
Remove the ham from the roasting pan and place it on a carving board or a clean platter.
Tent it loosely with foil. This keeps it warm while the juices redistribute. A good resting time is about 15 to 20 minutes.
For a very large ham, you might even let it rest a bit longer, up to 30 minutes. This allows the meat fibers to relax.
When meat cooks, the fibers tighten up. This squeezes out moisture. Resting lets those fibers relax.
The juices then flow back into the meat. If you cut into it too soon, all that delicious juice will run out onto the board. You’ll end up with a drier ham.
This resting time is also your chance to make gravy. Those drippings in the roasting pan are liquid gold. You can skim off some of the fat and then whisk in some flour to make a roux.
Then, add your pan juices and maybe some broth or water to create a flavorful gravy. It’s a perfect way to use everything.
So, even though it feels like you’re waiting, this is an active, important part of the cooking process. It’s the final step before you get to enjoy the fruits of your labor. Make sure your side dishes are ready to go during this time, so everything comes together smoothly.
Carving and Serving Your Masterpiece
After the rest, it’s carving time! How you carve depends on the ham. For a bone-in ham, locate the main bone.
You’ll want to slice across the grain. For a spiral-cut ham, it’s already done for you. Just separate the slices.
For a whole or half ham, you might start by slicing off a section near the bone. Then, you can make thinner slices from that section. The goal is to get nice, even slices.
Don’t worry about perfect uniformity. It’s homemade ham, after all!
If you’re serving a glaze, make sure to spoon some extra glaze over the carved ham slices. This adds visual appeal and extra flavor. Arrange the ham on a platter.
Add your favorite sides like mashed potatoes, green beans, or a festive salad. It’s a beautiful sight.
Remember those delicious pan drippings? Use them to moisten the ham slices or serve as a side for your gravy. Don’t let any of that flavor go to waste!
Serving the ham warm is best. If you have a lot of it, you can keep it warm in a low oven (around 200°F or 95°C) for a short while.
Leftover ham is a treasure! It’s great in sandwiches, omelets, or soups. Store any extra ham tightly wrapped in the refrigerator.
It should keep well for several days. Planning for leftovers is part of the fun of cooking a big ham.
Serving Suggestions
Classic Sides:
- Mashed Potatoes
- Scalloped Potatoes
- Green Bean Casserole
- Roasted Brussels Sprouts
- Cornbread
Sauces & Condiments:
- Mustard (Dijon, Yellow)
- Horseradish
- Cranberry Sauce (optional, more for turkey but can work)
Troubleshooting Common Ham Problems
What if your ham seems dry? This often happens if it’s overcooked. Always use a thermometer to check the temperature.
Another reason can be not resting the ham long enough. Make sure to give it that 15-20 minutes of rest.
If the outside is getting too dark and the inside isn’t done, try tenting it with foil. This shields the top from direct heat. You can also turn the oven down a little.
Sometimes, just moving the ham to a cooler part of the oven helps.
What if your glaze burns? This means the sugars in the glaze cooked too fast. This can happen if the oven is too hot or if the glaze is applied too early.
Watch it closely during the last hour. If it looks like it’s burning, you can remove it from the oven, scrape off the burnt bits, and reapply a fresh layer of glaze more carefully.
If your ham seems bland, it might be the type of ham you bought. Some hams are cured with more flavor than others. You can also ensure your glaze is well-seasoned.
A good balance of sweet, savory, and a little acid can make a big difference. Don’t forget the salt and pepper on the ham before glazing.
Sometimes, people worry about the pink color of ham. Pre-cooked hams are safe to eat cold, but for best flavor, they should be heated. They might still have a pink hue even after cooking.
This is normal for cured ham and doesn’t mean it’s undercooked. The thermometer is your guide.
Real-World Ham Cooking Experiences
I remember one Thanksgiving, I was so focused on the turkey. The ham was almost an afterthought. I threw it in the oven with no real plan.
It came out okay, but honestly, it was a little dry. I realized then that even the “easy” things need attention. I hadn’t let it rest properly, and I think I pulled it out a bit too soon.
Another time, I was trying a new glaze. It had a lot of honey. I put it on way too early.
By the time the ham was done, the glaze was a dark, bitter mess. I had to scrape some of it off. It taught me a valuable lesson: glaze timing is critical.
And don’t be afraid to pull it out and scrape if needed.
One of my best ham experiences was when I decided to add some apple cider to the bottom of the pan. I also tossed in some cinnamon sticks and cloves. The aroma that filled the house was incredible.
The ham was so moist, and the subtle spice notes were lovely. It wasn’t a complicated glaze, but the pan additions made a big difference.
I also learned that the quality of the ham itself matters. Sometimes, a cheaper ham can be stringy or have too much fat that doesn’t render well. Investing in a good quality ham from a reputable butcher or grocery store can really elevate the final result.
It’s worth it for a special occasion.
I’ve found that for weeknight dinners, a fully cooked spiral-cut ham is a lifesaver. You just warm it up. But for holidays, I love the ritual of preparing a whole or half ham.
It feels more special. The smell of it roasting, the glazing process, the carving – it’s all part of the tradition.
Ham Myth vs. Reality
Myth: You must rinse all hams before cooking.
Reality: Only fresh, uncured hams typically need rinsing. Pre-cooked hams usually do not.
Myth: Ham must be cooked to a very high temperature to be safe.
Reality: Pre-cooked hams only need to be reheated to an internal temperature of 140°F (60°C). Fresh hams need to reach 160°F (71°C).
Myth: A pink color means the ham is raw.
Reality: Cured ham can remain pink even when fully cooked. Always rely on a thermometer.
What This Means for Your Next Meal
Knowing how to cook ham in a roasting pan means you can confidently tackle your next holiday meal or special dinner. You’ll understand why certain steps are important. You won’t be afraid of the process.
It means you can serve a ham that’s not just edible, but truly delicious. It will be juicy, flavorful, and look beautiful on your table. Your guests will be impressed, and more importantly, you’ll feel proud of your cooking.
This knowledge also helps you avoid common pitfalls. You’ll know to use a thermometer, to rest your ham, and how to manage glazes. These are simple things that make a world of difference.
You’re setting yourself up for success.
Ultimately, it means you can create memorable meals. Food brings people together. A perfectly cooked ham is a centerpiece that helps create those moments.
You’re not just following a recipe; you’re crafting an experience for yourself and your loved ones.
Quick Ham Checks
Is it Too Dry? Check thermometer reading and resting time.
Is it Too Dark? Tent with foil or lower oven temp.
Is Glaze Burning? Apply later, watch closely.
Is it Flavorless? Consider ham quality and glaze ingredients.
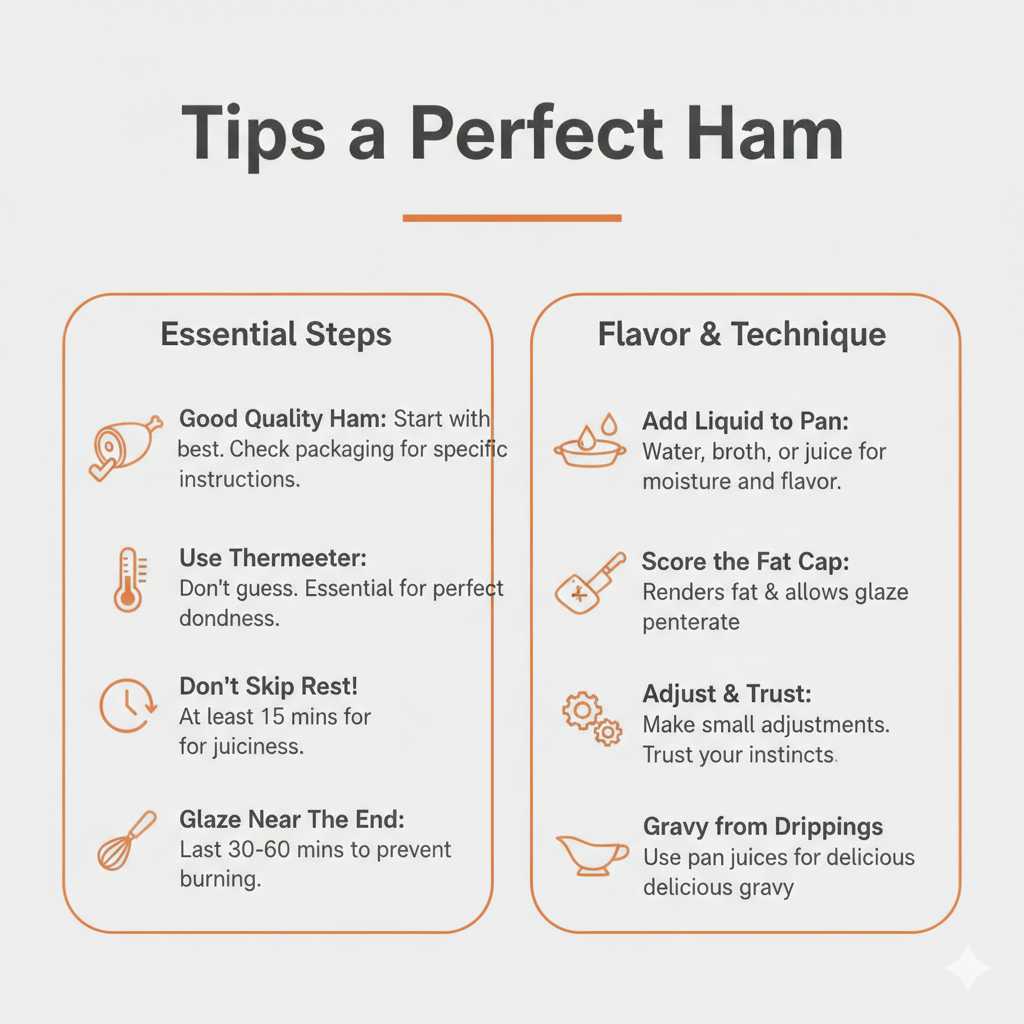
Tips for a Perfect Ham
Always start with a good quality ham. It makes a difference. Check the packaging for specific cooking instructions, especially if it’s a specialty ham.
Use a meat thermometer. This is the single most important tool for perfect ham. Don’t guess.
Don’t skip the rest! It’s essential for juiciness. Give it at least 15 minutes.
Glaze near the end. Apply it in the last 30-60 minutes of cooking to prevent burning.
Add liquid to the pan. Water, broth, or juice helps keep the oven moist and adds flavor.
Score the fat cap if it’s thick. This helps render fat and allows glazes to penetrate.
Don’t be afraid to adjust. If something isn’t looking right, make a small adjustment. Trust your instincts.
Make gravy from the drippings. It’s a delicious way to use all the pan juices.
Frequently Asked Questions About Cooking Ham
How do I know if my ham is fully cooked?
The most reliable way is to use a meat thermometer. For a pre-cooked ham, it should reach an internal temperature of 140°F (60°C). For a fresh, uncured ham, aim for 160°F (71°C).
Always insert the thermometer into the thickest part, avoiding the bone.
Can I cook ham without a roasting pan?
Yes, you can. Use a sturdy baking dish that is deep enough to hold the ham and any juices or liquids. A large oven-safe skillet or a disposable aluminum pan can also work in a pinch.
Ensure it’s large enough so the ham isn’t cramped.
Should I cover my ham while cooking?
It’s often recommended to cover your ham, especially for the first part of cooking. Tenting it loosely with aluminum foil helps it cook through evenly without drying out the exterior. Remove the foil during the last 30-60 minutes to allow the skin to crisp up and for glazing.
How long does ham need to rest after cooking?
Your ham should rest for at least 15 to 20 minutes after being removed from the oven. For larger or denser hams, a rest of up to 30 minutes is beneficial. This resting period allows the juices to redistribute throughout the meat, resulting in a more tender and moist ham.
What is the best way to reheat a pre-cooked ham?
Pre-cooked hams are safe to eat cold but are best when reheated. The general rule is to heat them at 325°F (160°C) for about 15-20 minutes per pound until the internal temperature reaches 140°F (60°C). Covering with foil during most of the heating process is advised.
Can I add vegetables to the roasting pan with the ham?
Yes, you absolutely can! Many people add hardy vegetables like carrots, potatoes, onions, and celery to the bottom of the roasting pan. They will absorb some of the ham drippings and become wonderfully flavorful.
Just ensure they are cut into pieces that will cook in the same time as the ham.
Putting It All Together
Cooking a ham in a roasting pan is an achievable skill. It’s about understanding your ham, using the right tools, and following a few key steps. You’ve learned about prep, temperature, time, glazing, and resting.
With this knowledge, your next ham will be a triumph. Enjoy the process, savor the aromas, and delight in serving a perfectly cooked ham that’s sure to impress everyone at your table. Happy cooking!