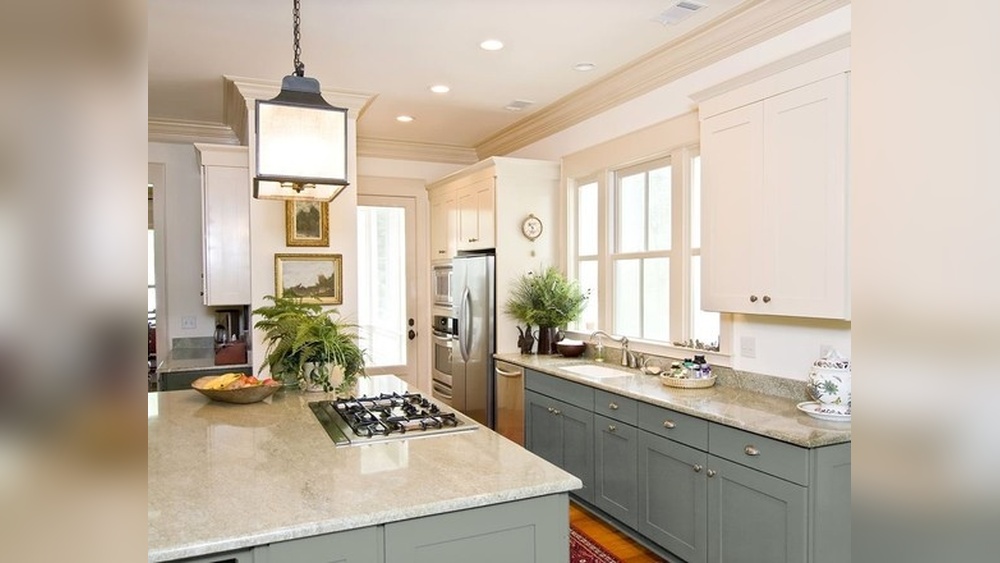

A built-in bookcase is framed from plywood boxes fitted into a wall recess, then finished with a face frame and trim so it looks original to the house. Skip measuring the wall and studs first, and the finished box either won’t fit the recess or has nothing solid to anchor into. This guide covers all 9 steps from cutting the plywood to painting, plus the exact tools and materials list.
For a related storage or furniture fix, How To Make A Drawer Lock: Diy Methods helps readers compare the next practical option.
For a closely related home or decor topic, How To Build Your Own Bookshelf Step By Step gives readers a useful next step.
For another table or room-layout decision, How To Build Foldable Table Legs Easily gives readers a useful follow-up.
Why Build a Built-In Bookcase?
Built-in bookcases offer a unique blend of function and high-end aesthetics. Unlike freestanding units, they integrate directly into your wall, creating a streamlined, custom look that can make any room feel more spacious and sophisticated.
Space Saving: They take up less visual space and can be designed to fit perfectly into awkward nooks or entire walls, maximizing every inch.
Customizable Style: You dictate the dimensions, depth, and even the style of shelving and trim, ensuring it perfectly matches your decor.
Increased Home Value: A well-executed built-in feature is a significant upgrade that can add aesthetic appeal and perceived value to your home.
Organized Elegance: They provide ample, organized storage for books, decor, and treasures, helping to declutter your living space.

Planning Your Built-In Bookcase Project
Before you pick up a single tool, thoughtful planning is key to a successful build. This stage ensures your bookcase will be both functional and beautiful, fitting seamlessly into your home.
Measuring Your Space
Accurate measurements are non-negotiable. Decide where you want your bookcase. Is it a small alcove, a section of a wall, or an entire wall?
1. Measure Width: Record the exact width of the intended space at the top, middle, and bottom. Use the smallest measurement to ensure a snug fit.
2. Measure Height: Measure from the floor to the ceiling.
3. Measure Depth: Determine how deep you want the shelves. Consider the size of books or items you plan to store. Standard shelf depths are usually between 10-12 inches, but you can customize this.
4. Check for Obstructions: Note any electrical outlets, light switches, vents, or structural elements that might interfere with your build.
Design Considerations
Think about the overall look you want to achieve.
Shelf Spacing: Will you have adjustable shelves or fixed ones? Consider varying shelf heights for different-sized books or decorative items.
Base and Top Trim: Do you envision a simple base, or a more elaborate molding? A crown molding at the top can make the unit look more integrated.
Backing: Will the back of the bookcase be open to the wall, or will you add a backing material like plywood or beadboard? A backing adds a finished look.
Material: Plywood is a popular choice for its stability and cost-effectiveness for the main structure. Solid wood offers a premium look but comes with a higher price tag and can be more challenging for beginners. MDF (Medium-Density Fiberboard) is a budget-friendly option but can be heavy and doesn’t hold screws as well as plywood. For this guide, we’ll focus on plywood.
Creating a Plan and Cutting List
Once you have your measurements and design in mind, sketch out your bookcase. This doesn’t need to be a professional architectural drawing; a simple, to-scale sketch will do. From this, create a detailed cutting list of all the pieces you’ll need.
Sides: The vertical pieces that form the outer edges.
Shelves: The horizontal pieces that support your books.
Top & Bottom: Horizontal pieces that cap the unit.
Back Panel (Optional): If you’re adding a backing.
Face Frame (Optional but Recommended): Thin strips of wood added to the front edges for a more finished, furniture-like appearance.
Base Trim & Crown Molding (Optional): Decorative elements to enhance the built-in look.
Best Stud Finder Pick

Franklin Sensors ProSensor M150 Stud Finder – $39.97
Step 5 of this guide depends on finding studs accurately — this multi-stud detector with live-wire warning takes the guesswork out.
- Best for: Locating wall studs before mounting the bookcase, exactly as this guide’s Step 5 requires
- Why we picked it: Detects multiple studs at once with live-wire warning, a trusted brand for accurate wall mounting
- Main drawback: Costs more than basic single-stud finders
Other tools this project calls for
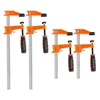 Option 1 JORGENSEN 4-Pack Steel Bar Clamps Set – $37.69
|  Option 2 SKIL 5″ Random Orbital Sander – $39.98
| 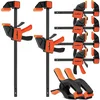 Option 3 HORUSDY 8-Pack Bar Clamps for Woodworking – $33.99
|
As an Amazon Associate we earn from qualifying purchases.
Essential Tools and Materials
Gathering your supplies before you start is crucial for a smooth building process. The right tools make the job easier and safer.
Tools You’ll Need
Tape Measure: For all your measurements.
Pencil: For marking cuts and assembly points.
Safety Glasses: Always protect your eyes!
Safety Gloves: To protect your hands.
Circular Saw or Miter Saw: For making straight, accurate cuts. A miter saw is great for crosscuts and can provide more precise angles.
Jigsaw (Optional): Useful for cutting out irregular shapes or notches if needed.
Drill/Driver: For pre-drilling holes and driving screws.
Level: To ensure everything is plumb and level.
Clamps: Essential for holding pieces together while gluing or screwing.
Sander (Orbital Sander recommended) & Sandpaper: For smoothing surfaces and edges.
Putty Knife: For filling holes and imperfections.
Paint Brushes/Rollers: For finishing.
Stud Finder: To locate wall studs for secure mounting.
Pry Bar and Hammer (Optional): If you need to remove existing trim.
Materials You’ll Need
Plywood: ¾-inch birch or oak veneer plywood is a good choice for the main structure. ½-inch plywood can be used for the back panel if you’re adding one. Your lumberyard can often cut large sheets to size for you.
Wood Screws: Various lengths (e.g., 1¼-inch and 2-inch) suitable for plywood.
Wood Glue: A strong adhesive for reinforcing joints.
Wood Filler or Spackle: For filling screw holes and imperfections.
Primer: To prepare the wood for paint.
Paint or Stain & Polyurethane: For the final finish.
Brad Nails (Optional): For attaching trim or back panels.
Wood Trim (Optional): For the face frame, base, and crown molding.
Step-by-Step: Building Your Built-In Bookcase
Let’s get building! This guide assumes a basic rectangular built-in bookcase.
Step 1: Prepare the Wall Space
If you are replacing existing trim, carefully remove it using a pry bar and hammer. Take care not to damage the drywall. If your bookcase will sit flush against the wall, ensure the wall is clean and dry.
Step 2: Cut Your Plywood Pieces
Using your cutting list and a circular saw or miter saw, cut all your plywood pieces to the exact dimensions. Measure twice, cut once! If you had the lumberyard cut your pieces, double-check their accuracy.
Sides: Two pieces, cut to your desired bookcase height.
Shelves: Cut to your desired bookcase width minus the thickness of the two side pieces (e.g., if your wall is 48″ wide and your plywood is ¾” thick, your shelves will be 48″ – 1.5″ = 46.5″ wide).
Top & Bottom: Cut to the same length as your shelves.
Back Panel (if used): Cut to the full height and width of your intended bookcase opening.
Step 3: Assemble the Main Box
This is where your bookcase starts to take shape.
1. Attach the Bottom: Apply wood glue to the edge of the bottom piece. Position it between the two side pieces, ensuring it’s flush with the back edges and the bottom edges of the sides. Clamp in place. Pre-drill pilot holes through the sides into the bottom piece, then drive screws.
2. Attach the Top: Repeat the process for the top piece, applying glue and screwing it into the top edges of the side pieces. Ensure everything is square.
3. Install Fixed Shelves (if any): If you have shelves that are structural and not adjustable, install them now. Measure and mark their positions on the inside of the side pieces. Apply glue to the shelf ends, position it between the sides, clamp, pre-drill, and screw from the outside of the side pieces into the shelf ends.
Tip: Using shelf pins for adjustable shelves is a great option for flexibility. You’ll drill rows of holes on the inside of the side panels before assembly.
Step 4: Add the Back Panel (Optional)
If you’re adding a back panel, position it onto the back of your assembled box. Ensure it’s square. Secure it using wood glue along the edges of the sides, top, and bottom, and then fasten it with small brad nails or screws every few inches.
Step 5: Install the Bookcase into the Wall
This is a critical step for stability and safety.
1. Locate Studs: Use a stud finder to locate the wall studs where your bookcase will attach. Mark their positions clearly on the wall.
2. Position the Bookcase: Carefully move the assembled bookcase into its final position.
3. Secure to Studs: From the inside of the bookcase (through the back panel or the back edge of the shelves/sides), drive long wood screws (at least 2-inch) directly into the wall studs. Use a level to ensure the bookcase is plumb as you secure it. You’ll want at least two screws into each vertical stud.
Step 6: Add a Face Frame (Optional but Recommended)
A face frame adds a professional, finished look and hides the exposed plywood edges.
1. Cut Face Frame Pieces: Cut thin strips of wood (e.g., 1×2 or 1×3 lumber) to create a frame that covers the front edges of your bookcase. You’ll have vertical stiles and horizontal rails.
2. Attach the Face Frame: Apply wood glue to the front edges of your bookcase box. Position your face frame pieces, ensuring they are flush with the outer edges. Secure them with brad nails or screws, pre-drilling if necessary to prevent splitting.
Step 7: Install Trim and Molding (Optional)
This is where you can really make your bookcase look like a custom architectural feature.
Base Trim: Apply a baseboard trim along the bottom of the bookcase, matching the rest of your room’s trim.
Crown Molding: Install crown molding along the top, either just on the bookcase or extending along the wall for a true built-in look. Many resources, like Lowe’s, have excellent guides on installing molding.
Step 8: Sanding and Filling
Now it’s time to prepare for finishing.
1. Fill Holes: Use wood filler or spackle to fill all screw holes, nail holes, and any small gaps or imperfections. Let it dry completely according to the product instructions.
2. Sand: Once the filler is dry, sand all surfaces smooth. Start with a medium-grit sandpaper (e.g., 120-grit) and finish with a fine-grit sandpaper (e.g., 220-grit). Pay attention to edges and corners. Wipe away all dust with a clean cloth.
Step 9: Priming and Painting/Staining
The final finishing touches bring it all together.
1. Prime: Apply one or two coats of a good quality primer. This ensures even paint absorption and a smooth finish. Let each coat dry completely and lightly sand between coats if necessary (using fine-grit sandpaper).
2. Paint or Stain: Apply your chosen paint color or stain. For paint, two coats are usually recommended for full coverage. If staining, apply evenly and wipe off excess. Once the stain is dry, apply a protective topcoat of polyurethane or a clear varnish for durability. For the most durable finish on a bookcase, consider a good quality enamel paint.
Maintenance for Your Built-In Bookcase
To keep your beautiful built-in bookcase looking its best for years to come, a little regular care goes a long way.
Dusting: Dust regularly with a soft, dry cloth. For more stubborn dust, a slightly damp (not wet) microfiber cloth can be used, followed by a dry cloth.
Cleaning Spills: Wipe up any spills immediately with a clean, absorbent cloth.
Check for Wear: Periodically check the finish for any signs of wear, especially in high-use areas. Touch-ups can be easily made with paint or stain.
Weight Distribution: Be mindful of how you load the shelves. Distribute weight evenly and avoid overloading shelves, particularly if you didn’t use strong joist hangers for fixed shelves or if they are made of thinner material. For heavy loads, ensure they are securely attached to wall studs.

Frequently Asked Questions (FAQ)
Q1: What is the easiest way to cut plywood for a bookcase?
A1: For beginners, the easiest way is to have your lumberyard cut the large sheets into your required dimensions. If you need to cut them yourself, a circular saw with a guide (like a straight edge or a specialized track saw guide) will give you straighter cuts than freehanding.
Q2: How do I make sure my shelves are level?
A2: Use a level! After you’ve marked your shelf positions and before you make permanent cuts or attach them, place your shelf piece in position and use a level to confirm it’s perfectly horizontal. Clamp it before attaching permanently.
Q3: Can I build a built-in bookcase directly into drywall without hitting studs?
A3: No, this is not recommended for stability and safety. For a solid, secure built-in bookcase that can hold the weight of books, you absolutely must anchor it into the wall studs. If you are unsure about locating studs, a stud finder is an invaluable tool, or you can consult resources from organizations like the National Association of Home Builders (NAHB) for general building practices.
Q4: What kind of wood is best for built-in bookcases?
A4: For a budget-friendly and stable option well-suited for DIY, plywood (like birch or oak veneer) is excellent. For a more premium look and feel, solid wood like pine, poplar, or maple can be used, but they are more expensive and can be trickier to work with. MDF is an option for a smooth paint finish but is heavy.
Q5: How deep should built-in bookcase shelves be?
A5: Standard shelf depth is typically 10 to 12 inches, which accommodates most books. However, you can customize this depth based on what you plan to store. If you’re storing very large art books or display items, you might opt for a deeper shelf.
Q6: Do I need a back panel for my built-in bookcase?
A6: A back panel is not strictly necessary for structural integrity if the unit is well-secured to wall studs. However, adding a back panel (like ¼-inch or ½-inch plywood or beadboard) gives the bookcase a much more finished, professional, and substantial look, preventing items from falling behind and hiding the wall.
Q7: How do I make my DIY built-in bookcase look professionally done?
A7: The key is in the details. Precise cuts, secure attachments to studs, filling and sanding all imperfections before painting, and adding a professional-looking face frame and trim (like baseboard and crown molding) will significantly elevate the finished product, making it look like a custom architectural feature.
Conclusion
Building a built-in bookcase is an achievable and incredibly rewarding DIY project that can transform your living space. By carefully planning, gathering the right tools, and following these step-by-step instructions, you can create a beautiful, functional, and custom piece of furniture that enhances both your home’s storage and its overall aesthetic. Don’t be afraid to take your time; the attention to detail will pay off in a stunning result you can be proud of for years to come. Happy building!