
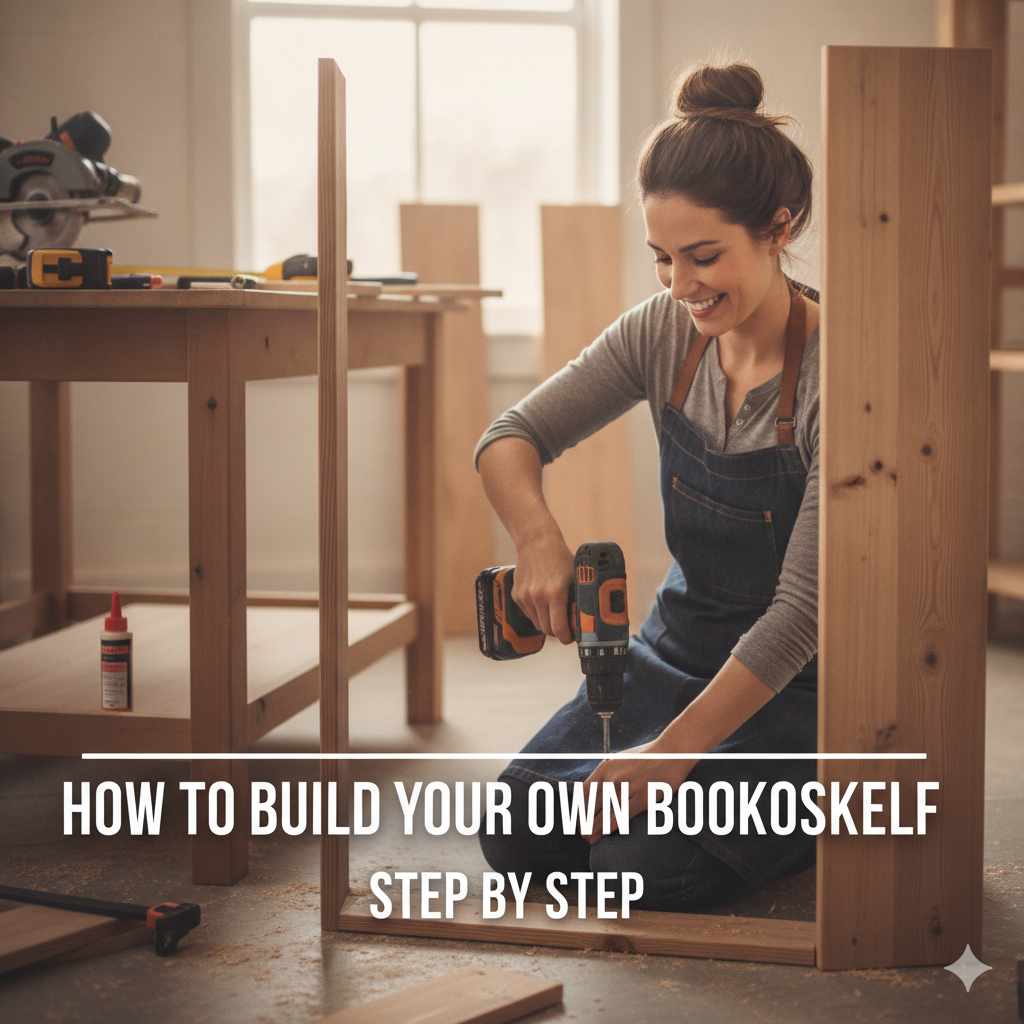
Building your own bookshelf is a rewarding DIY project. This guide offers simple steps for choosing materials, gathering tools, and assembling a sturdy shelf. Create custom storage that fits your home and style with this easy-to-follow plan.
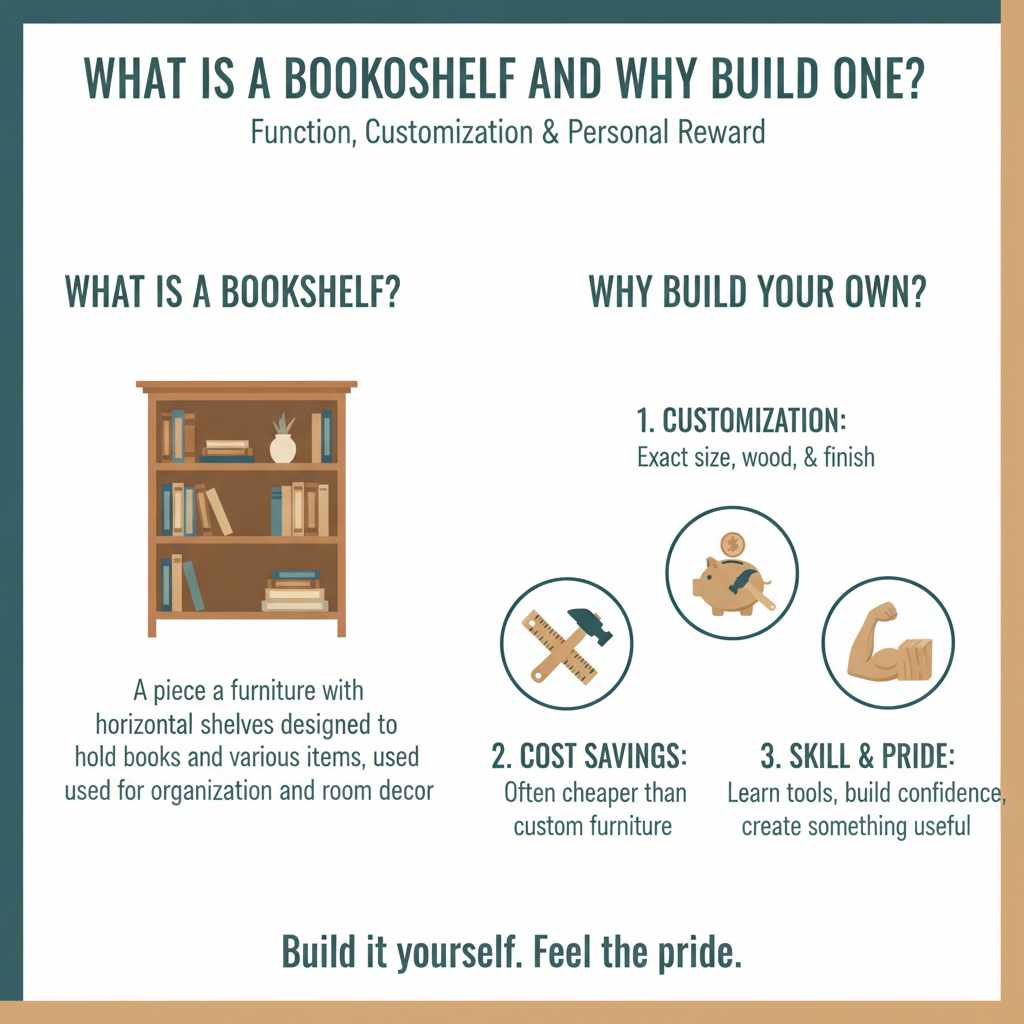
What Is a Bookshelf and Why Build One?
A bookshelf is a piece of furniture. It has horizontal shelves. These shelves hold books and other items.
People use them in homes and offices. They help keep things tidy. They also add to room decor.
Why build your own? Many reasons exist. First, you get exactly what you want.
You pick the size. You choose the wood. You decide the finish.
Second, it can save money. Buying custom furniture costs a lot. Building it yourself is often cheaper.
Third, it’s a great skill to learn. You build confidence. You learn to use tools.
It’s a fun hobby. You end up with a useful item. This item is made by your own hands.
That feels pretty good.
Gathering Your Materials
Before you start cutting wood, you need to know what you’ll build with. Choosing the right materials makes a big difference. It affects how strong your shelf is.
It also affects how it looks.
Wood Choices Explained
Wood is the main building block for most bookshelves. Different woods have different looks and strengths. For beginners, some are easier to work with than others.
Let’s look at common choices.
- Pine: This is a soft wood. It’s usually less expensive. It’s easy to cut and sand. Pine can dent or scratch more easily. It takes paint and stain well. Many starter projects use pine.
- Oak: This is a hard wood. It is very strong and durable. Oak looks beautiful when stained. It is heavier and harder to work with than pine. It costs more too.
- Plywood: This is made of thin wood layers. They are glued together. Plywood is strong and stable. It doesn’t warp easily. It’s good for shelves that hold heavy items. You can get it in different types. Birch plywood has a smooth surface.
- MDF (Medium-Density Fiberboard): This is an engineered wood product. It is made from wood fibers and resin. MDF is very smooth. It is great for painting. It is heavy. It can sag over time if not supported well. It doesn’t hold screws as well as solid wood.
For your first bookshelf, pine or a good quality plywood are great choices. They are easier to manage and still provide good results.
Hardware and Supplies
Besides wood, you’ll need other things. These hold your shelf together. They also help you finish it.
- Screws: Use wood screws. They are strong. Get the right length. They should go through one piece of wood and into another. About 1 1/4 inch or 1 1/2 inch screws are common for joining 3/4 inch thick wood.
- Wood Glue: This adds extra strength. Always use glue with screws. It makes your joints much stronger.
- Sandpaper: You’ll need different grits. Start with rougher grit (like 80 or 120). Finish with finer grit (like 180 or 220). This makes the wood smooth.
- Finishing Supplies: This includes stain or paint. You’ll also need a sealant like polyurethane. This protects the wood.
- L-Brackets (Optional): These can add extra support. They are good for heavy loads.
Quick Material Checklist
For a simple bookshelf:
- Wood: 1×10 or 1×12 boards (length depends on your design) OR good quality plywood sheets.
- Fasteners: Wood screws (1 1/4 inch or 1 1/2 inch).
- Adhesive: Wood glue.
- Finishing: Sandpaper (80, 120, 220 grit), primer (if painting), paint or stain, polyurethane sealant.
- Safety: Safety glasses, dust mask.
Essential Tools for Your Project
Having the right tools makes the job easier and safer. You don’t need a huge workshop to build a bookshelf. Some basic tools will get you far.
Measuring and Marking Tools
Accuracy is key. You need to measure twice and cut once.
- Tape Measure: A good quality tape measure is a must.
- Pencil: For marking cut lines.
- Carpenter’s Square: This helps draw straight lines. It also checks if corners are square (90 degrees).
- Speed Square: A smaller, versatile square. It’s great for marking cuts and angles.
Cutting Tools
This is where you shape your wood.
- Hand Saw: A basic option. It requires more effort. It works for small projects.
- Circular Saw: Much faster and easier. It makes straight cuts. You can get guides for straighter cuts.
- Miter Saw (Optional but Recommended): This is excellent for making precise angled cuts. It’s also great for cutting boards to exact lengths quickly.
Assembly Tools
These help you put the pieces together.
- Drill/Driver: Essential for drilling pilot holes and driving screws. Get a cordless one for ease of use.
- Drill Bits: You need bits for pilot holes. Also, need bits for driving screws. A countersink bit is useful. It lets screw heads sit flush with the wood.
- Clamps: These hold pieces together while glue dries. They also help keep wood steady while you screw. Bar clamps or pipe clamps are common. Spring clamps are good for smaller jobs.
Finishing Tools
These make your bookshelf look professional.
- Putty Knife: For applying wood filler.
- Paint Brushes or Rollers: For applying paint or stain.
- Rags: For wiping off excess stain or applying finish.
Safety First!
Always wear safety glasses. Use a dust mask when sanding or cutting. Make sure your work area is clean.
Secure lumber so it doesn’t move when cutting.
Planning Your Bookshelf Design
Before you buy wood, you need a plan. Think about where the shelf will go. What will you store on it?
This helps decide the size and style.
Key Design Considerations
- Dimensions: How tall and how wide do you need it? Measure the space. Think about the size of your books. Taller books need deeper shelves.
- Depth: Most bookshelves are 10 to 12 inches deep. This fits most books.
- Shelf Spacing: How much space between shelves? Standard books need about 8 to 10 inches. Larger books or decorative items might need more.
- Number of Shelves: How many shelves do you need? This depends on how many books you have.
- Style: Simple and modern? Or something more traditional? This affects the wood choice and finishing.
Simple Bookshelf Design Example
Let’s plan a basic, sturdy bookshelf. This is good for beginners.
Design: A rectangular frame with fixed shelves.
Materials:
- Two side pieces (e.g., 1×10 boards, 4 feet tall)
- One top piece (e.g., 1×10 board, 3 feet wide)
- One bottom piece (e.g., 1×10 board, 3 feet wide)
- Three shelves (e.g., 1×10 boards, 3 feet wide)
- Optional: A back panel (e.g., 1/4 inch plywood, 4 feet tall by 3 feet wide)
Dimensions: This example shelf is 4 feet tall and about 3 feet wide (plus the thickness of the side boards). The actual width will be around 37 inches if using 3/4 inch thick wood for sides.
Shelf Spacing: About 10 inches between shelves. This gives good space for most books.
Sketch Your Idea
Draw your bookshelf. Label the sides, top, bottom, and shelves. Write down the measurements.
This sketch is your blueprint. It helps you see everything before you cut.
Step-by-Step Construction Guide
Now comes the fun part: building! Follow these steps carefully. Take your time.
Precision will give you a better result.
Step 1: Measure and Cut Your Wood
This is the most critical step. Double-check all your measurements.
- Side Pieces: Cut two pieces to your desired height (e.g., 48 inches).
- Top and Bottom Pieces: Cut two pieces to your desired width (e.g., 36 inches).
- Shelves: Cut your shelves to the same width as the top and bottom pieces (e.g., 36 inches).
- Back Panel (Optional): If you are adding a back panel, cut it to the full height and width of the assembled frame.
Pro Tip: If you’re not comfortable with complex cuts, many hardware stores will cut lumber for you for a small fee. This can save you a lot of hassle.
Step 2: Mark Shelf Locations
On the inside of your two side pieces, you need to mark where each shelf will go. This ensures they are level.
- Measure up from the bottom of each side piece. Mark the height for the bottom of each shelf.
- Use your square to draw a straight line across the inside of the board. This line shows where the bottom of the shelf will sit.
- Make sure your marks are identical on both side pieces.
Spacing Tip
For consistent spacing, you can use a scrap piece of wood as a spacer. Mark your first shelf line, then use your spacer to mark the next one. This keeps everything even.
Step 3: Assemble the Frame (Sides, Top, and Bottom)
Start by building the outer box of your bookshelf.
- Lay one side piece flat. Apply wood glue to the end of the top piece.
- Position the top piece so its end is flush with the top edge of the side piece. Make sure the edges are aligned perfectly.
- Clamp them together. Drill pilot holes through the side piece into the top piece. Use 2-3 screws.
- Repeat this process for the bottom piece on the same side piece.
- Now, lay the other side piece flat. Apply glue to the other ends of the top and bottom pieces.
- Carefully position the second side piece onto the top and bottom pieces. Clamp and screw them together.
You should now have a basic rectangular frame. Check that all corners are square.
Step 4: Install the Shelves
This is where your shelf starts to take shape.
- Apply wood glue to the ends of one shelf.
- Carefully slide the shelf into the frame. Align it with your marked lines on the side pieces.
- Clamp the shelf in place. Drill pilot holes through the side pieces into the ends of the shelf. Use 2-3 screws per side.
- Repeat this for all remaining shelves.
Important: Make sure the shelves are level as you install them. Adjust clamps if needed.
Step 5: Add the Back Panel (Optional)
If you’re adding a back panel, this is the time.
- Lay the bookshelf face down on a flat surface.
- Position the back panel so it covers the entire back of the bookshelf. Make sure it’s square.
- Apply a thin bead of wood glue along the edges of the frame and shelves where the back panel will touch.
- Secure the back panel with small nails or screws every 6-8 inches around the perimeter and along the shelves.
A back panel adds significant stability. It prevents the shelf from wobbling side-to-side.
Contrast Matrix: Fixed vs. Adjustable Shelves
| Myth (Fixed Shelves) | Reality (Fixed Shelves) | Myth (Adjustable Shelves) | Reality (Adjustable Shelves) |
|---|---|---|---|
| Harder to build | Easier to build, less hardware | Easier to change later | Requires more complex hardware (shelf pins, drilling many holes) |
| Less versatile | Very sturdy, fewer weak points | Can look messy with empty holes | Offers flexibility for different item heights |
Step 6: Sanding and Finishing
This step makes your bookshelf look beautiful.
- Start with 80 or 120 grit sandpaper. Sand all surfaces and edges. Focus on removing any rough spots or glue drips.
- Move to 180 or 220 grit sandpaper. This makes the wood smooth to the touch.
- Wipe away all the dust with a clean cloth or tack cloth.
- If painting: Apply a coat of primer. Let it dry. Then apply your paint. You might need two coats.
- If staining: Apply wood stain according to the product directions. Wipe off excess. Let it dry completely.
- Sealant: Apply 2-3 coats of polyurethane or another clear sealant. This protects the wood from moisture and wear. Lightly sand with very fine grit sandpaper (220+) between coats for a smoother finish.
Let everything dry completely. Then, your new bookshelf is ready to use!
Personal Experience: The Time I Miscalculated Shelf Width
I remember building my first proper bookshelf years ago. I was so excited to get started. I had this beautiful piece of oak I’d found.
I planned out a nice, tall unit. I measured everything on paper, or so I thought.
The cutting went pretty smoothly. I felt like a pro with my new circular saw. I assembled the sides, top, and bottom.
It looked solid. Then came the shelves. I started sliding them in.
That’s when I noticed it. They were just a tiny bit too wide.
My carefully measured “36-inch” shelves were actually closer to 36 1/2 inches when accounting for the wood’s actual width and the angle of my cuts. Panic set in. I had all these shelves cut.
I didn’t want to start all over. It was a sinking feeling.
So, I did what any slightly panicked beginner would do. I grabbed my sander and tried to sand down the ends of the shelves. It was a mess.
It took forever. And they still didn’t fit perfectly. Some were a bit loose.
It taught me a valuable lesson: measure your actual wood dimensions. Don’t just rely on the label. And always, always check your fit before the glue is applied.
Real-World Context: Where and Why Bookshelves Matter
Bookshelves aren’t just storage. They are part of how we live. They show our interests.
They organize our spaces.
In the Living Room
Here, bookshelves often display more than just books. They hold decorative items. Photos of family and friends.
Small plants. Souvenirs from trips. A well-designed bookshelf can be a centerpiece.
The style here often matches the room. Dark wood for a traditional look. Painted white for a farmhouse feel.
Floating shelves for a modern, minimalist vibe.
In the Home Office or Study
This is where functionality often wins. Bookshelves need to hold heavy reference books. Textbooks.
Binders. Documents. They should be sturdy and practical.
Adjustable shelves can be very useful here. They allow you to change the spacing as your needs change. Deep shelves are good for larger volumes.
In the Bedroom
Often, a small bookshelf or nightstand with shelves is all that’s needed. It holds a few favorite reads. A lamp.
An alarm clock. Things you want close at hand.
This space might prioritize a softer look. Lighter woods or painted finishes are common. The scale is usually smaller.
In Kids’ Rooms
Safety is a big concern here. Bookshelves should be stable and anchored to the wall. Rounded edges are a plus.
Easy access for little hands is important.
Brightly colored shelves or shelves designed for toy storage are popular. The goal is to encourage reading and play.
User Behavior: The “To-Be-Read” Pile
Many people have a stack of books they plan to read soon. A well-organized bookshelf helps manage this. It stops piles from taking over your floors and furniture.
It makes finding your next read easy.
What This Means for You: When is it Okay?
Understanding how bookshelves are used helps you build one that works for you. It’s not just about putting wood together. It’s about solving a storage problem.
When is Your Bookshelf “Normal”?
- It holds your books! This sounds obvious. But if it’s doing its main job, it’s working.
- It fits your space. The dimensions are right. It doesn’t feel too big or too small.
- It’s stable. It doesn’t wobble. It feels secure when you put books on it.
- The finish looks good. It matches your room’s style. It’s smooth and clean.
When Might You Worry?
- Sagging shelves: If the shelves start to bend in the middle, especially between the ends, this is a concern. It means the wood might be too thin or unsupported for the weight.
- Wobbling or instability: If the whole unit feels shaky, especially when you touch it. This could be due to weak joints or missing a back panel.
- Cracking or splitting wood: This can happen if screws are too close to the edge or if the wood is stressed.
- Poor finish: Peeling paint, uneven stain, or a sticky surface. This usually means the finishing steps weren’t followed correctly.
Most of these issues can be prevented with good planning and solid construction. Don’t be afraid to reinforce a shelf if you plan to load it heavily.
Simple Checks
- Visual Inspection: Look for any obvious cracks or damage.
- The Wobble Test: Gently push on the side of the shelf. Does it move easily?
- Shelf Sag Check: Stand back and look at the shelves from the side. Are they straight?
Quick Fixes and Tips for Your Bookshelf
Even the best projects can sometimes use a little tune-up. Here are some tips to keep your bookshelf looking and working its best.
Reinforcing Sagging Shelves
If a shelf starts to sag, you have a few options.
- Add a Cleat: Cut a thin strip of wood (like a 1×2). Attach it underneath the shelf, running from one side to the other. Glue and screw it into place. This adds a lot of strength.
- Add a Center Support: For very long shelves, you might need a vertical support in the middle. This could be another piece of wood or even a decorative metal bracket.
- Use Stronger Wood: For future projects, choose thicker wood or hardwoods. Plywood is also a good option for shelves.
Dealing with Loose Joints
If a joint feels loose, sometimes you can fix it.
- Add More Screws: Carefully drill new pilot holes and add more screws.
- Wood Filler and Re-screw: If the hole is stripped, you can fill it with wood filler. Let it dry completely, then drill a new pilot hole and screw.
- Re-glue and Clamp: Sometimes, you can take a joint apart, clean off old glue, re-glue, and clamp it tightly.
Maintenance Tips
- Dust Regularly: Use a soft cloth or a duster.
- Avoid Direct Sunlight: This can fade finishes and dry out wood over time.
- Wipe Spills Immediately: Use a slightly damp cloth, then dry thoroughly.
Frequent Questions About Building Bookshelves
What kind of wood is best for a heavy-duty bookshelf?
For heavy-duty use, hardwoods like oak, maple, or walnut are excellent choices. Plywood, especially birch or furniture-grade plywood, is also very strong and stable for shelves that will hold a lot of weight. Avoid softwoods like pine for very heavy loads unless they are very thick or well-supported.
How do I prevent my bookshelf from tipping over?
The best way to prevent tipping is to anchor your bookshelf to the wall. Use L-brackets or furniture straps. These are inexpensive and easy to install.
Make sure to screw them into wall studs for maximum stability. This is especially important in homes with children or pets, or in earthquake-prone areas.
Can I build a bookshelf with just hand tools?
Yes, you absolutely can build a bookshelf with only hand tools. It will take more time and physical effort, especially for cutting. A good hand saw, a measuring tape, a square, a drill with a hand crank or brace, and a hammer will allow you to build a functional shelf.
Power tools just make the process faster and easier.
What is the best way to get a smooth finish on my bookshelf?
The key to a smooth finish is thorough sanding. Start with a coarser grit (like 80 or 100) to remove imperfections. Then, move progressively to finer grits (150, 220, and even higher if desired).
Always sand in the direction of the wood grain. Wipe away all dust between each sanding stage and before applying any finish.
How far apart should shelves be on a bookshelf?
Standard book sizes usually fit well with shelf spacing of 8 to 10 inches. For taller books or decorative items, you might want 12 inches or more. Measure your tallest books or items and add an inch or two for clearance when deciding on your spacing.
Is it cheaper to build a bookshelf or buy one?
In most cases, it is cheaper to build a basic bookshelf yourself than to buy a comparable-quality one, especially if you already own some basic tools. The cost of lumber, screws, glue, and finishing supplies will often be less than the retail price of a new shelf. However, if you need very exotic wood or complex designs, the cost can increase.
Conclusion: Your Custom Bookshelf Awaits!
You’ve learned the steps. You know the materials. You’re ready to build.
Remember, perfection isn’t the goal. A functional, custom bookshelf is. Enjoy the process.
You’re making something useful.


