How To Make A Wooden Bookshelf
Building your own wooden bookshelf combines creativity, craftsmanship, and functionality. Whether you’re aiming for a simple design or a statement piece for your home, the process offers a rewarding opportunity to customize storage while learning valuable woodworking skills. With a growing interest in DIY projects, wooden bookshelves have become a favorite for both beginners and experienced makers. Their versatility ensures they fit any décor, provide sturdy storage, and can be finished to suit your unique style.
The demand for quality shelving is rising, with homeowners seeking solutions for organizing books, collectibles, and décor. According to the National Association of Home Builders, custom shelving projects are among the top ten requested home improvements, reflecting their importance in modern homes.
This guide walks you through every step, from planning and material selection to finishing touches, offering practical tips, real-world examples, and expert insights to help you make a bookshelf that lasts.
Key Takeaways
- Planning and measurement are crucial for a successful bookshelf build.
- Material choice impacts durability, appearance, and budget.
- Tool selection and safety practices ensure efficient and safe construction.
- Assembly techniques like joinery and finishing affect bookshelf longevity.
- Customization options let you adapt the bookshelf to your space and needs.
- Real-world case studies and expert tips enhance your DIY confidence.
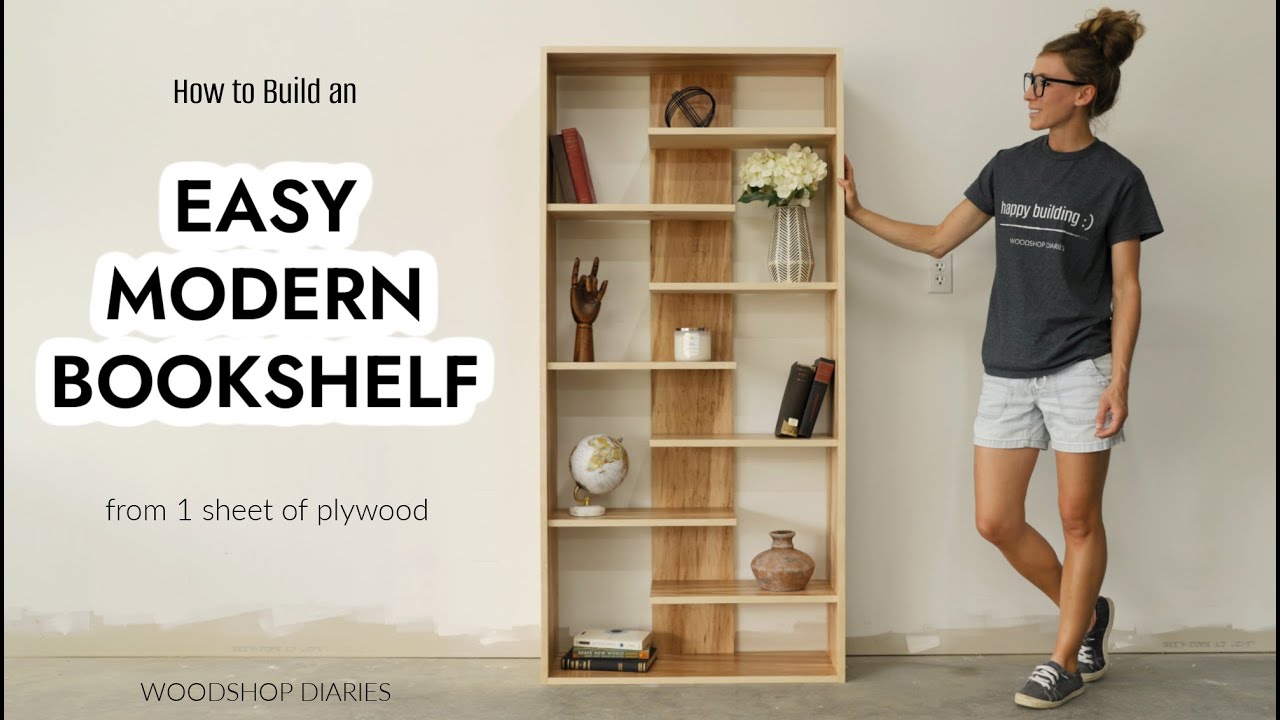
Credit: www.youtube.com
Planning Your Wooden Bookshelf Project
Careful planning sets the foundation for a successful bookshelf build. Before touching any tools, consider your needs, space, and design preferences.
Determining Shelf Size And Capacity
Start by assessing the space where your bookshelf will reside. Measure the width, height, and depth available, accounting for clearance from walls, windows, and doors. Decide how many shelves you need and what you’ll store, books, magazines, or décor items.
For heavy loads, ensure shelf spans are not too wide; experts recommend a maximum span of 36 inches for solid wood to prevent sagging.
Sketching And Designing Your Bookshelf
Draw a rough sketch or use free design software like SketchUp to visualize your bookshelf. Include shelf heights, width, and overall dimensions. Factor in the thickness of shelf material, commonly 3/4-inch plywood or solid wood. Determine whether you want fixed or adjustable shelves, and if you’ll add features like a back panel or decorative trim.
Setting A Budget And Timeline
Plan your budget based on the materials and tools you’ll need. Costs vary: a basic plywood bookshelf may cost $50-$100 in materials, while premium hardwoods and finishes can raise costs to $200+. Allocate time for each stage, cutting, assembly, finishing. Most DIYers complete a bookshelf over a weekend, though more intricate designs may take longer.
Example: Small Apartment Bookshelf
A college student in Boston designed a compact bookshelf for a 36-inch wall space. By sketching the design and carefully measuring, she maximized storage while maintaining easy access. Her total project budget was $80, and she completed it in two days.
Choosing Materials For Your Bookshelf
Material selection affects durability, appearance, and ease of construction. Evaluate options based on your project goals, budget, and woodworking experience.
Solid Wood Vs. Engineered Wood
Solid wood, like oak, maple, or pine, offers strength and natural beauty. Engineered woods, such as plywood and MDF, are cost-effective and stable, but may lack the character of solid wood.
| Material | Strength | Cost (per sq ft) | Finish Options | Ease of Use |
|---|---|---|---|---|
| Oak (Solid) | High | $4-8 | Stain, Paint | Moderate |
| Pine (Solid) | Medium | $2-4 | Stain, Paint | Easy |
| Plywood | Medium-High | $1-3 | Paint, Veneer | Easy |
| MDF | Medium | $1-2 | Paint | Easy |
Selecting The Right Wood
Choose wood based on your budget and desired look. For visible grain and strength, hardwoods like oak are ideal. Pine is affordable and easy to work with, but softer and prone to dents. Plywood provides stability for shelves and panels, especially in larger bookshelves.
Hardware And Fasteners
Select fasteners suited to your material. Wood screws, dowels, and metal brackets are common. For adjustable shelves, use shelf pins and supports. Choose hardware in finishes that match your décor.
Example: Library-style Shelf
A homeowner wanted a classic look, opting for oak and brass hardware. The project cost $250 in materials but yielded a bookshelf sturdy enough to hold hundreds of books.

Credit: www.youtube.com
Essential Tools And Safety
Having the right tools and safety practices is vital for efficient and safe construction.
Basic Tools For Woodworking
For most bookshelf projects, you’ll need:
- Circular saw or table saw (for straight cuts)
- Miter saw (for angled or precise cuts)
- Drill/driver (for holes and screws)
- Tape measure and square (for accurate layout)
- Clamps (to hold pieces during assembly)
- Sanding block or orbital sander (for smooth surfaces)
Optional but helpful:
- Router (for decorative edges)
- Jigsaw (for curved cuts)
- Level (for shelf alignment)
Safety Gear And Best Practices
Wear safety glasses, ear protection, and a dust mask. Keep your workspace clean and well-lit. Always check tool manuals for safe operation. Secure wood before cutting, and never rush through steps.
Pro Tip: Mark cut lines clearly and double-check measurements before cutting. Mistakes can be costly and time-consuming to fix.
Example: Workshop Safety
In my experience, using clamps and a dust mask prevented both injury and respiratory irritation during sanding and assembly. Investing in quality safety gear paid off in comfort and confidence.

Credit: www.youtube.com
Step-by-step Construction Process
Building a bookshelf involves precise steps. Following a systematic process ensures accuracy and stability.
Cutting Materials
Begin by cutting shelf boards, sides, and back panels to size. Use a circular saw or table saw for straight cuts, ensuring edges are square. Label each piece to keep your project organized.
- Measure twice, cut once.
- Sand cut edges to remove splinters.
Assembling The Frame
Lay out sides and shelves for assembly. Drill pilot holes to prevent wood splitting, then join shelves to sides using screws, dowels, or brackets. Use clamps to hold pieces in place as you secure fasteners.
- Check for square corners using a carpenter’s square.
- Attach the back panel for rigidity, using nails or screws.
Installing Shelves
For fixed shelves, fasten each shelf in place. For adjustable shelves, drill evenly spaced holes for shelf pins. Test the fit with a sample shelf before final installation.
- Ensure shelves are level.
- Space shelves based on item heights, 12 inches is standard for books.
Adding Trim And Finishing Touches
Install trim or molding for a finished look. Sand all surfaces, fill screw holes with wood putty, and touch up edges. Wipe away dust before finishing.
- Use wood glue for additional strength.
- Check for sharp edges and sand smooth.
Example: Diy Fixed Shelf
A teacher built a bookshelf with fixed pine shelves, using wood screws and glue for extra strength. The project took one weekend and is still in use after five years.
Finishing Your Bookshelf
The right finish protects your bookshelf and enhances its appearance.
Staining And Sealing
Apply wood stain for color, followed by polyurethane or lacquer for protection. Use a brush or rag to apply stain, wiping off excess for even coverage. Allow each coat to dry thoroughly.
- Sand between coats for smoothness.
- Choose finishes based on durability, polyurethane is highly resistant to wear.
Painting Techniques
For a bold look, paint your bookshelf with latex or acrylic paint. Prime surfaces first, especially MDF or plywood. Use foam rollers for smooth, even coats.
- Let paint cure fully before loading shelves.
- Consider semi-gloss or satin finishes for easy cleaning.
Installing Hardware
Attach handles, brackets, or shelf pins as desired. Ensure hardware is properly aligned and secured.
- Match hardware finishes to room décor.
- Use a level to check alignment.
Example: Painted Bookshelf
A family painted their bookshelf bright blue for a child’s room. Using primer and two coats of paint, the finish was durable and vibrant, making the bookshelf a centerpiece in the space.
Customization And Design Enhancements
Personalize your bookshelf with design features to match your taste and needs.
Adding Doors Or Drawers
Install cabinet doors or drawers for enclosed storage. Use concealed hinges for a seamless look. Drawers can be added to the base, ideal for storing small items.
- Choose soft-close hardware for safety.
- Match drawer fronts to shelf material.
Decorative Elements
Incorporate trim, molding, or carved accents. Use a router for decorative edges or add crown molding for a classic touch.
- Paint or stain trim separately for contrast.
- Add LED lighting for display shelves.
Modular And Built-in Designs
Design modular units for flexibility, bookshelves can be stacked or rearranged. For built-in shelving, anchor units securely to wall studs.
- Use adjustable shelves for changing needs.
- Plan for electrical outlets if adding lighting.
Example: Modular Bookshelf
A couple built modular plywood units to fit their living room, allowing them to reconfigure the shelves for books, plants, and electronics. The flexible design adapted easily as their collection grew.
Maintenance And Longevity
Proper care extends the life of your bookshelf, keeping it functional and attractive.
Cleaning And Dusting
Dust shelves regularly with a microfiber cloth. Avoid harsh chemicals that may damage wood finishes. For painted surfaces, use mild soap and water.
- Clean up spills promptly to prevent stains.
- Avoid placing wet items directly on shelves.
Repairing Damage
Fix scratches with touch-up markers or wood filler. Tighten loose screws and shelf pins periodically. If shelves sag, reinforce with additional brackets.
- Inspect for wear every six months.
- Replace damaged hardware as needed.
Preventing Warping And Sagging
Maintain stable humidity to prevent wood warping. Avoid overloading shelves beyond recommended capacity.
- Use shelf supports for long spans.
- Store heavy items near shelf ends.
Example: Long-term Care
A bookshelf built from oak stayed sturdy for over a decade with regular dusting and occasional tightening of screws. The owner reinforced shelves with brackets after noticing minor sagging.
Real-world Examples And Case Studies
Examining actual bookshelf builds offers practical insight and inspiration.
Case Study 1: Home Office Bookshelf
A software engineer needed efficient storage for technical manuals and devices. She built a custom bookshelf from birch plywood, incorporating adjustable shelves and cable management holes. The project cost $120 and took three days, resulting in a workspace upgrade.
Case Study 2: Children’s Room Bookshelf
A parent constructed a bookshelf with rounded corners and painted shelves, ensuring child safety. Using pine and non-toxic paint, the project cost $60 and was completed in a weekend. The bookshelf helped organize toys and books, fostering a tidy environment.
Case Study 3: Built-in Living Room Shelves
A DIY enthusiast transformed a living room wall into built-in shelving, using MDF for affordability. The shelves were anchored to studs, with crown molding for elegance. The project cost $350 but added significant storage and visual appeal.
Comparison Table: Diy Vs. Store-bought Bookshelves
| Feature | DIY Bookshelf | Store-Bought Bookshelf |
|---|---|---|
| Customization | High | Low-Medium |
| Cost | Variable ($50-$350+) | $60-$500+ |
| Durability | High (with quality materials) | Medium-High |
| Skill Required | Medium-High | None |
| Assembly Time | 1-3 days | 1-2 hours |
Sustainability And Environmental Considerations
Choosing eco-friendly materials and practices benefits both the environment and your home.
Using Sustainable Wood
Opt for FSC-certified wood to ensure responsible harvesting. Bamboo and reclaimed wood are sustainable options, reducing environmental impact.
- Check for certification labels when buying wood.
- Consider recycled materials for shelves and panels.
Low-voc Finishes
Select paints and stains with low VOCs (volatile organic compounds) for improved indoor air quality. Water-based finishes are safer and easier to apply.
- Read labels for VOC content.
- Ventilate workspace during finishing.
Minimizing Waste
Plan cuts to minimize scrap. Reuse leftover wood for small projects or repairs.
- Donate excess materials to local makerspaces.
- Compost sawdust if possible.
Example: Eco-friendly Bookshelf
A builder used reclaimed wood and low-VOC finish for a bookshelf, reducing environmental impact. The project inspired neighbors to choose sustainable options for their own home improvements.
Troubleshooting Common Issues
DIY bookshelf builds can present challenges. Addressing problems early ensures a successful outcome.
Shelves Sagging
If shelves sag, reinforce with metal brackets or add a center support. Reduce shelf span or use thicker material.
- Avoid overloading shelves.
- Use plywood for added strength.
Uneven Or Misaligned Shelves
Recheck measurements and use a level during installation. Adjust as needed and tighten fasteners.
- Mark shelf positions before assembly.
- Trim edges as needed for a precise fit.
Surface Imperfections
Fill gaps and holes with wood putty, then sand smooth. Use primer to hide imperfections before painting.
- Apply multiple coats for best results.
- Inspect finished surfaces under bright light.
Hardware Issues
If screws strip or hardware loosens, switch to longer screws or anchors. Use thread locker for persistent issues.
- Choose high-quality hardware.
- Test fit before final installation.
Frequently Asked Questions
How Do I Choose The Best Wood For My Bookshelf?
The best wood depends on your budget, desired appearance, and durability needs. Hardwoods like oak and maple are strong and attractive, but pricier. Softwoods like pine are affordable and easy to work with but may dent more easily. For larger projects, plywood offers stability and is often used for shelves and panels. Always check for FSC certification if sustainability matters to you.
Can I Build A Bookshelf With Only Hand Tools?
Yes, it’s possible to build a bookshelf with hand tools such as a handsaw, chisel, hammer, and hand drill. While power tools speed up the process and improve precision, traditional hand tools are sufficient for basic designs. Focus on careful measurement and patience for best results.
What’s The Ideal Shelf Spacing For Books?
Standard shelf spacing for books is 10 to 12 inches in height. Adjust spacing depending on the types of books, taller for reference books, narrower for paperbacks. For adjustable shelves, drill holes at 1-inch intervals for flexibility.
How Do I Prevent Bookshelf Tipping?
To prevent tipping, anchor the bookshelf to wall studs using brackets or anti-tip hardware. Especially for tall or heavy bookshelves, this improves safety. For children’s rooms, anchoring is essential to prevent accidents.
What Finish Is Safest For A Bookshelf In A Child’s Room?
For children’s rooms, use non-toxic, low-VOC paints or finishes. Water-based polyurethane is a safe option, and many brands offer child-safe products certified by third-party organizations. Ensure finishes are fully cured before use, and avoid solvents or strong-smelling products.
Building a wooden bookshelf is a fulfilling project that enhances your home and develops your skills. With careful planning, quality materials, and attention to detail, you can create a durable, attractive shelf tailored to your needs. Whether you choose a simple design or a custom piece, your bookshelf will serve as both storage and a showcase for your favorite items. For further inspiration, explore resources like Wikipedia: Woodworking and Popular Woodworking for expert advice and techniques. And if you’re interested in other DIY home projects, check out guides such as choosing the right canning jar makes preserving food easier or Freeze-drying vs canning: Which is better for long-term food storage? for additional tips on enhancing your living space.
Products related to this article
Sponsored / affiliate links. As an Amazon Associate I earn from qualifying purchases. I may earn additional commission from eligible campaigns.