How To Repaint A Kitchen Table: Step-By-Step Guide
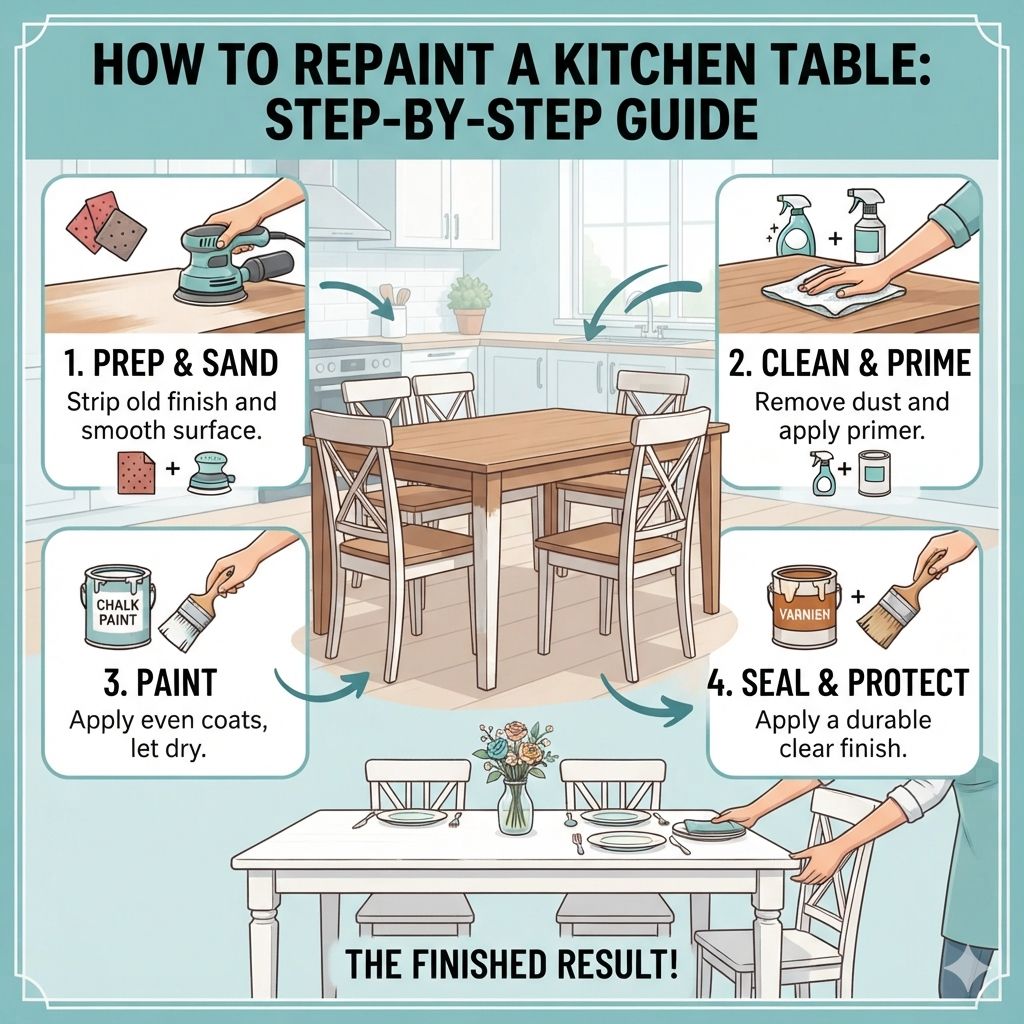
Repainting a kitchen table involves preparing the surface, applying primer and paint, and then sealing it. This process can transform an old table into a centerpiece for your kitchen, giving it a fresh look and extending its life. It’s a rewarding DIY project that’s achievable for most homeowners.
What is Repainting a Kitchen Table?
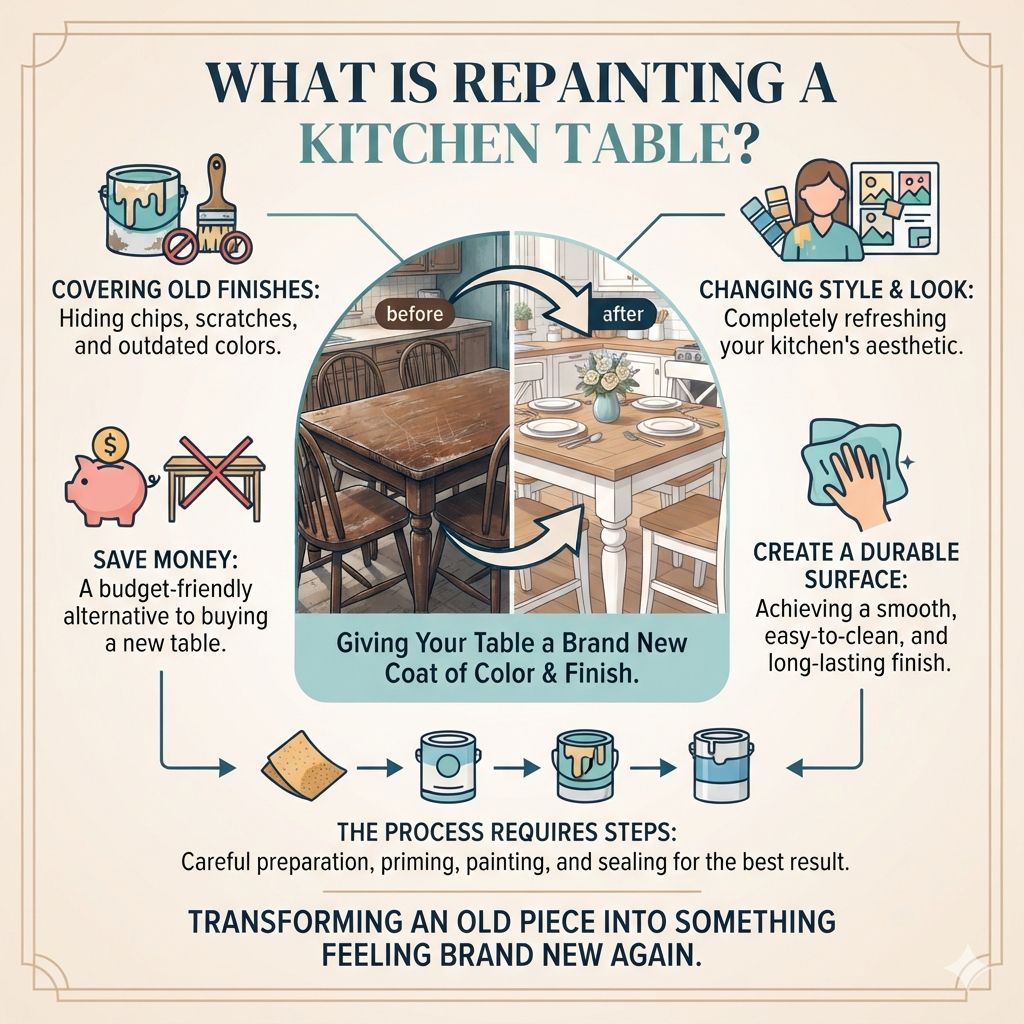
Repainting a kitchen table means giving it a new coat of color. You cover the old finish with new paint. This changes the look of your table completely.
It can be done for many reasons. Maybe the old paint is chipped. Or perhaps you just want a new style.
It’s a way to refresh your kitchen without buying a new table. This can save you a lot of money.
The goal is to create a smooth, durable surface. This new surface should be easy to clean. It should also look great.
The process is not just slapping on some paint. It takes careful steps. Each step is important for the final result.
It’s about transforming an old piece of furniture. You make it feel brand new again.
My First Time Repainting a Table: A Kitchen Meltdown
I remember my first attempt. It was years ago. My kitchen table was a dull brown.
It had seen better days. Kids had drawn on it. Spills had stained it.
I wanted a bright white table. It seemed like a simple idea. I bought some white paint and a brush.
I figured I’d just paint right over the old stuff. Easy, right?
Wrong. I started painting. The old brown peeked through.
My brush left streaks. It looked patchy. Then, I tried a roller.
It was even worse. Globs of paint appeared. The finish was rough.
I felt a wave of panic. My dream of a beautiful white table was turning into a sticky mess. I almost gave up right then.
It felt like a disaster. The kitchen felt smaller, and my mood sank with it.
Choosing the Right Paint
Latex Paint: Good for most tables. It cleans up with water. It dries fast.
Look for “all-in-one” paints. They have primer mixed in.
Chalk Paint: Very popular. It gives a matte finish. You don’t need much prep.
But it needs a top coat for protection.
Milk Paint: Creates a vintage look. It can chip naturally. It also needs a protective top coat.
Oil-Based Paint: Very durable. But it smells strong. Cleanup needs mineral spirits.
It takes longer to dry.
How to Prep Your Kitchen Table for Painting
Proper prep work is key. This is the most important part. Skipping steps here leads to bad results.
Think of it like building a house. You need a strong foundation. For a table, the surface is the foundation.
First, clear everything off the table. Take off placemats, dishes, and any decor. You need a clean workspace.
Then, give the table a good wash. Use warm water and mild soap. This removes grease and grime.
Kitchen tables get a lot of buildup. Don’t forget the legs and underside.
After washing, let the table dry fully. You can use a clean cloth to speed this up. Make sure there’s no dampness.
Next, inspect the table for damage. Are there nicks or scratches? Do you see any old finish peeling?
You need to fix these. Use wood filler for any holes or deep scratches. Let the filler dry completely.
Then, sand it smooth.
Sanding for a Smooth Surface
Sanding is vital. It removes the old finish. It also creates a surface the new paint can stick to.
You have a few options for sanding.
You can use sandpaper by hand. Start with a medium grit, like 120. This removes the bulk of the old finish.
Then, move to a finer grit, like 220. This smooths out the surface. Sand in the direction of the wood grain.
Always. Going against the grain leaves marks.
An electric sander makes this job faster. A random orbital sander is a good choice. Be careful with power sanders.
They can remove too much wood quickly. Always test on an inconspicuous spot first. You want to dull the old finish, not remove it all.
If your table has a thick, glossy coat, you might need to start with a slightly coarser grit, like 100.
Cleaning After Sanding
Once you’re done sanding, you must clean up. Dust is the enemy of a smooth paint job. Use a vacuum cleaner with a brush attachment.
Get into all the nooks and crannies. Then, use a tack cloth. A tack cloth is sticky.
It picks up the finest dust particles. Wipe down the entire table. Do this several times.
You can also use a damp cloth, but make sure it’s only slightly damp. Then dry it thoroughly.
This dust removal step is critical. Even a tiny speck of dust can ruin the smooth finish. You won’t see it until the paint dries.
Then it will look like bumps under the paint. Take your time here. It’s worth the effort for a professional look.
Ensure the table is completely dust-free before moving on.
Quick Sanding Tips
- Always sand with the wood grain.
- Use a tack cloth to remove all dust.
- Medium grit (120) followed by fine grit (220) is usually best.
- Don’t skip this step!
Applying Primer: The Foundation for Success
Primer is like a bridge. It helps the new paint stick. It also covers up stains.
Some old finishes can bleed through new paint. This is called tannin bleed. Good primer prevents this.
It makes your paint color truer. It also helps the paint last longer.
Choose a good quality primer. For most tables, a water-based (latex) primer works well. If you have dark stains or a very dark wood, consider an oil-based primer.
Or a stain-blocking primer. Follow the instructions on the can. Apply a thin, even coat.
Use a good quality brush or roller.
Avoid thick coats of primer. Thick coats can cause drips. They can also be hard to sand smooth.
Let the primer dry completely. Check the can for drying times. This is usually a few hours.
If you see any rough spots after it dries, lightly sand them. Use a fine-grit sandpaper, like 220. Then clean off the dust again with a tack cloth.
When to Use Multiple Coats of Primer
Sometimes, one coat of primer isn’t enough. If your table is a dark color and you want a light color, you might need more. If you still see dark spots showing through, apply another coat of primer.
Always let each coat dry completely. Sand lightly between coats if needed. Clean off the dust each time.
The goal is a uniformly colored surface. It should be a light, neutral color. This makes your final paint color pop.
It ensures the true color shows. Don’t rush this step. Patience here pays off.
A well-primed surface is the secret to a professional finish. It’s the unseen hero of your painted table.
Primer Checklist
Surface Clean? Yes
Surface Sanded? Yes
Dust Removed? Yes
Primer Chosen? Yes
First Coat Applied? Yes
Primer Dry? Yes
Light Sanding Done? Yes
Dust Removed Again? Yes
Painting Your Kitchen Table: The Fun Part
Now for the color! Pick a paint you love. For kitchen tables, use a durable paint.
Semi-gloss or satin finishes are popular. They are easier to clean. They also hide minor imperfections better than flat paint.
Many people like using latex paint. It’s easy to clean up. It dries fast.
You can also use chalk paint or milk paint. These give a different look. They often need a protective top coat.
For a kitchen table, durability is key. So, consider that when choosing your paint.
Apply the paint in thin, even coats. Use a good quality brush for edges and details. Use a foam roller for the main surfaces.
This gives a smooth finish. Avoid overloading your brush or roller. Too much paint leads to drips and uneven coverage.
Always paint in the direction of the wood grain.
Tips for Applying Paint
Work in a well-ventilated area. Open windows. Use a fan if needed.
Paint in good lighting. This helps you see where you’ve painted. It also helps you spot drips.
Apply the first coat. Let it dry completely. This is very important.
Rushing this step will cause problems. Check the paint can for drying times. It’s usually a few hours for latex paint.
Once the first coat is dry, inspect the table. Do you see any spots you missed? Are there any thin areas?
Lightly sand any rough spots with fine-grit sandpaper. Then clean off the dust with a tack cloth. Apply a second coat.
You might need a third coat. Most tables look best with two or three thin coats.
Choosing the Right Sheen
The sheen of your paint affects how it looks and performs. Flat paint hides imperfections the best. But it’s the hardest to clean.
It absorbs stains easily. It’s not ideal for a kitchen table.
Eggshell and Satin finishes offer a good balance. They have a slight sheen. They are more durable and easier to wipe down than flat.
Satin is a very popular choice for furniture.
Semi-Gloss has more shine. It’s very durable and easy to clean. This is a great option for high-traffic surfaces like a kitchen table.
It can highlight imperfections more than satin, so prep is crucial.
Gloss and High-Gloss are very shiny. They look sleek. But they show every single flaw.
They are also harder to apply smoothly. They are less common for entire tables.
Paint Application Order
Top Surface: Apply paint in smooth, even strokes. Work from one end to the other.
Edges: Use a good brush to get clean lines along the edges.
Legs and Apron: Paint these next. Ensure you get into all the corners.
Underside: Don’t forget the bottom. It completes the job.
Applying a Protective Top Coat
This step is crucial for durability. The paint itself might be tough. But a top coat adds another layer of protection.
It guards against scratches, spills, and wear. It makes your paint job last much longer.
You have several options for top coats. Polyurethane is very popular. It comes in water-based and oil-based versions.
Water-based polyurethane dries clear. It has low odor. Oil-based polyurethane is more durable.
But it can yellow over time, especially over light colors.
Another option is a polycrylic. This is a water-based product. It’s very durable.
It dries clear and doesn’t yellow. It’s a great choice for light-colored tables. You can also use a furniture wax or a sealer specifically designed for chalk paint or milk paint if you used those.
Apply the top coat in thin, even layers. Use a good quality synthetic brush or a foam applicator. Avoid applying it too thickly.
Thick coats can look streaky or cloudy. Let each coat dry completely. Lightly sand with very fine grit sandpaper (320 or higher) between coats.
Then clean off the dust.
How Many Coats of Top Coat?
For a kitchen table, you should plan on at least three coats of top coat. Some people even go for four. The more coats, the more protection you have.
This is especially true if you have kids or a busy household.
Remember to let each coat dry fully. Check the product instructions. Drying times can vary.
Some products need 24 hours to cure fully. Curing is different from drying. Drying means it’s dry to the touch.
Curing means it has reached its maximum hardness.
Be gentle with your table during the curing period. Avoid placing heavy objects on it. Don’t drag anything across the surface.
The first few weeks are important for the top coat to harden. This ensures a long-lasting finish.
Top Coat Styles
- Matte: No shine. Hides flaws well.
- Satin: A subtle sheen. Popular choice.
- Semi-Gloss: More shine. Easy to clean.
- Gloss: Very shiny. Shows imperfections.
Consider the look you want. Also, think about how easy it is to clean.
Real-World Context: Kitchen Table Scenarios
Kitchen tables see a lot of action. They are used for meals, homework, crafts, and more. This means they get a lot of wear and tear.
Think about the environment of a kitchen. It’s often humid. Spills are common.
Hot dishes might be placed on the table.
Habits play a big role. Do you have young children? They might bang toys on the table.
Do you eat messy foods? These things affect how well your paint job holds up. The design of the table also matters.
A table with many carvings or intricate details is harder to paint. It takes more time and care.
User behavior is key. If you use coasters and placemats, your table will last longer. If you drag chairs, the legs might get scuffed.
Understanding how you use your table helps you choose the right paint and top coat. It also helps you know how much protection you need.
Table Design and Durability
Some table designs are naturally more durable. A solid wood table can be sanded and repainted many times. Veneer tables need more care.
The thin top layer of wood can be damaged by too much sanding. Laminate tables are tricky. They can be hard to get paint to stick to.
Tables with metal bases might only need the wood top repainted. This simplifies the process. Older tables might have lead paint.
If your home was built before 1978, be cautious. Test for lead paint. If found, use proper safety gear and disposal methods.
The type of wood matters too. Softwoods like pine can dent easily. Hardwoods like oak are much more robust.
Knowing your table’s material helps you choose the best approach. It ensures you get the best and most lasting results. It’s about matching the treatment to the table.
Understanding Wood Types
Hardwoods (Oak, Maple, Cherry): Denser, stronger, more resistant to dents. Better for heavy use.
Softwoods (Pine, Fir): Lighter, easier to dent. May require more protective top coats.
Veneer: Thin layer of real wood over particleboard or plywood. Sand carefully to avoid going through the veneer.
Laminate/Melamine: Smooth, non-porous surfaces. Often require special primers for paint to adhere.
What This Means for You: When to Worry and When Not To
It’s normal for a freshly painted table to look amazing. Over time, some minor wear is expected. A small chip here or there might happen.
This doesn’t mean the job is ruined. It just means your table is being used.
You should worry if paint starts peeling in large sections. Or if the wood underneath is showing through everywhere. This could mean the prep work wasn’t thorough.
Or the paint wasn’t compatible. It might also mean the top coat wasn’t enough.
If you see deep scratches that go through the paint and top coat, that’s a sign. It means the surface isn’t protected enough for your household. You might need to reapply a top coat.
Or consider a tougher paint finish next time.
Simple Checks You Can Do
Run your hand over the surface. Does it feel smooth? Or can you feel bumps and rough spots?
Bumps could be dust or dried paint drips.
Tap the surface gently with your fingernail. Does the paint sound solid? Or does it sound hollow, like it might chip easily?
A hollow sound might mean poor adhesion.
Look at the edges and corners. Are they holding paint well? Or is the paint wearing away quickly there?
These areas get a lot of contact.
Check for any signs of moisture damage. Bubbling paint can indicate moisture getting trapped. This is common if the table wasn’t fully dry before painting, or if the top coat isn’t sealed well.
Normal vs. Concerning Signs
Normal: Very minor chips on edges after years of use. Slight fading over time.
Concerning: Large patches of peeling paint. Deep gouges through the finish. Bubbling or cracking paint.
Paint easily scraping off with a fingernail.

Quick Fixes and Tips for Maintaining Your Painted Table
If you get a small chip, you can touch it up. Lightly sand the area around the chip. Clean off the dust.
Apply a tiny bit of primer, then paint. Let it dry. You might need a tiny bit of top coat over that spot.
Use placemats and coasters. This is the easiest way to protect your table. Wipe up spills immediately.
Don’t let liquids sit on the surface. This is true even with a good top coat.
Clean your table regularly. Use a soft cloth and a mild cleaner. Avoid abrasive scrubbers.
They can scratch the paint or top coat. For tougher grime, you might use a slightly stronger cleaner, but always test it in an inconspicuous spot first.
Refreshing Your Paint Job Later
If your table starts to look dull after several years, you don’t always need to start over. Sometimes, a good cleaning and a fresh coat of top coat is enough. Clean the table thoroughly.
Lightly sand the entire surface to give the new top coat something to grip.
Apply 1-2 new coats of your chosen top coat. Let it cure fully. This can bring back the shine and add more protection.
If the paint itself is worn through in places, you’ll need to do more prep. This involves sanding down to the primer or bare wood, then repainting and resealing.
Remember to use the same type of products if possible. For example, if you used a water-based polyurethane, stick with water-based for touch-ups. This helps ensure compatibility.
It prevents issues like cracking or peeling.
Maintenance Checklist
- Wipe spills immediately.
- Use placemats and coasters.
- Clean with mild soap and water.
- Avoid abrasive cleaners.
- Inspect for chips or scratches regularly.
Frequently Asked Questions about Repainting Kitchen Tables
Do I need to sand my table if I use chalk paint?
Chalk paint is known for needing less prep. You usually don’t need to sand or prime extensively. A light scuff sanding is sometimes recommended.
Always check the specific chalk paint brand’s instructions. Chalk paint needs a protective top coat like wax or polycrylic.
Can I paint over a stained or varnished table?
Yes, you can. The key is proper preparation. You need to clean the table thoroughly.
Then, you must sand it well. This dulls the old finish. You will also likely need a good quality primer.
A stain-blocking primer is a great choice. This ensures the old stain doesn’t bleed through your new paint color.
What is the most durable paint for a kitchen table?
For maximum durability, consider high-quality latex paints with a satin or semi-gloss finish. These are designed for high-traffic areas. They are easy to clean.
Adding several coats of a durable top coat, like polyurethane or polycrylic, is also essential. This layered protection is key to a long-lasting finish.
How long does it take to repaint a kitchen table?
The time can vary greatly. It depends on the table’s condition and the type of paint used. Most projects take 2-3 days, spread over a week.
This accounts for drying and curing times between coats. Rushing the process will lead to a poor finish. Patience is important.
Can I paint a table with a laminate or veneer top?
Yes, but it requires specific products. Laminate and melamine surfaces are very smooth. Paint might not stick well.
You’ll need a special bonding primer designed for slick surfaces. For veneer, sand very lightly. Be careful not to sand through the thin wood layer.
Always test your primer and paint in an hidden spot first.
What kind of brush or roller should I use?
For edges and tight spots, use a good quality synthetic bristle brush. For large, flat surfaces, a high-density foam roller or a microfiber roller works best. These give a smooth, streak-free finish.
Avoid cheap rollers that shed fibers. Always clean your tools right after use.
Conclusion: Your Beautifully Repainted Table Awaits
Repainting your kitchen table is a rewarding project. It breathes new life into your space. It’s more affordable than buying new.
With careful prep and patient application, you can achieve a stunning result. Enjoy your refreshed kitchen centerpiece!
Products related to this article
Sponsored / affiliate links. As an Amazon Associate I earn from qualifying purchases. I may earn additional commission from eligible campaigns.
![Furniture Wax - 100% Natural Sealant for Chalk Furniture Paint or Raw Wood, Light Protection, Easy To Apply, No Odor, Eco-Friendly - 7 Color Choices - Antiquing [Brown] (8 oz)](https://m.media-amazon.com/images/I/41ZNmSTmwhL._SL500_.jpg) Furniture Wax - 100% Natural Sealant for Chalk Furniture Paint or Raw Wood, Light Protection, Easy To Apply, No Odor, Eco-Friendly - 7 Color Choices - Antiquing [Brown] (8 oz)
Furniture Wax - 100% Natural Sealant for Chalk Furniture Paint or Raw Wood, Light Protection, Easy To Apply, No Odor, Eco-Friendly - 7 Color Choices - Antiquing [Brown] (8 oz) Jungarian Wood Grain Furniture Paint 17.6oz with Tools - One-step No Need Prime No Need Varnish - Water-based & Low Odor - Outdoor & Indoor Wood Paint for Furniture and More - Black