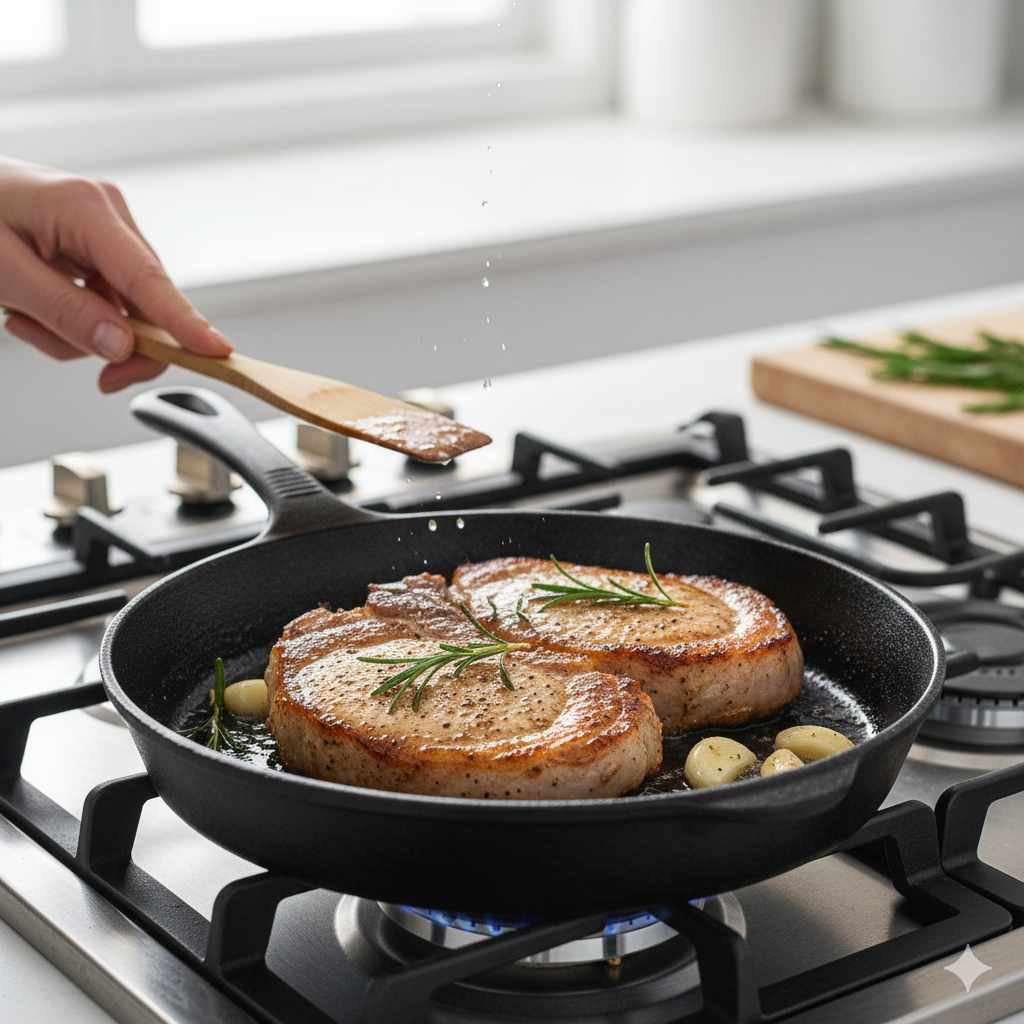
To cook pork chops in a skillet, pat 1-inch thick, brined chops dry and season them well. Heat oil in a skillet over medium-high heat until shimmering. Sear the chops for 3-5 minutes per side until golden brown. Add butter, garlic, and herbs, then baste until an internal thermometer reads 145°F. Rest them for 5 minutes before serving.
Tired of dry, tough, and tasteless pork chops? You are not alone. For many home cooks, the promise of a juicy, flavorful pork chop dinner often ends in disappointment. It’s a common and frustrating problem. But what if you could make perfectly tender, wonderfully seared pork chops every single time, right on your stovetop?
Why a Skillet Is the Best Way to Cook Pork Chops
While you can bake, grill, or air-fry pork chops, using a skillet on the stovetop offers unmatched benefits, especially for beginners. It’s a straightforward method that gives you incredible results with maximum control.
- Amazing Sear: A hot skillet creates direct contact with the pork, producing a deep, golden-brown crust through the Maillard reaction. This process develops hundreds of new flavor compounds, making the chop intensely savory and delicious. You simply can’t get this level of crust in an oven.
- Juicy and Tender Interior: The high heat of the skillet cooks the pork chops quickly. This fast cooking time prevents the muscle fibers from tightening up and squeezing out all their moisture, which is the primary cause of dry pork.
- Incredible Flavor Infusion: Cooking in a skillet allows you to create a simple, delicious pan sauce right after the chops are done. By adding butter, garlic, and herbs to the hot pan, you can baste the chops, infusing them with flavor as they finish cooking.
- Speed and Convenience: From start to finish, you can have perfectly cooked pork chops on the table in under 20 minutes. It’s an ideal method for busy weeknights when you want a restaurant-quality meal without the fuss.

Start with the Right Cut: Choosing Your Pork Chops
Your success starts at the butcher counter, not the stove. The type of pork chop you buy has the biggest impact on the final result. Trying to make a great meal from a subpar cut is like trying to win a race with flat tires—it just won’t work well.
Three Rules for Picking Perfect Pork Chops
- Thickness is Key: This is the most important rule. Look for pork chops that are at least 1-inch thick, and preferably 1.5 inches thick. Thinner chops cook too quickly, drying out before they can develop a good sear. A thick-cut chop gives you enough time to create that beautiful crust while the inside remains moist and tender.
- Bone-In for Flavor and Moisture: Whenever possible, choose bone-in pork chops. The bone helps insulate the meat, which promotes more even cooking. It also adds a significant amount of flavor and moisture to the meat as it cooks. Boneless chops can work, but they are far less forgiving.
- Look for a Little Fat: Fat equals flavor and moisture. Look for chops with some marbling (thin streaks of fat within the meat) and a nice, solid fat cap along the edge. This fat will render down during cooking, basting the meat and keeping it incredibly succulent.
A Quick Guide to Pork Chop Cuts
Navigating the different names can be confusing. Here’s a simple breakdown of the most common cuts you’ll find.
| Pork Chop Cut | Description | Best For Skillet Cooking? |
|---|---|---|
| Rib Chop | Cut from the rib section of the loin. Tender, mild flavor with some fat. Often has a bone running along the side. Sometimes called a center-cut rib chop. | Excellent Choice. The fat and bone make it juicy and forgiving. |
| Loin Chop (or T-Bone) | Contains two types of meat: the tender loin and the even more tender tenderloin, separated by a T-shaped bone. | Good Choice. Be aware the tenderloin portion cooks faster than the loin portion. |
| Boneless Loin Chop | The most common cut sold. It’s a rib or loin chop with the bone and tenderloin removed. It’s very lean. | Use with Caution. Very easy to overcook and dry out. Must be thick-cut and brined for best results. |
| Sirloin Chop | Cut from the area near the hip. Contains several different muscle groups and bone. It’s flavorful but can be tough. | Not Recommended. Better suited for slow cooking methods like braising. |
The Simple Secret to Unbelievably Juicy Pork: A Quick Brine
If you learn only one trick to improve your pork chops, let it be this: brine them. Brining is the simple process of soaking meat in a saltwater solution. It sounds fancy, but it’s incredibly easy and makes a world of difference.
Why Does Brining Work?
Brining works in two ways. First, the pork absorbs some of the saltwater through osmosis. This extra liquid provides a moisture buffer during cooking, making the chop juicier. Second, the salt alters the protein structures in the meat, preventing them from tightening up as much when heated. This makes the meat more tender and better at retaining its own natural juices.
How to Make a Simple Brine
You don’t need a complicated recipe. All you need is salt, water, and a little time.
- Ratio: Use 1 tablespoon of kosher salt for every 1 cup of water.
- Amount: You just need enough water to fully submerge the pork chops. For two thick-cut chops, about 4 cups of water and 4 tablespoons of kosher salt is usually perfect.
- Instructions: Stir the salt into lukewarm water until it is completely dissolved. Let the water cool to room temperature, then place your pork chops in the brine.
- Time: Even a quick 30-minute brine will make a noticeable difference. For thick 1.5-inch chops, you can brine for up to 2 hours in the refrigerator. Do not brine for more than a few hours, or the meat can become too salty.
Step-by-Step: The Perfect Skillet Pork Chops
Ready to cook? This proven method is simple and reliable. Follow these steps exactly, and you’ll be rewarded with perfectly cooked pork chops every time.
What You’ll Need
- A heavy-bottomed skillet: Cast iron is the gold standard because it holds heat incredibly well. A heavy stainless steel or carbon steel skillet will also work great. Avoid thin, non-stick pans, as they don’t get hot enough for a good sear.
- Tongs: For flipping the chops without piercing the meat.
- Instant-Read Meat Thermometer: This is the single most important tool for preventing overcooked meat. It’s the only way to know for sure when your pork is perfectly cooked.
- Ingredients: Two 1 to 1.5-inch thick, bone-in pork chops; 1 tablespoon high-smoke-point oil (like canola, grapeseed, or avocado oil); 2 tablespoons unsalted butter; 2-3 cloves of garlic, smashed; a few sprigs of fresh herbs (thyme or rosemary work well); kosher salt and freshly ground black pepper.
The Cooking Process
Brine and Dry the Chops: If you have time, brine your pork chops for 30 minutes to 2 hours. After brining, rinse them under cool water and, most importantly, pat them completely dry with paper towels. A dry surface is essential for getting a great crust. If you skip the brine, still make sure to pat the chops very dry.
Season Generously: Season the pork chops on all sides—including the fat cap edge—with a liberal amount of kosher salt and black pepper. Don’t be shy! A lot of the seasoning will fall off in the pan.
Preheat the Skillet: Place your skillet over medium-high heat. Let it get hot for a few minutes. Add the tablespoon of oil. You’ll know the pan is ready when the oil looks shimmery or you see the first tiny wisp of smoke.
Sear the First Side: Carefully place the pork chops in the hot skillet. You should hear a loud, satisfying sizzle. If you don’t, your pan isn’t hot enough. Let the chops sear, undisturbed, for 3-5 minutes. Don’t move them or poke them. Let them sit still to develop that deep, golden-brown crust.
Flip and Sear the Fat Cap: Using your tongs, check the underside of a chop. If it’s beautifully browned, flip them over. Now, use your tongs to stand each chop up on its fatty edge, pressing it against the hot pan for about 30-60 seconds to render the fat and get it crispy.
Add Aromatics and Baste: After searing the fat cap, lay the chops back down. Reduce the heat to medium. Add the butter, smashed garlic cloves, and herb sprigs to the pan. As the butter melts, tilt the pan towards you so the butter pools at the bottom. Use a large spoon to continuously scoop this fragrant, melted butter and pour it over the tops of the pork chops. Do this for about 1-2 minutes.
Cook to Temperature (Don’t Guess!): This is the crucial moment. Start checking the internal temperature with your meat thermometer. Insert the probe into the thickest part of the meat, avoiding the bone. You want to pull the pork chops from the skillet when they reach an internal temperature of 140°F to 145°F. According to the USDA, pork is safe to eat at 145°F, which will leave it slightly pink and perfectly juicy inside.
Rest the Meat: Immediately transfer the cooked pork chops to a clean cutting board or plate. Let them rest for 5-10 minutes before slicing. This step is non-negotiable! Resting allows the juices inside the meat to redistribute, ensuring every bite is moist and flavorful. If you cut into it too soon, all those delicious juices will run out onto your plate.
Pork Chop Cooking Time and Temperature Guide
Use this table as a guideline, but always trust your thermometer for the final word. Times are per side after the initial sear.
| Pork Chop Thickness | Approx. Cooking Time per Side (Medium Heat) | Final Internal Temperature |
|---|---|---|
| 1 inch | 4-5 minutes | 145°F |
| 1.5 inches | 5-7 minutes | 145°F |
| 2 inches | 7-9 minutes | 145°F |
Common Mistakes That Lead to Dry Pork Chops (And How to Avoid Them)
Understanding what can go wrong is just as important as knowing the right steps. Here are the most common pitfalls to avoid.
- Mistake 1: Using Thin Chops. Thin chops (under 1 inch) are destined to be dry. They cook through before a good crust can form.
Solution: Always buy thick-cut chops.
- Mistake 2: Cooking Cold Meat. Placing ice-cold meat into a hot pan causes it to cook unevenly.
Solution: Let your chops sit at room temperature for 20-30 minutes before cooking.
- Mistake 3: Overcrowding the Pan. If you squeeze too many chops into the skillet, they will steam instead of sear.
Solution: Cook in batches if necessary, ensuring there is plenty of space around each chop.
- Mistake 4: Overcooking. This is the number one cause of dry pork. Even 5 degrees can be the difference between juicy and tough.
Solution: Use an instant-read meat thermometer. It’s the only way to guarantee perfectly cooked pork.
- Mistake 5: Skipping the Rest. Cutting into the meat immediately after cooking lets all the juices escape.
Solution: Always rest your pork chops for at least 5 minutes before serving.

Frequently Asked Questions (FAQ)
What is the best kind of skillet for pork chops?
A heavy-bottomed skillet that retains heat well is best. Cast iron is the top choice for its superior heat retention, which gives you an amazing sear. Heavy-gauge stainless steel or carbon steel pans are also excellent options.
Can I use this method for boneless pork chops?
Yes, but you must be extra careful. Boneless pork chops are much leaner and cook faster, making them very easy to overcook. If using boneless chops, make sure they are at least 1-inch thick, brine them, and watch the internal temperature very closely with a thermometer. Pull them from the heat as soon as they reach 145°F.
How do I know when pork chops are done without a thermometer?
While a thermometer is strongly recommended for accuracy, you can use the touch test as a rough guide. A perfectly cooked pork chop should feel firm but still have a slight spring to it when pressed, similar to the fleshy part of your thumb. However, this method is unreliable and takes practice. A thermometer is foolproof.
Why are my pork chops always tough and dry?
The most common reason for tough, dry pork chops is overcooking. Modern pork is very lean and does not need to be cooked to high temperatures. The old rule of cooking pork until it’s white all the way through is outdated. Pulling it from the heat at 145°F, when it’s still slightly pink in the center, is the key to keeping it juicy.
Should I cover the pork chops while they cook?
No, do not cover the skillet. Covering the pan will trap steam, which prevents the pork chops from developing a deep, golden-brown crust. You want to sear the chops with dry, high heat, not steam them.
Can I add a sauce to the pan?
Absolutely! After you remove the pork chops to rest, you have a pan full of delicious browned bits (called fond). You can easily make a quick pan sauce. Just pour off any excess grease, add a splash of chicken broth, white wine, or even water to the hot pan to deglaze it, scraping up the browned bits. Let it reduce slightly and stir in a pat of butter to finish.
How long should I let pork chops rest?
A rest time of 5 to 10 minutes is ideal for most pork chops. A good rule of thumb is to let them rest for about half of their total cooking time. This allows the internal juices to settle back into the meat, ensuring a tender and moist result.
Conclusion: You’ve Got This!
Cooking juicy, flavor-packed pork chops in a skillet is not a difficult culinary challenge reserved for chefs. It’s a simple skill that anyone can master. By following these fundamental steps—choosing thick, bone-in chops, giving them a quick brine, searing them in a hot skillet, and using a meat thermometer to nail the temperature—you are setting yourself up for success.
Forget everything you thought you knew about dry, boring pork. With this proven method, you can confidently serve a meal that is both incredibly delicious and impressively easy. So fire up your stove, grab your skillet, and get ready to enjoy the best pork chop you’ve ever made.