How To Build A Wooden Bookcase
Building your own wooden bookcase is one of the most rewarding DIY projects you can tackle for your home. Not only does it provide a practical solution for storing books and displaying cherished items, but it also lets you customize the design, size, and finish to fit your unique space and style.
Whether you’re a seasoned woodworker or a motivated beginner, constructing a bookcase from scratch offers an ideal introduction to fundamental carpentry skills, with a finished piece you’ll be proud to show off for years.
A high-quality wooden bookcase can outlast mass-produced alternatives, add real value to your home, and even become an heirloom. But to ensure your bookcase is sturdy, functional, and visually appealing, you need more than just basic instructions. This guide blends expert advice, practical steps, and real-world examples, so you can plan, build, and finish a bookcase that suits your needs, while avoiding common pitfalls and costly mistakes.
Let’s get started on turning raw lumber into a statement piece for your living room, office, or library.
Key Takeaways
- Building a wooden bookcase is achievable for most DIYers with basic tools and planning.
- Careful material selection and precise measurements are crucial for strength and aesthetics.
- Step-by-step construction ensures structural integrity and a professional look.
- Proper finishing techniques enhance durability and beauty.
- Real-world examples and troubleshooting tips help you avoid common errors.
- Maintenance extends the lifespan of your custom bookcase.

Credit: www.youtube.com
Planning Your Wooden Bookcase
A successful woodworking project begins with comprehensive planning. The decisions you make at this stage will shape the final appearance, strength, and usability of your bookcase.
Choosing The Right Location
Start by identifying where your bookcase will reside. Measure the available wall space, ceiling height, and any obstacles like vents or outlets. A well-placed bookcase should:
- Allow enough room for access and cleaning
- Avoid blocking windows, doors, or electrical fixtures
- Complement other furniture without overwhelming the room
If you’re considering built-in bookcases, factor in baseboards and wall irregularities. For freestanding units, ensure the floor is level to prevent rocking or tipping.
Determining Dimensions And Shelf Layout
Your bookcase’s dimensions depend on its intended use. For general purposes, consider these typical measurements:
- Height: 36″, 84″ (short for children’s rooms, tall for home libraries)
- Width: 24″, 48″ per unit for stability
- Depth: 10″, 12″ for most books; 14″, 16″ if storing large art books
Plan shelf spacing based on what you’ll store. Standard novels need about 8″, 10″ of clearance, while tall binders or albums may require 12″, 15″. Adjustable shelves add flexibility but require extra hardware and careful drilling.
Pro Tip: Sketch your design on paper or use free online tools for visualization. Include trim, base, and top details for a polished look.
Selecting A Style
Bookcases range from simple and modern to ornate and traditional. Popular styles include:
- Shaker: Clean lines, flat panels, minimal ornamentation
- Mission: Vertical slats, exposed joinery, solid wood
- Contemporary: Open-back, geometric shelving, mixed materials
Choose a style that matches your décor and skill level. Simple cases are easier to build, while decorative features add complexity and time.
Real-world Example: Maximizing A Small Nook
When I built a bookcase for a narrow hallway, I customized the depth to just 9″ so it didn’t intrude into the walking path. Adjustable shelving let me fit both paperbacks and tall cookbooks. Even in a tight spot, thoughtful design made the bookcase functional and attractive.

Credit: www.youtube.com
Gathering Materials And Tools
Quality materials and the right tools make construction easier and yield professional results. Don’t skimp on either, sturdy wood and accurate cuts are key to a lasting bookcase.
Choosing Wood Types
Your choice of wood affects strength, appearance, and cost. Here’s a comparison of popular options:
| Wood Type | Pros | Cons | Cost (per board foot) |
|---|---|---|---|
| Pine | Affordable, easy to work, widely available | Prone to dents, knots may bleed | $2, $3 |
| Poplar | Stable, smooth, takes paint well | Less attractive grain, not as hard as oak | $3, $5 |
| Oak | Very strong, beautiful grain | Heavy, more expensive, harder to cut | $5, $8 |
| Birch Plywood | Flat, stable, large panels | Edges need covering, can chip | $2, $4 (per sq. ft.) |
For painted cases, poplar or birch plywood is ideal. For stained or natural finishes, oak or cherry offers elegant grain.
Hardware And Fasteners
Gather these essentials:
- 1¼” and 2″ wood screws
- Wood glue
- Shelf pins (for adjustable shelves)
- Corner brackets or pocket hole screws (for extra strength)
- Sandpaper (80, 120, 220 grit)
- Finishing supplies: Stain, polyurethane, or paint
Required Tools
You don’t need a full workshop, but some power tools are essential:
- Circular saw or table saw (for accurate cuts)
- Drill/driver with bits
- Measuring tape, square, and pencil
- Clamps (at least 2, 4)
- Sanding block or orbital sander
- Stud finder (for wall-mounted units)
- Level
Optional but helpful: miter saw, pocket hole jig, router for edge details.
Sourcing Materials Sustainably
Where possible, buy wood certified by the Forest Stewardship Council (FSC) or reclaimed lumber from architectural salvage stores. This reduces environmental impact and adds character.
Example: Using reclaimed barn wood for the sides of your bookcase can create a rustic, one-of-a-kind look while keeping usable materials out of the landfill.

Credit: www.youtube.com
Measuring, Cutting, And Preparing Components
Accurate measurements and clean cuts make assembly smooth and prevent frustrating rework.
Creating A Cut List
Start by making a detailed list of every part you’ll need:
- Sides (2): Full height of bookcase
- Top and bottom panels (2)
- Shelves (as needed)
- Back panel (plywood)
- Optional: Face frame, trim, toe kick
For a 72″H x 36″W x 12″D bookcase, a sample cut list might look like:
| Component | Quantity | Dimensions | Material |
|---|---|---|---|
| Sides | 2 | 72″ x 12″ | ¾” plywood |
| Top/Bottom | 2 | 34½” x 12″ | ¾” plywood |
| Shelves | 4, 6 | 34½” x 11¼” | ¾” plywood |
| Back | 1 | 72″ x 36″ | ¼” plywood |
Pro Tip: Always measure twice and cut once. Cut components slightly oversize, then trim for perfect fit.
Marking And Cutting
- Use a straight edge and pencil for layout lines.
- Cut panels with a circular saw and guide, or a table saw for best accuracy.
- Sand edges smooth after cutting to remove splinters.
For shelves, consider adding a slight chamfer or round-over to the front edge for comfort and style.
Drilling Shelf Pin Holes
If you want adjustable shelves, drill evenly spaced holes (typically 1″ apart) along the inner sides. Use a jig for consistent results. Mark the first hole carefully, any error will multiply across the row.
Edge Banding Plywood
If using plywood, cover exposed edges with iron-on veneer or solid wood strips. This prevents chipping and gives a furniture-quality finish.
Assembling The Bookcase
With all parts prepared, assembly brings your project to life. Careful alignment and sturdy joinery are vital for a strong, safe bookcase.
Dry Fitting
Before applying glue or screws, assemble the bookcase without fasteners to check fit. Adjust any tight or loose joints now.
Constructing The Box
- Lay one side panel flat; attach top and bottom panels with wood glue and screws or pocket holes.
- Attach the other side, forming a strong rectangle.
- For taller cases, add a fixed center shelf for extra rigidity.
- Square the frame with a carpenter’s square and clamps.
Pro Tip: Use a level and clamp a straight board across the top or bottom to keep everything aligned during assembly.
Installing Shelves
- Fixed shelves: Attach with glue and screws from the outside, or use dowels/pocket holes for a cleaner look.
- Adjustable shelves: Insert shelf pins into pre-drilled holes and set shelves in place.
Attaching The Back
- Cut the back panel slightly smaller than the opening.
- Attach with brad nails or screws, ensuring the bookcase is perfectly square.
- The back adds crucial racking strength, don’t skip it, even for open designs.
Adding Face Frames And Trim
Face frames (narrow strips of hardwood) cover plywood edges and add a professional look. Attach with glue and finish nails. Add baseboard or crown molding for an upgraded appearance.
Example: When building a bookcase for a client’s home office, I added a simple 1×2 face frame and a decorative top molding. This small detail elevated the whole piece and matched the room’s trim.
Securing To The Wall
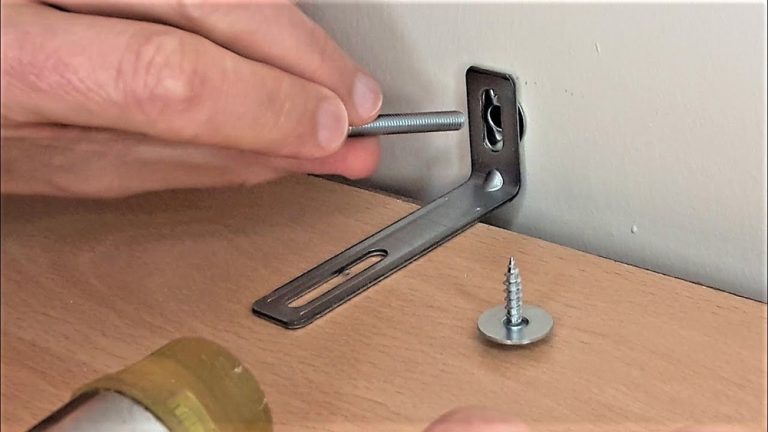
Tall or heavy bookcases should be anchored to the wall for safety, especially in homes with children. Use L-brackets or anti-tip hardware into wall studs.
Finishing Your Bookcase
A great finish protects the wood and enhances the beauty of your craftsmanship. Your choice depends on the wood type and your décor.
Sanding And Surface Preparation
- Sand all surfaces with progressive grits (80, 120, then 220) for a smooth finish.
- Pay extra attention to edges and corners.
- Wipe away dust with a tack cloth before applying finish.
Pro Tip: Filling nail holes and small gaps with wood filler, then sanding flush, results in a seamless look.
Stain, Paint, Or Clear Coat?
- Stain reveals wood grain and adds depth. Apply with a brush or rag, wipe off excess, and let dry.
- Paint works well for poplar, pine, or plywood. Prime first for best coverage.
- Clear polyurethane (oil- or water-based) adds durability and resists stains.
Apply at least two coats, sanding lightly between them. Water-based finishes dry faster and have less odor, while oil-based options offer a warmer tone.
Real-world Example: Matching Existing Furniture
A reader shared their experience of refinishing a new bookcase to match an antique desk. By mixing stains and testing on scrap, they achieved a near-perfect match, demonstrating the value of patience and sample testing before committing to a final finish.
Attaching Hardware And Final Touches
- Add felt pads to the bottom to prevent floor scratches.
- Install shelf pins or pegs.
- Consider adding doors, lighting, or decorative inlays for a custom touch.
Troubleshooting Common Problems
Even experienced woodworkers encounter setbacks. Here’s how to fix the most frequent issues.
Shelf Sag And Reinforcement
Long shelves may sag under heavy books. To prevent this:
- Limit shelf spans to 36″ or less for ¾” thick shelves.
- Use thicker wood or add a center divider for longer cases.
- Install a shelf stiffener (a strip of wood glued to the front edge).
| Shelf Span | Max Weight (¾” plywood) | Reinforcement Needed? |
|---|---|---|
| 24″ | 80 lbs | No |
| 36″ | 50 lbs | Optional |
| 48″ | 25 lbs | Yes |
Fixing Gaps And Misalignments
Small gaps can be filled with wood filler before finishing. For larger errors, carefully sand or trim with a hand plane for a flush fit.
Dealing With Warped Wood
Warped panels can ruin a project. Store wood flat and acclimate it to your home’s humidity before building. If a board is slightly bowed, clamp it straight during assembly and secure with screws.
Preventing Tear-out When Cutting
To avoid splintered edges, use sharp blades and cut with the finished side facing down (for circular saws) or up (for table saws). Painter’s tape along the cut line can minimize tear-out on plywood.
Customization Ideas And Advanced Features
With the basics mastered, you can personalize your bookcase to suit your space and tastes.
Built-in Bookcases
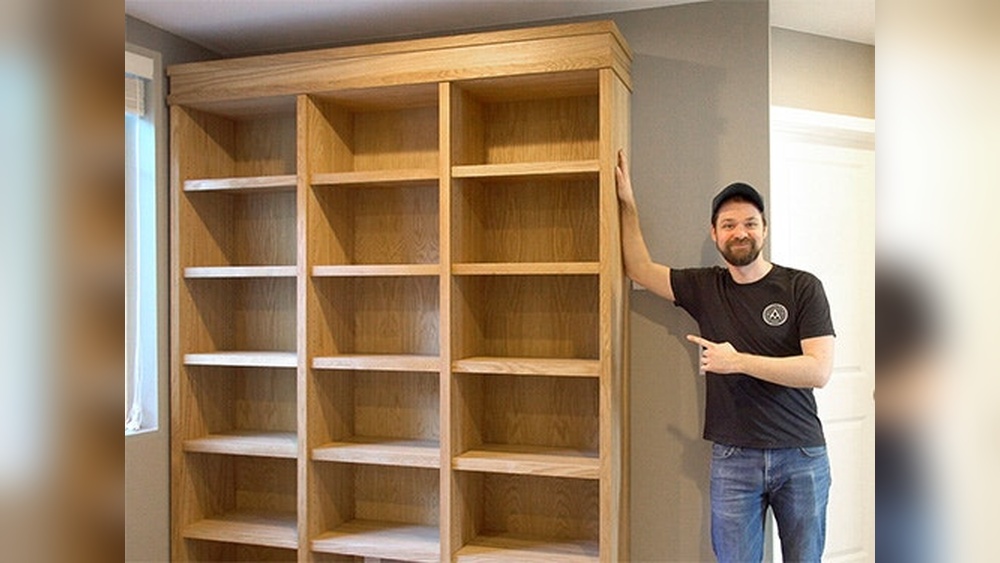
Built-ins add architectural interest and make use of awkward spaces. Install directly against the wall, scribe to fit uneven surfaces, and add baseboard or crown molding for a seamless look.
Example: In a historic home, I built floor-to-ceiling bookcases along a sloped attic wall. Careful scribing and trimming created a custom fit and maximized storage in a tricky spot.
Integrated Lighting
LED strip or puck lights can highlight your collection and add ambiance. Route shallow channels for wiring behind face frames for a clean installation.
Glass Doors And Display Options
Add doors to protect valuable books or display collectibles. Use glass for visibility, or wood panels for a traditional look. Install with soft-close hinges for a luxury feel.
Adjustable And Sliding Shelves
Shelves that adjust in height or slide out make for a versatile storage solution. Use commercial shelf standards, or create your own pin systems for maximum flexibility.
Incorporating Decorative Inlays Or Carvings
For advanced woodworkers, add marquetry, inlays, or routed designs to personalize your bookcase. These features require extra time and skill but yield one-of-a-kind results.
Real-world Case Studies
Looking at others’ projects can inspire your own work and help you learn from their successes.
Case Study 1: Budget-friendly Bookcase For A College Apartment
A college student built a simple pine bookcase for under $75 using basic tools and a borrowed circular saw. By choosing affordable materials and skipping decorative trim, they created a functional, sturdy shelf that disassembled for easy moving.
Case Study 2: Heirloom Bookcase For A Family Library
A retired woodworker crafted a cherry bookcase with adjustable shelves and hand-cut dovetail joints. The piece was finished with shellac and wax for a classic look and is now a centerpiece in their family library, a project that will be passed down for generations.
Case Study 3: Built-in Media Wall
A couple transformed their living room by building a full-wall bookcase and media center using birch plywood and poplar face frames. The project included integrated lighting, closed storage for electronics, and open shelves for books and décor. By doing it themselves, they saved thousands compared to custom cabinetry.
Maintenance And Care Tips
A well-built bookcase can last decades with minimal upkeep, but proper care preserves both function and appearance.
Regular Cleaning
- Dust shelves and surfaces with a soft, dry cloth weekly.
- Avoid water or harsh cleaners, which can damage wood finishes.
Protecting Against Moisture
- Place bookcases away from direct sunlight, radiators, or exterior walls to prevent warping and fading.
- Use coasters or mats under plants or drinks to avoid stains.
Adjusting Shelves
- Move adjustable shelves periodically to prevent permanent sagging.
- Re-tighten screws and hardware annually.
Repairing Minor Damage
- For scratches: Use a matching furniture marker or wax stick.
- For dings: Steam out small dents with a damp cloth and warm iron.
- For loose shelves: Check pins or brackets and replace if necessary.
Frequently Asked Questions
How Long Does It Take To Build A Wooden Bookcase?
For most DIYers, building a basic wooden bookcase takes 2, 3 days, including time for glue to dry and finish to cure. Complex built-ins, custom features, or elaborate finishes can extend the timeline to a week or more. If you’re new to woodworking, allow extra time for planning and careful measurement.
Can I Build A Bookcase With Hand Tools Only?
Yes, it’s possible to build a simple bookcase using only hand tools such as a saw, hand drill, chisel, and hammer. However, power tools like a circular saw and drill will make the process faster and deliver more precise results. For those interested in traditional joinery or working without electricity, Woodworking Hand Tools (Wikipedia) offers a detailed overview.
What’s The Best Way To Prevent A Tall Bookcase From Tipping?
To prevent tip-over accidents, especially in homes with children or pets, always anchor tall bookcases to the wall. Use metal L-brackets or anti-tip straps secured into wall studs. Avoid placing heavy items on upper shelves, and check anchors annually for tightness.
Can I Paint Over An Existing Finish On A Wood Bookcase?
You can paint over most existing finishes with proper preparation. Clean the surface, lightly sand to dull the gloss, and apply a high-quality primer before painting. For best results, use furniture-specific paints and allow adequate drying time between coats. Avoid painting rare or valuable antique pieces, as this can reduce their value.
How Can I Make My Bookcase Moisture-resistant For Use In Kitchens Or Bathrooms?
For high-humidity environments, use exterior-grade plywood or solid hardwoods and seal all surfaces with a water-resistant finish such as marine varnish or polyurethane. Avoid MDF or particleboard, which swell with moisture. Install rubber feet or a toe kick to keep the bookcase off damp floors. For more on preserving food safely in humid areas, see choosing the right canning method is crucial for preserving food safely.
Building a wooden bookcase is a project that combines creativity, craftsmanship, and practicality. With thoughtful planning, quality materials, and the right tools, you can create a custom storage solution that fits your space, style, and budget. Whether you’re starting out with a basic shelf or constructing a built-in masterpiece, each step offers opportunities to learn and improve your woodworking skills. For further inspiration on practical home projects and storage solutions, explore topics like choosing the right canning jar makes preserving food easier or This Old House. Your finished bookcase won’t just hold books, it will tell the story of your craftsmanship for years to come.
Products related to this article
Sponsored / affiliate links. As an Amazon Associate I earn from qualifying purchases. I may earn additional commission from eligible campaigns.