
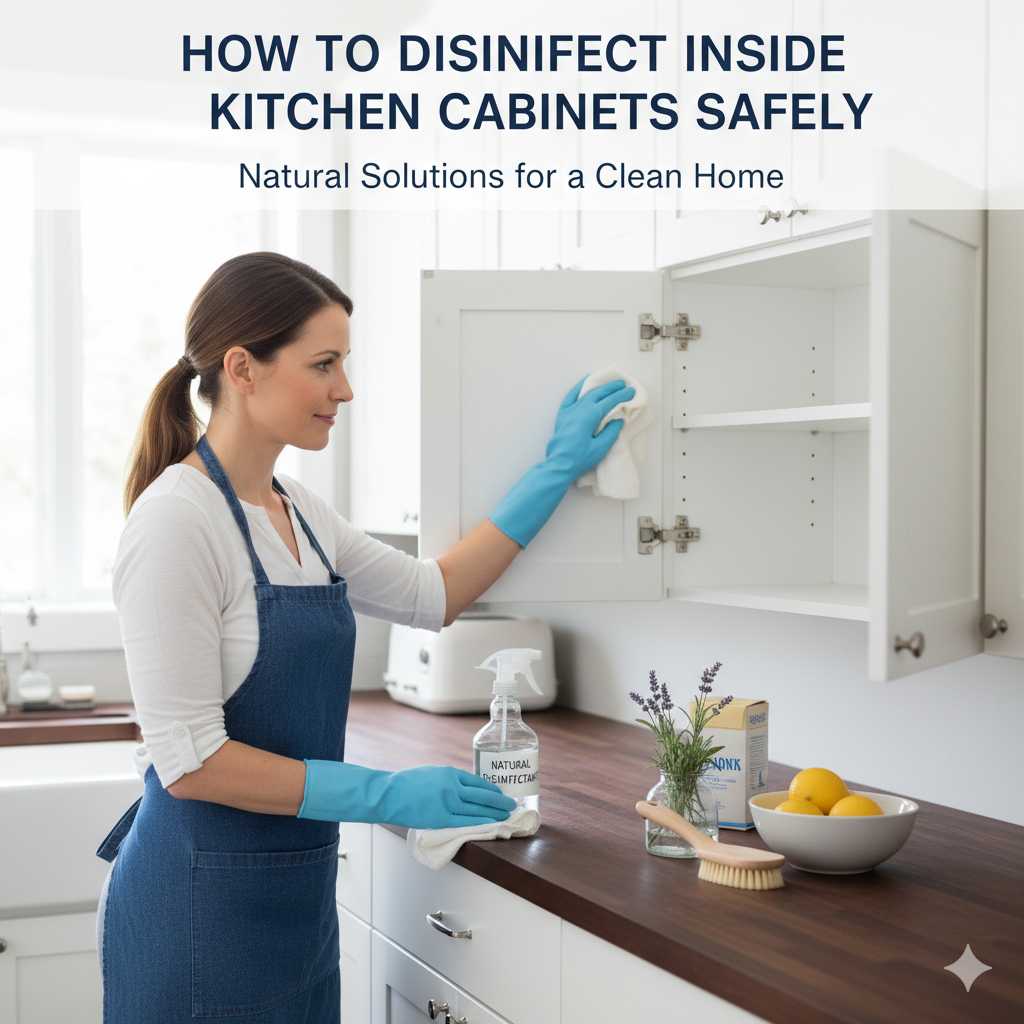
Kitchen cabinets can seem like out-of-sight, out-of-mind places. But they hold our food, dishes, and cooking tools. Over time, crumbs, spills, and dust can build up.
This can lead to yucky germs and even pests. You want to make sure the inside of your cabinets are clean and safe.
Disinfecting inside kitchen cabinets involves cleaning away spills and grime, then using a safe disinfectant to kill germs. Focus on food-safe cleaners and good ventilation. Regular cleaning prevents buildup and keeps your kitchen healthy.
What is Cabinet Disinfection?
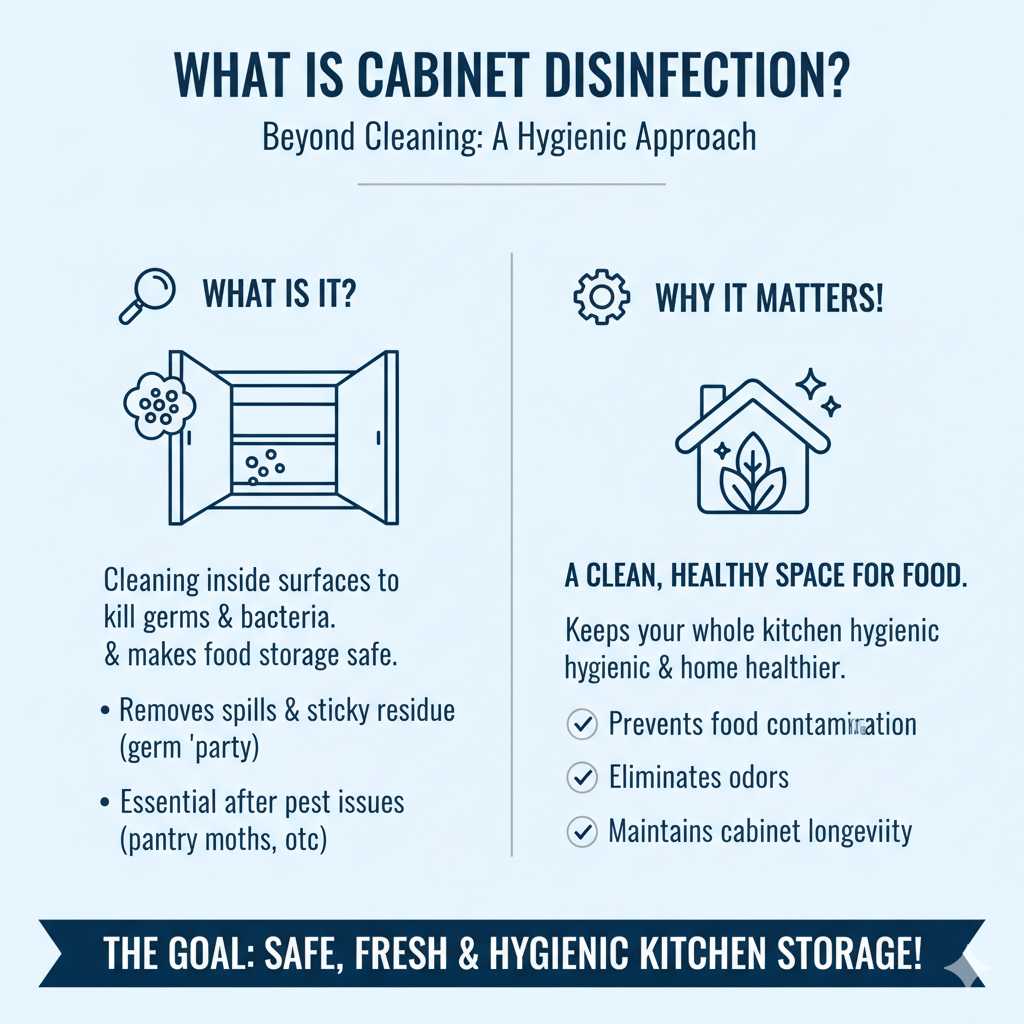
Cabinet disinfection means cleaning the inside surfaces of your kitchen cabinets. It’s about getting rid of tiny germs and bacteria. These can make your food unsafe or cause smells.
It’s more than just wiping. It’s about killing off invisible threats.
Think about what goes in your cabinets. Cereal boxes, canned goods, and spices. Sometimes, a little bit might spill.
This sticky stuff is a party for germs. Also, if you’ve had an issue with pantry moths or other pests, disinfection is key to a fresh start.
The goal is a clean, healthy space for your food and kitchenware. It’s an important part of keeping your whole kitchen hygienic. Regular attention here makes a big difference.
It helps keep your home healthier for everyone.
My Cabinet Cleaning Scare
I remember one summer. It was hot, and I’d been a bit lazy with my kitchen chores. We had a bag of flour sitting on the back of a shelf.
It had a tiny hole I hadn’t noticed. Over a few weeks, a little flour leaked out.
It wasn’t a big mess, just a dusting. But that dusting became a magnet for tiny ants. I found them marching one morning.
My stomach dropped. I realized this little flour trail had probably been there for days, unseen. It made me think about all the other hidden places.
That day, I pulled everything out of every cabinet. I scrubbed them down like never before. I felt a mix of panic and determination.
I didn’t want those ants, or worse, finding a home in my food storage. It was a real wake-up call about cleaning those overlooked spots.
Quick Cabinet Cleaning Checklist
Gather Supplies:
- All-purpose cleaner (food-safe)
- Microfiber cloths
- Spray bottle
- Vinegar or baking soda (for tougher spots)
- Trash bags
- Gloves (optional)
Empty Cabinets: Take everything out.
Wipe Down: Clean shelves, walls, and doors.
Disinfect: Use a safe spray.
Dry: Make sure they are dry before putting things back.
Why Disinfecting Matters Inside Cabinets
There are several good reasons to disinfect your kitchen cabinets. It’s not just about looks. It’s about health and safety.
First, germs. Food can spoil. Bacteria can grow.
This is especially true if you store raw foods or things that can leak. A clean cabinet stops this growth. It keeps your food safer to eat.
Second, pests. Ants, pantry moths, and other bugs love crumbs and spills. A clean cabinet is less attractive to them.
Disinfecting helps remove the attractants and can even kill tiny eggs or larvae.
Third, smells. Old food bits can make cabinets smell bad. This smell can transfer to your dishes or food.
Disinfecting removes the sources of these odors. It leaves your cabinets smelling fresh.
Finally, it’s part of good home hygiene. Kitchens are central to our homes. Keeping them clean from top to bottom is important.
It contributes to a healthier living environment for your family.
Common Kitchen Cabinet Germs
Salmonella: Can come from raw meat juices. A quick wipe might not get rid of it.
E. coli: Similar to Salmonella, needs proper cleaning to be removed.
Mold and Mildew: Can grow in damp, dark places. They release spores into the air.
Yeast: Often found in sweet spills. Can cause fermentation and off-smells.
Bacteria from Spills: Even small spills of juice, milk, or sauces can harbor bacteria.
Choosing the Right Cleaning Products
When you clean inside kitchen cabinets, product choice is super important. You’re storing food there. You don’t want harsh chemicals near your dishes or food items.
Safety first is the rule.
Many people prefer natural cleaners. These are often just as effective. They are also safer for your family and pets.
Good options include vinegar and baking soda. Water mixed with a little dish soap is also great for general cleaning.
For disinfection, look for products that are labeled as food-safe. Some products are designed for kitchens and food prep areas. Always read the label carefully.
Make sure it’s safe for interior cabinet surfaces.
Avoid using strong chemicals like bleach directly on shelves where food sits. If you must use bleach for a tough job, dilute it a lot. Then, rinse the area very well.
Ensure good ventilation. Open windows and turn on fans.
If you’re unsure, test a cleaner on a small, hidden spot first. This way, you can see if it damages the cabinet material. Most wood finishes or laminate surfaces are pretty tough.
But it’s always better to be safe.
Safe Cleaning Solutions
Vinegar Spray: Mix equal parts white vinegar and water in a spray bottle. This is great for general cleaning and light disinfection. The vinegar smell fades quickly.
Baking Soda Paste: Mix baking soda with a little water to make a paste. This is good for scrubbing tough spots or sticky residues.
Mild Dish Soap: A few drops of mild dish soap in warm water works for most everyday messes.
Food-Grade Sanitizers: Look for commercial products specifically marked as food-safe for sanitizing surfaces.
Step-by-Step Guide to Disinfecting
Let’s break down how to tackle this task. It might seem like a lot, but doing it step-by-step makes it manageable. Remember, patience is key here.
Step 1: Empty Everything Out. This is the most crucial first step. Take every single item out of the cabinets you plan to clean. Put them on your counter, table, or floor.
Group similar items together. Check expiration dates as you go.
Step 2: Remove Loose Debris. Use a dry cloth or a small brush to sweep out crumbs and dust. Pay attention to corners and seams. You can use a vacuum cleaner with a brush attachment if you have one.
Step 3: Wipe Down Surfaces. Mix your chosen cleaner. Dampen a microfiber cloth with it. Wipe down all interior surfaces.
This includes shelves, cabinet walls, the ceiling of the cabinet, and the back. For tough spots, use your baking soda paste.
Step 4: Address Stains and Spills. For dried-on food or sticky spills, you might need to let the cleaner sit for a minute. Then, gently scrub. If a stain is persistent, you might need a slightly stronger solution, but always keep safety in mind.
Step 5: Disinfect. Now, use your disinfectant. Spray it lightly over the surfaces. Let it sit for the time recommended on the product label.
This is called the “contact time.” It’s how long the disinfectant needs to work to kill germs.
Step 6: Rinse (If Needed). If you used a cleaner that needs rinsing, or if you’re concerned about residue, wipe the surfaces with a clean, damp cloth. Make sure to rinse the cloth often.
Step 7: Dry Thoroughly. Use a dry cloth to wipe down all surfaces again. It’s important that the cabinets are completely dry before you put anything back. Moisture can encourage mold growth.
It can also damage some cabinet materials.
Step 8: Put Items Back. As you put your items back, take a moment to organize them. This makes future cleaning easier. Place items you use often within easy reach.
Contact Time is Key
What is Contact Time? It’s the amount of time a disinfectant must remain wet on a surface to kill germs.
Why it Matters: If you wipe away the disinfectant too soon, it won’t kill all the germs effectively.
Check the Label: Always read the disinfectant product’s label for the correct contact time. It can vary by product.
Ensure Wetness: Make sure the surface stays visibly wet for the entire contact time.
Dealing with Different Cabinet Materials
Your kitchen cabinets might be made of different things. This affects how you clean them. Most cabinets are wood or a wood composite.
Some might have laminate or a painted finish.
Wood Cabinets: For solid wood cabinets, be careful not to use too much water. Water can cause wood to warp or swell. Use a damp cloth, not a soaking wet one.
For finished wood, mild soap and water or a vinegar solution are usually safe. Avoid abrasive cleaners that can scratch the finish.
Laminate Cabinets: Laminate is pretty durable. It’s often found on particleboard or MDF cabinets. A mild all-purpose cleaner or a vinegar-water mix works well.
Avoid harsh chemicals or abrasive pads. These can damage the laminate surface.
Painted Cabinets: Painted cabinets can be beautiful. But the paint can chip or scratch. Use gentle cleaning methods.
A soft cloth with mild soap and water is best. Test any disinfectant in an inconspicuous spot first. Some disinfectants might affect certain paint finishes.
Melamine Cabinets: Melamine is a tough, plastic-like material. It’s resistant to stains and scratches. You can generally use most mild household cleaners on melamine.
Just avoid abrasive scrubbers.
Stainless Steel Accents: If your cabinets have stainless steel parts, use a cleaner specifically for stainless steel. This will prevent streaks and maintain the shine.
Always remember to dry surfaces well, no matter the material. This helps prevent damage and keeps things looking good longer.
Cabinet Material Quick Guide
| Material | Best Cleaners | What to Avoid |
|---|---|---|
| Wood (Finished) | Mild soap, vinegar-water mix, damp cloth | Excessive water, abrasive cleaners, harsh chemicals |
| Laminate | All-purpose cleaner, vinegar-water mix | Abrasive pads, strong solvents |
| Painted | Mild soap, soft cloth, test cleaners first | Scrub brushes, abrasive cleaners, harsh disinfectants |
| Melamine | Mild household cleaners | Abrasive scrubbers |
Natural Disinfection Methods
Many people want to avoid chemical disinfectants. This is totally understandable, especially in the kitchen. Luckily, nature offers some effective ways to disinfect.
White Vinegar: This is a kitchen staple for a reason. White vinegar is acidic. This acidity helps kill many types of bacteria and viruses.
Mix it 50/50 with water in a spray bottle. Spray it on surfaces and let it sit for a few minutes before wiping. The smell dissipates as it dries.
Hydrogen Peroxide (3%): You can buy 3% hydrogen peroxide at most drugstores. It’s a mild disinfectant. It’s effective against bacteria, viruses, and fungi.
You can spray it directly onto surfaces. Let it bubble for a few minutes, then wipe clean. Store it in its original dark bottle, as light degrades it.
Baking Soda: While not a primary disinfectant, baking soda is a great cleaner and deodorizer. It can help lift grime where germs hide. You can make a paste with water to scrub surfaces.
Then follow up with a vinegar or hydrogen peroxide spray for disinfection.
Steam Cleaning: For certain types of cabinets, a steam cleaner can be very effective. The hot steam kills germs. It also helps loosen dirt.
Make sure your cabinet material can handle the heat and moisture.
These natural methods are generally safe. They are also good for the environment. Remember to still follow the contact time recommendations for best results, even with natural agents.
Natural Disinfectant Pros and Cons
Vinegar:
- Pros: Cheap, readily available, safe for most surfaces, breaks down grease.
- Cons: Strong smell, can etch some natural stones if used undiluted.
Hydrogen Peroxide (3%):
- Pros: Kills many germs, breaks down into water and oxygen, no harsh fumes.
- Cons: Light sensitive, can bleach some colored fabrics, test on surfaces.
Baking Soda:
- Pros: Mildly abrasive for scrubbing, deodorizes, safe.
- Cons: Not a strong disinfectant on its own.
When to Disinfect vs When to Just Clean
It’s important to know the difference between cleaning and disinfecting. Both are vital for a healthy kitchen, but they do different jobs.
Cleaning is about removing dirt, dust, and grime. It makes surfaces look and feel cleaner. You use soap and water for this.
Cleaning removes visible messes. It also removes some germs, but not all.
Disinfecting is about killing germs. It uses special products to reduce the number of bacteria and viruses on surfaces. This is important for areas that touch food or that are prone to germ growth.
When to Just Clean:
- For routine dusting and wiping up small spills.
- When there are no obvious signs of contamination or illness.
- On surfaces that don’t directly contact food and are not typically germ hotspots.
When to Disinfect:
- After cleaning up raw meat juices or spills from raw eggs.
- When someone in the household is sick.
- After dealing with a pest issue.
- Regularly on surfaces where food is prepared or stored.
- Inside kitchen cabinets, especially if you notice sticky residue or have had spills.
For cabinets, a good routine involves cleaning first, then disinfecting. This ensures you remove the mess that harbors germs, and then kill the remaining ones.
Preventing Future Build-up
Once your cabinets are sparkling clean and disinfected, you’ll want to keep them that way. Prevention is key. It makes future deep cleaning much easier.
Wipe Up Spills Immediately: This is the most important habit. Don’t let spills sit. A quick wipe takes seconds but saves you a lot of scrubbing later.
This applies to inside and outside cabinets.
Use Liners: Shelf liners are great. They catch crumbs and spills. They are easy to remove and wash or replace.
Choose washable or disposable liners for easy upkeep.
Store Food Properly: Keep food in sealed containers. This prevents leaks and spills. It also stops pests from getting into your food.
Regular Decluttering: Go through your cabinets every few months. Toss expired items. This prevents old food from becoming a hidden mess.
Ventilation: Make sure your kitchen is well-ventilated. This helps prevent moisture build-up. Damp cabinets can lead to mold and mildew.
Don’t Overcrowd: Too many items packed into a cabinet can cause things to tip over. This leads to spills. Leave a little breathing room.
Small, consistent habits make a big difference. They keep your cabinets cleaner for longer. They also reduce the need for intense cleaning sessions.
Top 5 Prevention Tips
1. Immediate Spill Action: Wipe spills the moment they happen.
2. Containerize Everything: Use airtight containers for dry goods and leftovers.
3. Monthly Check-ins: Quickly scan and toss expired items monthly.
4. Shelf Liner Power: Use washable liners for easy cleanup.
5. Air Flow is Key: Keep cabinets slightly ajar if possible or ensure good kitchen ventilation.
Addressing Tough Stains and Odors
Sometimes, despite your best efforts, you’ll encounter stubborn stains or lingering odors. Don’t worry, there are ways to tackle these.
For Tough Stains:
Try a paste of baking soda and water. Apply it to the stain and let it sit for 15-30 minutes. Then, gently scrub with a soft brush or cloth.
Rinse and dry. For very tough, old stains, you might need a specialized cleaner. But always test it in a hidden area first.
For Lingering Odors:
Once you’ve cleaned and disinfected, odors can sometimes remain. This might be from old spills or trapped moisture.
- Baking Soda: Place an open box of baking soda in the cabinets. It absorbs odors. Replace it every few months.
- Activated Charcoal: Similar to baking soda, activated charcoal is a powerful odor absorber.
- Vinegar: Leave a small bowl of white vinegar in the cabinet overnight. It can neutralize many smells.
- Coffee Grounds: Dry, unused coffee grounds can also absorb odors. Put them in a breathable sachet.
Make sure the cabinets are completely dry before trying odor-absorbing methods. Moisture can make odors worse or create new ones like mildew.
Safety Precautions for Cabinet Disinfection
Your safety and the safety of your home are paramount. Follow these precautions when cleaning and disinfecting.
Ventilation is Key: Always ensure good airflow. Open windows and doors. Use exhaust fans.
This is especially important when using any cleaning product, even natural ones. It helps disperse fumes and reduces exposure.
Read Labels Carefully: For any commercial cleaner or disinfectant, read the instructions and warnings. Know what surfaces it’s safe for and how long to leave it on.
Wear Gloves: Protect your skin from prolonged exposure to cleaning solutions. Disposable gloves are easy to use and discard.
Keep Children and Pets Away: Ensure children and pets are out of the kitchen while you are actively cleaning and disinfecting. Also, keep cleaning supplies stored safely away from them.
Never Mix Cleaners: This is a critical safety rule. Mixing certain cleaners, like bleach and ammonia, can create toxic gases. Stick to one product at a time, or use known safe combinations like vinegar and water.
Test First: If you’re using a new product or cleaning an unusual material, test it on a small, hidden area first. This prevents accidental damage to your cabinets.
By taking these simple steps, you can ensure a safe and effective cleaning process.
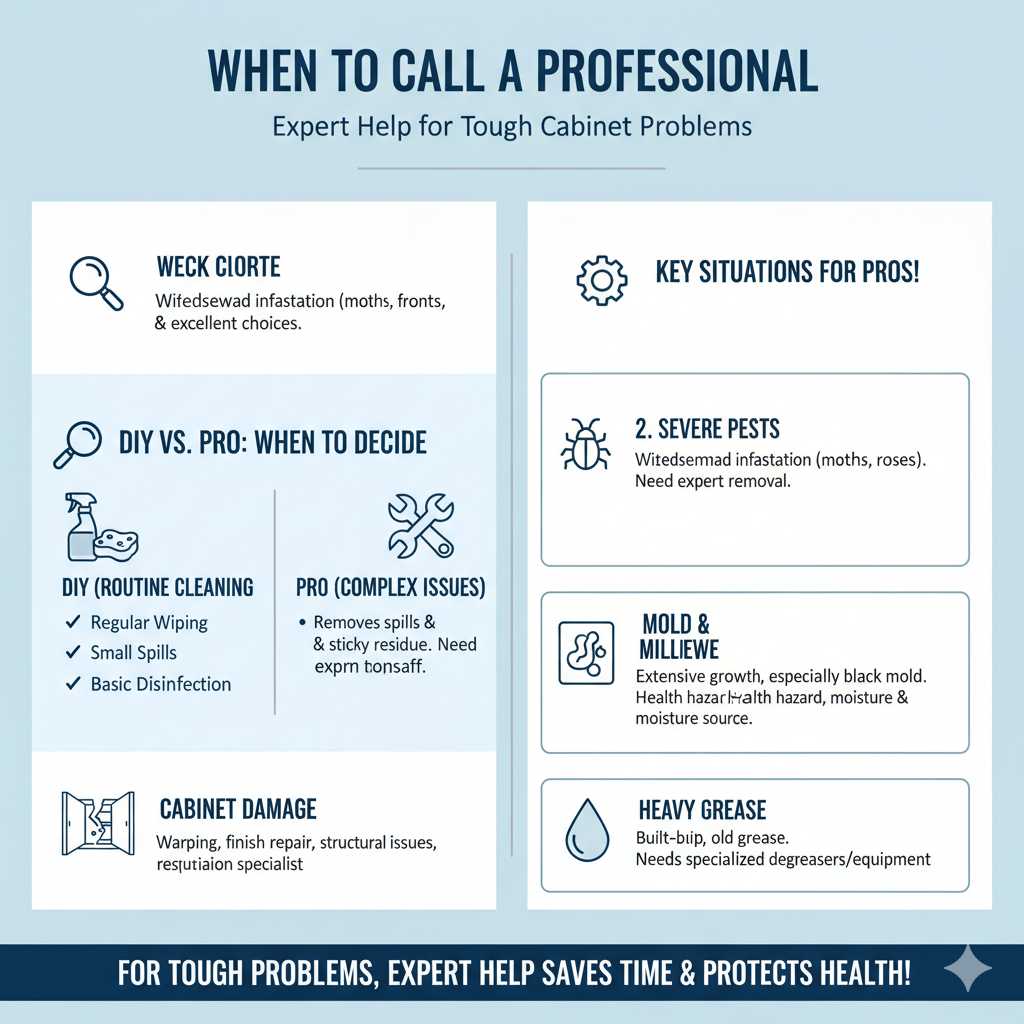
When to Call a Professional
For most typical cabinet cleaning and disinfection, you can handle it yourself. However, there are times when it’s best to bring in a professional.
Severe Pest Infestation: If you’ve discovered a significant pest problem (like widespread pantry moths, roaches, or ants), professionals have stronger tools and knowledge to deal with it. After pest removal, you’ll still need to clean and disinfect, but the initial removal might need expert help.
Mold or Mildew Growth: If you find extensive mold or mildew inside your cabinets, especially if it’s black mold, it’s a health concern. Professionals can safely remove mold and identify the source of the moisture problem.
Damage to Cabinets: If your cabinets are severely damaged, warped, or have finish issues that require repair, a cabinet restoration specialist might be needed.
Extensive Grease Buildup: In very old kitchens or restaurants, grease can build up to a point where it’s very hard to remove with standard methods. Professional cleaning services often have specialized degreasers and equipment.
For routine maintenance and disinfection, DIY is usually the way to go. But for complex issues, don’t hesitate to seek expert advice.
Frequently Asked Questions
How often should I disinfect inside kitchen cabinets?
It’s a good idea to disinfect the inside of your kitchen cabinets at least twice a year. More often if you notice spills, have had a pest issue, or if someone in your home has been sick. A quick wipe down every month or two can also help.
Can I use bleach to disinfect my cabinets?
You can use bleach, but with extreme caution. It should be heavily diluted (e.g., 1 tablespoon of bleach per gallon of water). Always ensure good ventilation and rinse the surface thoroughly afterwards.
It’s not ideal for regular use due to its harshness and fumes. Food-safe cleaners or natural alternatives are usually preferred.
What if my cabinets have a strong smell that won’t go away?
After cleaning and disinfecting, try placing an open box of baking soda or activated charcoal inside the cabinet. Leave it there for a week or two. Ensure there are no hidden spills or food particles contributing to the smell.
If it persists, check for moisture or mold issues.
Are shelf liners necessary for cabinet disinfection?
Shelf liners are not strictly necessary for disinfection, but they are very helpful for prevention. They catch crumbs and spills, making them easier to clean up. If you use liners, make sure to clean and disinfect them regularly, or replace them as needed.
Can I clean my cabinets with just water?
Water alone can clean away loose dirt and dust. However, it won’t disinfect surfaces. For true disinfection, you need a cleaning agent that kills germs.
Water is a good first step in the cleaning process, but it’s not enough on its own for germ control.
Should I empty all my cabinets at once?
Yes, it’s best to empty all cabinets you plan to clean at the same time. This allows you to do a thorough job without missing spots. You can work section by section if your kitchen is large.
Just make sure to have enough counter space to hold everything.
Conclusion
Keeping the inside of your kitchen cabinets clean and disinfected is a vital part of home hygiene. It protects your food, prevents pests, and ensures a healthier environment. By using safe products, following clear steps, and practicing good prevention habits, you can maintain fresh and hygienic cabinets.


