How to Decorate a Bedroom Armoire: A Complete Makeover Guide
You bought an armoire because you needed storage. Now it’s the biggest, heaviest thing in the room, and it’s just… there. Maybe it’s a hand-me-down oak beast from 1998. Maybe it’s a perfectly fine flat-pack piece that looks like everyone else’s. Either way, you’re wondering how to decorate a bedroom armoire so it actually fits your style instead of fighting it.
This guide walks the whole process, from deciding whether to paint or stain to organizing the inside and styling the top. You’ll get specific numbers, material recommendations, and the mistakes to dodge. By the end, you’ll know exactly what to do with that hulking piece of furniture.

AXCIGOC
AXCIGOC 72" Wooden Armoire Wardrobe Closet with…
- 【Ample Storage Space】Dimensions for this 3-door wardrobe: 72"H × 47"W × 18"D.This wardrobe armoire features 3 spacious deep drawer…
- 【Motion-Activated Light & Light Strips】Our modern wardrobe features a built-in magnetic light with an ultra-long battery life and…
- 【Elegant Modern Design】The sleek, modern lines paired with vintage-style ceramic and metal handles complement various room styles…
As an Amazon Associate I earn from qualifying purchases.
If you’re starting from scratch or your current armoire is beyond saving, a new unit like the AXCIGOC 72-inch wooden armoire gives you a blank slate with built-in LED lighting and soft-close hinges. But most armoires are worth keeping. Let’s make yours work.
Assess Your Armoire: Paint, Stain, or Refinish?
Before you buy a single can of paint, look at what you’re working with. Your decision depends on the wood type, the current finish, and the condition.
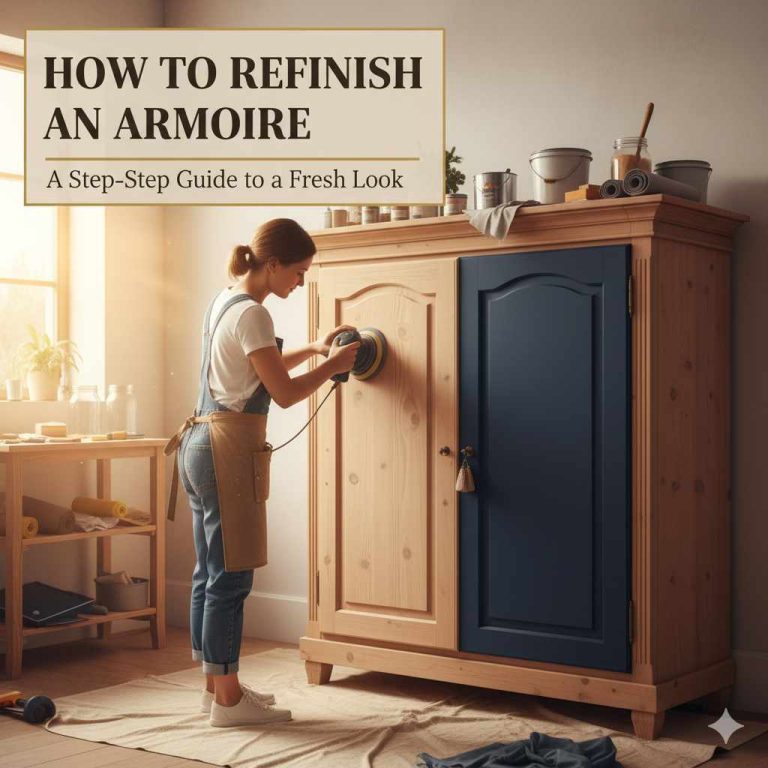
Solid wood, good condition: You have options. Staining highlights the grain and looks classic. Painting covers imperfections and gives a modern look. Refinishing (stripping and re-staining) is the most labor-intensive but rewards you with a piece that looks factory-new.
Solid wood, damaged or stained: Paint is your friend. It hides water rings, scratches, and glue marks that stain won’t cover. You’ll still need to sand and prime, but you won’t need to match the existing color.
Plywood or veneer: This is where it gets tricky. Veneer is a thin layer of real wood over cheaper material. If the veneer is intact, you can paint it. Sand lightly (veneer is thin, so don’t go aggressive) and use a high-adhesion primer like Zinsser B-I-N. Staining veneer works only if it’s real wood veneer, not a printed pattern. Test an inconspicuous spot first.
Laminate or melamine: These are plastic coatings. Paint won’t stick without special bonding primer. Skip the stain entirely. If the laminate is peeling or chipped, replacement is often cheaper than repair.
Here’s a quick rule of thumb: if you can see and feel the wood grain, you can stain it. If it’s smooth and cold to the touch, it’s laminate, and you should paint it with bonding primer or leave it alone.
Essential Prep and Supplies for a Flawless Finish
Ninety percent of a good paint job is prep. Skipping this step is why your last furniture flip looked streaky and started chipping within a month.
- Remove all hardware. Knobs, pulls, hinges, and the doors themselves if possible. You want to paint each piece flat, not hanging.
- Clean the surface. Use a degreaser like TSP (trisodium phosphate) or a simple mix of warm water and dish soap. Grease from hands and dust prevent paint from adhering.
- Sand. For painted pieces, use 120-grit to rough up the surface, then 220-grit for a smooth finish. For stained pieces, start with 100-grit and work up to 220. Always sand in the direction of the grain.
- Fill holes and dents. Wood filler for gouges, spackle for small dings. Sand smooth after drying.
- Prime. This is non-negotiable. A good primer (shellac-based for stains, water-based for general use) seals the wood and gives paint something to grip.
Your supply list: sandpaper in multiple grits, a sanding block or orbital sander, wood filler, a putty knife, painter’s tape, drop cloths, a high-quality brush (a 2-inch angled brush for edges, a 4-inch foam roller for flat surfaces), primer, and your chosen paint.
One opinion: buy decent brushes. A $5 brush sheds bristles into your finish and leaves streaks. A $15 brush pays for itself in frustration saved.
10 Paint and Finish Ideas (From Chalk Paint to High-Gloss)
You’ve done the prep. Now the fun part. Here are ten directions, from subtle to bold.
- Classic chalk paint. Chalk paint adheres to almost anything without heavy sanding. It dries to a matte, velvety finish that’s perfect for a farmhouse style. You’ll want to seal it with wax or a matte topcoat, or it will scuff.
- High-gloss lacquer. A glossy finish looks expensive and modern. It’s unforgiving — every imperfection shows — so your prep needs to be perfect. Use a sprayer or a very fine roller for a smooth result.
- Matte black. Bold, moody, and hides dirt well. Works in a boho decor or industrial room. Pair with brass hardware for contrast.
- Soft sage or eucalyptus. A muted green that feels calm and natural. Complements wood tones and white bedding.
- Warm white. The safest choice, but done right, it’s timeless. Use a warm white (not stark) and add texture with a linen or woven basket on top.
- Navy blue. Deep and dramatic. A navy armoire becomes a focal point. Use gold or brass pulls to make it pop.
- Two-tone. Paint the body one color and the door panels another. White body with a sage green panel, or black body with a natural wood interior. This adds depth without much effort.
- Distressed. Sand the edges and corners after painting to reveal the wood underneath. This works best with chalk paint and a farmhouse style. Go easy — a little distressing looks intentional, a lot looks like neglect.
- Wood stain with a gel stain. If the wood is good, a rich walnut or espresso gel stain can modernize it. Gel stains don’t require stripping the old finish, just a good cleaning and light sanding.
- Decoupage. Cover the door panels with decorative paper or fabric using Mod Podge. This is a statement piece, not for the faint of heart. Choose a large-scale pattern and commit.
The Two-Tone Trend
Two-tone is the easiest way to look like you hired a designer. The trick is contrast. Paint the frame (the outer edges) one color and the recessed panels another. Or paint the entire exterior one color and the interior of an open shelf a contrasting shade.
For a modern armoire, try a warm gray body with a dusty blue interior. For a farmhouse look, white body with a black interior. The interior color shows every time you open the doors, so it adds interest without overwhelming the room.
Decoupage and Stencil Techniques
Stenciling is more forgiving than freehand. Use a stencil brush and a dry-brush technique (dip the brush, wipe most of the paint off, then dab). This prevents paint bleed under the stencil. Hold the stencil flat with painter’s tape and remove it while the paint is still wet.
Decoupage works best on flat surfaces. Cut your paper to size, apply a thin layer of Mod Podge to the surface, lay the paper down, and smooth out bubbles with a credit card. Seal with two or three coats of Mod Podge on top. Let each coat dry completely.
Upgrading Hardware: The Quickest Transformation
You can change the entire look of an armoire by swapping the hardware, and it takes twenty minutes. It’s also the cheapest makeover move you can make.
Here’s the decision framework:
- Knobs vs. pulls: Knobs are casual, traditional, and work well on drawers. Pulls (bar or cup style) feel more substantial and modern. On a large armoire, pulls often look better because they match the scale.
- Finish: Brass and gold are warm and trendy. Black is modern and graphic. Nickel is safe and cool-toned. Match the finish to the room’s other metals — door handles, light fixtures, picture frames.
- Size: A small knob on a large drawer looks like a mistake. Measure the drawer front and choose hardware that’s roughly one-third of its width for pulls.
- Mixing: You can mix finishes on the same piece if you’re confident. Brass pulls on the drawers and a black hinge, for example. But if you’re unsure, keep it uniform.
A hardware swap is also a great chance to fix misaligned holes. If the old holes don’t match the new hardware, fill them with wood filler and re-drill. Use a template to keep the new holes straight.
Interior Upgrades: Organization and Lighting
Most armoires have one hanging rod and a couple of fixed shelves. That’s wasted space. The interior is where you can make the piece genuinely useful for bedroom storage.
Drawer dividers. For the bottom drawers, use bamboo or plastic dividers to keep socks, underwear, and accessories separated. You can buy adjustable ones that expand to fit any width.
Adjustable shelving. If your armoire has fixed shelves, consider replacing them with adjustable shelf pins and new shelves. This lets you configure the space for folded sweaters one week and a stack of jeans the next.
Hanging rod options. A single rod at 60 inches high wastes the space below. Install a second rod lower for shirts and pants. Or remove the rod entirely and install shelves for folded items. For long dresses, keep the rod high.
Lighting. Battery-operated LED puck lights are the easiest upgrade. Stick them to the top of the interior and they’ll turn on with a touch or a motion sensor. Some armoires, like the AXCIGOC wooden wardrobe, come with built-in motion-activated lights and an RGB strip, which saves you the hassle of retrofitting.
Door organizers. On the inside of the doors, attach an over-the-door shoe organizer or a small fabric pocket holder for scarves, belts, and jewelry. This uses vertical space that’s otherwise dead.
Styling the Top: Vignettes for Every Ceiling Height
The top of the armoire is prime real estate, and most people ignore it or pile junk there. A styled top adds height and personality to the room.
First, measure your ceiling height. If the armoire is within 12 inches of the ceiling, skip the tall decor. You’ll just create a cramped look. If you have a foot or more of clearance, you can go vertical.
For 8-foot ceilings: Keep it low. A stack of two or three hardcover books, a small plant (pothos or snake plant), and a bowl for keys or change. Total height should stay under 18 inches.
For 9-foot ceilings: You have room for a tall vase with dried pampas grass or a framed photo leaning against the back. Balance the visual weight — if the armoire is dark, use a light-colored vase to break it up.
For 10-foot ceilings: Go bold. A large piece of art, a tall floor vase, or a stack of vintage luggage. Use odd numbers (three items) and vary the heights so the eye moves around.
One rule of thumb: the top decor should take up about one-third of the top surface. Less looks empty, more looks cluttered. And always anchor the arrangement with something heavy at the back so it doesn’t topple over when you open the doors.
Common Armoire Makeover Mistakes (And How to Fix Them)
You’ll make mistakes. Everyone does. Here are the ones to avoid, and what to do if you’ve already made them.
Paint bleed under stencils. You used too much paint on the brush. Fix: let it dry, sand the bleed spots lightly, and touch up with a tiny brush. Next time, use a dry brush and dab, don’t stroke.
Visible brush strokes. You used a cheap brush or painted in one direction only. Fix: sand the final coat lightly with 320-grit and apply a thin topcoat. Better yet, use a foam roller for the final coat.
Improper sanding. You skipped the fine grit, so the paint feels rough. Fix: sand with 220-grit and apply another coat. It’s not the end of the world, but it’s extra work.
Not priming. The paint is peeling within months. Fix: strip it down and start over. There’s no shortcut. Primer is what makes paint stick to slick surfaces.
Ignoring the interior. You painted the outside but left the inside stained and dusty. Fix: at minimum, clean the interior and paint it a light neutral. It makes the armoire feel finished and helps you see your clothes better.
Mismatched hardware. You bought knobs without measuring, and they look tiny. Fix: measure the drawer front and order larger pulls. If the holes don’t line up, fill and re-drill.
Budget Breakdown: DIY vs. Buying New
Let’s talk money. A full DIY makeover costs less than a new armoire, but not by as much as you’d think.
| Item | DIY Makeover Cost | Buying New (Mid-Range) |
|---|---|---|
| Paint or stain (1-2 quarts) | $20 – $40 | — |
| Primer | $15 – $25 | — |
| Sandpaper, filler, tape | $15 – $30 | — |
| New hardware (6-8 pieces) | $30 – $80 | — |
| Interior lighting (2-4 pucks) | $20 – $50 | — |
| Total DIY | $100 – $225 | — |
| New armoire | — | $300 – $800+ |
The DIY route saves you $200 to $500, but it takes a weekend (or two) and requires patience. If your current armoire is structurally sound, the makeover is worth it. If it’s wobbly, has water damage, or the doors don’t close, put that money toward a new piece like the AXCIGOC armoire with its solid composite wood construction and soft-close doors.
One more consideration: time. A makeover costs you about 10 to 15 hours of labor. If your time is worth more than $20 an hour, buying new might be the smarter financial move.
Final Thoughts: Making Your Armoire Work
Decorating a bedroom armoire isn’t about following a single trend. It’s about making the piece fit your room, your storage needs, and your taste. Start with the assessment, do the prep properly, and don’t skip the interior organization.
- Assess wood type and condition before choosing paint or stain. Veneer and laminate need different treatment than solid wood.
- Prep is 90% of the job. Clean, sand, fill, and prime — every time.
- Hardware swaps are the cheapest and fastest transformation. Match scale and finish to the room.
- Fix the interior with dividers, adjustable shelves, and battery LED lights before styling the exterior.
- Style the top based on ceiling height. Keep it low for 8-foot ceilings, go taller for 9-foot and above.
- Budget for $100-$225 for a DIY makeover versus $300+ for a new armoire. Factor in your time.
- If the armoire is beyond repair, invest in a new one with modern features like built-in lighting and soft-close hinges.
You don’t need to be a professional carpenter to pull this off. You need a plan, the right supplies, and a willingness to sand. Your armoire can go from forgotten to focal point. That’s a pretty good return on a weekend.
Products related to this article
Sponsored / affiliate links. As an Amazon Associate I earn from qualifying purchases. I may earn additional commission from eligible campaigns.