How to Refinish an Armoire: A Diagnose-First Guide
You finally found that solid oak armoire at an estate sale. It cost you $80, but it’s covered in a thick, orange shellac that hides the wood grain. Or maybe you have a particleboard unit from a big-box store that’s chipped and dated. Either way, you want it to look different.
Refinishing an armoire is a messy, slow, but deeply satisfying project. It’s not a single task. It’s a sequence of small decisions: what kind of wood you have, what finish you want, and how much elbow grease you’re willing to burn. This guide walks you through the entire process, from the first inspection to the final coat of topcoat. You’ll learn how to avoid ruining veneer, fix sticky drawers, and choose between paint and stain based on the actual condition of the wood.

Minwax
Minwax Antique Furniture Refinisher, 1 Quart
- ANTIQUE FURNITURE RESTORATION – Minwax Antique Furniture Refinisher is a low viscosity, amber-colored blend of solvents and wood c…
- GENTLE FORMULA – This antique wood refinishing formula contains natural wood oils that penetrate and condition wood. It can be use…
- EASY TO APPLY – With no scraping, no sanding, and no mess, it’s easy to apply this wood refinish in just a few steps.
As an Amazon Associate I earn from qualifying purchases.
The good news is you don’t need a workshop full of tools. You need patience, a few chemicals, and the willingness to work in a well-ventilated space. Let’s get started.
For stripping stubborn old finishes, a product like Minwax Antique Furniture Refinisher can save you hours of sanding. It dissolves old varnish and lacquer without harming the wood underneath, which makes it a solid choice for delicate veneers.
Assess Your Armoire: Solid Wood, Veneer, or Laminate?
Before you buy any stripper or sandpaper, figure out what you’re working with. This single step determines everything else. Grab a flashlight and inspect the edges, the inside of the doors, and the back panel.
- Solid wood: You’ll see a continuous grain pattern running through the edges and the end grain on the back. It’s heavy. It can be sanded aggressively.
- Veneer: A thin layer of real wood (often 1/32-inch thick) glued over plywood or particleboard. Look at the edges — you’ll see a visible seam where the veneer meets the core. Sanding through this layer ruins the piece.
- Laminate: A plastic or melamine layer printed to look like wood. It doesn’t accept stain. It doesn’t accept paint well without heavy primer. If you have laminate, skip the stripping chemicals and go straight to a bonding primer.
Most mid-range armoires from the 1970s and later are veneer over particleboard. They’re not junk, but they demand respect. A power sander with 80-grit paper will eat through veneer in seconds. If you see that telltale seam, plan on hand-sanding only.
Safety First: Ventilation, Gloves, and Chemical Disposal
Chemical strippers are effective because they’re toxic. Methylene chloride, toluene, and acetone are common ingredients. They’ll give you a headache, a rash, or worse if you don’t respect them.
Work outside or in a garage with the door open. Set up a fan to push fumes away from your face. Wear nitrile gloves — the thick, disposable kind, not the thin ones that tear on a drawer edge. Safety glasses are non-negotiable; splashes happen when you’re scraping overhead.
Disposal is the part most guides skip. You can’t pour leftover stripper down the drain. Let it evaporate in a metal can, or check your local waste facility for hazardous material drop-off days. The same goes for rags soaked in stripper or oil-based finishes. Spread them flat to dry outside before throwing them away. If you ball them up, they can spontaneously combust. That’s not a myth.
Tools and Materials: The Complete Checklist
Gather everything before you start. Running to the hardware store mid-project with a sticky armoire in your garage is a recipe for frustration.
- Chemical stripper (or heat gun)
- Putty knives and scrapers (plastic for veneer, metal for solid wood)
- Steel wool (0000 grade for final clean-up)
- Sanding blocks and paper (grits 80, 120, 180, 220)
- Tack cloth
- Wood filler and grain filler
- Wood conditioner
- Stain, gel stain, or primer and paint
- Polyurethane or furniture wax
- Mineral spirits for clean-up
- New hardware (if you’re not reusing the old)
Don’t cheap out on sandpaper. A pack of cheap sheets that shreds after one pass will cost you more time than the premium stuff. You’ll use roughly 10-15 sheets of each grit for a large armoire.
Step 1: Remove Hardware and Label Everything
Take off every knob, handle, hinge, and latch. Put the screws in a small zipper bag and tape it to the back of the armoire. For the hinges, use a permanent marker to write ‘top left’ or ‘middle right’ on masking tape and stick it to the hinge. This saves you 20 minutes of fiddling during reassembly.
Remove the drawers completely. Check the slides or glides for wear. If a drawer sticks, now is the time to fix it — more on that in Step 3.
If the hardware is brass or has a nice patina, consider cleaning it with a vinegar-and-salt solution instead of replacing it. New hardware can look out of place on a piece with history.
Step 2: Strip the Old Finish (Chemical vs. Heat Gun)
You have two main paths to remove the old finish. Chemical strippers are the safest for beginners. Heat guns are faster but risk scorching the wood and can ignite old finish.
Chemical stripping: Apply a thick coat with a cheap brush. Let it sit for 15-20 minutes. The finish will bubble and wrinkle. Scrape it off with a putty knife, working with the grain. You’ll need two or three applications for heavy coats. For the last residue, use 0000 steel wool dipped in mineral spirits.
Heat gun: Hold the gun 2-3 inches from the surface and move it slowly. When the finish bubbles, scrape it off immediately. Keep a metal bucket nearby for the scrapings — they’re flammable. This method works great on solid wood but is risky on veneer. The heat can soften the glue and cause the veneer to blister.
After stripping, wipe the entire piece down with mineral spirits to remove any waxy residue left by the stripper. Let it dry overnight. If the wood looks blotchy or has residue in the corners, repeat the mineral spirits wipe.
Step 3: Repair Structural Issues (Drawers, Doors, and Veneer)
This is the step most tutorials ignore. An armoire that looks perfect but has a drawer that jams is a failure. Fix these issues before you paint or stain.
Sticky drawers: Remove the drawer and rub a candle or a bar of paraffin wax along the bottom edges and the runners. If it still sticks, the drawer might be warped or the slides misaligned. Check the screws on the slides — tighten or adjust them. For wooden runners, sand them down with 120-grit paper until the drawer slides smoothly.
Misaligned doors: Loosen the screws on the hinge plate attached to the frame. Adjust the door up, down, left, or right, then retighten. For European-style hinges, turn the adjustment screws (usually a Phillips head or hex) to fine-tune the position.
Veneer repair: If a corner is chipped, use a wood filler that matches your final finish. For larger damaged areas, glue a patch of new veneer over the spot. Cut the patch slightly oversized, glue it down, clamp it, and trim with a razor blade after it dries.
Fill any dents or scratches with wood filler. Let it dry completely, then sand it flush. For open-pored woods like oak, apply a grain filler after the wood filler dries. This creates a smooth surface and prevents the stain from pooling in the pores.
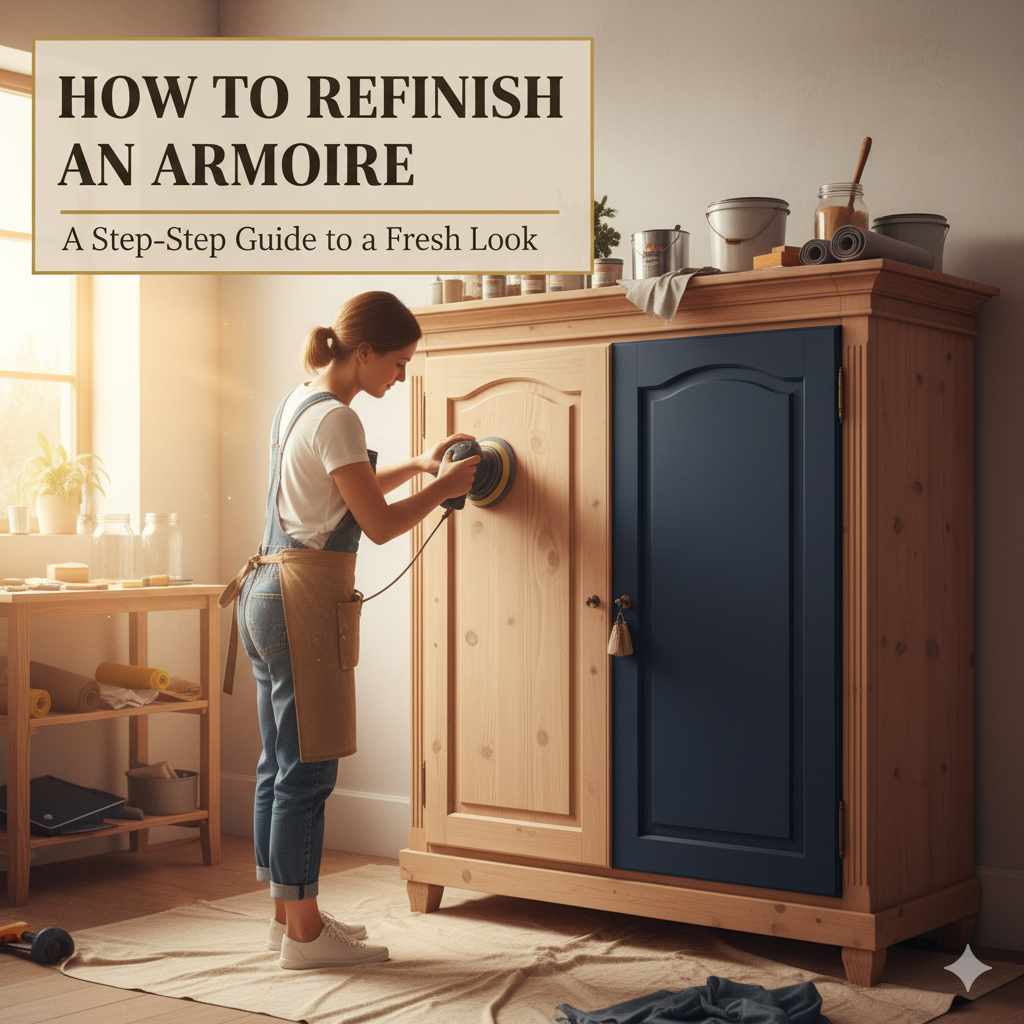
Step 4: Sanding Sequence (Grits 80 to 220)
Sanding is the difference between a good finish and a great one. Don’t skip grits. Don’t press hard. Let the paper do the work.
- Start with 80-grit if you’re removing the last bits of old finish or leveling a repair. On veneer, skip this grit entirely — it’s too aggressive.
- Move to 120-grit to smooth the surface and remove scratches from the 80-grit.
- Use 180-grit for the final pass on bare wood before staining.
- Use 220-grit between coats of polyurethane for a glass-smooth finish.
Sand with the grain, not in circles. On flat panels, use a sanding block to avoid creating waves. On curved or carved areas, fold the sandpaper and use your fingers. Wipe the dust off with a tack cloth between each grit change.
For veneer, use 120-grit at the most, and go easy. You’re not trying to remove the wood — just rough it up enough to accept the new finish.
Step 5: Choose Your Finish: Paint, Stain, or Gel Stain
Here’s the decision tree. Look at the wood after sanding.
- If the wood has a beautiful, uniform grain — solid oak, cherry, walnut — use a traditional stain.
- If the wood is blotchy, mismatched, or has heavy repairs, use a gel stain. It’s thicker and sits on top of the wood, so it evens out the color.
- If the wood is cheap (birch, poplar, particleboard) or the veneer is damaged, paint it. Paint hides everything.
For a painted finish, use a shellac primer first. It seals the wood and prevents tannins from bleeding through. Then apply two coats of a high-quality latex or enamel paint. Sand lightly with 220-grit between coats.
When to Use a Wood Conditioner
Wood conditioner is not optional for soft woods like pine or maple. These woods absorb stain unevenly, creating blotches. Conditioner seals the pores so the stain goes on evenly.
Apply a thin coat of conditioner, wait 15 minutes, then apply the stain. You have about two hours before the conditioner stops being effective, so work in sections. For hardwoods like oak or walnut, you can skip the conditioner.
How to Apply Gel Stain Without Brush Marks
Gel stain is forgiving, but it still shows brush strokes if you’re careless. Use a foam brush or a lint-free cloth. Apply a thin, even coat. Don’t over-brush — one pass is usually enough. Let it sit for 5-10 minutes, then wipe off the excess with a clean cloth.
The key is to work in small sections (about 2 square feet at a time). If you wait too long, the gel starts to set and you’ll pull it off unevenly. Two thin coats are better than one thick coat.
Step 6: Sealing and Topcoats (Poly vs. Wax)
Stain and paint need protection. You have two main options.
Polyurethane: The workhorse. It’s durable, water-resistant, and comes in satin, semi-gloss, and gloss. Use a water-based poly for a clear finish that won’t yellow. Use oil-based poly for a warm, amber tone. Apply three thin coats with a foam brush, sanding with 220-grit between coats. Wait 2 hours between coats.
Furniture wax: This is for pieces that won’t see heavy use. It’s easier to apply — just rub it on with a cloth and buff it off. But it offers little protection against water or scratches. You’ll need to reapply it every six months or so.
For an armoire that holds a TV or kids’ clothes, use polyurethane. For a decorative piece in a guest bedroom, wax is fine.
Step 7: Reassemble and Adjust Hardware
Wait at least 24 hours after the final coat before you touch the piece. Then reattach the hardware. Use the labeled bags from Step 1. If you’re installing new knobs, measure the hole spacing first — don’t assume they’ll fit.
Reinstall the drawers and doors. Check the alignment again. If a door sags, adjust the hinge screws. If a drawer sticks, apply a little more wax to the runners.
One last tip: put felt pads on the bottom of the armoire before you slide it back into place. It protects your floor and makes it easier to move later.
Cost and Time Breakdown: Weekend vs. Full Week
Refinishing takes longer than you think. Here’s a realistic breakdown.
| Project Scope | Time | Cost (Materials) | Best For |
|---|---|---|---|
| Quick refresh (paint only, no stripping) | 1-2 days | $40-$80 | Laminate or already-painted pieces |
| Full refinish (strip, sand, stain, seal) | 4-5 days | $80-$150 | Solid wood or veneer with a good base |
| Full restoration (repairs + refinish) | 1-2 weeks | $150-$250 | Antiques or damaged pieces |
Most of that time is drying and waiting, not active work. You’ll spend maybe 6-8 hours of actual labor on a weekend project. The rest is waiting for stripper, stain, and polyurethane to cure.
If you’re on a tight schedule, skip the chemical stripper and use a heat gun. It cuts the stripping time in half. But you trade that for the risk of scorching the wood.
Frequently Asked Questions
Can I refinish an armoire without stripping the old finish?
Yes, if you’re painting it. Clean the surface with a degreaser, scuff it with 220-grit sandpaper, and apply a bonding primer. For staining, you can’t skip the strip. Old finish blocks the stain from penetrating.
How do I match the new finish to my existing bedroom furniture?
Bring a drawer front or a sample of the existing furniture to the paint store. Compare it to stain swatches in natural light. If you can’t find an exact match, pick a stain that’s slightly lighter — it’s easier to darken a piece with a second coat than to lighten it.
What’s the difference between wood filler and grain filler?
Wood filler is for fixing dents and holes — it’s thick and dries hard. Grain filler is for smoothing open-pored woods like oak — it’s a paste you rub across the surface to fill the natural pores. You need both for a flawless finish.
Is chalk paint a good option for an armoire?
Chalk paint works well on veneer and laminate without stripping. It gives a matte, vintage look. But it’s soft — you need to seal it with wax or a topcoat, or it will scuff. It’s a great choice if you want a distressed look. For a more thorough guide, check out this chalk paint dresser guide.
How do I fix a sticky drawer after refinishing?
Rub a candle or paraffin wax on the drawer’s bottom edges and the runners. If that doesn’t work, the drawer might have swollen from moisture during stripping. Let it dry for a few days, then sand the edges with 120-grit paper until it slides freely.
What to Do With Your Newly Refinished Armoire
You’ve put in the work. The armoire looks different — maybe better than when it was new. Here’s what to remember for the next time you tackle a project like this.
- Diagnose the wood type first. Veneer and laminate require different approaches than solid wood.
- Work in a ventilated space and dispose of chemical-soaked rags properly.
- Fix structural issues like sticky drawers and misaligned doors before you apply any finish.
- Sand through every grit — 80 to 220 — and never skip grits.
- Choose your finish based on the wood’s condition: stain for good grain, gel stain for blotchy wood, paint for everything else.
- Seal with polyurethane for durability; use wax only for low-traffic pieces.
- Label all hardware during disassembly to make reassembly painless.
Refinishing an armoire is a commitment. But the payoff is a piece of furniture that fits your space and your style, built to last another decade. If you’re planning a bigger build from scratch, you might find this armoire building guide useful for the next project. And if you’re still debating whether to tackle it, remember: the worst that happens is you learn what not to do next time.
Products related to this article
Sponsored / affiliate links. As an Amazon Associate I earn from qualifying purchases. I may earn additional commission from eligible campaigns.
![Furniture Wax - 100% Natural Sealant for Chalk Furniture Paint or Raw Wood, Light Protection, Easy To Apply, No Odor, Eco-Friendly - 7 Color Choices - Antiquing [Brown] (8 oz)](https://m.media-amazon.com/images/I/41ZNmSTmwhL._SL500_.jpg) Furniture Wax - 100% Natural Sealant for Chalk Furniture Paint or Raw Wood, Light Protection, Easy To Apply, No Odor, Eco-Friendly - 7 Color Choices - Antiquing [Brown] (8 oz)
Furniture Wax - 100% Natural Sealant for Chalk Furniture Paint or Raw Wood, Light Protection, Easy To Apply, No Odor, Eco-Friendly - 7 Color Choices - Antiquing [Brown] (8 oz) All-in-One Water-Based Wood Refinishing Paint - Low VOC, Fast-Drying, for Furniture, Cabinets & Doors - Easy Furniture Makeovers, with Paint Roller (Orange Brown, 16 Fl Oz)