
Don’t let squeaky doors disrupt your peace! Learn how to make door hinges not squeak easily and effectively with simple household items, restoring quiet and comfort to your home in no time.
Is there anything more annoying than a door that announces its arrival with a loud, drawn-out squeak every single time it’s opened or closed? It’s one of those little home annoyances that can really get on your nerves, isn’t it? Whether it’s the bedroom door, a closet door, or even your front door, that persistent squeak can be a real buzzkill, especially when you’re trying to tiptoe around or just want some quiet. But don’t worry, you absolutely don’t need a handyman or fancy equipment to fix this common problem. With a few simple steps and some common household items, you can banish those squeaky hinges and enjoy the sweet sound of silence. Get ready to transform those noisy doors into smooth operators!
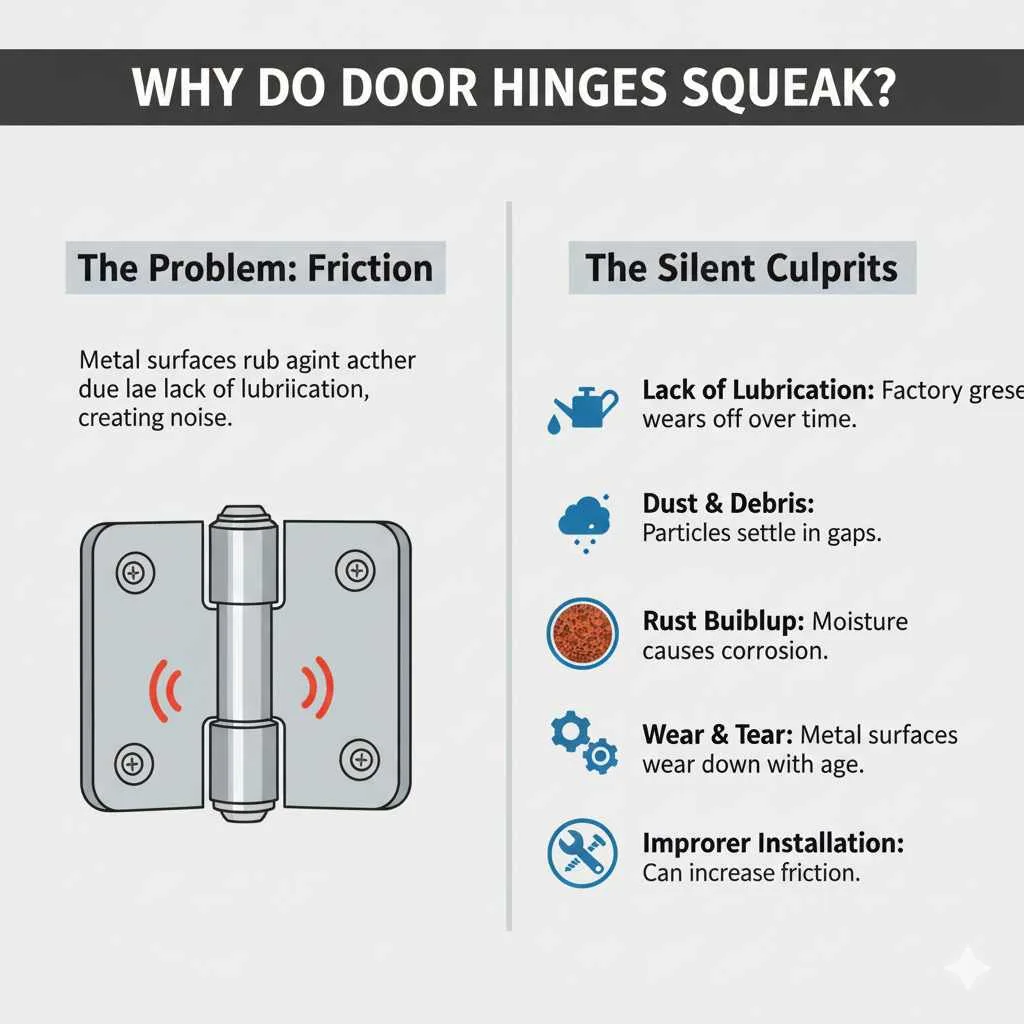
Why Do Door Hinges Squeak?
Door hinges get squeaky for a surprisingly simple reason: friction. Over time, the metal parts of the hinge, particularly the pin that connects the two leaves, can lose their lubrication. Dust, dirt, and even rust can build up in the tiny gaps between the hinge components. When these dry metal surfaces rub against each other, they create that grating, squeaking sound we all know and dislike. Think of it like any moving part – without a little oil or something to help it glide smoothly, it’s going to protest!
The Silent Culprits: What Causes Hinge Friction
There are a few key factors that contribute to that irritating hinge squeak:
Lack of Lubrication: This is the most common culprit. The factory grease or oil on new hinges wears off over time.
Dust and Debris: Airborne particles settle into the hinge, creating a gritty barrier that hinders smooth movement.
Rust Buildup: Moisture, especially in humid environments, can cause the metal to corrode, leading to friction and noise.
Wear and Tear: As hinges age and are used frequently, the metal surfaces can wear down slightly, increasing contact and potential for squeaking.
Improper Installation: While less common, a hinge that wasn’t installed correctly might also develop squeaks sooner.
Your Ultimate Guide: How to Make Door Hinges Not Squeak
Ready to tackle those squeaky hinges? It’s easier than you think! We’ll walk you through the most effective methods, starting with the quick fixes and moving to slightly more involved, but still very beginner-friendly, solutions. The goal is to lubricate the moving parts of the hinge and dislodge any grit or grime that’s causing the friction.
Method 1: The Quick and Easy Household Lube
Before you run out to buy specialized products, check your kitchen and bathroom! Many common household items can work wonders on squeaky hinges in a pinch.
What You’ll Need:
A clean cloth or paper towels
Your chosen lubricant:
Household Oil: A few drops of vegetable oil, olive oil, or even mineral oil.
Petroleum Jelly (Vaseline): A small dab can work wonders.
Dish Soap: Mix a small amount with water for a temporary fix.
Window Cleaner: Some contain lubricants that can quiet a hinge.
Step-by-Step Process:
1. Clean Around the Hinge: Before applying any lubricant, take your cloth and wipe away any visible dust or cobwebs from the hinge. This prevents you from pushing dirt further into the mechanism.
2. Apply Lubricant:
For Oils: Gently open the door so the hinge pin is slightly exposed. Apply 2-3 drops of your chosen household oil directly onto the top of the hinge, allowing gravity to carry it down into the hinge mechanism. You might need to carefully lift the hinge pin a tiny bit to get the oil in.
For Petroleum Jelly: Use a small amount on your fingertip or a cotton swab and carefully spread it over the hinge joint and around the pin.
For Dish Soap/Window Cleaner: Dip a cloth or cotton swab into the mixture and apply it to the hinge.
3. Work the Hinge: Open and close the door several times. This is crucial! It helps the lubricant spread evenly throughout the hinge mechanism and work its way into all the nooks and crannies.
4. Wipe Away Excess: Use your clean cloth to wipe off any drips or excess lubricant that may have squeezed out. This prevents it from attracting more dust or staining your doorframe or floor.
This method is fantastic for temporary relief or when you don’t have specialized tools. It’s incredibly simple and can make a big difference almost immediately.
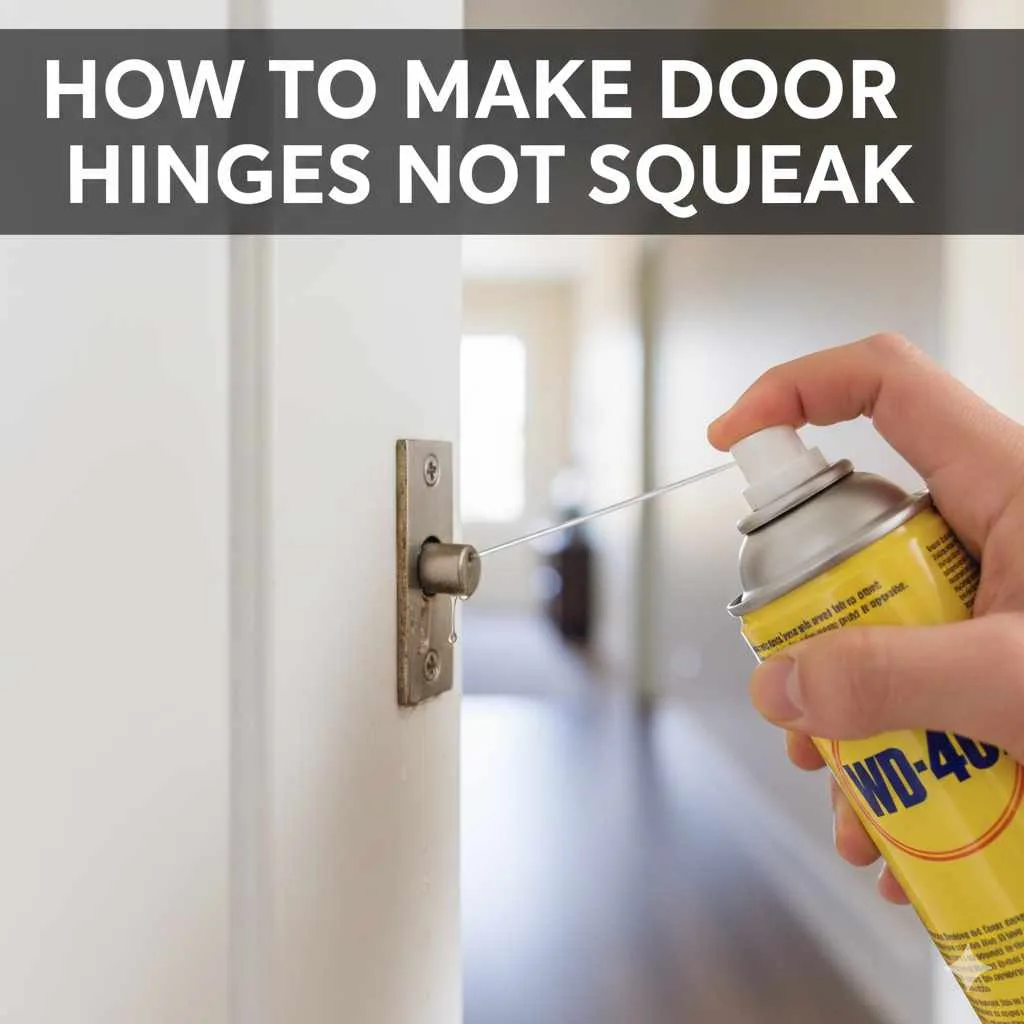
Method 2: The Powerful Penetrating Oil
When household remedies aren’t quite cutting it, or if you want a longer-lasting solution, a dedicated penetrating oil is your best friend. These are specifically designed to seep into tight spaces and break down rust and grime while providing excellent lubrication.
What You’ll Need:
A clean cloth or paper towels
Penetrating oil (e.g., WD-40, PB Blaster, or a silicone spray)
Optional: A small hammer and a nail or screwdriver
Step-by-Step Process:
1. Protect Your Surfaces: Lay down an old towel or newspaper on the floor below the hinges to catch any drips.
2. Clean Visible Dirt: As before, wipe down the exterior of the hinges to remove loose debris.
3. The Hinge Pin Trick (Optional but Recommended): For the most effective lubrication, you’ll want to get the oil inside the hinge.
Gently tap upwards on the bottom of the hinge pin with a nail or screwdriver and a small hammer. You don’t need to remove the pin entirely, just lift it about half an inch to an inch. This creates a better channel for the lubricant. If the pin is stuck, don’t force it too hard, or try a bit of the penetrating oil first and let it sit for a few minutes before tapping again.
4. Apply Penetrating Oil: Aim the nozzle of your penetrating oil can directly at the seam of the hinge and around the exposed part of the pin. Give it a good spray. If you’ve lifted the pin, spray some oil directly into the gap where the pin meets the hinge.
5. Work it In: Swing the door back and forth multiple times. This action is key to distributing the oil thoroughly inside the hinge. You’ll feel the movement becoming smoother.
6. Clean Up Drips: Wipe away any excess spray and drips immediately with your cloth.
A penetrating oil often provides a more robust and longer-lasting solution than basic household oils because it’s formulated to handle corrosion and provide superior lubrication.
Method 3: The Old-School Lard or Wax Method
This might sound a bit old-fashioned, but for a natural and long-lasting lubrication, certain waxes and even lard can be very effective. It’s a trick that has been passed down through generations!
What You’ll Need:
A clean cloth or paper towels
Lubricant:
Paraffin Wax: From a candle (unscented is best).
Beeswax: A small block or a beeswax crayon.
Lard or Shortening: A small amount (use sparingly as it can become rancid or attract pests over very long periods, but is very effective short-term).
Optional: Craft knife or scissors to shave wax.
Step-by-Step Process:
1. Prepare the Lube:
For Wax: If using a candle, gently scrape off some wax shavings using a craft knife or scissors. You can also rub the candle directly onto the hinge if the pin is accessible.
For Lard/Shortening: Take a very small amount on your finger or a cotton swab.
2. Access the Hinge: Open the door to expose the hinge pin.
3. Apply the Lubricant:
For Wax: Rub the wax shavings directly onto the hinge pin and into the seams of the hinge. If using a candle, rub the side of the candle directly onto the pin and around the joint.
For Lard/Shortening: Apply a small, thin layer to the hinge pin and joint.
4. Work it In: Open and close the door vigorously several times to spread the wax or grease throughout the hinge mechanism. The friction will help melt and distribute the wax.
5. Wipe Away Excess: Clean up any residue with a cloth.
This method is excellent because wax provides a dry, long-lasting lubrication that doesn’t attract as much dust as liquid oils can. It’s a great eco-friendly option too!
Method 4: The Full Hinge Pin Clean and Lubricate (For Stubborn Squeaks)
If the squeak is particularly stubborn, or if your hinges look a bit rusty, then removing the hinge pin for a thorough cleaning and lubrication is the most effective solution. Don’t be intimidated; it’s still a beginner-friendly DIY task!
Which hinges in your home are the most annoying when they squeak? Cast your vote!
What You’ll Need:
Hammer
Nail or flat-head screwdriver (that fits into the bottom of the pin)
Pliers (optional, for stubborn pins)
Penetrating oil or an all-purpose grease (like lithium grease)
Steel wool or a wire brush
Clean rags or paper towels
Safety glasses (highly recommended!)
Step-by-Step Process:
1. Support the Door: It’s a good idea to have a helper for this step, or prop the door open with a wedge or books so it doesn’t sag when the pin is removed.
2. Loosen the Pin: Place the tip of your nail or screwdriver against the bottom of the hinge pin. Gently tap upwards with the hammer. The pin should start to rise.
3. Remove the Pin: Once the pin is lifted enough, you can often pull it out by hand. If it’s stuck, use pliers to grip the top of the pin and gently twist and pull. Work slowly and avoid forcing it, as you don’t want to damage the hinge. If it’s very stubborn, apply some penetrating oil, let it sit for 15-30 minutes, and try again.
4. Clean the Pin: Once removed, lay the pin on your rag. Use steel wool or a wire brush to scrub off any rust, dirt, or old grease. You want the pin to be as clean and smooth as possible. Wipe it down thoroughly with a clean rag.
5. Clean the Hinge: While the pin is out, use a damp cloth and a bit of steel wool to clean out the inside of the hinge barrels as best you can.
6. Lubricate: Generously coat the clean hinge pin with your chosen lubricant – either a good penetrating oil or a thicker all-purpose grease. Ensure it’s well-covered.
7. Reinsert the Pin: Line up the hinge leaves and carefully slide the lubricated pin back into place from the top. You may need to tap it gently with the hammer to seat it fully.
8. Test and Clean: Open and close the door several times to distribute the lubricant throughout the hinge. Wipe away any excess grease or oil.
This method is incredibly effective, especially for older doors or hinges that haven’t been maintained. A well-lubricated pin means a smooth, quiet operation for a long time.
Choosing the Right Lubricant: A Quick Guide
Not all lubricants are created equal, and the best one for your squeaky hinge might depend on a few factors. Here’s a breakdown to help you decide:
| Lubricant Type | Best For | Pros | Cons |
| :——————— | :————————————– | :——————————————————————- | :———————————————————————— |
| Household Oils | Quick fixes, minimal squeaks | Readily available, inexpensive | Temporary, can attract dust, may go rancid over time |
| Petroleum Jelly | Temporary relief on accessible hinges | Readily available, inexpensive, good viscosity | Can be messy, attracts dust, not ideal for harsh conditions |
| Penetrating Oil | Rust removal, loosening stuck parts, deep lubrication | Excellent for breaking rust, seeps into tight spaces, fast-acting | Can be messy, some have strong odors, may need reapplication more often |
| Silicone Spray | General use, works on various materials | Doesn’t attract dust, good for indoor/outdoor use, water-resistant | Can be less effective on heavy rust, needs frequent application |
| Lithium Grease | Long-term lubrication, heavy-duty | Durable, long-lasting, water-resistant, good for metal-on-metal | Can be thick and messy, may require pin removal for best application |
| Wax (Candle/Beeswax) | Natural, long-lasting, dry lubrication | Clean, doesn’t attract dirt, long-wearing | Can be harder to apply, may require some heat to fully embed (friction) |
For most DIYers looking for a reliable fix, a good quality penetrating oil or an all-purpose lithium grease are excellent choices. You can often find these at your local hardware store or even in the automotive section of a large store. For instance, products like WD-40 Specialist Penetrant or a can of white lithium grease are readily available and highly effective.
Preventing Future Squeaks
Once you’ve silenced your doors, the last thing you want is for them to start squeaking again soon. A little preventative maintenance goes a long way!
Regular Cleaning: Dust and wipe down your hinges periodically. A quick wipe with a dry cloth can remove surface dust before it gets ground in.
Annual Lubrication: Aim to lubricate all your door hinges once a year. Spring is a great time for this! It doesn’t have to be a major overhaul; a quick spray of lubricant can keep things running smoothly.
Address Moisture: If your home is particularly humid, consider using a dehumidifier or ensuring good ventilation, especially around doors that might be exposed to more moisture.
* Check for Wear: Occasionally inspect your hinges. If you notice excessive rust or wear, it might be time to replace the hinge before it becomes a problem. A new hinge is often a simple and inexpensive fix!

Frequently Asked Questions About Squeaky Hinges
Q1: How often should I lubricate my door hinges?
A1: For most homes, lubricating your door hinges once a year is sufficient to prevent squeaks. If you live in a very humid climate or notice signs of rust, you might want to do it twice a year.
Q2: Can I use cooking oil to lubricate my door hinges?
A2: Yes, you can use cooking oil like olive or vegetable oil for a quick fix. However, it’s a temporary solution and can attract dust or even go rancid over time. Specialized lubricants are more effective for long-term results.
Q3: My hinge pin is stuck and won’t come out. What should I do?
A3: First, try applying a generous amount of penetrating oil and let it sit for at least 15-30 minutes, or even overnight if possible. Then, gently tap upwards on the pin with a hammer and nail or screwdriver. If it’s still stuck, you might need a pair of pliers to help gently twist and pull it free.
Q4: Will WD-40 fix my squeaky hinges?
A4: Yes, WD-40 is a popular choice for silencing squeaky hinges! It’s a penetrating lubricant that can get into the hinge mechanism effectively. For a longer-lasting solution, some people prefer to follow up with a thicker lubricant like lithium grease after the WD-40 has done its work cleaning and freeing the parts.
Q5: Is it safe to use lubricant on painted hinges?
A5: Most lubricants are safe for painted hinges, especially when used sparingly. Just be sure to wipe away any excess immediately with a clean cloth to prevent drips from damaging the paint job on the door or frame. Silicone sprays are often a good choice as they are less likely to affect finishes.
Q6: My doors are old and the hinges look rusty. What’s the best approach?
A6: For rusty hinges, the most effective method is to remove the hinge pin (Method 4), clean the pin thoroughly with steel wool or a wire brush to remove all rust, and then apply a good quality lubricant like penetrating oil or lithium grease before reinserting it. This will give you the best chance of restoring smooth, quiet operation.
Q7: Can I just spray lubricant on without removing the pin?
A7: Absolutely! For many minor squeaks, simply spraying a lubricant like WD-40 or a silicone spray directly onto the hinge and working the door back and forth is enough to solve the problem. The lubricant will gradually work its way into the hinge mechanism. Removing the pin just ensures a more thorough treatment, especially for older or more stubborn squeaks.
Conclusion: Enjoying Your Quiet Home
And there you have it! Silencing squeaky door hinges is a straightforward DIY task that can make a surprisingly big difference in the comfort and peace of your home. You’ve learned that a little lubrication is all it takes to get those doors gliding smoothly and quietly. Whether you used a quick household fix, a trusted penetrating oil, or even tackled the hinge pin removal for a deep clean, you’ve armed yourself with the knowledge to banish those irritating squeaks for good.
Remember, maintaining your home doesn’t have to be complicated. With simple tools and a little know-how, you can tackle common issues like this and feel a wonderful sense of accomplishment. Now, go forth and enjoy the sweet sound of… well, nothing at all! Your home is now a more peaceful sanctuary, and you did it yourself. Bravo!


