Wall Anchor One Time Use: The Complete Lifecycle Guide
What Does “One-Time Use” Really Mean for Wall Anchors?
You just hung a heavy mirror. It feels solid. Then you need to move it six inches to the left. You unscrew the screw, pull the anchor out, and stare at a hole that’s now too big for a new anchor. That’s the reality of wall anchor one time use.
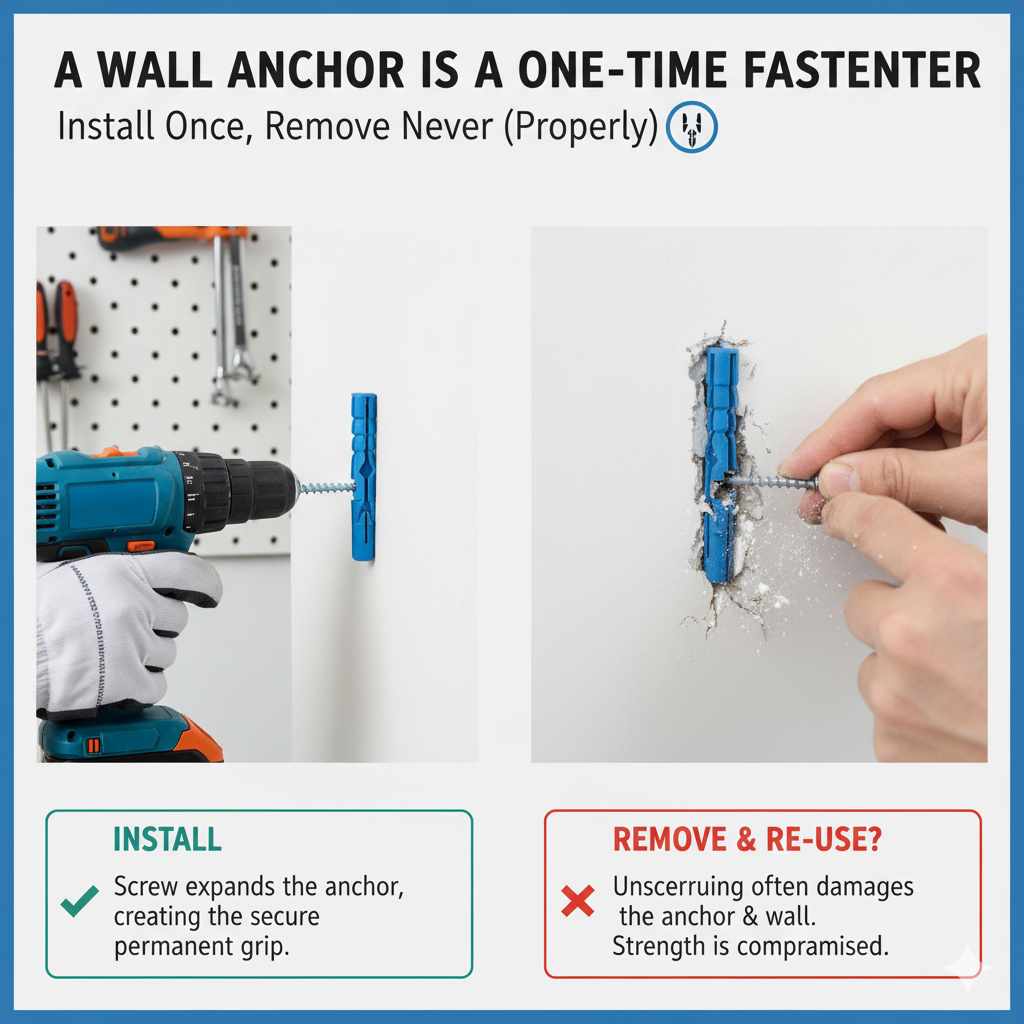
Unlike a wood screw that you can back out and reinsert, most wall anchors are designed to deform permanently when installed. That deformation is what creates the grip. Once you remove the screw, the anchor’s expansion mechanism collapses or the threads strip out the soft drywall. Either way, it won’t hold again.

KURUI
KURUI Drywall Anchors and Screws Assortment Kit,…
- FIVE ESSENTIAL SIZES FOR MULTIPLE PROJECTS: This dry wall anchors and screws kit comes with five of the most widely used sizes: #6…
- PREMIUM MATERIALS FOR SUPERIOR DURABILITY: Our plastic wall anchors are crafted from a high-performance nylon and PE compound, pro…
- CLEARLY ASSORTED FOR EASY SELECTION – The drywall anchors and wood screws assortment kit come with a well-built clear plastic orga…
As an Amazon Associate I earn from qualifying purchases.
This guide walks through the entire lifecycle of a one-time fastener: the physics behind the grip, the five main types you’ll encounter, how to match an anchor to your wall material, how to install it correctly, and how to remove and patch the hole when you’re done. You’ll also learn why the rated load on the box is not the number you should trust.
Anatomy of a One-Time Fastener: How Deformation Creates Grip
Think about how a screw holds in wood. The threads cut into the wood fibers, and the friction between the thread faces and the wood keeps it from pulling out. You can reverse the screw and the threads retrace their path. The wood mostly springs back.
Drywall doesn’t work like that. It’s compressed gypsum plaster sandwiched between paper layers. It has almost no ability to grip a screw directly. A screw driven into bare drywall will pull out with just a few pounds of force.
An anchor solves that by spreading the load over a larger area. The plastic sleeve or metal wings press against the backside of the drywall panel. The force that would pull the screw out is now distributed across a wide surface. The anchor is the load-bearing element, not the screw.
The one-time nature comes from the installation process. Plastic expansion anchors get squeezed and deformed as the screw drives into them. Threaded drywall anchors cut a channel into the gypsum that is slightly larger than the anchor body. Molly bolts crush their own sleeve against the back of the wall. Toggle bolts open their wings and cinch them tight. None of these mechanisms can be reversed without destroying the anchor or the wall around it.
So when you see “one-time use” on a package, it’s not a marketing gimmick. It’s a warning that this fastener is designed to be installed once and left alone. Plan your layout before you drill.
The 5 Main Types of One-Time Wall Anchors (And When to Use Each)
Plastic Expansion Anchors
These are the white or yellow cones you find in cheap furniture kits. You drill a hole, tap the anchor flush, then drive a screw into it. The screw forces the anchor’s ribs to expand outward against the drywall.
They work fine for light loads under 20 pounds. Picture frames, small towel bars, and light curtain rods are perfect candidates. The catch is that they rely on the screw being the exact right size. Use a screw that’s too small and the anchor won’t expand. Use one that’s too big and you’ll strip the plastic.
They’re also the least forgiving of mistakes. If you drill the hole too big, the anchor spins freely and the whole thing fails. If you’re hanging something you care about, upgrade to a threaded anchor.
Threaded Drywall Anchors
These look like coarse-threaded screws with a small pilot hole in the center. You drive them directly into the drywall without pre-drilling. The threads bite into the gypsum, and the screw goes into the center hole.
Threaded anchors are a big step up from plastic expansion types. They hold 30 to 50 pounds in 1/2-inch drywall. They’re also removable, sort of. You can back the anchor out with a screwdriver, but it will rip a larger hole than the original pilot. The gypsum around the threads gets destroyed on the way out.
These are my default choice for medium-duty hanging in drywall. They’re fast, reliable, and don’t require a hammer to install. Just make sure you use the included screw, not a random one from your drawer.
Molly Bolts (Sleeve Anchors)
A molly bolt is a metal sleeve with a screw threaded into it. You insert the sleeve into a drilled hole, then tighten the screw. The sleeve collapses and forms a flange against the back of the drywall. The screw stays in place, and the sleeve stays permanently deformed.
Molly bolts hold 50 to 75 pounds in drywall. They’re excellent for shelf brackets and heavy curtain rods. They also require a specific drill bit size, usually noted on the package. Getting that hole size right is critical. Too small and the sleeve won’t fit. Too large and the flange won’t have enough material to bite into.
Removing a molly is a chore. You have to pull the screw out, then either push the sleeve into the wall cavity or cut it flush with the surface and patch over it. Most people just patch over it.
Toggle Bolts (Winged & SnapToggle)
Toggle bolts use spring-loaded wings that open behind the drywall. You push the folded wings through a hole, and they snap open on the other side. Then you tighten the screw, which pulls the wings tight against the back of the panel.
Traditional toggle bolts have the wings attached to the screw. That means you have to remove the screw completely to take the fixture off, and the wings fall into the wall cavity. SnapToggle style bolts solve that by using a threaded stud with a separate cap. You can remove the fixture and leave the wings in place.
These are the heavy hitters. A 1/8-inch SnapToggle is rated for 265 pounds of pull-out force in 1/2-inch drywall. Even the smaller sizes handle 100 pounds easily. They’re the go-to for TVs, heavy mirrors, and anchored furniture.
The downside is the hole size. You need a 1/2-inch or 5/8-inch hole for most toggle bolts. That’s a big hole to patch if you ever move the fixture.
Heavy-Duty Metal Expansion Anchors
These are the metal cousins of plastic expansion anchors. They’re used in masonry, concrete, and brick. The anchor body expands against the sides of the drilled hole when you tighten the screw.
They’re not for drywall. In hollow drywall, there’s nothing for the expansion to grip. Use them only in solid materials. They hold several hundred pounds when installed correctly in concrete.
One thing to note: metal expansion anchors in masonry are also one-time use. The expansion sleeve deforms and cannot be removed without drilling it out. If you’re hanging something on a concrete wall, get the placement right the first time.
How to Choose the Right Anchor Based on Wall Material & Weight
Before you buy any anchor, figure out what your wall is actually made of. This step saves you from a frustrating failure.
Drywall: The most common residential wall. It’s 1/2-inch or 5/8-inch thick. Use threaded drywall anchors for light to medium loads, toggle bolts for heavy loads.
Plaster: Older homes often have plaster over lath. Plaster is harder and more brittle than drywall. It cracks easily under pressure. Plastic expansion anchors often crumble the plaster. Use a molly bolt or a threaded anchor designed for plaster. Drill slowly and don’t hammer the anchor in.
Tile: You need a carbide-tipped drill bit and a masonry anchor. Standard plastic anchors won’t bite into tile. The risk is cracking the tile during drilling. Use masking tape over the spot and start with a small pilot hole.
Concrete or Brick: Use a hammer drill and a masonry bit. Metal expansion anchors or sleeve anchors are the right choice. Avoid plastic anchors in concrete; they don’t expand enough to grip.
Here’s a simple weight-based guide:
- Under 10 lbs: Any plastic expansion anchor works.
- 10-25 lbs: Threaded drywall anchor or a small molly bolt.
- 25-50 lbs: Molly bolt or a 3/16-inch toggle bolt.
- 50-100 lbs: 1/8-inch SnapToggle or larger toggle bolt.
- Over 100 lbs: Toggle bolts, or anchor into a stud.
If you’re hanging something heavy, the stud is always the best option. A 2-inch wood screw into a stud holds several hundred pounds. An anchor is a compromise for when a stud isn’t in the right spot.
Step-by-Step Installation Guide for a Perfect Fit
Getting the installation right is more about preparation than strength. Follow these steps for any anchor type.
- Find the studs. Use a stud finder and mark the edges. You may be able to shift your fixture a few inches to hit a stud and skip anchors entirely.
- Mark the hole locations. Level the fixture and mark each screw point with a pencil. Double-check your measurements. Remember, one-time use means no second chances.
- Drill the pilot hole. Use the exact drill bit size specified on the anchor package. For threaded drywall anchors, you often don’t need a pilot hole, but a small one reduces the risk of cracking the paper.
- Insert the anchor. For plastic expansion anchors, tap them in with a hammer until flush. For toggle bolts, squeeze the wings and push through the hole until they pop open.
- Drive the screw. Tighten until snug. Don’t overtighten. If you strip the screw head or spin the anchor, you’ve ruined it.
- Test the fixture. Apply gentle downward pressure before loading it with your heavy item. A slight wiggle is normal for toggle bolts. A lot of movement means the anchor isn’t seated correctly.
One habit that saves time: keep a small assortment kit nearby. A set like the KURUI Drywall Anchors and Screws Assortment Kit gives you five common sizes in one organizer box. You just grab the size you need instead of making a trip to the hardware store.
How to Remove a Spent Anchor and Repair the Wall (Without Patching Nightmares)
Eventually you’ll need to move that shelf or mirror. Here’s how to cleanly remove the anchor and leave a wall that looks untouched.
Step 1: Remove the screw. Back the screw out with a screwdriver or drill. For toggle bolts, unscrew the cap and let the wings fall into the wall cavity. They’ll rattle around harmlessly behind the drywall.
Step 2: Deal with the anchor body. For plastic expansion anchors, grab the flange with pliers and pull straight out. If it’s stuck, push it into the wall cavity instead. For molly bolts, use a screwdriver to push the sleeve inward until it drops behind the wall.
Step 3: Clean the hole. Use a vacuum or a small brush to remove loose gypsum dust. This gives the patching compound something to bond to.
Step 4: Patch the hole. For holes under 1/4 inch, just fill with spackle or joint compound. Use a putty knife to press it in and scrape it flush. Let it dry, sand lightly, and paint.
Step 5: For larger holes (over 1/2 inch), use a mesh patch or a piece of drywall tape. Cover the hole with the mesh, apply a thin layer of joint compound over it, and let it dry. Apply a second coat, feathering the edges. Sand smooth.
The trick is to avoid overfilling. Multiple thin coats dry faster and look better than one thick glob. A 1/2-inch hole takes about 20 minutes of work spread over two drying cycles.
If you’re hanging something new in the same spot, don’t reuse the old hole. Patch it and drill a fresh hole nearby. The patched area is weaker than the original drywall.
Load Ratings vs. Real-World Safety Margins
The pull-out strength printed on the anchor package is the number the manufacturer measured in a lab. It’s the force required to rip the anchor straight out of the drywall. In practice, you should never load an anchor to its rated capacity.
The safe working load is typically one-quarter of the rated pull-out strength. So a toggle bolt rated for 265 pounds should only be trusted with about 65 pounds of actual weight. This safety margin accounts for:
- Drywall that’s thinner or older than the test panel.
- Vibration from doors or foot traffic.
- Weight shifts when you lean on a shelf.
- Expansion and contraction from temperature changes.
Exceeding the safe working load leads to sudden, catastrophic failure. The anchor doesn’t slowly loosen. It rips a chunk of drywall out and the whole fixture crashes down. That’s a real risk for anything mounted over a bed or near a walkway.
If your fixture weighs 30 pounds, don’t use a 40-pound rated anchor. Use a 75-pound rated molly bolt or a toggle bolt. The extra cost is pennies. The difference in safety is enormous.
Also consider the type of load. A static load, like a picture frame, is easier on an anchor than a dynamic load, like a towel rack that gets pulled on daily. If the item will be handled, add an extra 50% to the weight estimate.
Frequently Asked Questions
Can I reuse a toggle bolt?
No. Once the wings have opened and been cinched tight against the back of the drywall, the spring mechanism is stressed and the metal may be deformed. Even if you get it out, the wings won’t open reliably the second time. Also, the hole in the drywall is now larger than the original, so a new toggle bolt would need a bigger hole. Treat every toggle bolt as one-time use.
Why did my plastic anchor spin when I drove the screw?
That’s a classic installation error. The pilot hole was drilled too large, or the anchor wasn’t tapped fully into the wall. Once the anchor starts spinning, it chews out the drywall around it. Stop immediately. Pull the anchor out, patch the hole, and drill a new one with the correct bit size.
Is a wall anchor one time use if I only hang a small picture?
Yes. The one-time limitation is about the anchor’s deformation, not the weight. A small plastic anchor still expands when the screw goes in, and it won’t contract back to its original shape. You can’t reuse it. The good news is that small anchors are cheap, so the cost of a new one is negligible.
What’s the strongest wall anchor for drywall?
Toggle bolts, specifically the SnapToggle style, hold the most weight in hollow drywall. A 1/8-inch SnapToggle has a rated pull-out strength of 265 pounds. In comparison, a molly bolt tops out around 100 pounds, and plastic anchors are under 50 pounds. If you’re mounting a TV or a heavy mirror, use a toggle bolt.
Do building codes require specific anchors for furniture?
In some areas, yes. Seismic zones like California require that tall furniture and TVs be anchored to the wall to prevent tip-over injuries. The code typically specifies the anchor type and the installation method. Check your local building department’s website for the exact requirements. In general, anti-tip straps use toggle bolts or wood screws into studs, not plastic expansion anchors.
Final Verdict: When to Use a One-Time Anchor vs. a Reusable Fastener
Most wall anchors are one-time use, and that’s fine. The key is matching the anchor to the job and accepting that you’ll patch the hole when you move.
- Use plastic expansion anchors for light, temporary items under 10 lbs.
- Use threaded drywall anchors for medium loads between 10 and 30 lbs.
- Use molly bolts for 30-50 lbs where you want a flush mount.
- Use toggle bolts for anything over 50 lbs or anything you can’t afford to drop.
- Always drill the correct pilot hole size. It’s the most common cause of failure.
- Never trust the rated pull-out strength. Divide by four for a safe working load.
- Patch holes with mesh tape and joint compound for a clean finish.
If you’re planning a wall decor project, check out some creative bedroom wall decor ideas or living room wall decor ideas to plan your layout before you drill. A little planning saves you from patching a dozen holes later.
Products related to this article
Sponsored / affiliate links. As an Amazon Associate I earn from qualifying purchases. I may earn additional commission from eligible campaigns.
 20PCS Home Decor Brick Hook, Metal Brick Wall Hanger for 2 - 1/4 to 2 - 2/5 Inch Bricks, No Drill Heavy Duty Alloy Steel Clip with 20 lbs Capacity for Indoor Outdoor Use20PCS Home Decor Brick Hook, Metal Brick Wall Hanger for 2 - 1/4 to 2 - 2/5 Inch Bricks, No Drill Heavy Duty Alloy Steel Clip with 20 lbs Capacity for Indoor Outdoor Use