
To lock your oven door, usually check for a keyhole or lock switch near the handle or control panel for self-cleaning models, or utilize the control panel settings for digital displays. Always consult your owner’s manual, as locking mechanisms vary widely by brand and model for safety and cleaning cycles.**
Welcome to your kitchen comfort zone! Sometimes, the simplest tasks feel the trickiest, especially with modern appliances. You might need to secure your oven door for child safety or during a self-cleaning cycle. It can be confusing if your oven doesn’t have a giant, obvious latch.
Don’t worry! We are going to walk through every common way to secure your oven door, step-by-step. You do not need to be a handyman to figure this out. By the end of this guide, you’ll feel confident knowing exactly how to lock your specific oven. Let’s unlock the secret to that sometimes hidden lock!
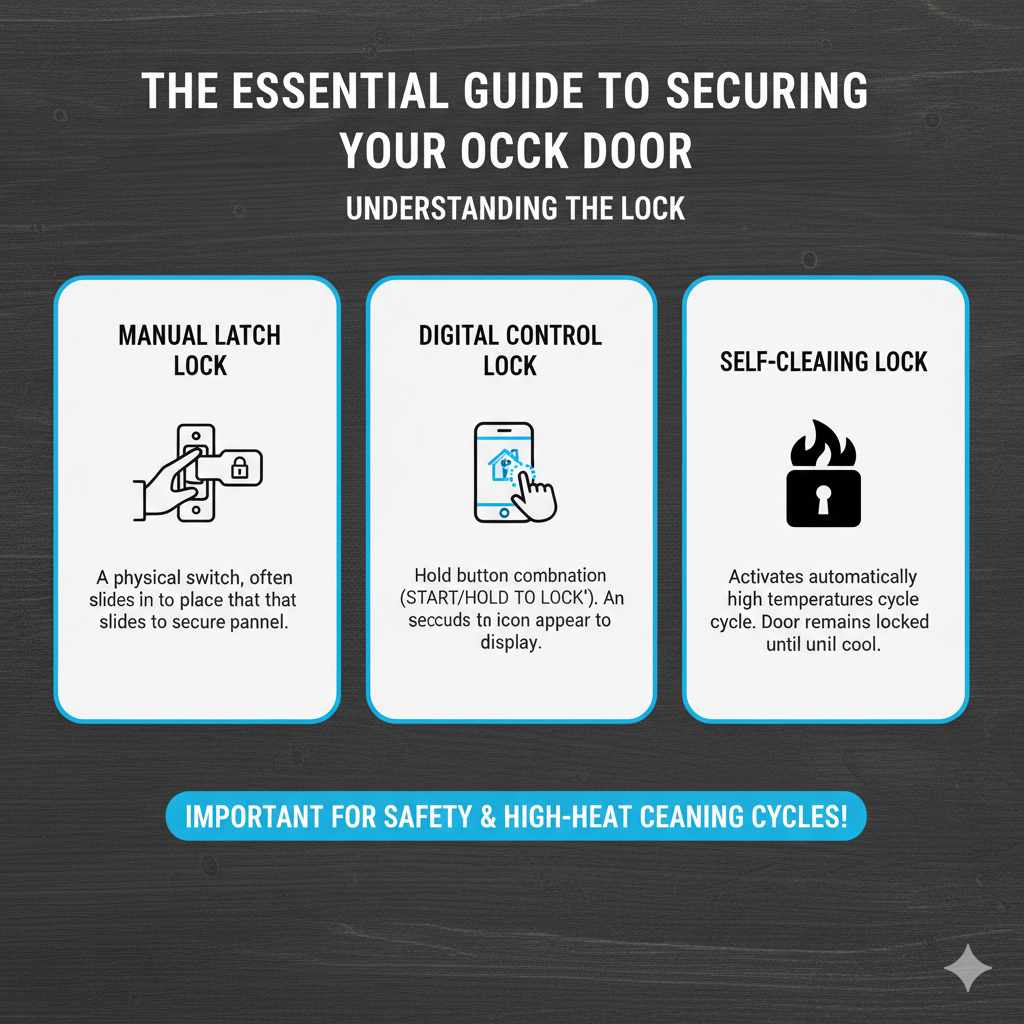
The Essential Guide to Securing Your Oven Door: Understanding the Lock
Knowing how to lock your oven door is important for safety around little ones and ensuring that high-heat cleaning cycles work correctly. Modern ovens often feature automatic locking systems, especially when the oven nears very high temperatures. However, many homeowners struggle because the lock isn’t always a physical latch they can see.
This guide breaks down the three main types of locks you might encounter: manual locks, digital controls, and self-cleaning locks. We’ll focus on making this process simple and removing any guesswork.
Why Would You Need To Lock Your Oven Door?
Before we dive into the “how,” let’s quickly touch on the “why.” Understanding the purpose helps you locate the right mechanism. Homeowners typically lock their oven doors for two main reasons:
- Child Safety: Protecting curious toddlers from opening a hot door during or after baking.
- Self-Cleaning Cycles: Ovens reach extremely high temperatures (often over 800°F) during pyrolysis (self-cleaning). The door locks automatically and remains locked until the oven cools down to a safe temperature. Safety first!
Understanding Oven Door Locks By Type
Oven locks aren’t one-size-fits-all. Depending on how old your oven is and whether it’s gas or electric, the locking system will look very different. Identifying your oven type is the first step to success.
Type 1: Manual/Physical Locks (Common on Older or Gas Models)
These locks require a physical action or a specific key. They are often found when manual child-proofing is desired, or sometimes integrated near the bottom storage drawer or on older ranges.
What to look for:
- A small, visible keyhole near the handle or control panel.
- A sliding latch mechanism, often tucked just under the upper door lip.
- A lever that requires you to physically push or slide it into place.
Type 2: Digital/Control Panel Locks (Common on Modern Electric Ovens)
If your oven has a digital display and touch controls, the locking mechanism is almost certainly software-controlled. This is usually linked to the “Oven Lock” or “Control Lock” feature.
What to look for:
- A dedicated button labeled “Lock,” “Control Lock,” or often symbolized by a key icon.
- A combination press required on the display (e.g., holding the Bake and Timer buttons simultaneously).
Type 3: Self-Cleaning Cycle Automatic Locks
This type is the easiest in a way—it locks itself! When you initiate the self-clean mode, the oven heats up, and a solenoid or mechanical bolt engages automatically. You cannot open the door until the cycle ends and the oven cools significantly. Trying to force it open can damage the oven.
Step-by-Step: How to Lock Your Oven Door (The Action Plan)
Follow these steps based on the type of lock you suspect you have. Remember, your best resource is always the manufacturer’s manual, which you can often find online using your model number.
Method A: Locking via the Digital Control Panel
This is the standard practice for most contemporary electric and dual-fuel ranges.
- Ensure the Oven is Off: Make sure the oven is not actively heating or cooling. The lock function might be disabled if a cooking cycle is running (unless it’s a specific control lock).
- Locate the Lock Setting: Look carefully at your control panel. Scan for buttons labeled “Lock,” “Oven Lock,” or a key icon.
- Press and Hold: Most digital locks require you to press and hold the designated button for 3 to 5 seconds. You might need to hold two buttons simultaneously, such as ‘Bake’ and ‘Start,’ or ‘Timer’ and ‘Off’.
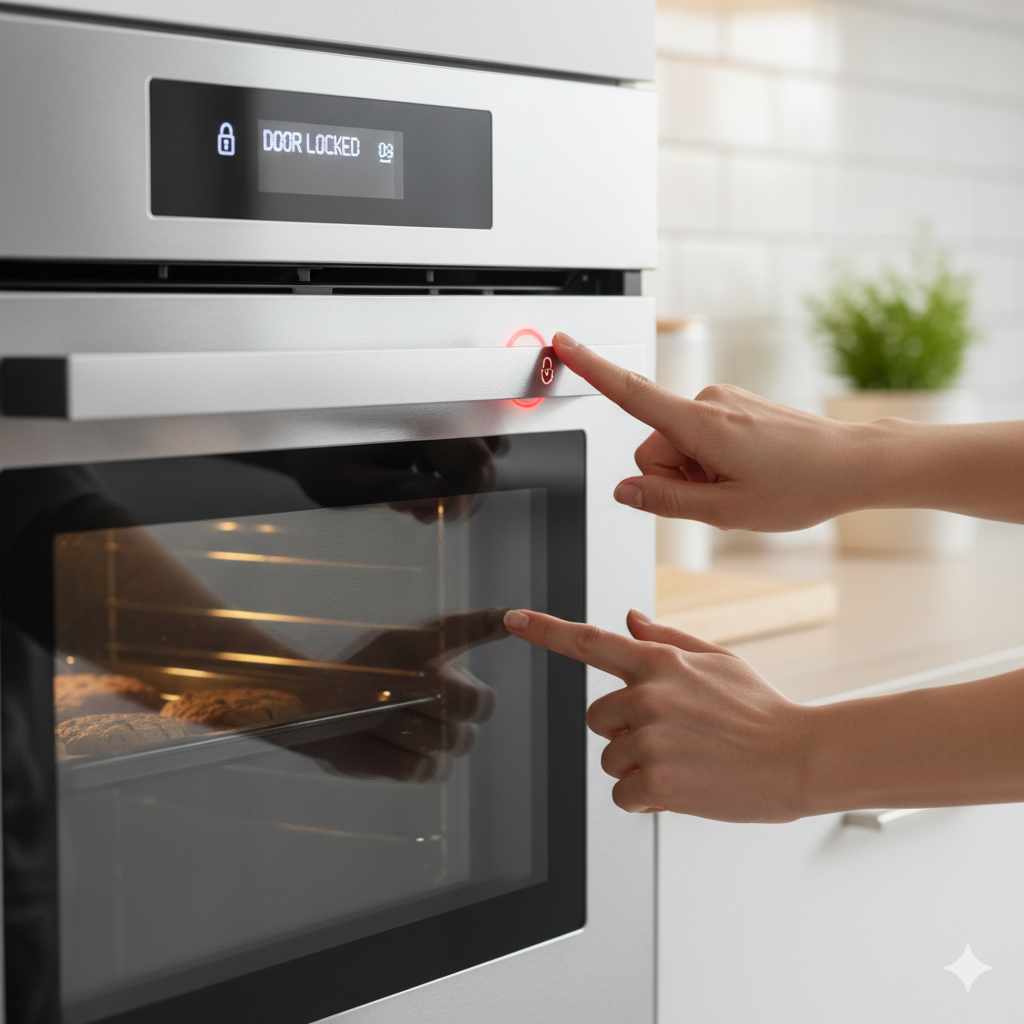
- Confirmation: Listen for a soft click or look for a prompt on the display screen that says “Door Locked.” A small lock icon should illuminate.
- Test Gently: Gently pull on the door handle. It should feel firmly secured and not move more than a tiny fraction of an inch.
Method B: Locking Older Ovens or Gas Ovens (Manual Latch)
If there is no digital panel, the lock is mechanical.
- Inspect the Frame: Open the oven door completely. Look along the top edge of the oven opening (the frame) or along the bottom front panel where the storage drawer is.
- Find the Lever or Slide: Search for a small metal tab or lever. Sometimes this lever sits right next to the hinge mechanism on the side.
- Engage the Lock: Slide or push the lever or tab firmly into the locked position. You might hear a slight engagement sound.
- For Key Locks: If you see a keyhole, insert the specialized locking key (often provided when the oven was installed) and turn it 90 degrees clockwise until it stops. Remove the key immediately and place it somewhere safe.
Method C: What Happens During Self-Cleaning?
You generally don’t have to do anything here, but it’s good to know the sequence:
- Start Clean Cycle: Select the self-cleaning option on your control panel.
- Automatic Lock Engagement: Once the oven temperature reaches about 300°F (150°C), you will hear a definite, sturdy click as the mechanical bolt slides into place. The door locks automatically.
- Cool Down: The door will remain locked until the interior temperature drops below approximately 500°F (260°C). This can take an hour or more after the cycle finishes. Attempting to open it during this phase will not work and could damage the locking hardware.
Troubleshooting Common Oven Door Locking Issues
Sometimes, even when you follow the steps, the door won’t lock, or it seems stuck. Here are the most common solutions we see homeowners encounter.
Issue 1: Digital Lock Won’t Engage
If you press the buttons but nothing happens, the issue is usually power or function incompatibility.
Quick Check List for Digital Locks
- Is the oven completely turned off? Many control locks won’t activate if the oven is heating.
- Are you holding the correct combination of buttons long enough? Try holding for a full 5 seconds.
- Is there an error code on the display? An error code might override the lock feature. Check your manual for the specific code.
Issue 2: Door Won’t Open After Self-Cleaning
This is the most frequent complaint during cleaning cycles. The oven is simply being safe!
Solution: Patience is key. Seriously! The locking mechanism is designed to hold until the ambient temperature inside the oven cavity is safe. Do not try to pry the door open. Wait at least an hour after the cycle completes. If it still hasn’t unlocked after two hours, contact a service technician, as the door latch solenoid may have failed.
Issue 3: Physical Latch is Stuck or Broken
If you have a manual latch and it won’t slide or turn, avoid excessive force.
Solution: Inspect the area for any debris, grease, or food particles that might be jamming the mechanism. If it’s clean but still jammed, the internal spring or lever might be broken, which usually requires professional repair or replacement of the striker/latch assembly.
Comparing Locking Methods: Pros and Cons
Deciding which method is best for your home often comes down to convenience versus comprehensive safety. Here is a comparison to help you understand the trade-offs.
| Locking Method | Best For | Pros | Cons |
|---|---|---|---|
| Digital Control Lock | Modern kitchens, easy activation | Very easy to engage/disengage via button press; keeps displays clean. | Requires electricity; complex repair if the touchpad fails. |
| Manual Latch/Key Lock | Older models, backup safety | Works without power (if no electronic components are involved); simple mechanism. | Requires physical access to a small part; may need a key. |
| Self-Cleaning Lock | High-heat safety assurance | Automatic and mandatory for safe operation. | You cannot access the oven until it cools down naturally; often takes hours. |
Tips for Maintaining Your Oven Door and Lock Components
A little preventative care goes a long way in keeping your oven looking beautiful and functioning smoothly. Since the door and its latch are moving parts, they need gentle attention, especially if you use the manual or cleaning lock often.
Regular Oven Care Checklist:
- Wipe Down the Door Frame: Before initiating a self-clean or manually locking the door, wipe away any heavy grease or spills on the inner door gasket and the frame surrounding the opening. Grease buildup can interfere with the proper seating of the lock bolt.
- Keep Hinges Moving: Occasionally open and close the door fully a few times before locking it. This ensures the hinges are lubricated with any residual internal grease and are ready for the task.
- Use Gentle Pressure: When physically locking a manual latch, use firm but gentle pressure. Do not slam the latch into place.
- Avoid Spraying Cleaners Directly On Seals: If you use an oven cleaner spray (not self-clean), cover the locking elements above the door opening. Harsh chemicals can degrade the plastic or rubber components in the latch assembly over time.
For general appliance maintenance tips on extending the life of your kitchen tools, resources like the U.S. Department of Energy’s energy efficiency guides often provide great advice on keeping appliances running smoothly.
Securing Your Oven When Renting or Using Temporary Setups
If you are renting and unable to modify the appliance, or if you are using a temporary convection setup, a true built-in lock might not be an option. In these cases, external childproofing is your best friend.
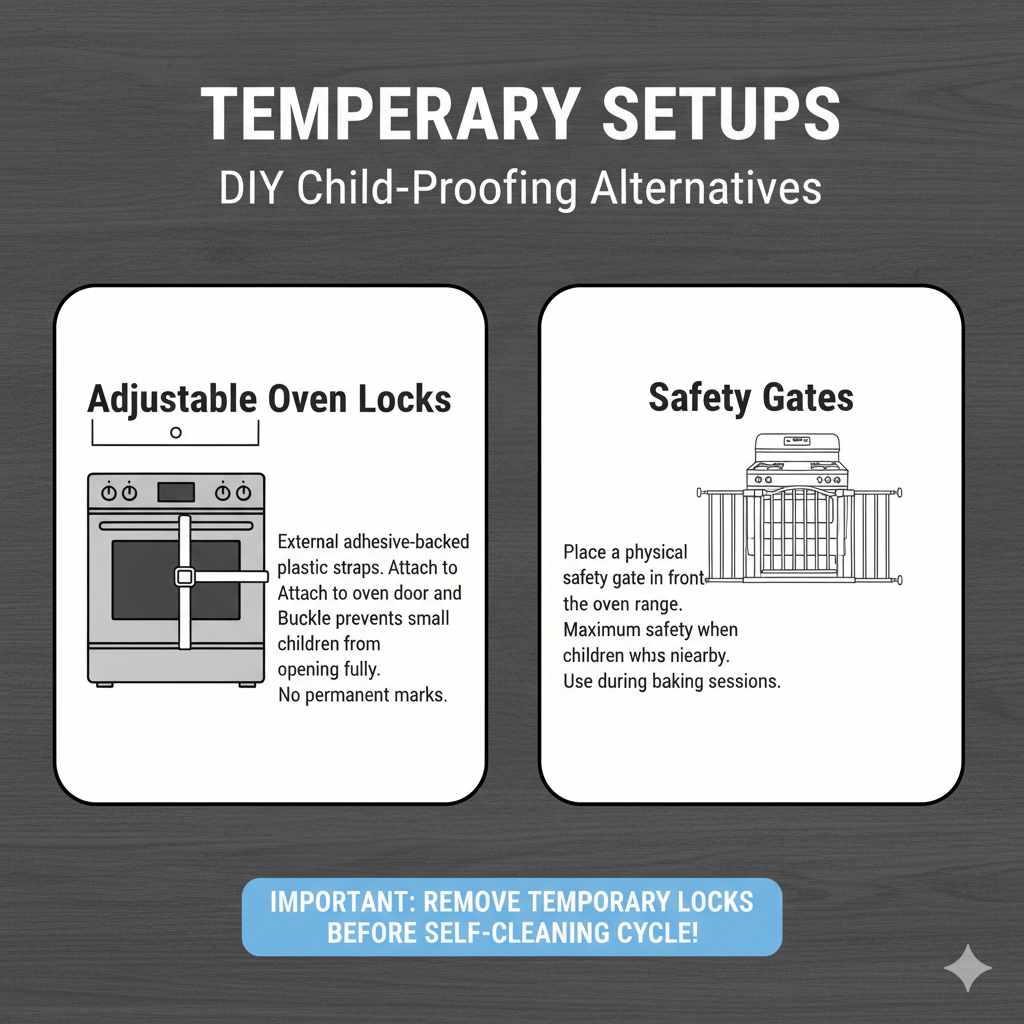
DIY Child-Proofing Alternatives:
- Adjustable Oven Locks: These are external adhesive-backed plastic straps that attach to the oven door and the cabinet face above or beside the oven. They are designed to buckle open if pulled hard, preventing small children from opening the door fully. These are fantastic because they leave no permanent marks.
- Safety Gates: For maximum safety, use a safety gate in front of the oven range area if you know you will be baking during times when children are freely wandering.
These external measures provide excellent peace of mind without interfering with the electronic or mechanical locking systems needed for the self-cleaning function. Just remember to remove temporary locks before you start any high-heat cleaning cycle!
Frequently Asked Questions (FAQ) About Oven Door Locks
Q1: My oven door locks automatically when I clean it, but how do I unlock it later?
A: After the self-clean cycle finishes, the oven must cool down to a safe temperature (usually around 500°F inside). Once cool enough, the electronic bolt will retract, and you will hear a “click,” or the lock indicator will disappear from the screen. You must wait for this cooldown period; forcing it will damage the mechanism.
Q2: Can I disable the self-cleaning lock feature permanently?
A: No, you should never disable the self-cleaning lock. It is a critical safety feature designed to prevent dangerous burns caused by the extreme temperatures reached during pyrolysis. Disabling it is a serious safety hazard.
Q3: I don’t see a keyhole or a lever. How can I lock my oven door?
A: If you have a modern oven with a digital touchpad, the lock is almost certainly a software feature. Look for the “Control Lock” or “Oven Lock” icon on the panel and follow the specific instructions for pressing and holding the required buttons until the lock icon appears.
Q4: My oven door is child-proofed electronically, but I want extra security. Can I use a padlock?
A: Never attempt to use a padlock, chain, or any external device on the oven door latch, especially not when the oven is on or self-cleaning. This can interfere with the normal expansion and contraction of the metal, leading to warped doors or broken internal parts.
Q5: How much force will the self-cleaning lock withstand?
A: The automatic lock is designed to handle significant internal pressure generated by the heat. It is robust. If you feel the door move even slightly during the cooling phase, tug very gently, but if it resists, wait longer. It is engineered to hold firm until safe.
Q6: Does the door lock when the oven door light shines?
A: No, the door light turning on simply indicates you have pressed the light button or that the oven is very hot and the light comes on automatically to show you the contents. The door lock is a separate mechanism directly tied to safety or digital settings.
Conclusion: Locking Up for Peace of Mind
Securing your oven door, whether for safety or cleaning, is a straightforward process once you know what to look for. Remember, your oven usually tells you how it works—either through a friendly icon on the digital screen or a small, hidden physical latch.
If you have a newer model, assume the lock is controlled digitally until proven otherwise. Take a moment to find that dedicated lock button or combination press. If you have an older range, a quick visual scan along the frame should reveal any manual lever you need to slide. You’ve got this! By mastering this simple step, you enhance both the safety and proper functioning of one of your kitchen’s hardest-working appliances, ensuring your home remains beautiful, functional, and secure.


