
To fix broken box spring boards, you generally need to support the sagging area using strong wooden bracing or metal strapping. This repair involves reinforcing the damaged slats or entire frame section with readily available lumber secured firmly beneath the broken spot. This simple DIY fix restores support and saves you the cost of buying a new box spring quickly.
That annoying dip right in the middle of your mattress? It’s usually caused by a broken support board inside the box spring. You might think this means you need to haul that bulky old box spring to the curb, but hold on a second! Fixing a broken box spring board is much easier than you think. Many drivers run into similar issues with their vehicles—a small fix saves a big repair bill. We are going to walk through the simple steps to get that support back. You don’t need to be a master carpenter. Let’s save you some money and get your bed level again, starting right now.
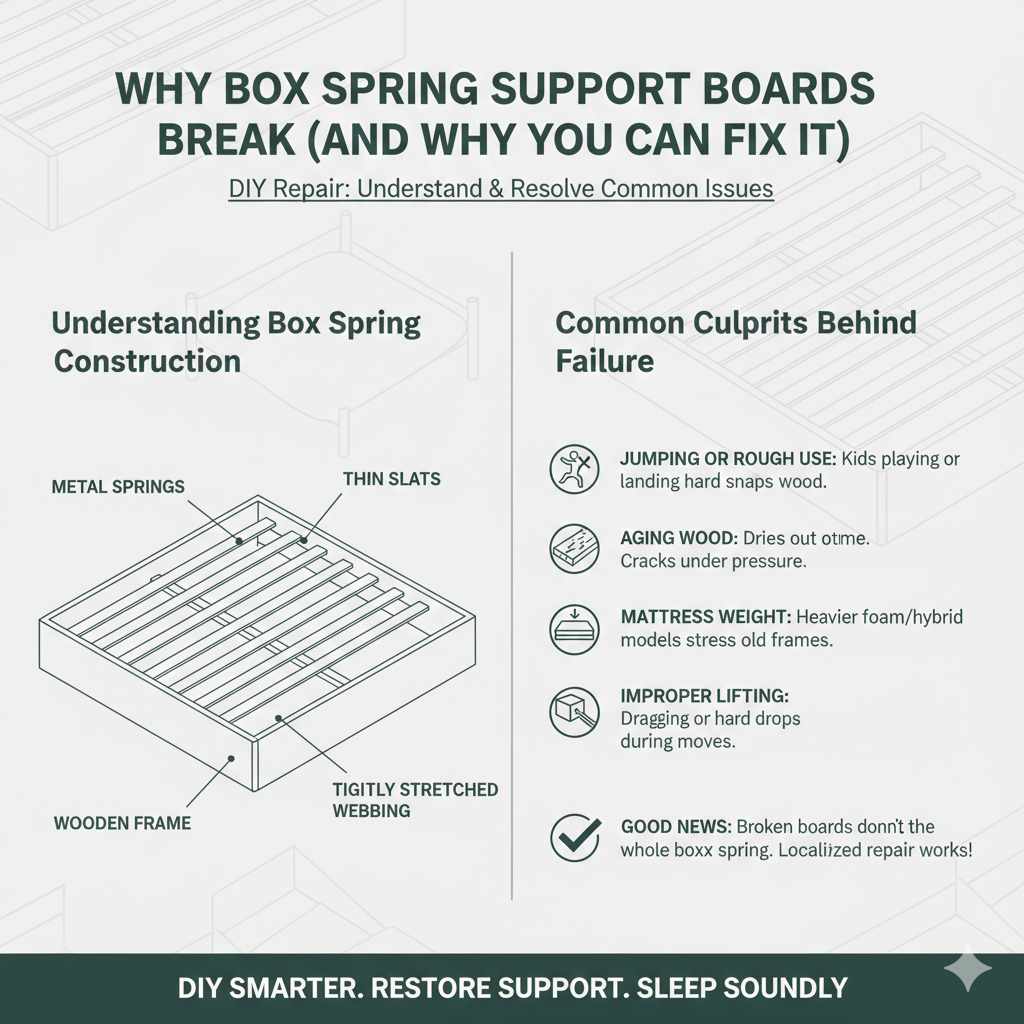
Why Box Spring Support Boards Break (And Why You Can Fix It)
Box springs are built to handle weight distributed across a large area. They are not designed to handle concentrated, heavy stress in one spot over time. Inside your box spring, you’ll find a wooden frame holding up thin slats or sometimes continuous boards that provide the foundation for your mattress. Think about it like the frame of a car—it needs all its support beams intact to keep things straight.
Common Culprits Behind Box Spring Failure
Most failures happen gradually, but sometimes a sudden event can do the trick. Understanding the cause helps ensure your repair lasts.
- Jumping or Rough Use: Kids playing on the bed or accidentally landing hard on the edge can snap relatively thin lumber.
- Aging Wood: Over many years, wood naturally dries out. Even standard weight can cause it to crack under pressure.
- Mattress Weight: Newer mattresses, especially thick memory foam or hybrid models, are significantly heavier than older spring mattresses. This extra load stresses the frame.
- Improper Lifting or Moving: Dragging or setting the box spring down too hard during a move can flex the frame beyond its limits.
The good news, just like a slightly dented fender doesn’t require a whole new frame, a few broken boards don’t doom the whole box spring. We focus on localized repair.
Essential Tools and Materials for Box Spring Repair
Before we start turning screws, prepping your workspace is key. Since a box spring is essentially wood framing covered in thin fabric, we need materials that offer strong support without adding excessive bulk. If you’ve ever swapped out a flat tire, gathering these simple items will feel just as straightforward.
What You Need to Gather
Safety first! Always wear gloves when handling wood to avoid splinters, and eye protection is wise just in case anything shifts unexpectedly. This repair uses standard, accessible hardware store items.
- Support Material:
- 2×2 lumber (easiest to work with for bridging gaps).
- Alternatively, sturdy metal strapping or thick plywood strips (if the break is very wide).
- Measuring Tool: Tape measure.
- Cutting Tool: Hand saw or circular saw (if you need to cut the new support pieces).
- Fasteners: Strong wood screws (1 1/2 inch to 2 inches long). Do not use nails if possible; screws offer much better holding power.
- Drill/Driver: Cordless drill with appropriate driver bits.
- Pencil or Marker: For marking cuts.
- Pry Bar or Sturdy Screwdriver: To carefully lift the fabric wrapper if necessary.
Pro Tip from a DIY Friend: When buying lumber, check for straightness. Just like you wouldn’t want a warped steering linkage, straight wood provides the best support. Look for clear grain with no large knots.
Step-by-Step Guide: How To Fix Broken Box Spring Boards
The main goal here is to bridge the gap created by the broken board, providing a solid intermediate support structure directly underneath the damaged area. We need to work carefully with the fabric shell, which holds everything together.
Phase 1: Accessing the Damage
Your box spring is wrapped in a durable, thin fabric cover, often stapled to the bottom frame. We need to open a small window to get underneath.
- Flip the Box Spring: Carefully turn the box spring upside down. Working on the bottom is easier because the top fabric is usually stretched tightly.
- Locate the Sag: With the box spring upside down, identify exactly where the mattress was sinking. Look for cracks or splits in the internal wooden supports.
- Access the Interior: Find the seam where the fabric wrapper is stapled near the damaged board. Using a flat-head screwdriver or a putty knife (gently!), pry up the staples holding the fabric to one edge of the wooden frame surrounding the affected board. You only need to pull back enough fabric to slide your bracing material underneath—usually an 8-inch wide strip is enough. Be careful not to rip the fabric excessively.
Phase 2: Measuring and Cutting the Support Braces
The best method focuses on creating support beams that run perpendicular to the broken slat, bridging it to the solid frame pieces on either side.
- Measure the Span: Measure the distance across the broken board and the solid wood immediately next to it. You want your new support piece (the 2×2 lumber) to run past the broken spot and rest firmly against at least two solid frame sections or solid, unbroken slats.
- Cut the Lumber: Cut your 2×2 lumber to the required length. Remember, this piece needs to be strong and long enough to share the load with the existing good wood. For instance, if the board broke in the middle of a 30-inch span, you might want a brace about 36 inches long to cross over safely.
Phase 3: Installing the Reinforcement
This step is where you restore 100% of the missing structural integrity. Good bracing is like adding a solid, new cross-member to a vehicle frame after a minor impact.
- Position the Brace: Slide the newly cut 2×2 lumber underneath the fabric and position it directly below the broken or severely cracked board. Ensure the brace sits vertically (so the 2-inch side rests against the broken board) and spans well beyond the compromised area.
- Attach the Brace to the Frame: Using your power drill and wood screws, secure the brace to the outer wooden frame of the box spring. Drive screws down through the 2×2 brace, through the bottom fabric, and into the solid outer rail of the box spring structure. Use at least two screws on each side of the damaged section, driving them deep into the solid wood frame. (Reference diagram concepts from structural engineering principles for load distribution, similar to how bridge supports work.)
- Secure the Brace to the Broken Slats (Optional but Recommended): If the broken board is still somewhat in place, use short screws (about 1 inch) to attach the new 2×2 brace directly to the top (which is now underneath) of the damaged slat. This prevents the old broken piece from shifting inside the fabric pocket.
Phase 4: Re-Covering and Testing
Once the support is in place, we need to seal it back up so the mattress doesn’t catch on anything.
- Inspect Stability: Gently tug on your new brace to ensure it is rock-solid. It should not wiggle or shift.
- Re-Secure the Fabric: Pull the protective fabric wrapper back into position neatly over the repaired area. Using a staple gun (or carefully hammering in the old staples if you saved them), reattach the fabric to the bottom frame rail. Space staples about every 3 to 4 inches for a tight fit.
- Final Flip and Test: Carefully flip the box spring back onto its feet. If you notice any slight unevenness on the top surface where the brace is, place firm padding or small cardboard shims between the brace and the internal board before putting the mattress back on.
Your box spring board is now reinforced with a sturdy wooden beam, ensuring long-lasting support. This bypasses the weak spot entirely!
Alternative Repair: Bridging Wide Gaps with Plywood
Sometimes, the damage isn’t just one small slat snapping. If the central support beam itself has failed, or if two adjacent slats are broken, you need a wider load distribution area. This is where simple plywood reinforcement comes in handy. This is comparable to installing a heavy-duty skid plate underneath a sensitive engine component.
When to Use Plywood
- The break spans more than 12 inches horizontally.
- Multiple slats in a row have failed completely.
- The user is over 250 lbs and needs maximum load capacity restored.
Plywood Installation Steps
- Follow Phase 1 (Accessing the Damage) exactly, but peel back a larger section of the bottom fabric (perhaps 12 inches wide).
- Cut a piece of 1/4-inch or 3/8-inch plywood just slightly longer than the broken area. The width should match the width of the inner box structure (often around 10 to 12 inches wide).
- Slide the plywood sheet underneath. It acts as an immediate floor, resting flat against the current interior space.
- Secure the plywood rigorously using 1 1/2-inch wood screws driven every 6-8 inches along the edges of the plywood, screwing directly into the outer frame rails. Keep screws away from the very center where there might be fragile interior bracing.
- This method completely bridges the entire damaged area, distributing weight across solid, healthy structure around the break.
For further guidance on structural reinforcement available to consumers, resources like those provided by university extension programs often detail basic carpentry and structural support techniques that apply here.
Troubleshooting Common Repair Issues
Not every home repair goes perfectly the first time. Don’t worry if you hit a snag; that’s part of learning! Just like diagnosing an engine noise, diagnosing a repair issue is half the battle.
Table 1: Common Box Spring Repair Snags and Fixes
| The Problem You See | The Likely Cause | The Quick Fix |
|---|---|---|
| The new brace keeps spinning when I drive screws. | The outer frame wood is old, soft, or stripped out. | Use slightly longer screws that penetrate deeper into solid wood, or pre-drill pilot holes slightly smaller than the screw diameter. |
| The mattress still sags a little in that spot. | The new brace isn’t tall enough to meet the original height. | Remove the brace, place a couple of layers of thin cardboard or hard foam padding where the brace sits against the broken board, and reinstall. |
| I ripped the fabric too much! | Trying to remove staples too forcefully. | Don’t worry about perfect looks. Just use a large patch of heavy-duty duct tape or needle and strong thread to sew the major tears before flipping it over. |
| My drill bit snapped when going into the frame. | Hitting a hidden metal staple or corner bracket inside the frame. | Stop drilling immediately. Pull the bit out, check the hole location, and move your brace placement a few inches over, or use a specialized metal-cutting bit carefully. |
Preventative Maintenance: Keeping Your Box Spring Strong
Once you’ve done the repair, you want that fix to last! Prevention beats cure every time, whether you are maintaining a classic car or your bedroom furniture. Proper care extends the life of your investment considerably.
Best Practices for Box Spring Longevity
- Check Monthly: Every time you change your sheets, physically press down on the center of the bed. If it feels springy or dips too much, investigate. Early detection means smaller repairs.
- Don’t Sit on Edges: Avoid sitting or leaning heavily on the perimeter of the bed. The frame rails are sturdy, but the internal supports are not designed for point-loading on the edges.
- Use the Right Foundation: If you have a very heavy, modern mattress (especially thick pillow-tops or extra-firm hybrids), ensure your box spring system is rated for that weight. Sometimes, modern mattresses require a “bunkie board” or a solid platform base, not a traditional box spring, for optimal support.
- Handle with Care When Moving: Always lift the box spring by the strong wooden frame rails, never by dragging the fabric shell.
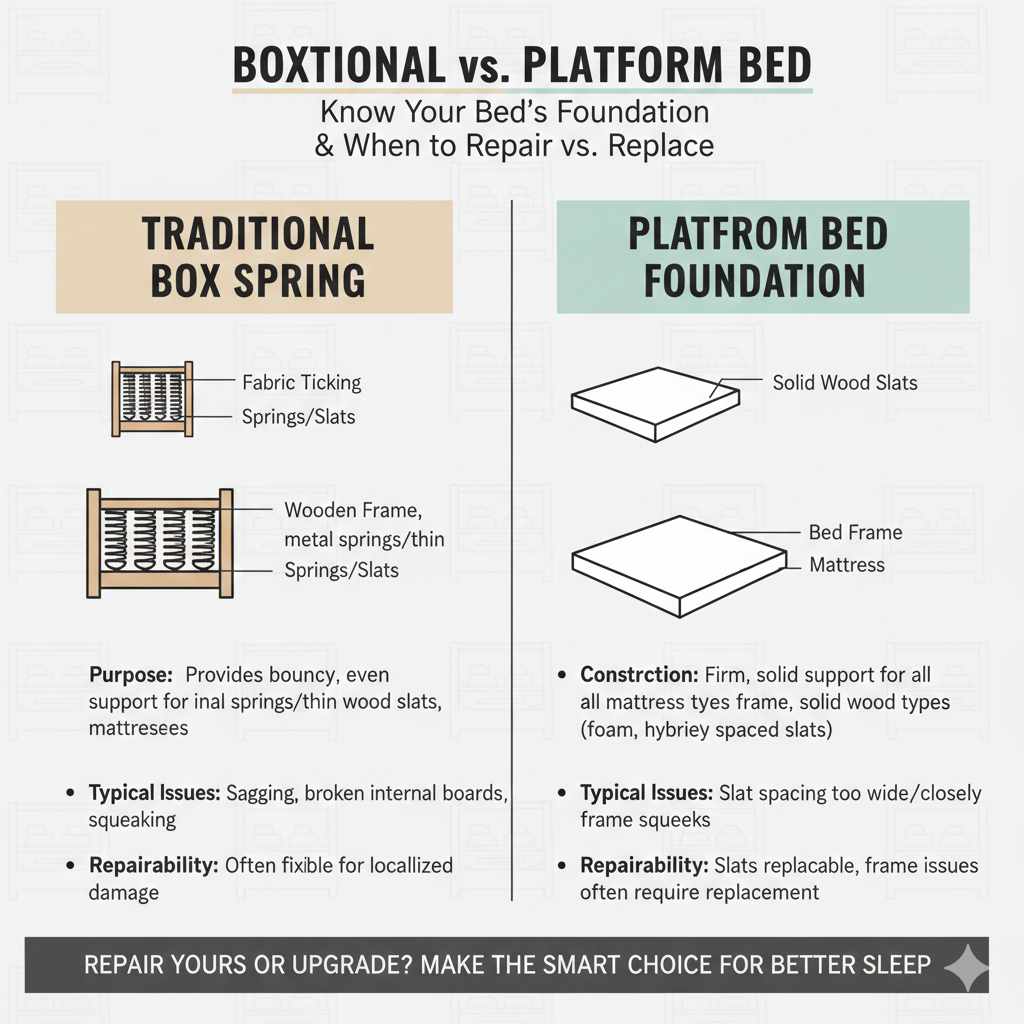
Understanding Box Spring Construction vs Platform Beds
It’s helpful to know what you are fixing versus what you might replace it with. Many people confuse a traditional box spring with a modern platform bed foundation. Fixing a box spring is worthwhile because it’s usually cheaper and uses less material than buying a whole new setup.
Traditional box springs rely on springs or wooden slats inside a fabric shell. Platform beds, on the other hand, use solid wood panels or closely spaced, sturdy slats underneath the mattress directly on the bed frame. They don’t typically have this type of internal breakable board structure.
If your box spring is very old (10+ years) and the frame itself feels weak even after bracing, it might be time to consider switching to a platform style. However, for a simple broken board, repair is the most cost-effective route.
FAQ: Beginner Questions About Box Spring Repairs
Q1: How long should this repair take a beginner?
A: If you have all your tools ready, fixing one broken slat should take about 30 to 45 minutes from start to finish, including accessing the damage and stapling the fabric back down.
Q2: Can I use duct tape or glue instead of wood, since it’s just a small break?
A: No. Glue or tape might hold for a day or two, but they cannot handle the consistent, heavy downward pressure from a person sleeping. You must use rigid material like 2×2 lumber or plywood for load-bearing support.
Q3: Do I need to remove the mattress before I start?
A: Absolutely yes. You will need to flip the box spring over to work on the bottom staple points, and you cannot do that safely or effectively with a heavy mattress still resting on top.
Q4: Where is the best place to screw the new support brace into the frame?
A: Screw into the main rail (the thickest piece of wood forming the perimeter rectangle) because this wood is designed to handle direct downward pressure and fastener tension. Avoid screwing into the thin internal slats unless they are part of the support brace itself.
Q5: What if the break is right in the middle section, far from any outer frame wood?
A: If the break is far from the perimeter, you will need to install internal cross-members. You might have to cut a rectangle in the bottom fabric and screw your 2×2 directly down into the strongest adjacent slat, running perpendicularly across the break, effectively creating a new solid beam underneath the weak spot.
Q6: Will this repair affect my mattress warranty?
A: Yes, most manufacturers void warranties if the mattress is not used on its original, intended support system. Since you are repairing the support system (the box spring) rather than replacing it, it’s a risk you take. However, since a repair is so much cheaper than replacement, most everyday drivers find this trade-off acceptable.
Conclusion: Restoring Confidence and Comfort
See? That wasn’t so complicated! Dealing with household repairs, just like basic vehicle upkeep, often seems intimidating until you break it down into simple, manageable steps. When you notice that frustrating dip in your bed, remember that fixing a broken box spring board is a very achievable weekend project. By reinforcing the failed area with sturdy 2×2 lumber or plywood, you are not just masking a problem; you are restoring the structural integrity and ensuring your mattress gets the flat, solid support it needs night after night.
Next time you tackle a repair, remember the approach: assess the damage, gather strong, appropriate materials (like that reliable 2×2 lumber), and secure the new support firmly into the existing solid framework. You just saved yourself the hassle and expense of buying a whole new box spring. Drive safely, sleep soundly, and feel confident anytime a simple, fixable problem pops up around the house!


