
To clean the outside of a cast iron skillet, create a paste of baking soda and a little water. Apply the paste to the skillet’s exterior, let it sit for 10-15 minutes, then scrub with a stiff brush or steel wool. Rinse thoroughly, dry completely, and apply a thin layer of cooking oil to re-season the surface and prevent rust.
Ever look at the bottom of your favorite cast iron skillet? It can get pretty grimy. Black, flaky stuff can build up over time. This buildup comes from grease and oil dripping down the sides. It then gets baked on by the heat. It looks messy, and it can even make your stove top dirty. Don’t worry, this is a very common problem. It happens to almost everyone who loves cooking with cast iron. The good news is that it’s easy to fix. You don’t need fancy chemicals or a lot of elbow grease. I’ll show you a few simple, fast ways to get the outside of your skillet looking brand new again. Let’s get that pan looking great.
Why a Clean Skillet Exterior Matters
You might be thinking, “It’s just the outside, who cares?” Well, think of it like the undercarriage of your car. You don’t see it every day, but keeping it clean prevents bigger problems down the road. A clean exterior on your cast iron skillet is about more than just looks. Here’s why it’s a smart move to keep it clean:
- Even Heating: Thick, caked-on carbon and grease act as an insulator. This can create hot spots and prevent your skillet from heating up evenly. A clean bottom allows the heat from your burner to transfer directly and efficiently to the pan. This means better cooking results for you.
- Stove Top Safety: Those flaky, black bits of carbon can break off and fall onto your stove burner. On a gas stove, this can clog the burner ports. On an electric or glass cooktop, it can burn, smoke, and create a baked-on mess that’s a pain to clean. Keeping the skillet clean keeps your stove top clean and safe.
- Prevents Rust: The “seasoning” on your cast iron protects it from rust. Thick, uneven gunk on the outside can trap moisture against the bare metal, leading to rust spots. A smooth, clean, and properly seasoned exterior is your best defense against rust.
- Easier to Handle: A gritty, greasy skillet is just unpleasant to handle. It can get your hands, your dish towels, and your cupboards dirty. A clean pan is a joy to use and store.
Just like a well-maintained engine runs better, a well-maintained skillet cooks better. Taking a few minutes to clean the outside will pay off in the long run.

Your Toolkit: Supplies for a Sparkling Clean
Before you start, let’s get your tools lined up. You probably have most of these items in your kitchen already. Having everything ready makes the job go much faster. It’s like laying out your sockets and wrenches before starting on an oil change.
Basic Cleaning Supplies:
- Baking Soda: This is your secret weapon. It’s a gentle abrasive that cuts through grime without damaging the iron.
- Coarse Salt: Another great natural abrasive, perfect for scrubbing away tough spots.
- White Vinegar: Its acidity helps dissolve rust and stubborn buildup.
- Dish Soap: A small amount of mild dish soap is perfectly fine for this job, especially when you’re going to re-season the pan afterward.
- Water: You’ll need it for rinsing and making pastes.
Scrubbing Tools:
- Stiff-Bristled Brush: A good nylon brush works wonders for general scrubbing.
- Steel Wool: For the really tough, baked-on carbon, nothing beats steel wool. Get a medium-grade pad.
- Scouring Pad: A heavy-duty scouring pad can also be very effective.
- Old Rags or Paper Towels: You’ll need these for drying and applying oil.
Safety Gear (Especially for Heavier Cleaning):
- Rubber Gloves: Protects your hands from getting grimy and dry.
- Safety Glasses: A must-have if you use power tools. You don’t want bits of carbon flying into your eyes.
Choosing Your Cleaning Method: From Light Touch-Up to Full Restoration
Not all dirty skillets are the same. Some just have a little grime, while others look like they were pulled from a pirate ship. Here are four proven methods, from a simple scrub to a complete overhaul. Pick the one that matches the condition of your pan.
Method 1: The Quick Scrub (For Light Buildup)
This is your go-to method for routine maintenance. If the outside of your pan just feels a little sticky or has some light, fresh grease buildup, this is all you need. It’s quick, easy, and keeps things from getting out of hand.
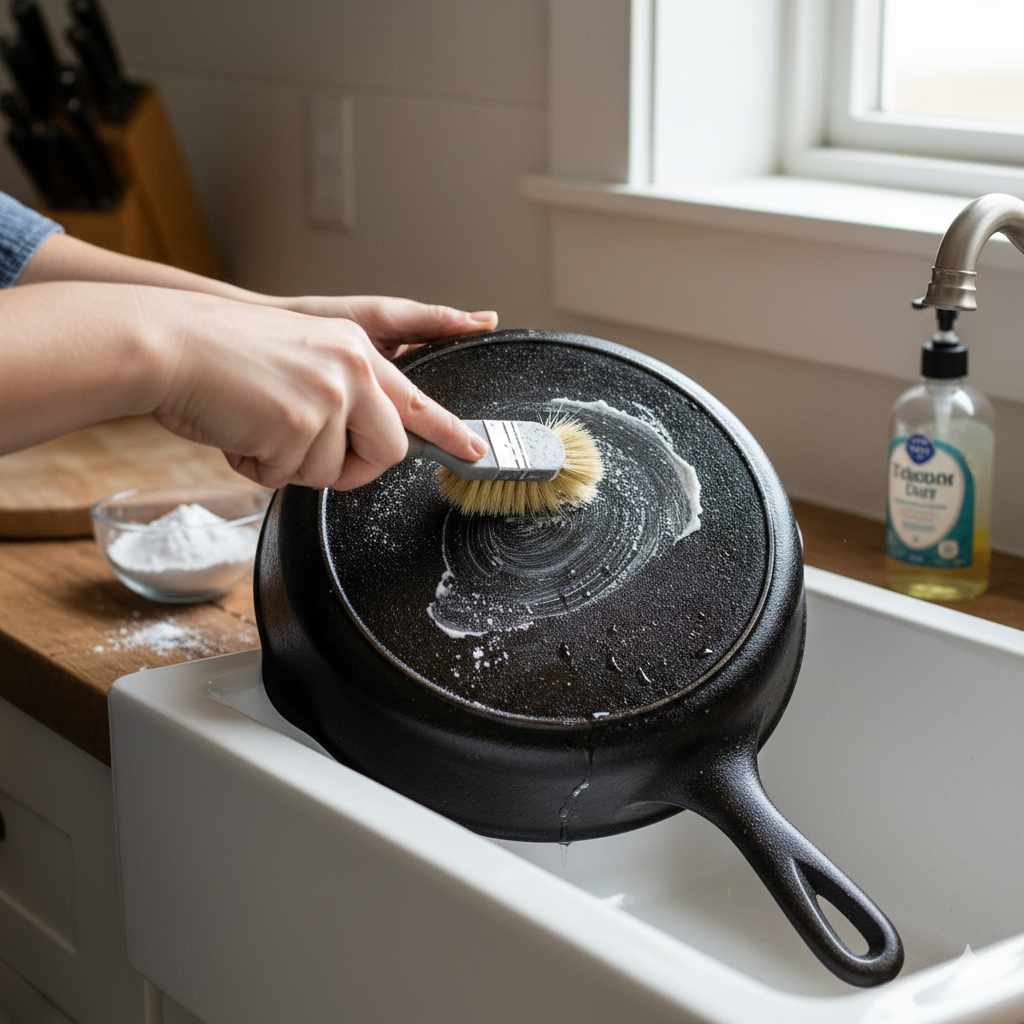
- Make a Paste: In a small bowl, mix about a half-cup of baking soda with a few tablespoons of water. You want a thick paste, something like the consistency of toothpaste.
- Apply the Paste: Flip your cool skillet over in the sink. Smear the baking soda paste all over the outside of the pan. Get it into all the nooks and crannies, including the handle.
- Let It Sit: Let the paste sit and work its magic for about 15-20 minutes. The baking soda will start to break down the grease.
- Scrub Gently: Grab your stiff-bristled brush or a scouring pad. Scrub the pan in small, circular motions. You’ll feel the grime start to loosen up. For slightly tougher spots, sprinkle on some coarse salt for extra scrubbing power.
- Rinse and Repeat: Rinse the pan thoroughly with warm water. Take a look. If there are still some sticky spots, apply a little more paste and scrub again.
- Dry and Oil: This is a critical step! Dry the skillet completely with a towel. Then, place it on the stove over low heat for a few minutes to evaporate any remaining moisture. While it’s still warm, apply a very thin layer of cooking oil to the outside with a paper towel. This protects it from rust.
Method 2: The Deep Clean (For Stubborn Carbon and Grime)
If your skillet has layers of black, bumpy buildup that the quick scrub can’t handle, it’s time to bring in a stronger player: vinegar. The combination of acidic vinegar and abrasive baking soda is a powerful one-two punch for tough gunk.
- Vinegar Soak: Find a container large enough to lay your skillet in upside down, or just do this in your sink if it has a stopper. Pour enough white vinegar to cover the bottom of the pan. Let it soak for at least one hour. The vinegar will begin to soften the hardened carbon.
- Drain and Coat: After soaking, drain the vinegar. Without rinsing, sprinkle a generous layer of baking soda all over the wet exterior. It will fizz and bubble—that’s the chemical reaction helping you out.
- Create the Paste: Add a tiny bit of water if needed to form a thick, bubbly paste. Let this mixture sit on the pan for another 30 minutes.
- Time to Scrub: Now it’s time for some elbow grease. Grab your steel wool or a heavy-duty scouring pad. Scrub the pan firmly. The buildup should start coming off in black flakes and sludge. Keep scrubbing until you’re back to the smooth, bare iron.
- Rinse and Wash: Rinse the pan extremely well under hot water to remove all the residue. You can use a little bit of dish soap at this stage to make sure all the vinegar and grime are gone.
- Full Re-Seasoning Needed: This method will likely strip some or all of the seasoning from the outside. You must dry it perfectly and then do a full re-seasoning in the oven. We’ll cover how to do that in a bit.
Method 3: The “Nuclear Option” (For Extreme Cases – Self-Cleaning Oven)
Warning: This method is very effective but comes with risks. It creates a lot of smoke and fumes, so your kitchen must be extremely well-ventilated. Some oven manufacturers and cast iron pan makers advise against it because the extreme heat can potentially warp or crack the pan. Proceed with caution and at your own risk.
This method uses your oven’s self-cleaning cycle to burn everything off the pan, reducing it to ash. It’s for skillets that are so caked with carbon they look more like a rock than a pan.
- Prepare Your Kitchen: Open all the windows in your kitchen. Turn on the exhaust fan. If you have smoke detectors near the kitchen, you may want to temporarily disable them. Make sure pets and children are in another part of the house.
- Place the Skillet: Place the cast iron skillet upside down on the middle rack of your cold oven. Do not put anything else in the oven.
- Run the Cycle: Close the oven door and start the self-cleaning cycle. This cycle locks the door and heats the oven to extreme temperatures (often over 900°F / 482°C).
- Wait and Ventilate: The cycle will take several hours. It will produce a lot of smoke and unpleasant odors as the gunk burns off. Do not leave your home during this process.
- Cool Down Completely: After the cycle is finished and the oven has unlocked, DO NOT open it. The pan is still incredibly hot. Let the oven and the pan cool down completely for several hours, or even overnight.
- Wipe Away Ash: Once it’s totally cool, remove the pan. It will be covered in a fine grey or reddish ash. Wipe it clean with a damp cloth. It should be stripped down to the bare, grey metal.
- Immediate Re-Seasoning: The pan is now completely unprotected and will rust almost immediately if exposed to air and moisture. You must wash it quickly with soap and water, dry it instantly, and begin the oven re-seasoning process right away.
Think of this method as a full engine teardown and rebuild. It’s a lot of work, but it brings the part back to its original factory state.
Method Comparison
Here’s a quick table to help you decide which method is right for your skillet:
| Method | Best For | Effort Level | Time Required | Risks |
|---|---|---|---|---|
| Quick Scrub (Baking Soda) | Light, sticky grease; routine cleaning | Low | 20-30 minutes | None |
| Deep Clean (Vinegar & Soda) | Stubborn, bumpy carbon buildup | Medium | 1.5 – 2 hours (mostly waiting) | May strip seasoning |
| Self-Cleaning Oven | Extreme, thick, flaky carbon; full restoration | Low (but high attention) | 4-8 hours (including cool down) | High smoke/fumes; potential for pan to warp or crack |
The Most Important Step: How to Re-Season Your Skillet
Cleaning is only half the battle. After a deep clean, you’ve likely stripped off the protective layer of seasoning. Seasoning is just oil that has been baked onto the iron, creating a rust-proof, non-stick surface. Think of it as the clear coat on your car’s paint—it protects what’s underneath.
Neglecting this step will cause your pan to rust very quickly. Here’s how to do it right:
- Preheat Your Oven: Set your oven to 450-500°F (232-260°C). You want it nice and hot.
- Wash and Dry THOROUGHLY: After its deep clean, wash your skillet one last time with warm, soapy water. Rinse it well. Dry it completely with a towel, then place it on a stove burner over low heat for 5-10 minutes to ensure every last drop of moisture is gone. This is critical for preventing rust.
- Apply a Thin Coat of Oil: While the pan is still warm (but cool enough to handle safely), apply a very thin layer of a neutral, high-smoke-point oil. Good choices include grapeseed oil, canola oil, or specialized seasoning blends. Use a paper towel to coat the entire pan—inside, outside, handle, everywhere.
- Wipe It All Off: Now, take a clean, dry paper towel and wipe the pan down as if you’re trying to remove all the oil you just applied. You want a micro-thin layer. Too much oil will result in a sticky, splotchy finish. The surface should look matte, not shiny or wet.
- Bake the Pan: Place the skillet upside down on the top rack of your preheated oven. Placing it upside down prevents oil from pooling on the cooking surface. You can place a sheet of aluminum foil on the rack below to catch any potential drips.
- Bake for One Hour: Let the skillet bake for one full hour. It will smoke a bit, so keep your kitchen ventilated. This process, called polymerization, is what transforms the oil into a hard, protective coating. The U.S. Department of Agriculture notes how heat transforms fats, and this is exactly what we’re doing on a microscopic level.
- Cool in the Oven: After an hour, turn the oven off but leave the pan inside. Let it cool down completely with the oven. This slow cooling process helps the seasoning cure properly.
- Repeat if Necessary: For a brand-new or fully stripped pan, you may want to repeat this process 2-3 times to build up a durable, long-lasting layer of seasoning.
Common Mistakes to Avoid
Just like working on a car, a few wrong moves can cause problems. Here are some common mistakes to steer clear of when cleaning your cast iron’s exterior.
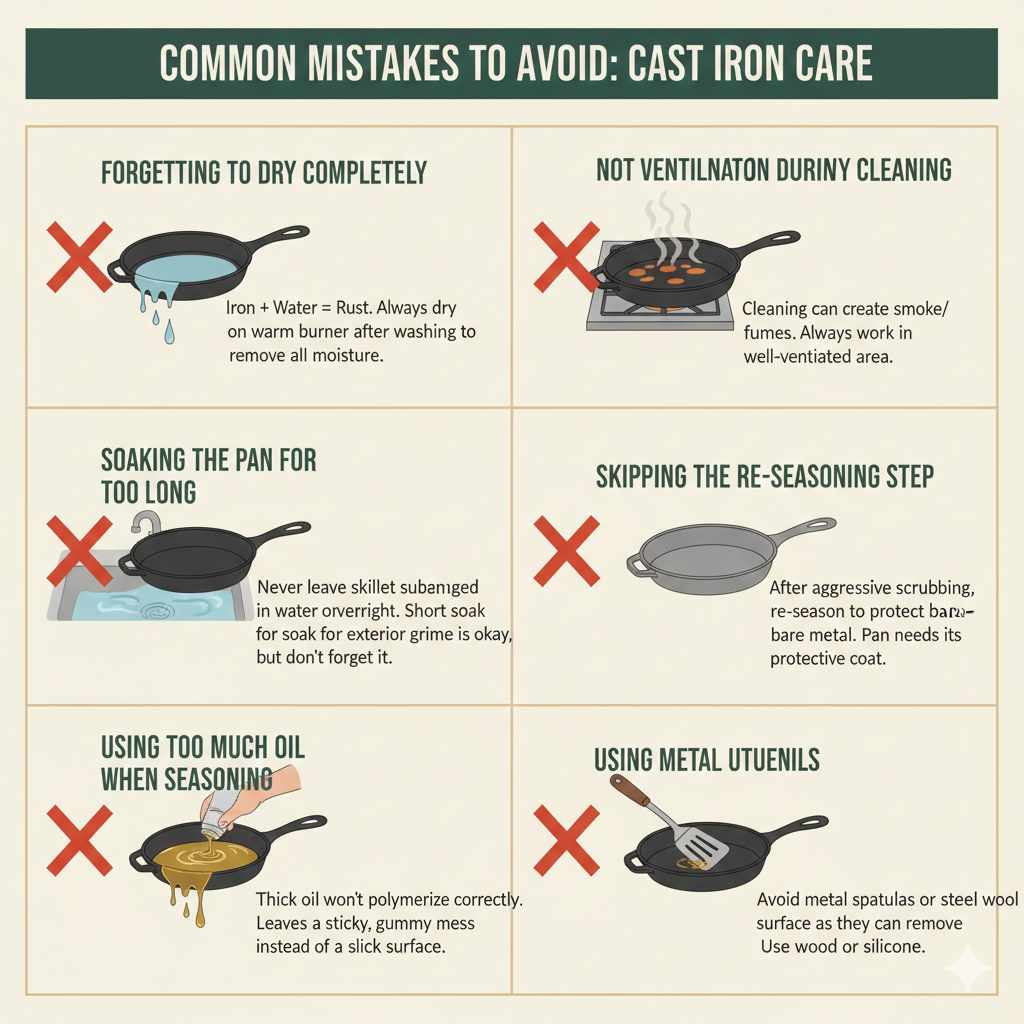
- Forgetting to Dry Completely: This is the number one mistake. Iron + Water = Rust. Always, always dry your pan on a warm burner after washing to remove all moisture.
- Soaking the Pan for Too Long: Never leave your cast iron skillet to soak in water overnight, especially the inside. This is a guaranteed recipe for rust. A short soak for cleaning the exterior is okay, but don’t forget about it.
- Using Too Much Oil When Seasoning: More is not better. A thick layer of oil won’t polymerize correctly, leaving you with a sticky, gummy mess instead of a hard, slick surface.
- Not Ventilating During Heavy Cleaning: Whether you’re using the self-clean oven method or just scrubbing hard, you can create smoke and fumes. Always work in a well-ventilated area.
- Skipping the Re-Seasoning Step: If you’ve scrubbed hard with steel wool or used an aggressive cleaning method, you must re-season the pan. A bare cast iron pan is vulnerable and needs its protective coat back.
Frequently Asked Questions (FAQ)
Can I use a wire wheel on a drill to clean the outside?
Yes, you can, but this is an advanced method for heavy restoration. It’s very aggressive and will strip the pan down to bare metal instantly. You MUST wear safety glasses and gloves. It creates a lot of dust and debris. Only use this method outdoors and be prepared to do a full oven re-seasoning immediately after.
What’s the black stuff flaking off the bottom of my pan?
That is carbonized grease and oil. It happens when drips and splatters on the outside of the pan are repeatedly heated past their smoke point. It’s not harmful, but it can make a mess on your stovetop and prevent even heating.
Is it okay to use soap on the outside of cast iron?
Yes, a little mild dish soap is perfectly fine for cleaning the outside, especially if it’s very greasy. The modern myth about soap ruining seasoning is overblown. Just be sure to rinse it well, dry it completely, and apply a thin coat of oil afterward to maintain the seasoned surface.
Can I put my cast iron skillet in the dishwasher?
No. Never, ever put cast iron in the dishwasher. The harsh detergents and prolonged exposure to hot water will completely strip the seasoning and cause the pan to rust severely. It is one of the fastest ways to ruin a good skillet.
How often should I deep clean the outside of my skillet?
You don’t need to do a deep clean often. The “Quick Scrub” method with baking soda is great for regular maintenance whenever you notice it getting sticky. Only perform a “Deep Clean” or use a more aggressive method when the buildup has become thick, hard, and bumpy—perhaps once every few years, depending on use.
Why did my pan turn a rusty color after cleaning?
This is called flash rust. It happens when bare iron is exposed to air and moisture. It means you’ve successfully scrubbed off the old gunk but didn’t dry and oil the pan quickly enough. Don’t panic! Just scrub the light rust off with a bit of steel wool, and then immediately dry and re-season the pan.
Can I use oven cleaner on my cast iron skillet?
Yes, the lye-based oven cleaner method is another popular restoration technique. You place the skillet in a sealed plastic bag and spray it with heavy-duty oven cleaner, letting it sit for a day or two. It’s very effective but involves harsh chemicals. You must use it outdoors and wear protective gloves and eyewear. The baking soda and vinegar method is a safer, fume-free alternative for most situations.
Your Skillet is Ready for the Road Ahead
There you have it. Cleaning the outside of your cast iron skillet isn’t some dark art—it’s just a straightforward maintenance job, much like cleaning your spark plugs or changing your air filter. By choosing the right method for the job, you can easily remove anything from light grease to decades of baked-on carbon.
Remember the most important rules: always dry your pan completely, and always protect it with a thin layer of oil after cleaning. That protective seasoning is what makes cast iron so special, and it’s your job to maintain it. A little care goes a long way, ensuring your skillet will keep cooking delicious meals for years, and even generations, to come. So go ahead, tackle that grime with confidence. You’ve got this!


