
Building a bookshelf wall is simpler than it looks! With basic tools and careful measuring, you can transform an empty wall into stunning, customized storage using readily available materials like MDF or lumber. This guide breaks down the process into easy, manageable steps, ensuring a sturdy, beautiful result for any book lover or organizer.
Are you tired of stacks of books taking over your floors or end tables? Having an entire wall dedicated to organized storage, often called a “wall library,” is the dream for anyone serious about books, collectibles, or just needing better organization. It might sound like a huge, intimidating project reserved only for professional carpenters, but I promise you, it’s not!
When you break down building a bookshelf wall into simple stages—planning, framing, building the boxes, and finishing—the whole task becomes much less scary. I’m Dustin, and I’ve spent years helping folks tackle DIY projects they thought were too big. We will walk through this step-by-step, focusing on techniques that keep things straight, save you money, and result in a professional-looking finish.
If you’re ready to ditch the clutter and create a built-in feature that adds serious value and beauty to your home, stick with me. First, let’s look at what you need to know before you even touch a piece of wood.
Phase 1: Planning Your Perfect Bookshelf Wall
Proper planning is the absolute foundation of any successful build—just like checking your tire pressure before a long drive ensures safety, planning prevents costly mistakes when building.
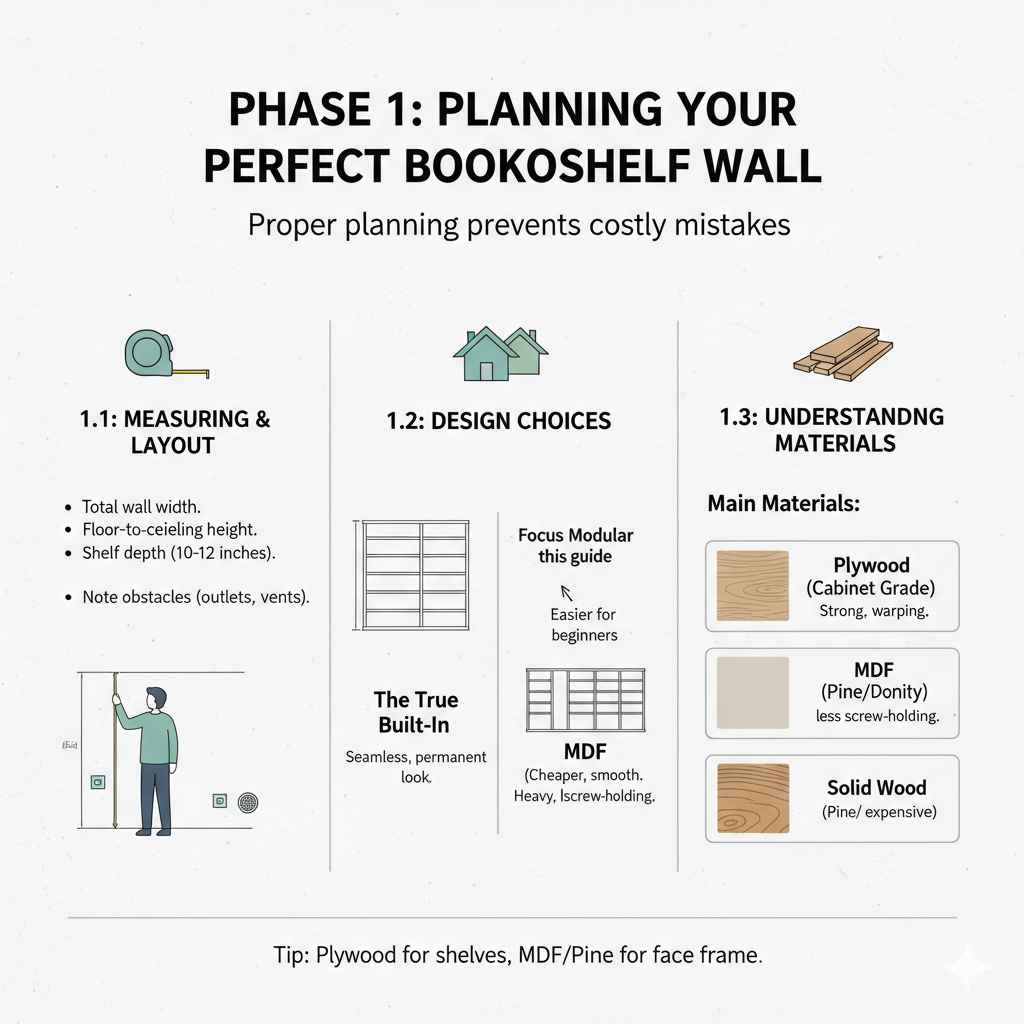
Section 1.1: Measuring and Layout
You need accurate measurements. Even a tiny error here can make the whole structure look off-kilter later. Measure the entire wall space you plan to cover. Always measure three times and cut once!
Measure the:
- Total width of the wall.
- Height from the floor to the ceiling.
- Depth you want your shelves to be (standard is usually 10 to 12 inches).
- Note any obstacles like electrical outlets, vents, or light switches. You need to either build around them or plan to relocate them (call an electrician for that last part!).
Section 1.2: Design Choices: Built-in vs. Modular
There are two main ways people approach a bookshelf wall. Choosing the right one depends on your comfort level and budget.
The True Built-In (Framed Look)
This method involves building the shelves directly into the wall structure, often using simple framing techniques to match the depth of the surrounding drywall. This looks the most professional and permanent, truly making it look like the house was built with the shelves included.
The Modular Approach (Bookcases Joined Together)
This is often the easiest way for beginners! You buy or build several standard-sized bookcases (like the common “cube” style). You then align these units snugly against the wall and join them together, securing them to each other and the wall. We will focus primarily on the true built-in style, as it provides the most custom, seamless look, but the anchoring steps apply to modular builds too.
Section 1.3: Understanding Materials
The right material ensures your shelves don’t sag under the weight of heavy encyclopedias or textbooks. Sagging shelves are a common DIY letdown!
Here are the main materials for the shelving structure:
- Plywood (Cabinet Grade): Strong, resists warping, and takes paint or stain well. It’s often the best choice for durability.
- MDF (Medium-Density Fiberboard): Cheaper and very smooth for painting. However, it is heavy and doesn’t hold screws as securely as solid wood or plywood, and it’s susceptible to water damage.
- Solid Wood (e.g., Pine or Poplar): Beautiful, very strong naturally, but the most expensive. Good for staining.
For a beginner building a sturdy wall, a combination is often best: use sturdy plywood for the shelving surfaces and perhaps MDF or painted pine for the decorative face frame.
Phase 2: Gathering Your Essential Tools and Supplies
Don’t worry; you don’t need a full professional shop. Having the right gear makes the job safer and the cuts cleaner. Think of this as checking your toolkit before heading out on the road—safety and precision first!
Essential Tool Checklist
Here are the core tools I recommend having on hand:
}
| Tool | Why You Need It |
|---|---|
| Miter Saw or Circular Saw with Guide | For perfectly straight, square cuts on your lumber and shelving pieces. |
| Stud Finder | Crucial for locating wall studs—this is where you anchor everything securely. |
| Level (Long 4-Foot Recommended) | To ensure every shelf is perfectly horizontal and plumb against the vertical walls. |
| Drill/Driver with Countersink Bits | For assembling the boxes and driving anchors into the wall studs without splitting wood. |
| Tape Measure and Pencil | For layout and marking cuts accurately. |
Essential Supplies Checklist
- Plywood or lumber for shelves and vertical supports (if applicable).
- Base molding and top molding (to give the bookshelf that finished, built-in look).
- Wood screws (usually 2-inch or 2.5-inch length).
- Wood glue (essential for strength!).
- Finishing nails or brad nails (for attaching the back panel or face frame).
- Wall anchors (if you cannot hit a stud everywhere—though hitting studs is always best).
Phase 3: Step-by-Step Construction Guide for Your Bookshelf Wall
This process focuses on building individual shelf boxes or bays that are then locked together and finished to look like one unit. This is much easier for beginners than trying to build one giant unit.
Step 3.1: Locate and Mark Studs
This is the safety check before any major construction. You must connect your shelving structure directly into the wall studs for load-bearing strength. Use your stud finder along the entire wall where the shelves will go.
- Mark the center of every stud clearly along the floor and near the ceiling line.
- These marks will guide where you screw the vertical supports later.
Step 3.2: Build the Base Platform (Toe Kick)
Cabinets and built-ins usually sit on a recessed base, called a toe kick, which lets you stand closer to the shelves without stubbing your toes. This base elevates the shelves slightly off the floor.
- Cut strips of plywood or lumber (usually 3-4 inches high and 3-4 inches deep) to run the length of your planned wall.
- Assemble these pieces into a simple box frame.
- Place this frame on the floor along your wall layout and screw it securely into the subfloor and any studs it crosses. This acts as your level base for the entire structure.
Step 3.3: Constructing the Shelf Boxes (The Actual Shelves)
Most bookshelf walls are made of repeating vertical sections (bays). If you have a 10-foot wall, you might plan for three or four sections.
For each bay, you will build a simple rectangular box using your plywood or lumber:
- Cut Sides and Tops/Bottoms: Cut the two vertical side pieces and the top and bottom horizontal pieces for one open bay. Remember to account for the thickness of the wood when calculating how long your shelves need to be!
- Assemble the Box: Apply wood glue liberally to all joining edges. Clamp the pieces together until the glue sets slightly. Use your drills and screws to secure the joints, driving screws through the top/bottom pieces into the sides. Use your level frequently to ensure the box is square (90 degrees at the corners).
- Install Intermediate Shelves (If Fixed): If you are using fixed shelves rather than adjustable pins, now is the time to glue and screw them into place inside the box structure. Ensure fixed shelves are supported every 30 to 36 inches to prevent sag.
Dustin’s Tip on Shelf Depth: For maximum stability and minimal sag pressure, aim for shelf depths between 10 and 12 inches. If you must go wider, reinforcing the center of the shelf with a hidden strip of wood underneath (a cleat) makes a huge difference!
Step 3.4: Securing the Boxes to the Wall
This is where we lock everything down. Take your assembled boxes, maneuver them onto the base platform, and line them up against the wall.
- Positioning: Place the first box into position, ensuring the front edge is perfectly flush with the front edge of your toe-kick base.
- Checking Plumb and Level: Before screwing anything, check the box with your level—side-to-side (level) and front-to-back against the wall (plumb). Adjust underneath the toe-kick if necessary.
- Anchoring: Drive long wood screws (or structural screws rated for this purpose) through the back panel of the shelf box directly into the wall studs you marked earlier. Use at least two screws per stud location.
- Joining Bays: When you place the next shelf box next to the first, securely screw the sides of the adjacent boxes together. This turns several separate boxes into one solid wall unit.
For more detailed anchoring guidance to meet home safety standards, resources like those provided by the International Residential Code (IRC) often have guidelines related to fastening large structures, though for simple bookshelves, strong stud attachment usually suffices for stability.
Step 3.5: Adding Adjustable Shelving (If Desired)
If you skipped fixed shelves earlier, you now need to prepare for adjustable ones. This requires drilling shelf pin holes.
- Use a shelf pin jig (available cheaply at hardware stores) to ensure all your holes are perfectly aligned vertically. This jig makes the professional look achievable!
- Mark your desired shelf heights on the pin holes inside the box.
- Drill the small pilot holes for the shelf pins.
Step 3.6: Building the Face Frame (The “Built-In” Look)
This step hides all the screw heads, uneven edges, and exposed plywood ends, transforming your assembled boxes into one seamless piece of furniture.
- Cut Face Strips: Cut narrow strips of wood (the width depends on how substantial you want the frame to look—usually 1.5 to 3 inches wide) for the vertical pieces (stiles) and horizontal pieces (rails).
- Assembly Prep: Lay these strips out, ensuring they cover the front edges of your shelf boxes completely. When attaching them, they should overlap the shelf edges slightly.
- Attaching the Frame: Glue and then secure the face frame pieces using a nail gun (brad or finish nailer) or by using pocket hole joinery if you learned that technique. If using nails, ensure they are sunk beneath the surface (countersunk).
This face frame should run continuously across the entire wall, connecting all the bays visually.
Step 3.7: Finishing Touches: Trim and Caulk
Trim is the secret sauce that makes a bookshelf look like it was custom-built by the home builder.
- Baseboard and Crown Molding: Install new baseboard trim along the bottom of your toe-kick structure, making it look like it’s part of the room’s original base molding. If your room has crown molding, add a matching molding piece to the very top of your shelf unit to tie it into the ceiling line.
- Caulk Everything: This is non-negotiable for a professional look. Fill every single gap, seam, and nail hole with paintable caulk. This includes the seam between the face frame and the shelf box, the seam between the trim and the wall, and any gaps where the unit meets the ceiling or floor.
Once the caulk is dry, you are ready to prime and paint! A good coat of paint hides a multitude of minor imperfections, giving you that flawless custom finish.
Phase 4: Ensuring Longevity and Stability
We talked about anchoring into studs, but let’s reinforce why stability is key in any storage system, especially one holding heavy items.
The Importance of Load Distribution
When loading your new wall, distribute weight evenly. Don’t stack all the hefty hardbacks on one small section.
| Item Type | Recommended Shelf Reinforcement | Maximum Recommended Span (No Center Support) |
|---|---|---|
| Light Paperbacks/Media | Standard 3/4 inch plywood/MDF shelving is usually fine. | 36 inches |
| Heavy Hardcover Books | Reinforced with a hidden wood cleat underneath, or use 1-inch thick material. | 28–30 inches |
| Very Heavy Items (e.g., full sets) | Use solid hardwood or build the structure with vertical dividers every 24 inches. | 24 inches |
If you are concerned about how your structure attaches to the home, remember that building codes focus heavily on earthquake safety or sheer tipping hazards in homes, especially regarding tall furniture. While a fully anchored bookshelf wall is usually safe, always ensure your mounting screws are driven deep into solid structural wood behind the drywall.
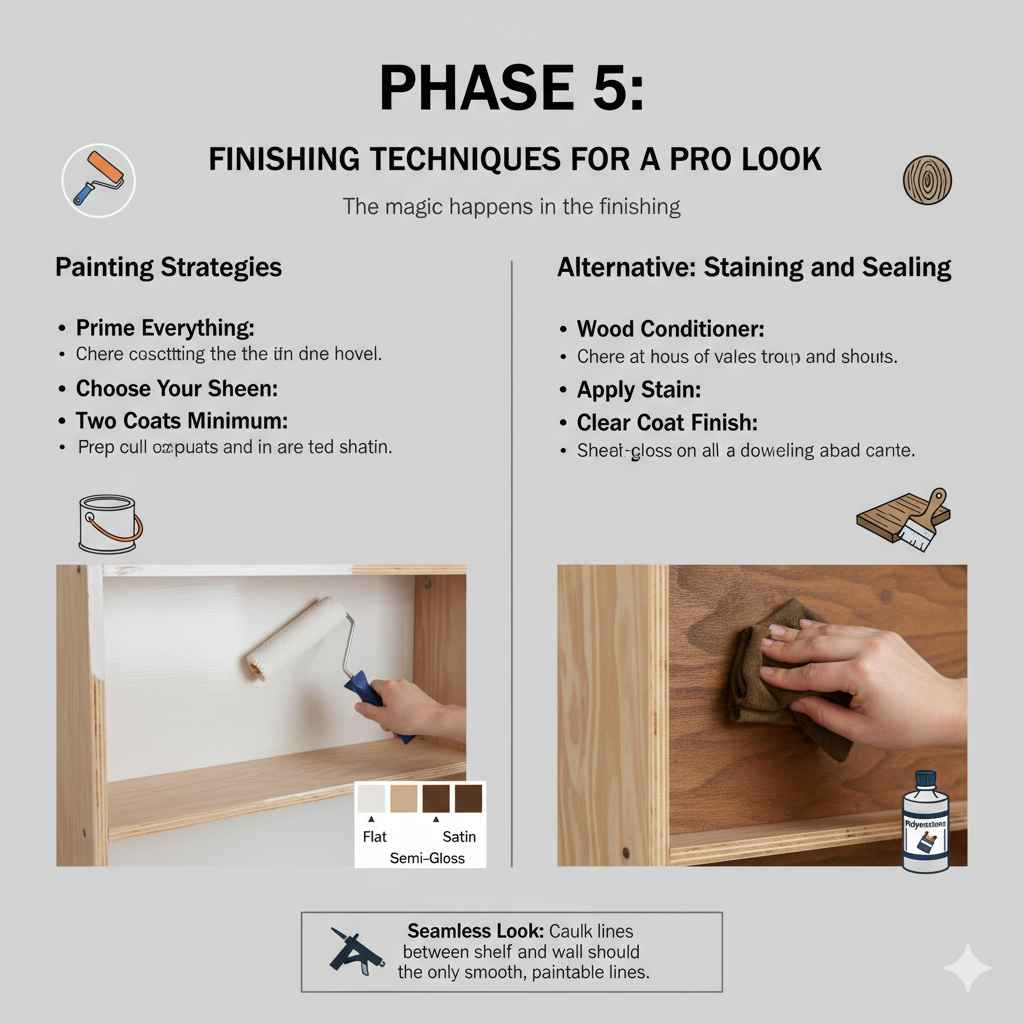
Phase 5: Finishing Techniques for a Pro Look
The magic happens in the finishing. This is where your wood box turns into custom cabinetry.
Painting Strategies
- Prime Everything: Use a high-quality bonding primer, especially if you used MDF or raw plywood edges. This seals the porous material and provides a smooth base for paint.
- Choose Your Sheen: Flat finishes hide imperfections better, but semi-gloss or satin finishes are far more durable and wipeable—essential for a library that sees daily use!
- Two Coats Minimum: Apply two thin, even coats of your chosen color, sanding lightly with 220-grit sandpaper between coats for the smoothest feel.
Alternative: Staining and Sealing
If you opted for sturdy plywood or solid wood and prefer a natural look, stain application is different:
- If using plywood, you must use a wood conditioner first, or the stain will look blotchy.
- Apply the stain, wiping off the excess based on the manufacturer’s instructions.
- Once dry, use several coats of a durable clear coat finish, like polyurethane, paying special attention to sealing the edges where books rest.
No matter how you finish it, remember that the caulk lines (from Step 3.7) should be the only smooth, paintable lines between the shelf frame and the wall, giving that seamless “built-in” illusion.
Frequently Asked Questions (FAQ) about Bookshelf Walls
Q1: How deep should the shelves in a wall unit be?
A: For standard books (hardcovers and paperbacks), a depth of 10 to 12 inches is ideal. This gives enough space for large books while minimizing wasted space in front of the shelves.
Q2: Do I have to attach the bookshelf to the wall studs?
A: Yes — absolutely. If you’re building a full bookshelf wall, it must be anchored into wall studs for safety and stability. Drywall alone cannot support the weight of loaded shelves. Screwing directly into studs prevents tipping and structural failure. For very heavy installations, use structural screws or lag bolts rated for load-bearing applications.
Q3: How do I prevent shelves from sagging over time?
A: Shelf sag happens when spans are too wide or materials are too thin. To prevent it:
- Use 3/4-inch plywood or thicker material.
- Keep unsupported spans under 30–36 inches.
- Add a hidden support cleat under the shelf.
- Install vertical dividers every 24–30 inches for heavy books.
- Consider a hardwood front edge strip (called edge banding) to stiffen the shelf.
Proper spacing and reinforcement make a huge difference in long-term durability.
Q4: Is MDF strong enough for bookshelf walls?
A: MDF can work well for painted bookshelf walls, but it has limitations:
- It’s heavy.
- It doesn’t hold screws as well as plywood.
- It can swell if exposed to moisture.
For maximum strength, many DIY builders use cabinet-grade plywood for structure and MDF for decorative trim or face frames.
Q5: How much does it cost to build a bookshelf wall?
A: Costs vary depending on size and materials, but here’s a rough estimate:
- Basic plywood + paint build (8-foot wall): $300–$700
- Higher-end plywood + trim + molding: $800–$1,500
- Solid wood or custom millwork style: $1,500+
Doing it yourself can save thousands compared to custom cabinetry installations.
Conclusion
Building a bookshelf wall may seem intimidating at first, but when broken into clear phases—planning, framing, building boxes, anchoring, and finishing—it becomes a manageable and highly rewarding DIY project.
The keys to success are:
- Careful measurements
- Anchoring securely into studs
- Preventing sag with proper material thickness
- Finishing with trim and caulk for that seamless built-in look
A well-built bookshelf wall doesn’t just organize your space — it transforms a room. It adds character, increases storage, and even boosts home value. With patience and attention to detail, you can create a professional-quality feature that looks like it was installed by a custom carpenter.
Now it’s time to grab your tape measure, mark those studs, and start building your wall library.


