
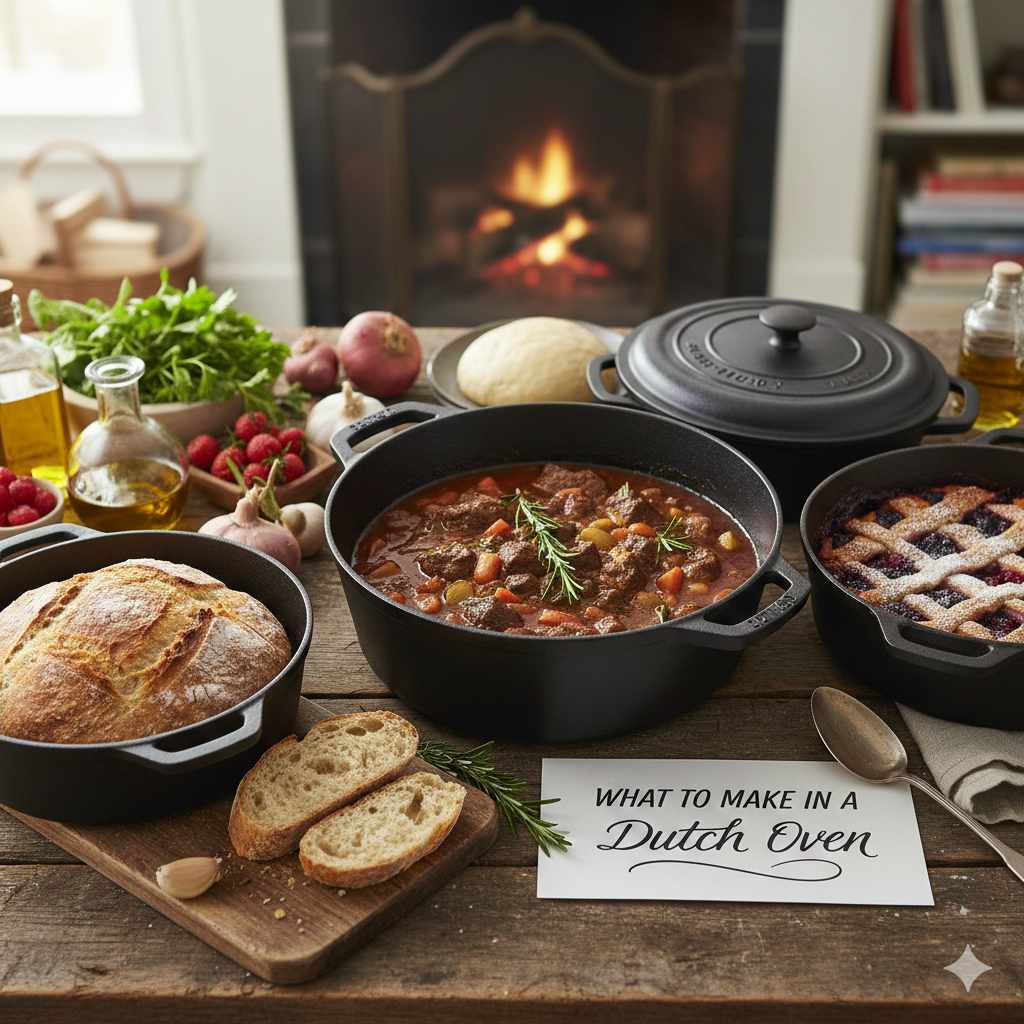
What to make in a Dutch oven includes foolproof classics like no-knead bread, tender pot roast, chili, deeply flavored soups, and perfectly cooked fried chicken. This sturdy pot excels at slow cooking, braising, and achieving even heat, making it ideal for one-pot comfort meals that taste amazing with minimal effort.
It’s easy to feel overwhelmed when you first look at a heavy Dutch oven sitting on your counter. You might wonder if it’s just for camping or if it only makes complicated dishes. Don’t worry! This piece of kitchen equipment is one of the most friendly tools you can own. It handles heat like a champ, whether it’s on your stovetop or in your oven. We are going to break down the best and easiest dishes you can make, proving that this pot is your new best friend for weeknight dinners and weekend projects. Get ready to build confidence and make some incredible food!
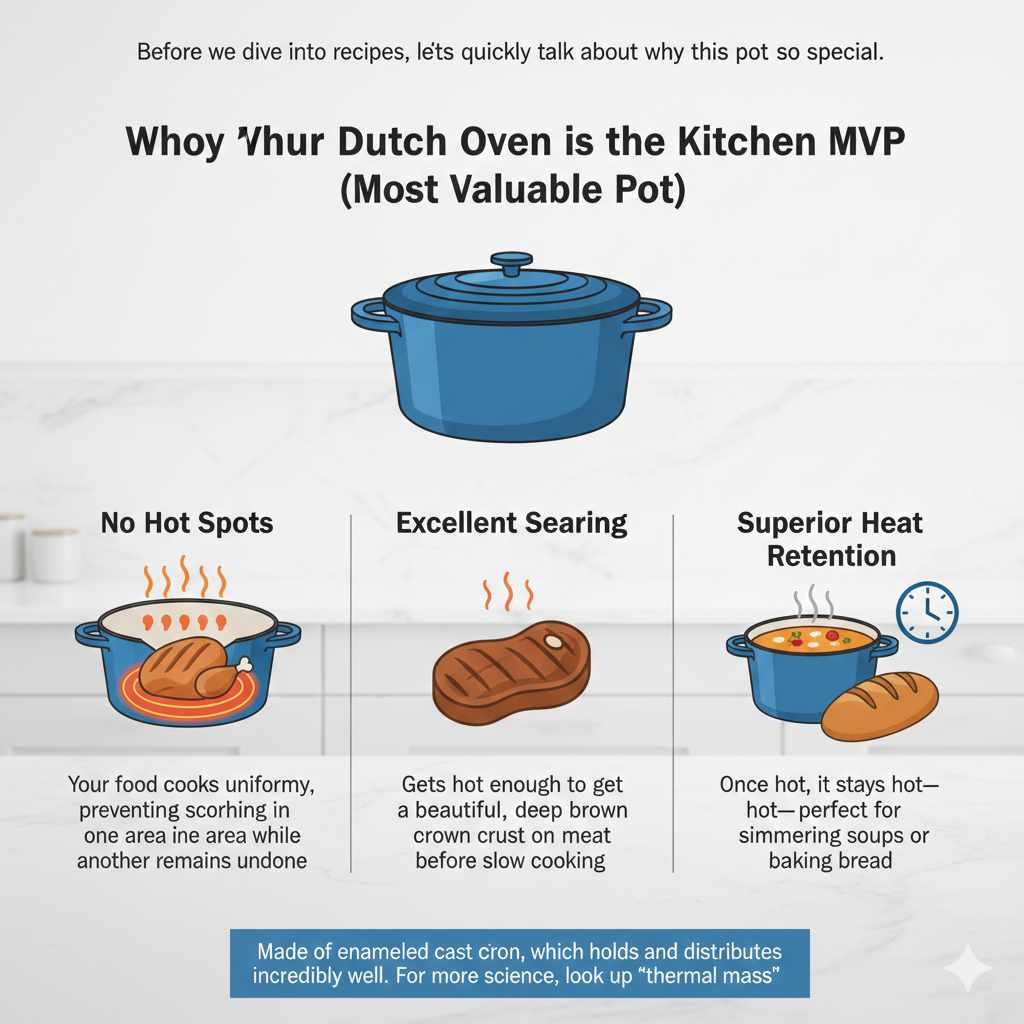
Why Your Dutch Oven is the Kitchen MVP (Most Valuable Pot)
Before we dive into recipes, let’s quickly talk about why this pot is so special. The Dutch oven is usually made of enameled cast iron. Cast iron holds heat incredibly well and distributes it evenly across the bottom and up the sides.
This means:
No Hot Spots: Your food cooks uniformly, preventing scorching in one area while another remains underdone.
Excellent Searing: It gets hot enough to get a beautiful, deep brown crust on meat before slow cooking.
* Superior Heat Retention: Once hot, it stays hot—perfect for simmering soups or baking bread.
If you’re looking for the science on why cast iron performs so well, you can often find good material on material science resources regarding thermal mass.
The Absolute Best Beginner Dishes for Your Dutch Oven
If you’re just starting out, we need to focus on recipes where the Dutch oven does the heavy lifting. These recipes maximize flavor without demanding perfect timing or complicated techniques.
1. No-Knead Bread: Magic in a Pot
This is the ultimate starting project. It proves the Dutch oven can mimic a professional bakery oven. The heavy lid traps steam released from the dough, creating a crust that is beautifully crispy and brown.
Simple Steps for Beginner No-Knead Bread:
- Mix Ingredients: Combine flour, water, yeast, and salt in a large bowl. Mix until just combined (it will look shaggy). Cover it and let it sit on the counter for 12–18 hours. This slow fermentation builds amazing flavor.
- Shape (Barely): Gently fold the dough over itself a few times on a lightly floured surface. Don’t punch it down!
- Preheat: Place your empty Dutch oven (with the lid on) into your regular oven and preheat to 450°F (232°C) for at least 30 minutes. It needs to be scorching hot.
- Bake Covered: Carefully remove the hot pot, drop the dough inside, put the lid back on, and bake for 30 minutes. The steam trapped inside cooks the crust perfectly.
- Bake Uncovered: Remove the lid and bake for another 15–20 minutes until the crust is deep golden brown.
The results are always fantastic—a crusty exterior and a soft, airy interior. This is all thanks to the trapped steam!
2. Classic Pot Roast: Fork-Tender Perfection
Pot roast is where the Dutch oven truly shines. It’s perfect for low and slow cooking, which breaks down tough cuts of meat until they fall apart with a fork.
Key Technique: Sear First, Then Simmer
The difference between a good pot roast and an amazing one is the initial sear. Because the Dutch oven handles high heat so well, you can create a deep, flavorful crust on the roast before adding any liquid.
| Step | Action | Why We Do This |
|---|---|---|
| 1 | Season and Sear Meat | Creates deep, savory flavor (the Maillard reaction). |
| 2 | Sauté Vegetables | Cooks onions, carrots, and celery until slightly soft. |
| 3 | Deglaze and Add Liquid | Use broth or wine to scrape up the brown bits from the bottom. |
| 4 | Braise Low and Slow | The heavy lid keeps moisture in, tenderizing the meat over hours. |
You are essentially braising the meat. Braising is cooking something slowly in a small amount of liquid. Since the Dutch oven maintains a steady, low temperature, you trust it to handle the 3–4 hours needed. Check out resources from culinary schools on proper braising techniques to see why this method works so well—it converts tough connective tissues into gelatin, making the meat juicy.
3. Hearty Chili or Beef Stew
Stews and chili benefit from the same extended, gentle cooking time as pot roast. When you make chili in a Dutch oven, the flavors meld together wonderfully.
Start by browning your ground beef or cubed chuck steak right in the pot. Once browned, remove the meat, sauté your aromatics (onions, peppers), and then combine everything back together with tomatoes, beans, and spices. Simmering chili for two hours in a heavy pot deepens the spice profile far better than a thin stockpot.
Beyond the Basics: Expanding Your Dutch Oven Repertoire
Once you’ve mastered bread and roast, it’s time to explore other reliable winners.
4. Deep-Dish Pizza
Yes, you can make pizza! A Dutch oven creates a unique, crunchy, yet tender-chewy crust that rivals deep-dish joints.
The Deep-Dish Difference:
- Oil the Pot: Coat the bottom and sides of your (unheated) Dutch oven generously with olive oil.
- Press the Dough: Press your pizza dough up the sides of the pot to form a crust wall.
- Layering Order: Because the bottom cooks intensely, layer your pizza backwards: Dough, Cheese (to insulate the dough), Toppings, then Sauce on top. This prevents the bottom crust from burning before the cheese melts.
- Baking: Bake at a slightly lower temperature (around 425°F or 220°C) until the edges are golden.
5. Fried Chicken: The Ultimate Crunch
One surprising use for the Dutch oven is deep frying. Because cast iron holds its temperature so well, it prevents the classic “fryer temperature drop” that happens when you add cold food to oil in a thinner pot. This results in less greasy, crispier fried chicken.
Safety First for Frying
When dealing with hot oil, safety is paramount. Always make sure the oil fills no more than one-third of the Dutch oven. Never let the temperature exceed 375°F (190°C). If you are unsure about temperature control, consider using an oven-safe thermometer clipped to the side. For more detail on safe oil temperatures, reviewing guidelines from consumer safety organizations can be helpful.
6. Soups and Stocks for Days
Making large batches of chicken stock, bone broth, or vegetarian soup is simple. The sheer volume the Dutch oven can handle means you can make enough for several meals. Its heavy bottom ensures that if you are simmering bones or vegetables for 8+ hours, nothing will scorch to the bottom.
Mastering Temperature Control: Tips from an Old Hand
The biggest hurdle for beginners is temperature management. Here is how to treat your Dutch oven depending on where you are cooking.
Stovetop Cooking (Searing and Sautéing)
Start on medium heat. Let the empty pot warm up for five minutes before adding oil. Cast iron takes longer to heat up than stainless steel, but once it’s hot, it holds that heat. If you start too high, you risk burning ingredients before the center is cooked.
Oven Cooking (Braising and Baking)
When using the oven, you usually want the pot hot before adding anything (like with that no-knead bread). For long braises, set your oven temperature low, typically between 275°F and 325°F (135°C to 163°C). Always use oven mitts—handle the pot only by the handles once it’s been in the oven, and never touch the lid knob directly.
Using an oven thermometer to verify your oven temperature is set correctly can save you hours of cooking time, as many home ovens run hotter or cooler than the dial indicates.
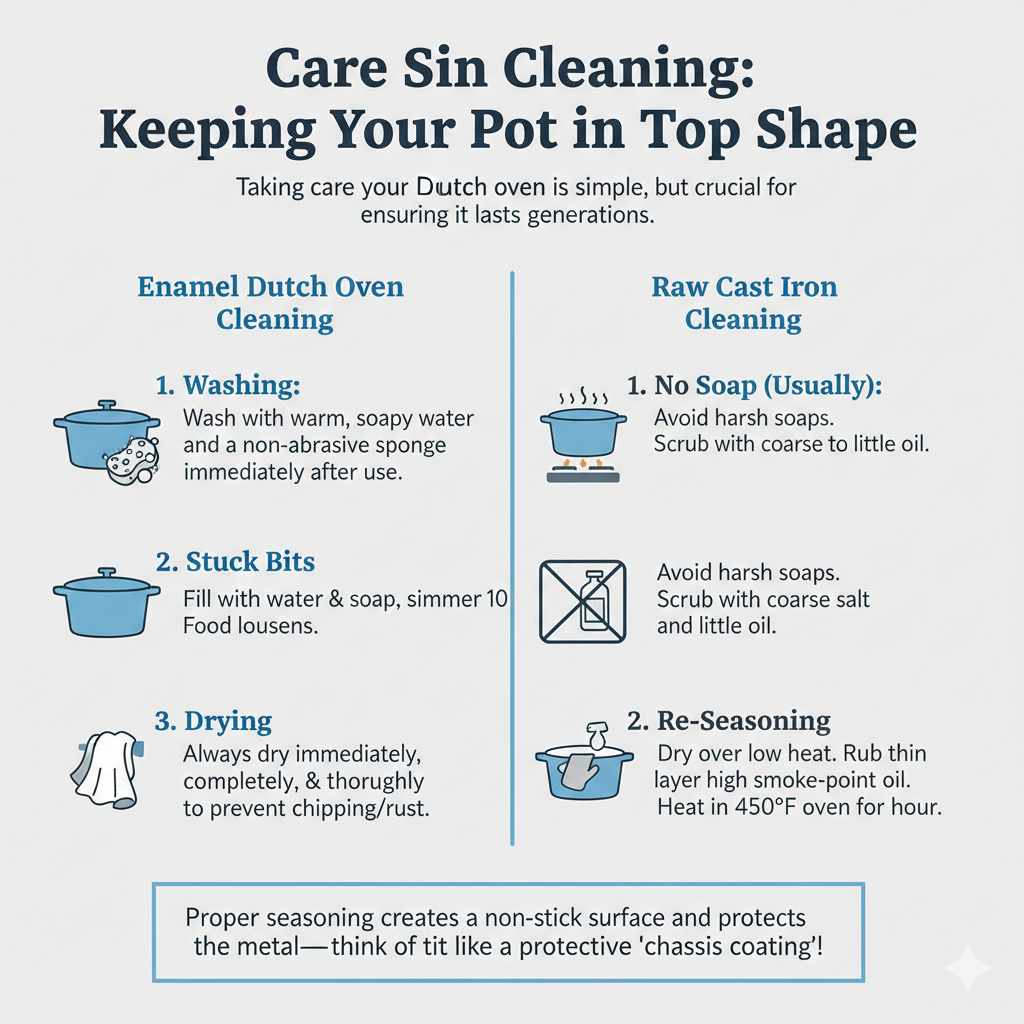
Care and Cleaning: Keeping Your Pot in Top Shape
Taking care of your Dutch oven is simple, but crucial for ensuring it lasts generations. If you have an enameled cast iron pot (the shiny, colorful kind), cleaning is easy. If you have a raw, seasoned cast iron pot, you must be more careful.
Enamel Dutch Oven Cleaning (Most Common Type)
- Washing: Wash with warm, soapy water and a non-abrasive sponge immediately after use.
- Stuck Bits: Fill the pot halfway with water and a few drops of dish soap. Bring to a simmer on the stove for 10 minutes. The stuck food usually loosens right off.
- Drying: Always dry immediately, completely, and thoroughly. Water left sitting can cause chipping or rust spots.
Raw Cast Iron Cleaning (If Applicable)
- No Soap (Usually): Avoid harsh soaps, which can strip the seasoning. Scrub with coarse salt and a little oil if needed.
- Re-Seasoning: After washing, dry immediately over low heat on the stove. Rub a very thin layer of high smoke-point oil (like flaxseed or canola) over the entire inner surface, then wipe off any excess until it looks almost dry. Heat the pot upside down in a 450°F oven for one hour to build the protective layer.
Proper seasoning is what creates that non-stick surface and protects the metal. Think of it like keeping the protective ‘chassis coating’ on your truck—it keeps the metal sound!
Budgeting for Your Next Project: What Dutch Ovens Cost
While a high-quality Dutch oven is an investment, they last forever if cared for properly. Understanding the price range helps you know what to look for.
| Category | Typical Size (Quarts) | Approximate Price Range | Best For |
|---|---|---|---|
| Entry Level (Colorful Enamel) | 5.5 Qt | $80 – $150 | Soups, bread, small roasts. Great starter size. |
| Mid-Range (Name Brands/Better Finish) | 7 Quart | $200 – $350 | Standard family chili, whole chickens, larger roasts. |
| Premium (Heavy Duty/Lifetime Warranty) | 9 Qt+ | $350+ | Large gatherings, deep frying, professional-grade results. |
Whether you find a great deal at a garage sale or invest in a new piece, remember that you are buying cooking durability. A well-loved, used pot often has superior seasoning already built up.
Frequently Asked Questions (FAQ) for New Dutch Oven Cooks
Here are quick, clear answers to common questions new users have.
Q1: Can I use my enameled Dutch oven on a gas stovetop?
A: Yes! Enameled Dutch ovens work perfectly on gas, electric coil, and induction cooktops. Just always use medium heat to start to prevent thermal shock, which can crack the enamel coating.
Q2: Do I really need to preheat the Dutch oven for bread?
A: Absolutely. Preheating the pot to 450°F ensures that when the cold dough hits the surface, it gets an immediate, powerful burst of heat. This traps the moisture instantly, creating that signature puffy, crusty loaf.
Q3: Is it okay if condensation drips back into my stew?
A: Yes, that dripping condensation is wonderful! It keeps the food moist and flavors the dish as it cooks. The heavy lid creates a slight seal that allows condensation to drip evenly, which is why braising works so well.
Q4: Can I use metal utensils inside my enameled Dutch oven?
A: It’s best to avoid metal utensils, especially spoons or whisks, when cooking in an enameled pot. Metal can scratch the smooth enamel surface over time. Stick to wooden spoons or silicone tools to keep your finish looking great.
Q5: How do I know when my pot roast is finally done?
A: You don’t rely on time alone; you rely on texture. The pot roast is done when you can easily shred the meat with two forks. If it’s resisting, give it another 30–60 minutes covered on low heat. The internal temperature should be around 205°F (96°C) for ideal shreddability.
Q6: Can I use a Dutch oven for baking cakes or desserts?
A: Yes, especially cobblers, crisps, and dump cakes! They create a fantastic, caramelized crust on the edges, similar to baking in a cast-iron skillet. Just ensure you use parchment paper or grease the sides well if you are worried about sticking.
Conclusion: Your Kitchen Confidence is Ready to Roll
You now have the go-to list of recipes that prove exactly what your Dutch oven is built for: delivering deep, satisfying flavor with reliable, easy results. From the mind-blowing simplicity of no-knead bread to the comforting tenderness of a slow-cooked roast, this pot is designed to make you look like a culinary genius with minimal fuss.
Don’t let the weight of the pot intimidate you. Start with one recipe this week—maybe sear that roast or try that simple soup. Remember, every successful dish you make builds your kitchen confidence, much like learning a simple oil change builds your mechanical knowledge. Grab that lid, preheat that surface, and trust the heavy iron to do the hard work. Happy cooking!


